Additional Maintenance: Inlet Water Valve Screen
The inlet water valve has a screen on its inlet side
to keep debris from flowing into the valve. In some
cases, this screen may become clogged or
restricted by debris build up. Check for the proper
water flow:
Flow rate is 2.7 G.P.M.
1. Remove front panel.
2. Obtain a 16 ounce cup and a watch.
3. Pull the water discharge tube out of the
reservoir and place it in the cup.
4. Push and release the Harvest button.
5. If working properly, the water valve will fill an 16
oz cup in about 3 seconds. Be prepared to push
the Off button! If it does not, the water valve inlet
or other water device is restricted.
To Check the Inlet Water Valve Screen
.
1. Disconnect the electrical power.
2. Shut off the water supply.
3. Remove the left front panel.
4. Unplug the electrical connection of the inlet
water valve.
5. Remove the screws holding the inlet water valve
to the cabinet.
6. Remove outlet tube from inlet water valve.
7. Rotate inlet water valve from inlet fitting and
remove valve from machine.
8. Examine the inlet screen, if dirty, brush off
screen.
Note: Screen is not replaceable, and may only be
removed by taking off the covering bracket. The
bracket forms part of the inlet water system, and
must be water tight to the valve body, removal is
not recommended.
9. Reverse to reassemble.
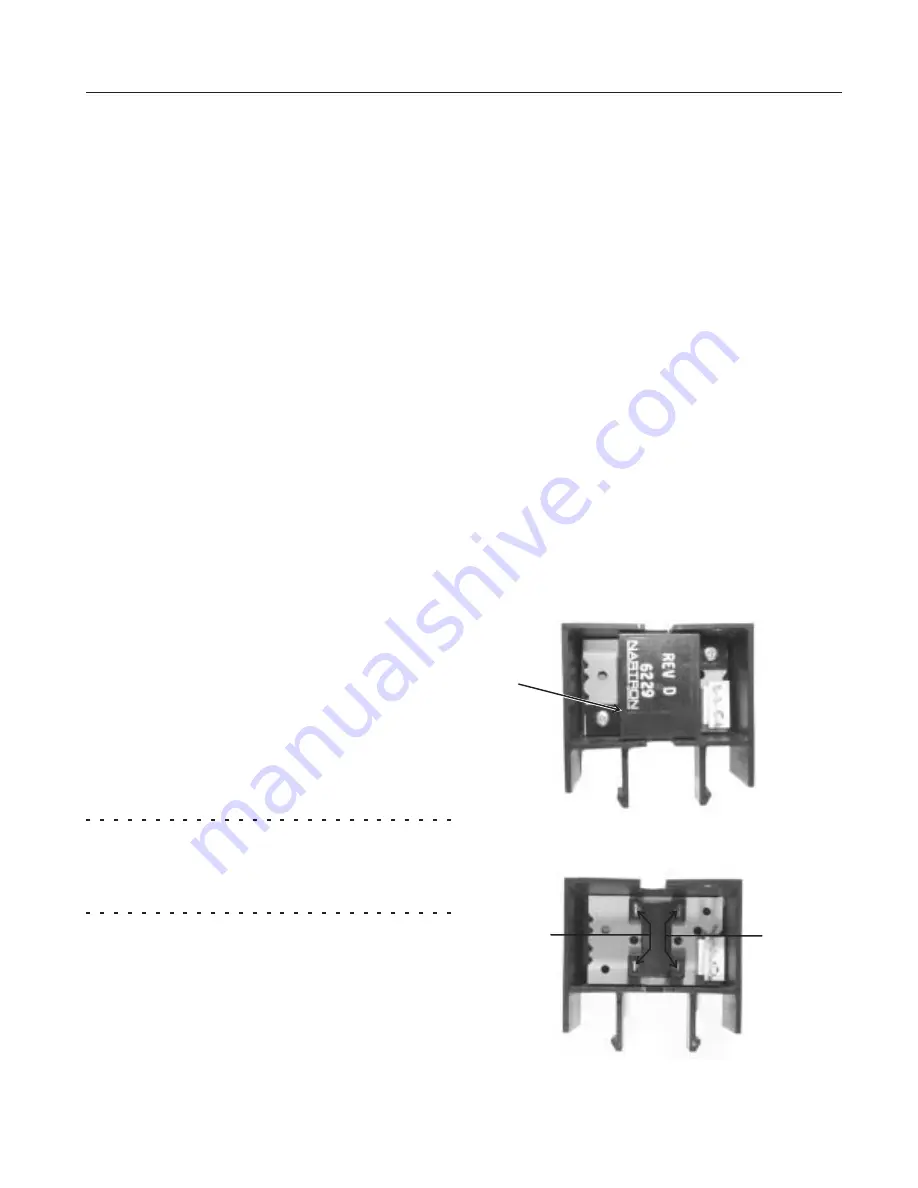
Water Level Sensor
The water level sensor contains two photo-electric
eyes and each eye has an emitter and a receiver.
For proper operation the receiver must be able to
sense the signal of the emitter.
Dust can reduce the efficiency of the photo-electric
eyes. To clean them:
1. Remove front panel.
2. Push and hold the Off button until the machine
stops.
3. Remove the screw holding the right reservoir
cover to the reservoir and lift the cover up.
4. Reach in and hold the float while pulling the float
stem up and out of the float.
5. Reach in under the pump mounting cover and
locate the two tabs of the water level sensor.
Squeeze them towards each other and pull the
sensor up and out of the pump mounting cover.
6. Disconnect the wire harness from the water
level sensor.
7. Remove two screws holding the dust cover to
the water level sensor.
8. Clean the 4 lenses with a soft tissue or cotton
swab.
9. Reverse to reassemble.
CME1856W
November 2001
Page 27
Dust
Cover
Water Level Sensor, Dust Cover Removed
Clean
Lenses
Clean
Lenses


