Innovative Vacuum for Automation
EN
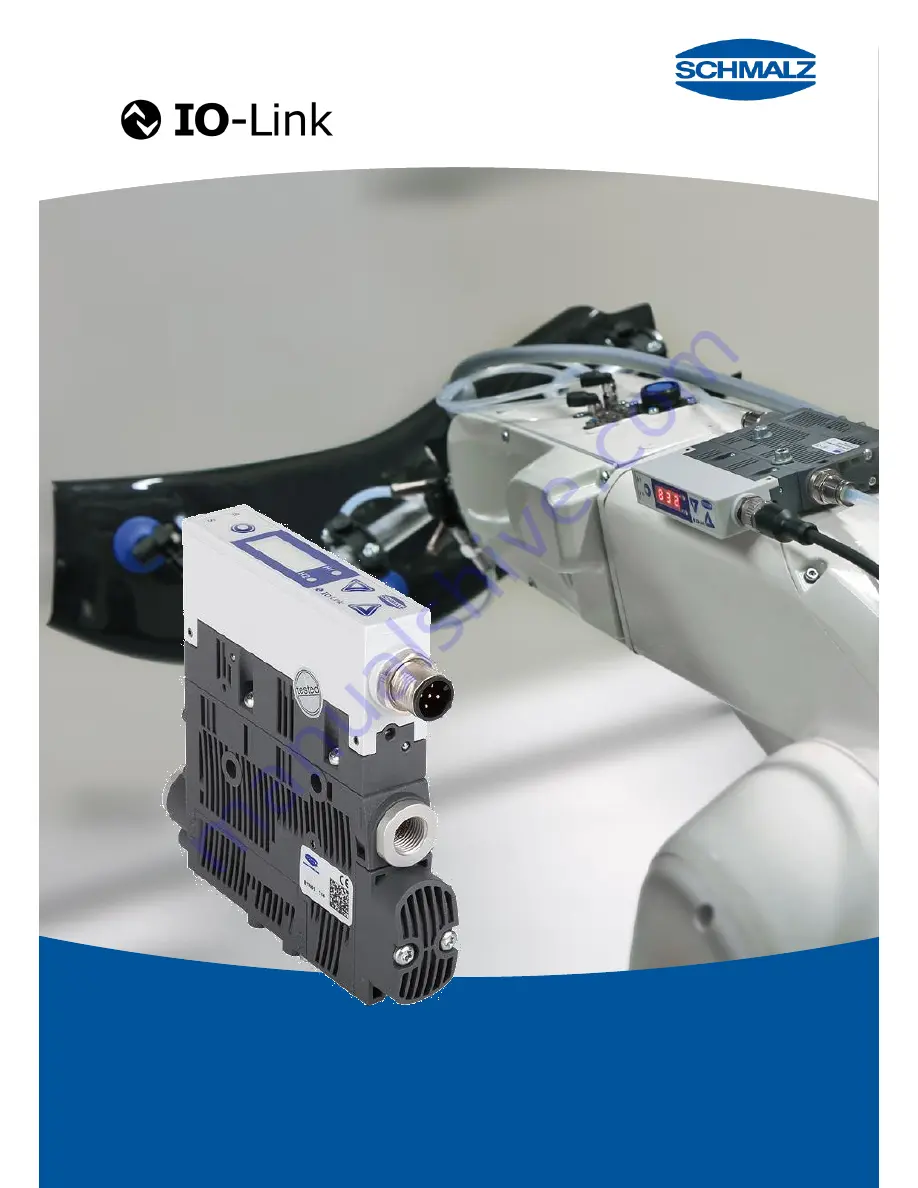
SCPSi-2
Eco-Nozzle Technology
Operating instructions 30.30.01.00762
Page 1: ...Innovative Vacuum for Automation EN SCPSi 2 Eco Nozzle Technology Operating instructions 30 30 01 00762...
Page 2: ...cuum 3 18 Zero point adjustment of the sensor calibration 3 18 Control function 3 19 Deactivating the control shutoff function 3 19 Blow off modes 3 20 Signal output 3 21 Selecting the vacuum unit 3 2...
Page 3: ...iguration menu 4 37 Setting the parameters in the configuration menu 4 39 Entering the PIN 4 39 Executing the reset to factory settings function 4 39 System menu 4 40 Viewing data in the system menu 4...
Page 4: ...earing parts 6 62 Spare and wearing parts 6 63 Troubleshooting 6 63 Accessories 6 63 7 Technical Data 7 64 Electrical parameters 7 64 Display parameters 7 65 Mechanical data 7 65 General parameters 7...
Page 5: ...Eyes can be sucked in Compressed air can cause closed containers to explode A vacuum can cause closed containers to implode The ejector may only be operated with a silencer Never look into the exhaus...
Page 6: ...ontrol components and feed back signals INTENDED USE The ejector is designed to generate a vacuum for gripping and transporting objects when used in conjunction with suction pads Neutral gases in acco...
Page 7: ...its specified performance limits Doing so may cause it to malfunction or be destroyed During installation and maintenance make sure that the ejector is disconnected and depressurized and that it cann...
Page 8: ...ted air saving function The ejector automatically regulates the vacuum while in suction mode The electronics system switches the Venturi nozzle off when the switching point H1 set by the user is reach...
Page 9: ...e the Blow off signal input is received The ejector also has a manual mode In this mode suction and blow off can be controlled using the keys on the ejector s foil keypad See the Manual mode section f...
Page 10: ...d M12 1xM12 5 pin The most important components are described below EJECTOR VERSION PNP OR NPN The behavior of the ejector s electrical inputs and output can be adjusted on the device and therefore do...
Page 11: ...outlet compressed air during operation Position Description Max tightening torque 1 Process state display suction blow off vacuum value 2 Controls 3 Blow off valve screw 4 G1 8 vacuum connection labe...
Page 12: ...reshold values H1 H2 3 MENU button 4 UP button 5 DOWN button 6 LED Process state Suction 7 LED Process state Blow off LEDS PROCESS STATE The Suction and Blow off process states are each assigned an LE...
Page 13: ...dent of the switching functions or assignment of the output it is also independent of whether the condition monitoring function is active Threshold value LEDs Ejector status LEDs are both off Rising v...
Page 14: ...matic mode and ready for operation This is the normal operating mode in which the ejector is operated by the system controller A differentiation is made between SIO mode and IO Link mode In addition t...
Page 15: ...N1 off NO IN1 on Blow off OFF NC NO IN2 off Pneumatically OFF Counter menu Pneumatically OFF NC Power failure NO Power failure Suction Venturi nozzle active Venturi nozzle inactive Vacuum H1 Vacuum H1...
Page 16: ...16 CONTROL CONCEPT FOR NO EJECTORS 1 0 0 bar p 1 0 0 bar p Suction IN1 Blow off IN2 Suction Mode Blow off Mode CONTROL CONCEPT FOR NC EJECTORS 1 0 0 bar p 1 0 0 bar p Suction IN1 Blow off IN2 Suction...
Page 17: ...gether for more than 3 seconds During activation M will appear When manual mode is activated the current process state will initially be maintained MANUAL SUCTION In manual mode suction is activated b...
Page 18: ...nals and parameters Threshold value LED H1 Threshold value LED H2 Signal output H2 Vacuum analog value Process data bits H1 Process data bits H2 The threshold values and the corresponding hysteresis v...
Page 19: ...f is deactivated dCS oFF CONTROL The ejector switches off the vacuum generator when the threshold H1 is reached and swit ches it back on when the vacuum falls below the threshold H1 h1 This setting is...
Page 20: ...tch among the three blow off modes The function can be set in the configuration menu under the bLo menu item or via IO Link EXTERNALLY CONTROLLED BLOW OFF The blow off valve is controlled directly via...
Page 21: ...it using the IO Link The function of the switching threshold H2 h2 component check is assigned to the OUT 2 signal output OUTPUT TYPE The output type can be used to switch between PNP and NPN The sign...
Page 22: ...te this function The switch off delay affects the OUT2 discrete output the process data bit in IO Link and the H2 status display If the OUT2 output is configured as a normally open contact no there wi...
Page 23: ...eleted PIN 000 via IO Link The PIN is entered in the configuration menu under the menu item PIN or via IO Link A PIN is recommended because carrying out parameterization while the ejector is in operat...
Page 24: ...ofiles Restoring the factory settings will change the switching points and the configura tion of the signal output This can change the status of the ejector system COUNTER The ejector has two internal...
Page 25: ...anceled if the voltage drops while suction is active In addition an excessive supply voltage will be detected and a corresponding error mes sage will be generated EVALUATING THE INLET PRESSURE The sup...
Page 26: ...functions described below are only available in IO Link mode The ejector can store up to four different production setup profiles P 0 to P 3 All im portant data for workpiece handling is stored in the...
Page 27: ...off automatically at a switching fre quency of 6 3 seconds and activates continuous suction i e the ejector then remains in the Venturi nozzle active state The basic monitoring of valve protection fun...
Page 28: ...he vacuum level continues to fall until the switching point H1 h1 and then the ejector resumes suction normal control mode The condition monitoring warning is not ac tivated and there is no effect on...
Page 29: ...ntil the switching threshold H2 is reached MEASUREMENT OF THE EVACUATION TIME t1 This measures the time in ms from when the switching threshold H2 is reached until the switching threshold H1 is reache...
Page 30: ...ction cycle This value corresponds to the ratio of the active suction blow off times to the total duration of the suc tion cycle ABSOLUTE AIR CONSUMPTION MEASUREMENT An externally recorded pressure va...
Page 31: ...threshold value H1 are output as 0 mbar to indicate that a valid dynamic pressure measurement could not be performed Measured values that are greater than the threshold value H2 h2 but less than the...
Page 32: ...iagnostic buffer or also by restoring the factory settings on the device EPC DATA BUFFER The ejector provides a ten stage data buffer to enable long term monitoring and trend ana lysis of the most imp...
Page 33: ...Y The ejector is in display mode when the menus are not being accessed The current vacu um or the current system pressure is displayed If there is overpressure in the suction circuit this is indicated...
Page 34: ...ting mode The display returns to the vacuum display after 3 s ERROR DISPLAY If an error occurs it appears on the display in the form of an error code E number The ejector s response to an error depend...
Page 35: ...m Continue to h 1 Setting the value flashing flashing Switching point for the air saving function Hysteresis of air saving function Switching point for the component check Hysteresis of the component...
Page 36: ...the or button is pressed for approx 3 seconds the value to be chan ged begins to quickly scroll through the available options If you exit the changed value by briefly pressing the value will not be a...
Page 37: ...follows back to ctr flashing 2 sec 2 sec 3 sec back to t 1 flashing Air saving function Control shutoff deactivated No continuous suction Max permitted evacuation time Evaluation only in IO Link Max...
Page 38: ...t digit flashes flashing flashing Switch Off Delay of the signal H2 Vacuum unit displayed 180 display rotation Display in ECO mode Locking the menu using a PIN Press menu for 2 sec Save Briefly press...
Page 39: ...ss the key 2 s ENTERING THE PIN Press the for longer than 3 s to enter the PIN Use the and buttons to select the Pin menu item Confirm by pressing the button Enter the first digit of the PIN code usin...
Page 40: ...an 3 se conds During activation S will appear Use or to select the value to be displayed Confirm using the key The value is displayed To exit the system menu press the key 2 s VIEWING THE COUNTERS Thi...
Page 41: ...can be displayed using the and buttons The decimal points indicate which three digit block of the serial number is shown in the display The serial number consists of all the three digit blocks togeth...
Page 42: ...n this mode requires two signal inputs and one signal output via which the ejector communicates with the controller This means that the ejector s basic suction and blow off functions as well as the Co...
Page 43: ...ctions hoses or pipelines can lead to partial or complete ejector malfunction Hoses and pipelines should be laid such that distances are minimized If the internal diameter on the compressed air side i...
Page 44: ...he ejector may only be operated using power supply units with protected extra low voltage PELV The system must incorporate safe electrical cut off of the power supply in compliance with EN60204 The li...
Page 45: ...en Schmalz connection line is used art no 21 04 05 00080 Vorsicht Vorsicht The system may only be operated using power supply units with protected ext ra low voltage PELV and safe electrical cut off o...
Page 46: ...T OF OPERATIONS A typical handling cycle is divided into three steps pick up blow off and the idle state During the pick up step output 2 is monitored to determine whether a sufficient vacuum has been...
Page 47: ...wn in the display Symbol Error code Electronics error EEPROM Electronics error internal communication Zero point of vacuum pressure sensor adjusted outside of 3 FS Supply voltage is too low Short circ...
Page 48: ...ur production profiles Errors and warnings Ejector system status display Access to all parameters Counters Condition monitoring Energy monitoring Predictive Maintenance In this mode all adjustable par...
Page 49: ...ctions hoses or pipelines can lead to partial or complete ejector malfunction Hoses and pipelines should be laid such that distances are minimized If the internal diameter on the compressed air side i...
Page 50: ...not be connected or disconnected while voltage is applied The ejector may only be operated using power supply units with protected extra low voltage PELV The system must incorporate safe electrical cu...
Page 51: ...T PLANNING To operate the ejector in IO Link mode you only need to connect an IO Link connection line C Q in addition to the power supply Each ejector therefore only requires one line for all process...
Page 52: ...full range of functions is available with 4 bytes of input data and 2 bytes of output data IODD in accordance with the revision 1 0 for use with older IO Link masters legacy mode The range of function...
Page 53: ...ess data from the ejector SCPSi is as follows PROCESS DATA INPUT PDI PDI Byte Bit Parameter IO Link Revision 1 1 1 0 0 0 Part present H2 X X 1 Air saving function H1 3 CM Autoset Acknowledge 4 EPC Sel...
Page 54: ...rameters for the old device are automatically saved in the new device by the master In order for this to work with the ejector SCPSi it must be operated on a master with IO Link revision 1 1 or higher...
Page 55: ...PDO 0 1 Blow off ON 5 PDO 0 1 Blow off OFF PDO 0 1 Blow off OFF 6 PDI 0 0 Vacuum H2 h2 PDI 0 0 Vacuum H2 h2 Signal status switches from LOW to HIGH Signal status switches from HIGH to LOW PDO 0 0 BDO...
Page 56: ...the start of every suction cycle and then permanently updated during the cycle It can continue to change until after the end of blow off To determine the other EM values air consumption in percent and...
Page 57: ...PICAL SUCTION CYCLES The following diagrams show some typical vacuum curves during a suction cycle and show the points at which EPC values could be updated Handling cycle with dynamic pressure measure...
Page 58: ...SCH MAL Z SCPSI 2 5 58 Handling cycle with dynamic pressure measurement and excessive leakage Handling cycle with leakage L and readjustment...
Page 59: ...SCH MAL Z SCPSI 2 5 59 Handling cycle with very high leakage H1 is not reached Handling cycle with excessive evacuation time t1...
Page 60: ...d Red system status Error Safe operation of the ejector within the operating limits is no longer ensured Error code is available in the error parameter WARNINGS AND ERRORS Coding of the condition moni...
Page 61: ...1 ms 1 10 Leakage rate Unit 1 mbar s Last measured dynamic pressure Unit 1 mbar 1 11 Supply voltage Unit 0 1 V Air consumption Unit 0 1 NL 1 The switch is made depending on the structure of the autom...
Page 62: ...r connections include press in screens Over time dust chips and other solids can become deposited in the screens If you notice that the performance of the ejector system has declined simply replace th...
Page 63: ...observe max limits Internal diameter of hose lines too small See recommended hose diameters Payload cannot be held securely Vacuum level too low Increase the control range if the air saving function...
Page 64: ...Current of signal output NPN IOL 140 mA Short circuit proof 3 Voltage of signal input PNP UIH 15 UA SA VDC Relative to GndA SA Voltage of signal input NPN UIL 0 9 VDC Relative to UA SA Current of sign...
Page 65: ...see the Electrical parameters section for signal inputs and out puts Idle time before the menu is exited 2 min If no settings are made in a menu the ejector automati cally returns to display mode MEC...
Page 66: ...ert PE porous Seals NBR Lubricants Silicone free Screws Galvanized steel MECHANICAL PARAMETERS Type Nozzle size Max vacuum 2 Suction rate 1 Max blow off capacity 1 Air con sumption 1 Sound level 1 Wei...
Page 67: ...PSi 2 B B1 d d1 d2 1 d3 G1 G2 G3 H H2 H3 18 18 6 4 4 6 6 8 2 6 G1 8 IG G1 8 IG M12x1 AG 99 40 8 47 5 H4 H5 L L1 L2 L3 L4 X1 X2 Y1 Y2 16 5 5 5 93 8 107 1 91 5 22 29 5 36 9 16 12 12 1 Only with plug in...
Page 68: ...SCH MAL Z SCPSI 2 7 68 PNEUMATIC CIRCUIT DIAGRAMS SCPSi 2 NO SCPSi 2 NC...
Page 69: ...Displays the article number of the ejector Serial number Displays the serial number of the ejector Air saving function control Setting for the air saving function Air saving function on Activation of...
Page 70: ...NPN input output on 0 V Vacuum unit Vacuum unit in which the measurement and setting valu es are displayed Vacuum value in mbar The vacuum and pressure values are displayed in mbar Vacuum value in kPa...
Page 71: ...activate conti nuous suction Evacuation time 2 s Leakage value 250 mbar s Blow off function Externally controlled blow off Configuration of the signal output Normally open contact Signal type PNP swit...
Page 72: ...SCH MAL Z SCPSI 2 8 72 8 CONFORMITY DECLARATION...
Page 73: ...SCH MAL Z SCPSI 2 8 73...
Page 74: ...s were originally written in German and have been translated into English We reserve the right to make technical changes No responsibility is taken for print errors or other types of errors All inform...
Page 75: ...ands Tel 31 0 74 255 5757 Fax 31 0 74 255 5758 schmalz schmalz nl Poland Tel 48 0 22 46 04970 Fax 48 0 22 87 40062 schmalz schmalz pl Russia Tel 7 495 9671248 Fax 7 495 9671249 schmalz schmalz ru Spai...