FOR INDOOR USE ONLY!
DO NOT use with non-resistive loads, such as fluorescent lighting,
CFL bulbs or motors.
To reduce the risk of electric shock, this product has a grounding
type plug that has a third (grounding) pin. This plug will only fit
into a grounding type power outlet. If the plug does not fit into the
outlet, contact a qualified electrician to install the proper outlet. Do
not change the plug in any way.
Any modification or use other than described may damage the unit
and will void the warranty.
Introduction
The RP200 Home Dimmer Module works with the Nexia Home
Intelligence system as both a light controller and a signal repeater to
help extend the range of the Schlage Bridge.
RP200 Home Dimmer Module
User Guide
Installation
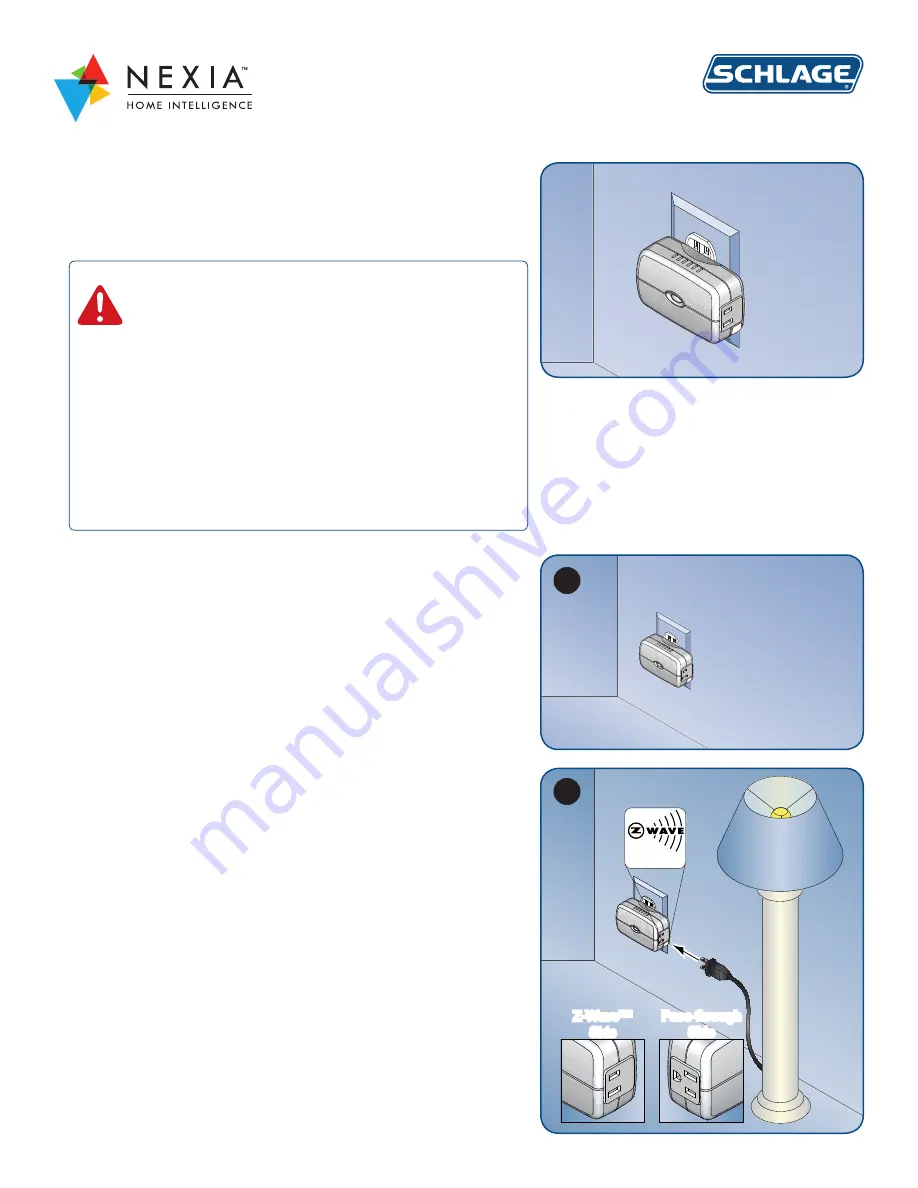
1. Plug the dimmer module into any available outlet.
•
The dimmer module can be used to control a lamp.
•
The dimmer module repeats the Z-Wave™ signal. In some homes, the
dimmer module must be used to improve communication between the
bridge and the lock. During the online portion of the setup, the system
will determine if it is communicating properly or not. You can move the
dimmer module during online setup if necessary.
•
The dimmer module should be installed into any indoor, three-prong,
120 volt A/C outlet.
2. (Optional) Plug a lamp into the Z-Wave™ (two-prong) side of the
dimmer module.
•
There are two outlets on the dimmer module. One of the outlets has
only two prongs and is labelled with a Z-Wave™ sticker. A lamp (25
watts minimum and 300 watts maximum) can be controlled by the
system if it is plugged into the Z-Wave™ side of the dimmer module.
•
Use only an incandescent light bulb in the lamp that is plugged into
the dimmer module. DO NOT use a CFL (compact fluorescent light
bulb) or any other kind of electric device.
•
The other outlet has three prongs and can be used simply as a
pass-through outlet (1500 watts maximum). It is not controlled by the
system, and the system is not affected when it is used.
Max. 300W
Incandescent
Z-Wave™
Side
Pass-through
Side
1
2


