background image

www.scheppach.com

GB | 35 

This product must be handed over at the intended col-
lection point. This can be done, for example, by return-
ing it when purchasing a similar product or delivering it 
to an authorised collection point for the recycling of old 
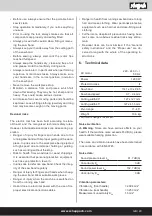
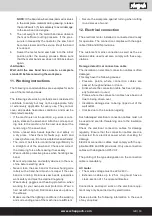
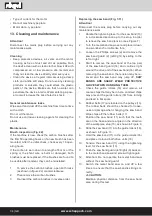
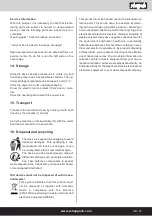
electrical and electronic devices. Improper handling of 
waste equipment may have negative consequences for 
the environment and human health due to potentially 
hazardous substances that are often contained in elec-
trical and electronic equipment. By properly disposing 

of this product, you are also contributing to the effective 

use of natural resources. You can obtain information on 
collection points for waste equipment from your munic-
ipal administration, public waste disposal authority, an 
authorised body for the disposal of waste electrical and 
electronic equipment or your waste disposal company.

Service information

With this product, it is necessary to note that the fol-
lowing parts are subject to natural or usage-related 
wear, or that the following parts are required as con-
sumables. 
Wearing parts*: Carbon brushes, saw band

* may not be included in the scope of supply!

Spare parts and accessories can be obtained from our 
service centre.  To do this, scan the QR code on the 
cover page.

14.  Storage

Store the device and its accessories in a dark, dry and 
frost-free place that is inaccessible to children. The op-

timum storage temperature lies between 5 and 30 ˚C.


Store the power tool in its original packaging.
Cover the electric tool to protect it from dust or mois-
ture.
Store the operating manual with the power tool.

15.  Transport

Transport the metal band saw by holding it with both 
hands by the handles (1) and (8).

Carry the machine on the saw table (21) with the metal 
band saw mounted to the saw table.

16.  Disposal and recycling

The device is supplied in packaging to avoid 
transport damages.  This packaging is raw 
material and can thus be used again or can 
be reintegrated into the raw material cycle.
The device and its accessories are made of 

different materials, such as metals and plas

-

tics.  Take defective components to special 

waste disposal sites. Check with your specialist dealer 
or municipal administration!

Old devices must not be disposed of with house-
hold waste!

This symbol indicates that this product must 
not be disposed of together with domestic 
waste in compliance with the Directive 
(2012/19/EU) pertaining to waste electrical and 
electronic equipment (WEEE). 

Summary of Contents for 5901508901

Page 1: ...saw Translation of original instruction manual 24 FR Scie à ruban pour métaux Traduction des instructions d origine 37 IT Troncatrice per metalli La traduzione dal manuale di istruzioni originale 51 NL Metaallintzaag Vertaling van de originele gebruikshandleiding 65 ES Sierra de cinta para metales Traducción del manual de instrucciones original 79 PT Serra circular para corte de metal Tradução do ...

Page 2: ...www scheppach com 2 ...

Page 3: ...www scheppach com 3 1 3 11 2 13 4 5 9 9 10 1 15 16 18 17 2 3 1 6 8 7 12 14 ...

Page 4: ...www scheppach com 4 19 3 20 22 23 26 21 24 25 27 ...

Page 5: ...www scheppach com 5 11 14 9 9 9 a 8 4 5 3 1 4 5 13 7 6 10 6 12 10 ...

Page 6: ...www scheppach com 6 14 18 11 10 12 13 11 10 11 18 11 16 16 18 18 ...

Page 7: ...www scheppach com 7 24 16 23 20 15 25 17 25 19 18 15 22 21 26 19 20 19 24 23 21 25 22 27 ...

Page 8: ...Sicherheitshinweise lesen und beachten Schutzbrille tragen Gehörschutz tragen Bei Staubentwicklung Atemschutz tragen Achtung Verletzungsgefahr Nicht in das laufende Sägeband greifen Tragen Sie Schutzhandschuhe Achtung Vor Montage Reinigung Umbau Instandhaltung Lagerung und Transport müs sen Sie das Gerät ausschalten und von der Stromversorgung trennen Sägebandrichtung Schutzklasse II Doppelisolier...

Page 9: ...erwendung 11 5 Allgemeine Sicherheitshinweise für Elektrowerkzeuge 11 6 Technische Daten 14 7 Auspacken 14 8 Montage 15 9 Vor Inbetriebnahme 15 10 Bedienung 16 11 Arbeitshinweise 17 12 Elektrischer Anschluss 18 13 Reinigung und Wartung 18 14 Lagerung 20 15 Transport 20 16 Entsorgung und Wiederverwertung 20 17 Störungsabhilfe 21 ...

Page 10: ...e trieb des Elektrowerkzeugs geltenden Vor schriften Ihres Landes beachten Bewahren Sie die Bedienungsanleitung in einer Plas tikhülle geschützt vor Schmutz und Feuchtigkeit bei dem Elektrowerkzeug auf Sie muss von jeder Bedie nungsperson vor Aufnahme der Arbeit gelesen und sorgfältig beachtet werden An dem Elektrowerkzeug dürfen nur Personen arbei ten die im Gebrauch des Elektrowerkzeugs unter wi...

Page 11: ...hörschäden bei Nichtverwendung des nötigen Gehörschutzes Gesundheitsschädliche Emissionen von Holzstäu ben bei Verwendung in geschlossenen Räumen Unfallgefahr durch Handkontakt in nicht abgedeck tem Schneidbereich des Werkzeuges Verletzungsgefahr beim Werkstückwechsel Schnittgefahr Gefährdung durch das Wegschleudern von Werk stücken oder Werkstückteilen Quetschen der Finger Gefährdung durch Rücksc...

Page 12: ...eitsschuhe Schutzhelm oder Gehörschutz je nach Art und Einsatz des Elektrowerkzeuges verringert das Risiko von Verletzungen Vermeiden Sie eine unbeabsichtigte Inbetriebnah me Vergewissern Sie sich dass das Elektrowerk zeug ausgeschaltet ist bevor Sie es an die Strom versorgung anschließen es aufnehmen oder tragen Wenn Sie beim Tragen des Elektrowerkzeuges den Finger am Schalter haben oder das Gerä...

Page 13: ...ektrischen Schlag führen Halten Sie Ihre Hände vom Sägebereich und Sä geband fern Achten Sie vor der Verwendung immer darauf dass die tragbare Bandsäge sauber ist Stellen Sie immer sofort den Betrieb ein wenn Sie irgendetwas Ungewöhnliches bemerken Stellen Sie vor der Verwendung des Werkzeugs im mer sicher dass alle Komponenten ordnungsge mäß und sicher montiert sind Seien Sie immer vorsichtig wen...

Page 14: ...anhand der Bedie nungsanleitung mit dem Produkt vertraut Verwenden Sie bei Zubehör sowie Verschleiß und Ersatzteilen nur Originalteile Ersatzteile erhalten Sie bei Ihrem Fachhändler Geben Sie bei Bestellungen unsere Artikelnummern sowie Typ und Baujahr des Produkts an m WARNUNG Gerät und Verpackungsmaterialien sind kein Kin derspielzeug Kinder dürfen nicht mit Kunststoff beuteln Folien und Kleinte...

Page 15: ...e den Schalter auf O AUS 8 Montage 8 1 Auflagearm 19 auf dem Sägetisch 21 montie ren Abb 3 1 Drehen Sie die Grundplatte Auflagearm 22 so bis die Bohrung der Grundplatte Auflagearm mit der Bohrung im Sägetisch übereinstimmt 2 Stecken Sie die Innensechskantschraube von oben durch die übereinstimmenden Bohrungen in den Sägetisch 21 3 Kippen Sie den Sägetisch 21 auf die Seite und befestigen Sie die mi...

Page 16: ...sdauer des Sägebands zu er reichen ist sicherzustellen dass zu Beginn des Sägevorgangs kein plötzlicher Stoß auftritt 5 Es können gerade Schnitte dadurch erreicht wer den wenn das Sägeband mit der Seitenfläche des Motorgehäuses fluchtet Achten Sie hierbei auf Ihren Blickwinkel 2 HINWEIS Wischen Sie Schmutz auf der LED 3 1 mit einem trockenen Tuch ab Achten Sie sorgfältig darauf dass Sie die LED 3 ...

Page 17: ...llbandsägen Die folgenden sicheren Arbeitsweisen werden als Bei trag zur Sicherheit angesehen können aber nicht für jeden Einsatz angemessen vollständig oder umfas send anwendbar sein Ein Verdrehen oder Schrägstellen des Säge bandes bewirkt dass der Schnitt neben der Schnittlinie erfolgt und sich die Lebensdauer des Sägebandes verringert HINWEIS Wenn die Bandsäge während des Sägens blockiert oder ...

Page 18: ...erpretiert wer den Wenn die Maschine außer Betrieb ist z B bei Ar beitsende entspannen Sie das Sägeband Bringen Sie einen entsprechenden Hinweis zum Spannen des Sägebandes für den nächsten Benutzer an der Maschine an Bewahren Sie nicht benutzte Sägebänder zusam mengelegt und sicher an einem trockenen Platz auf Überprüfen Sie diese vor der Benutzung auf Fehler z B Zähne und Risse Verwenden Sie kein...

Page 19: ...Sägebandschutz links rechts 9 durch Schieben nach links bzw rechts 4 Beginnen Sie mit dem Entfernen des Sägeban des am oberen Teil des Sägebandschutzes 14 und fahren Sie um die Antriebseinheit des Sä gebandes 16 herum fort Beim Entfernen des Sägebandes kann sich die Spannung lösen und das Sägeband abspringen SÄGEBÄNDER SIND SCHARF TRAGEN SIE BEIM UMGANG DAMIT SCHUTZHANDSCHUHE 5 Überprüfen Sie die ...

Page 20: ...eit zu schützen Bewahren Sie die Bedienungsanleitung bei dem Elek trowerkzeug auf 15 Transport Transportieren Sie die Metallbandsäge indem Sie diese mit beiden Händen an den Handgriffen 1 und 8 halten Tragen Sie die Maschine bei montierter Metallband säge auf dem Sägetisch am Sägetisch 21 16 Entsorgung und Wiederverwertung Das Gerät befindet sich in einer Verpa ckung um Transportschäden zu verhind...

Page 21: ...cht volle Leistung nicht Stromkreise in Netzanlage überlastet Lampen andere Motoren etc Verwenden Sie keine andere Geräte oder Motoren auf demselben Stromkreis Motor überhitzt sich leicht Überlastung des Motors ungenügen de Kühlung des Motors Verhinden Sie eine Überlastung des Motors beim Schneiden Entfernen Sie Staub vom Motor damit eine optimale Kühlung des Mo tors gewährleistet ist Sägeschnitt ...

Page 22: ... an denenVeränderungen oder Modifikationen vorgenommen wurden Geringfügige Abweichungen von der Soll Beschaffenheit die fürWert und Gebrauchstauglichkeit des Geräts unerheblich sind Geräte an denen eigenmächtig Reparaturen oder Reparaturen insbesondere durch einen nicht autorisierten Dritten vorgenommen wurden Wenn die Kennzeichnung am Gerät bzw die Identifikationsinformationen des Produktes Masch...

Page 23: ...Akkus 8 Kostenvoranschlag Von der Garantieleistung nicht oder nicht mehr erfasste Geräte reparieren wir gegen Berechnung Auf Nachfrage bei unserem Service Center können Sie die defekten Geräte für einen Kostenvoranschlag einsenden und ggf dem Service Center schriftlich per Post eMail die Reparaturfreigabe erteilen Ohne Reparaturfreigabe erfolgt keine weitere Bearbeitung 9 Andere Ansprüche als die ...

Page 24: ... follow them Wear eye protection Wear hearing protection If dust builds up wear respiratory protection Attention Risk of injury Do not reach into saw band while it is running Wear protective gloves Attention Before assembly cleaning modification servicing storage and transport the device must be switched off and disconnected from the power supply Saw band direction Protection class II double insul...

Page 25: ...4 Proper use 27 5 General power tool safety warnings 27 6 Technical data 29 7 Unpacking 30 8 Assembly 30 9 Before commissioning 31 10 Operation 31 11 Working instructions 33 12 Electrical connection 33 13 Cleaning and maintenance 34 14 Storage 35 15 Transport 35 16 Disposal and recycling 35 17 Troubleshooting 36 ...

Page 26: ... assumes no lia bility for damage to the device or caused by the device arising from Improper handling Failure to comply with the operating instructions Repairs carried out by third parties unauthorised specialists Installing and replacing non original spare parts Application other than specified Failure of the electrical system in the event of the electrical regulations and VDE provisions 0100 DI...

Page 27: ...ng the power tool or pulling the plug out of the socket Keep the cable away from heat oil sharp edges or moving device parts Damaged or coiled cables increase the risk of an electric shock 4 Proper use The portable metal band saw with speed setting is ex clusively suited for cutting wood pipes profiles and thin non ferrous metals The shape of the workpieces must be such that safe clamping in the m...

Page 28: ...parts and lead to an electric shock Keep your hands away from the sawing area and saw band If you work with a power tool outdoors only use ex tension cables that are also suitable for outdoor use Using an extension cable suitable for outdoor use re duces the risk of an electric shock If you cannot avoid using the electrical tool in a wet environment use a fault current circuit breaker Use of an RC...

Page 29: ... fitting or remov ing the saw band Always keep your hands away from the cutting path of the saw band Before sawing always wait until the motor has reached full speed Always keep the handles dry clean and free of oil and grease Hold the tool firmly during work Always remain alert in particular when performing repetitive monotonous tasks Always make sure your hands are in the correct position in rel...

Page 30: ... area during this test The specified vibration emission value has been measured according to a standardised test proce dure and can be used for comparison of one electric tool with another The specified vibration emission value can also be used for an initial assessment of the load Warning The vibration emission value can vary from the specified value during the actual use of the electric tool dep...

Page 31: ...ce is securely clamped If the vibrations continue replace the saw band see chapter 13 Cleaning and maintenance 9 Before commissioning m ATTENTION Always make sure the device is fully assembled before commissioning Check all screws and connections for firm seating Check that the saw band is in perfect condition Remove all tools from the clamping jaw and the saw table The saw band must be able to ru...

Page 32: ...y adjust or reload workpieces when the metal band saw is at a standstill 1 Clamp the workpieces to be sawed in a vice or in another clamping device i e directly between the two clamping jaws and without placing other objects in between 2 Bring the workpiece stop 10 in contact with the workpiece and whilst doing so hold the saw band away from the workpiece 3 Then switch the metal band saw on To do ...

Page 33: ...ff switch 5 immediately to avoid damage to the saw band and engine 5 The net weight of the metal band saw delivers the most efficient cutting pressure If the pres sure is increased by the operator the saw band becomes slower and the service life of the band is reduced 6 Swivel the metal band saw back into the initial position after the sawing process Make sure that the metal band saw does not tilt...

Page 34: ... Fig 7 11 Attention Disconnect the mains plug before carrying out any maintenance work 1 Rotate the tightening lever for the saw band 13 in a clockwise direction up to the stop in order to relieve the saw band tension see Figure 7 2 Turn the metal band saw over and place it down on a workbench or table like this 3 Loosen the Phillips screws a and remove the saw band guard 9 left right by sliding t...

Page 35: ...ope of supply Spare parts and accessories can be obtained from our service centre To do this scan the QR code on the cover page 14 Storage Store the device and its accessories in a dark dry and frost free place that is inaccessible to children The op timum storage temperature lies between 5 and 30 C Store the power tool in its original packaging Cover the electric tool to protect it from dust or m...

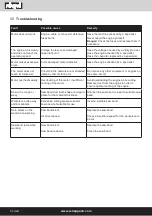
Page 36: ...r Circuits in the network are overloaded lamps other motors etc Do not use any other equipment or engines on the same circuit Motor overheats easily Overloading of the motor insufficient cooling of the motor Avoid overloading the engine while cutting Remove dust from the engine in order to ensure optimal cooling of the engine Saw cut is rough or wavy Saw band dull tooth shape not appro priate for ...

Page 37: ...a mise en service Portez des lunettes de protection Portez une protection auditive Portez un masque anti poussière Attention Risque de blessure Ne pas toucher la ruban de scie en marche Porter des gants de protection Attention Arrêtez la machine et débranchez le câble d alimentation de la machine avant de l assembler de la nettoyer de la régler et d effectuer des travaux d entretien ainsi que pour...

Page 38: ...40 5 Consignes de sécurité générales pour les outils électriques 40 6 Caractéristiques techniques 43 7 Déballage 43 8 Montage 44 9 Avant la mise en service 44 10 Commande 45 11 Consignes de travail 47 12 Raccordement électrique 47 13 Nettoyage et maintenance 48 14 Stockage 49 15 Transport 49 16 Élimination et recyclage 49 17 Dépannage 50 ...

Page 39: ...Straße 69 D 89335 Ichenhausen Cher client Nous espérons que votre nouvelle machine vous ap portera satisfaction et de bons résultats Remarque Conformément à la loi en vigueur sur la responsabilité du fait des produits le fabricant de cet appareil n est pas responsable des dommages survenus ou générés sur l appareil en cas de Manipulation incorrecte Inobservation de la notice d utilisation Réparati...

Page 40: ... à bonne distance Toute déviation peut entraîner une perte de contrôle de l appareil 2x Clé à six pans creux 2x Rubans de scie Original du mode d emploi 4 Utilisation conforme La scie à ruban métallique portative avec réglage de la vitesse convient exclusivement à la découpe de bois de tuyaux de profilés et de métaux non ferreux fins La forme des pièces usinées doit être conçue de manière à permet...

Page 41: ...qu elles nuisent au bon fonc tionnement de l outil électrique Faire réparer les pièces endommagées avant d utiliser l appareil 2 Sécurité électrique Le connecteur de raccordement de l outil électrique doit correspondre à la prise de courant Ne modifier d aucune manière le connecteur N utiliser aucun connecteur adaptateur avec des outils électriques mis à la terre Des connecteurs non modifiés et fi...

Page 42: ...ruban de scie en rotation Portez un équipe ment de protection individuelle par exemple un filet à cheveux et des vêtements de travail près du corps De nombreux accidents sont dus à des outils élec triques mal entretenus Maintenir les outils de coupe aiguisés et propres Des outils de coupe bien entretenus aux arêtes de coupe aiguisées se coincent moins et sont plus faciles à guider Utiliser l outil...

Page 43: ... emballage jusqu à la fin de la période de garantie Familiarisez vous avec l appareil à l aide de la notice d utilisation avant de commencer à l utiliser N utilisez que des pièces originales pour les acces soires ainsi que les pièces d usure et de rechange Vous trouverez les pièces de rechange chez votre distributeur spécialisé Lors d une commande indiquez nos numéros d ar ticles ainsi que le type...

Page 44: ...e 1 vous offre une prise sûre m AVERTISSEMENT L appareil et les matériaux d emballage ne sont pas des jouets Les enfants ne doivent pas jouer avec les sacs en plastique films d emballage et pièces de petite taille Il existe un risque d ingestion et d étouffement 8 Montage 8 1 Montez le bras d appui 19 sur la table de scie 21 Fig 3 1 Tournez le socle du bras d appui 22 jusqu à ce que l alésage du s...

Page 45: ... Cela risquerait d endommager gravement le ruban de scie Pour garantir une durée de vie maximale du ruban de scie il convient de veiller à éviter tout choc soudain au début de l opération de sciage 1 Placez la poignée 1 dans une position de travail agréable et sûre 9 3 Démarrage de la lampe à DEL Fig 1 1 Pour démarrer la DEL 3 1 placez l interrupteur On Off 3 sur I MARCHE Pour arrêter la DEL place...

Page 46: ... métallique ne rebascule pas vers le bas m Attention Attendez que le ruban de scie s arrête complète ment avant de retirer la pièce usinée 5 Il est possible d obtenir des coupes droites lorsque le ruban de scie est aligné avec la sur face latérale du carter de moteur Faire attention à votre angle de vision En cas de torsion ou de position inclinée du ruban de scie la coupe a lieu à côté de la lign...

Page 47: ...a plaque signalétique du mo teur 11 Consignes de travail Les recommandations suivantes sont des exemples pour une utilisation sûre des scies à ruban métallique Les méthodes de travail sûres suivantes contribuent à la sécurité mais peuvent ne pas être appliquées de manière appropriée complètement ou globalement en fonction de chaque utilisation Elles ne peuvent pas traiter toutes les situations dan...

Page 48: ...rotection pour ruban de scie gauche droite 9 sur la scie à ruban métallique et revissez la 12 Attention La scie à ruban métallique ne doit pas être utilisée sans protection pour ruban de scie 13 Nettoyage et maintenance Attention Débranchez l appareil du secteur avant toute interven tion de maintenance Nettoyage Veillez à ce que les dispositifs de protection le vo let d aération et le logement du ...

Page 49: ...relles Les informations relatives aux points de collecte pour appareils usés sont disponibles auprès de la mai rie des services de collecte locaux de tout point habi lité à éliminer les appareils électriques et électroniques usés ainsi qu auprès de votre service de collecte des déchets 13 Démarrez et arrêtez la scie à ruban métallique plusieurs fois pour vérifier que le ruban de scie est correctem...

Page 50: ...ur chargé lampes autres moteurs etc N utilisez aucun autre appareil ou moteur sur le même circuit électrique Le moteur surchauffe facilement Surcharge du moteur refroidissement insuffisant du moteur Empêchez la surcharge du moteur lors de la découpe Éliminez la poussière du moteur pour garantir un refroidissement optimal du moteur La coupe de scie est ru gueuse ou gondolée Ruban de scie émoussé fo...

Page 51: ... occhiali protettivi Usare gli otoprotettori In caso di produzione di polvere indossare la maschera a protezione delle vie respiratorie Attenzione Pericolo di lesioni Non mettere nel nastro per sega in movimento Indossare dei guanti protettivi Attenzione È necessario spegnere l apparecchio e scollegarlo dall alimentazione di corrente prima del montaggio della pulizia della conversione della manute...

Page 52: ... uso 54 5 Indicazioni generali di sicurezza per gli attrezzi elettrici 54 6 Dati tecnici 57 7 Disimballaggio 57 8 Montaggio 58 9 Prima della messa in funzione 58 10 Funzionamento 59 11 Istruzioni di lavoro 61 12 Allacciamento elettrico 61 13 Pulizia e manutenzione 61 14 Stoccaggio 63 15 Trasporto 63 16 Smaltimento e riciclaggio 63 17 Risoluzione dei guasti 64 ...

Page 53: ... dado 2 brugola 1 Introduzione Produttore Scheppach GmbH Günzburger Straße 69 89335 Ichenhausen Germania Egregio cliente Le auguriamo un piacevole utilizzo del Suo nuovo ap parecchio Avvertenza Sulla base della legge attualmente in vigore sulla re sponsabilità per prodotti difettosi il produttore del presente apparecchio non risponde dei danni all ap parecchio in questione o derivanti da esso in c...

Page 54: ...ve essere assolu tamente modificato Non utilizzare adattatori con gli attrezzi elettrici con collegamento a terra 2 nastri per sega Istruzioni per l uso originali 4 Impiego conforme alla destinazio ne d uso La sega a nastro per metalli con regolazione della ve locità è idonea soltanto al taglio di legno tubi profili e metalli non ferrosi di spessore sottile Il pezzo da lavorare deve avere una form...

Page 55: ...rischio di scossa elettrica si riduce se si utilizzano spine non modificate e prese di corrente adatte Evitare il contatto tra il corpo e le superfici che sca ricano a terra come ad es tubi elementi riscaldan ti fornelli e frigoriferi Sussiste un rischio elevato di scarica elettrica se il proprio corpo è a potenziale di terra Conservare gli attrezzi elettrici al riparo da pioggia o umidità La pene...

Page 56: ...no essere minimizzati se si rispettano complessivamente le Indicazioni di si curezza generali l Utilizzo conforme nonché il manuale di istruzioni Utilizzare l attrezzo elettrico gli accessori gli at trezzi ausiliari etc attenendosi alle istruzioni e prendendo in considerazione le condizioni operati ve e l attività da svolgere Un utilizzo degli attrezzi elettrici per applicazioni diverse da quelle ...

Page 57: ...cambio presso il proprio rivenditore specializzato In caso di ordinazioni indicare i nostri codici di arti coli il tipo e l anno di costruzione del prodotto m AVVISO L apparecchio e il materiale di imballaggio non sono giocattoli per bambini I bambini non devo no giocare con i sacchetti di plastica pellicole e piccole parti Sussiste il pericolo di ingerimento e soffocamento 6 Dati tecnici Motore a...

Page 58: ...1 Fig 3 1 Ruotare la piastra di base del braccio di supporto 22 in modo che il foro della piastra di base del braccio di supporto coincida con il foro sul banco sega 2 Inserire la vite a esagono cavo dal di sopra attra verso i fori coincidenti nel banco sega 21 3 Capovolgere il banco sega 21 sul lato e fissare il dado fornito in dotazione sulla vite a esagono cavo 4 Fissare il dado con una chiave ...

Page 59: ...modo che il nastro per sega duri il più a lungo possibile accertarsi che l ope razione di taglio non inizi con un urto improvviso 5 Per ottenere tagli diritti il nastro per sega deve essere allineato con la superficie laterale della carcassa del motore Durante questa operazio ne fare attenzione all angolo di osservazione 2 AVVERTENZA Strofinare via lo sporco sul LED 3 1 con un panno asciutto Fare ...

Page 60: ... Attenzione Prima di rimuovere il pezzo attendere fino a quan do il nastro per sega si è completamente arrestato Se il nastro per sega viene sottoposto a torsione o inclinata il taglio viene eseguito vicino alla linea di taglio con conseguente riduzione della durata della vita utile del nastro per sega AVVERTEN ZA Se durante l operazione di taglio la sega a nastro si blocca o resta incastrata nel ...

Page 61: ...ro di se ghe a nastro per metalli Si ritiene che le seguenti pratiche di lavoro sicure con tribuiscano alla sicurezza ma potrebbero non essere appropriate pienamente o ampiamente applicabili per ogni uso Non possono coprire tutte le possibili con dizioni pericolose e devono essere interpretate con diligenza Quando la macchina è fuori servizio ad es alla fine del lavoro rilassare il nastro per sega...

Page 62: ...seguenti com ponenti sono soggetti a naturale usura o usura legata all uso e sono richiesti i seguenti pezzi come materiali di consumo Pulizia Mantenere i dispositivi di protezione le feritoie di ventilazione e l alloggiamento del motore il più pos sibile privi di polvere e di sporcizia Pulire l apparec chio strofinando con un panno pulito o soffiando con aria compressa a bassa pressione Si raccom...

Page 63: ...o e i relativi accessori in un luo go buio asciutto e non soggetto a gelo non accessi bile ai bambini La temperatura di stoccaggio ideale è compresa tra 5 e 30 C Conservare l elettroutensile nell imballaggio originale Coprire l elettroutensile per proteggerlo da polvere o umidità Conservare le istruzioni per l uso nei pressi dell elet troutensile 15 Trasporto Trasportare la sega a nastro per metal...

Page 64: ...ri ecc Non utilizzare altri i motori o altri dispositivi sullo stesso circuito Il motore si surriscalda facilmente Motore sovraccarico insufficiente raffreddamento del motore Evitare di sovraccaricare il motore durante il taglio Rimuovere la polvere dal motore in mo do che il motore si raffreddi in modo ottimale Il taglio è ruvido o ondulato Nastro per sega poco affilato forma del dente non adatta...

Page 65: ...shandleiding en de veiligheids voorschriften Draag een veiligheidsbril Draag gehoorbescherming Bescherm de luchtwegen bij stofontwikkeling Let op Gevaar voor letsel Niet in de draaiende zaagband grijpen Draag veiligheidshandschoenen Let op Voor montage reiniging ombouw instandhouding opslag en transport moet u het apparaat uitschakelen en loskoppelen van de stroomvoorziening Zaagbandrichting Besch...

Page 66: ...Algemene veiligheidsvoorschriften voor elektrische apparaten 68 6 Technische gegevens 71 7 Uitpakken 71 8 Montage 72 9 Voor de ingebruikname 72 10 Bediening 73 11 Werkinstructies 74 12 Elektrische aansluiting 75 13 Reiniging en onderhoud 75 14 Opslag 76 15 Transport 76 16 Afvalverwerking en hergebruik 77 17 Verhelpen van storingen 78 ...

Page 67: ...sen u veel plezier en succes bij het werken met uw nieuwe apparaat Aanwijzing De fabrikant van dit apparaat is volgens de van kracht zijnde wet inzake productaansprakelijkheid niet aan sprakelijk voor schade die aan dit apparaat of door dit apparaat ontstaan bij ondeskundige behandeling veronachtzaming van de instructies voor de bedie ning reparaties door derden niet geautoriseerde vak mensen inbo...

Page 68: ... ge bruik uit de buurt van het elektrische gereedschap Bij afleiding kunt u de controle over het apparaat ver liezen 2x inbussleutel 2x zaagbanden Originele gebruikshandleiding 4 Beoogd gebruik De draagbare metaallintzaag met snelheidsinstelling is alleen geschikt voor het zagen van hout buizen pro fielen en dunne non ferrometalen Het werkstuk moet een zodanige vorm hebben dat het veilig in de mac...

Page 69: ... of die deze aanwijzingen niet hebben ge lezen Elektrische apparaten zijn gevaarlijk als ze door onervaren personen worden gebruikt 2 Elektrische veiligheid De aansluitstekker van het elektrische gereedschap moet in het stopcontact passen De stekker mag op geen enkele wijze worden gewijzigd Gebruik geen adapterstekker samen met geaard elektrisch gereedschap Ongewijzigde stekkers en passende stopco...

Page 70: ...n Onderhoud elektrisch gereedschap zorgvuldig Controleer of bewegende delen probleemloos functioneren en niet klemmen of onderdelen ge broken of beschadigd zijn waardoor de functie van het elektrische gereedschap wordt beïnvloed Laat beschadigde onderdelen voor gebruik van het ap paraat eerst repareren Veel ongevallen ontstaan door slecht onderhouden elektrisch gereedschap Houd snijgereedschap sch...

Page 71: ...dleiding Gebruik bij accessoires alsook slijtage en reserve onderdelen uitsluitend originele onderdelen Reser veonderdelen zijn verkrijgbaar bij de leverancier Geef bij bestellingen onze artikelnummers alsook type en bouwjaar van het product aan m WAARSCHUWING Het apparaat en de verpakkingsmaterialen zijn geen kinderspeelgoed Kinderen mogen niet met plastic zakken folies en kleine onderdelen spele...

Page 72: ...er krassen op de LED 3 1 komen anders neemt de lich tintensiteit af 8 Montage 8 1 Steunarm 19 op de zaagtafel 21 monteren afb 3 1 Draai de grondplaat steunarm 22 dusdanig tot het boorgat van de grondplaat steunarm met het boorgat in de zaagtafel overeenkomt 2 Steek de inbusbout van bovenaf door het betref fende boorgaten in de zaagtafel 21 3 Kantel de zaagtafel 21 op de zijkant en bevestig deze me...

Page 73: ...ogd nemen de snelheid en levensduur van het zaagband 11 af 7 Zware eindstukken die letsel kunnen veroorza ken als ze omlaag vallen moeten worden onder steund Gebruik van veiligheidsschoenen wordt sterk aanbevolen Let op Eindstukken kunnen heet en scherp zijn 3 Gebruik geen verdunner of benzine voor het rei nigen van de LED 3 1 Dergelijke oplosmidde len kunnen de LED beschadigen 4 Schakel de LED 3 ...

Page 74: ...dspanning draagt aanzienlijk bij tot een rechte zaagsnede van de zaagband Controleer en corrigeer de spankracht eventueel na het inzagen Draag bij het gebruik met zaagbanden geschikte veiligheidshandschoenen Monteer voor aanvang van de werkzaamheden al le beschermings en veiligheidsvoorzieningen op de machine 8 Houd tijdens het zagen de metaallintzaag met beide handen vast 9 Voorkom dat de metaall...

Page 75: ...s of de veer of shuntdraad verbrand of beschadigd is moet u beide borstels vervangen Reinig de zaagband of zaagbandgeleiding nooit handmatig met een borstel of schraper als de zaag band draait Zaagbanden met harsafzettingen vor men een risico voor de werkveiligheid en moeten regelmatig worden gereinigd Draag voor uw persoonlijke veiligheid tijdens de werkzaamheden een veiligheidsbril en gehoorbe s...

Page 76: ...n om onderhoud aan de koolborstels te verrichten 2 Verwijder vervolgens de koolborstels 3 Plaats de koolborstels in omgekeerde volgorde terug Vervangen van de zaagband afb 7 11 Let op Trek bij alle onderhoudswerkzaamheden altijd de stek ker uit het stopcontact 1 Draai de spanhendel voor de zaagband 13 met de wijzers van de klok mee tot aan de aanslag om de spanning van de zaagband weg te nemen zie...

Page 77: ... mag worden gegooid Dit product moet bij een hiervoor bestemde verzamelpunt worden afgegeven Dit kan bijv door teruggave bij de aanschaf van een soortgelijk product of door inlevering bij een erkend verzamelpunt voor het recyclen van verbruikte elektrische en elektronische apparatuur Het onjuist handelen van oude apparatuur kan door mogelijke ge vaarlijke stoffen die veelal in verbruikte elektrisc...

Page 78: ...e vermogen niet Groep van stroomnet overbelast lampen andere motoren enz Gebruik geen andere apparaten of motoren op de groep Motor raakt snel oververhit Overbelasting van de motor ontoereikende koeling van de motor Voorkom een overbelasting bij de motor tijdens het zagen Verwijder stof van de motor zodat een optimale koeling van de motor is gewaarborgd Zaagsnede is ruw of gegolfd Zaagband bot tan...

Page 79: ...ad Use gafas protectoras Llevar protección auditiva En caso de formación de polvo llevar protección respiratoria Atención Peligro de lesión No tocar la cinta de sierra mientras se encuentra en funcio namiento Lleve guantes de protección Atención Antes del montaje la limpieza reconstrucción el mantenimiento almace namiento y el transporte se debe desconectar el aparato y separar este del suministro...

Page 80: ...5 Indicaciones generales de seguridad para herramientas eléctricas 82 6 Datos técnicos 85 7 Desembalaje 85 8 Montaje 86 9 Antes de la puesta en marcha 86 10 Manejo 87 11 Indicaciones de trabajo 89 12 Conexión eléctrica 89 13 Limpieza y mantenimiento 90 14 Almacenamiento 91 15 Transporte 91 16 Eliminación y reciclaje 91 17 Solución de averías 92 ...

Page 81: ...ación escala graduada 27 Perno de seguridad 1 Introducción Fabricante Scheppach GmbH Günzburger Straße 69 D 89335 Ichenhausen Alemania Estimado cliente Le deseamos éxito y disfrute al trabajar con su nuevo aparato Nota El fabricante de este aparato de acuerdo con la legis lación alemana de responsabilidad sobre productos no se hace responsable de los daños originados en este aparato o causados por...

Page 82: ...El término empleado en las indicaciones de segu ridad herramienta eléctrica se refiere a las herra mientas eléctricas conectadas a la red eléctrica con cable de red eléctrica 3 Volumen de suministro Sierra de cinta para metales Mesa de aserrado 3 tornillos de cabeza con hexágono interior 1 tornillo de cabeza con hexágono interior tuerca 2 llaves Allen 2 cintas de sierra Traducción de las instrucci...

Page 83: ...herramienta eléctrica que ya no se pueda conectar o desconectar de nuevo es peligrosa y se debe reparar Retire la clavija de la toma de corriente antes de realizar ajustes en el aparato cambiar accesorios o guardar el aparato 1 Seguridad en el lugar de trabajo Tenga su zona de trabajo ordenada y bien iluminada Las zonas de trabajo desordenadas o mal iluminadas pueden causar accidentes Con la herra...

Page 84: ...e proyectada en caso de una sujeción o un guiado incorrecto como el tra bajo sin tope Esta medida de precaución evita el arranque invo luntario de la herramienta eléctrica Mantenga las herramientas eléctricas que no utilice fuera del alcance de los niños No deje que use el aparato ninguna persona que no esté familiariza da con él o no haya leído estas instrucciones Las herramientas eléctricas son ...

Page 85: ...ompruebe que no haya daños de transporte en el aparato y en los componentes de los accesorios En caso de reclamación ésta deberá comunicarse de inmediato al transportista Las reclamaciones reali zadas posteriormente no serán atendidas Riesgo para la salud por polvo o viruta de made ra Es de obligado cumplimiento emplear equipos de protección tales como una protección para los ojos Lesiones por una...

Page 86: ...es se deslicen con suavidad Antes de conectar la máquina asegúrese de que los datos de la placa de características coinciden con los datos de la red Conserve el embalaje por si fuera preciso hasta la extinción del período de garantía Familiarícese con el producto antes de su uso con ayuda del manual de instrucciones Emplee únicamente piezas originales para los acce sorios las piezas de desgaste y ...

Page 87: ... cinta de la sierra consulte el capítulo 13 Limpieza y man tenimiento 10 2 Procedimiento de aserrado sin mesa de ase rrado fig 13 m Advertencia Ajuste o posicione las piezas de trabajo solo cuando la sierra de cinta para metales esté detenida 9 1 Conectar la máquina fig 4 PRECAUCIÓN Antes de conectar la máquina a la red eléctrica ase gúrese siempre de que el interruptor de conexión des conexión 5 ...

Page 88: ...rpo ner otros objetos 2 Procure que el tope de la pieza de trabajo 10 entre en contacto con la pieza de trabajo mien tras mantiene la cinta de la sierra alejada de la pieza de trabajo 3 A continuación conecte la sierra de cinta para metales Para ello presione el interruptor de conexión desconexión 5 y el interruptor de des bloqueo 6 al mismo tiempo 4 Cuando la sierra de cinta para metales alcance ...

Page 89: ...xión del enchufe de la pared Grietas causadas por el envejecimiento del aisla miento 4 Cuando la sierra de cinta para metales alcance el número de revoluciones deseado tire del per no de seguridad 27 véase fig 3 e incline lenta y cuidadosamente el cuerpo principal de la sierra de cinta para metales hacia abajo para que la cinta de la sierra entre en contacto con la pieza de trabajo No aplique pres...

Page 90: ...nta de la sierra 14 y continúe alrededor de la unidad de accio namiento de la cinta de la sierra 16 Al retirar la cinta de la sierra se puede liberar la tensión y la cinta de la sierra puede saltar LAS CINTAS DE SIERRA ESTÁN AFILADAS Tales líneas de conexión eléctrica defectuosas no de ben utilizarse pues suponen un riesgo para la vida de bido a los daños de aislamiento Supervisar con regularidad ...

Page 91: ... PROTECCIÓN DURANTE SU MANIPULACIÓN 5 Compruebe los rodillos guía 18 y retire las viru tas de gran tamaño que puedan quedar en ellos Las virutas atascadas pueden impedir la rota ción de los rodillos guía 18 y dar lugar a puntos planos en ellos 6 Hay cintas de goma 17 en las poleas de la co rrea 13 Las cintas de goma deben revisarse para ver si están flojas o dañadas al cambiar la cinta de la sierr...

Page 92: ...esional que controle el motor Encargue a un profesional el reemplazo del condensador El motor hace demasia do ruido Bobinas dañadas motor defectuoso Encargue a un profesional que controle el motor El motor no alcanza la capacidad total Circuitos del sistema eléctrico sobre cargados lámparas otros motores etc No utilice otros aparatos o motores con el mismo circuito eléctrico El motor se sobreca li...

Page 93: ...ção em funcionamento Use óculos de proteção Use proteção auditiva Use uma proteção respiratória em caso de formação de pó Atenção perigo de ferimentos Não pegue na fita de serra em funcionamento Use luvas de proteção Atenção Antes da montagem limpeza alteração manutenção armazenamento e trans porte deve desligar o aparelho e desconectar a fonte de alimentação elétrica Sentido da lâmina de serra Cl...

Page 94: ...icações de segurança gerais para ferramentas elétricas 96 6 Dados técnicos 98 7 Desembalar 99 8 Montagem 99 9 Antes da colocação em funcionamento 100 10 Operação 101 11 Dicas de trabalho 102 12 Ligação elétrica 103 13 Limpeza e manutenção 103 14 Armazenamento 104 15 Transporte 104 16 Eliminação e reciclagem 105 17 Resolução de problemas 106 ...

Page 95: ...a 1 Introdução Fabricante Scheppach GmbH Günzburger Straße 69 D 89335 Ichenhausen Alemanha Estimado cliente Desejamos lhe muita satisfação e sucesso ao traba lhar com o seu novo aparelho Nota De acordo com a legislação vigente relativa à respon sabilidade pelos produtos o fabricante deste aparelho não é responsável por danos que ocorram nele ou através dele nas seguintes situações manuseio incorre...

Page 96: ...étricas com li gação à terra As fichas inalteradas e as tomadas adequadas diminuem o risco de um choque elétrico 2 chaves Allen 2 fitas de serra Tradução do manual de instruções original 4 Utilização correta A serra de fita metálica portátil com ajuste da veloci dade destina se exclusivamente ao corte de madeira tubos perfis e metais não ferrosos finos O formato das peças deve fazer com que seja p...

Page 97: ...s para aplicações que não sejam as previstas pode conduzir a situações perigosas Evite o contacto do corpo com superfícies ligadas à terra como tubos aquecedores fogões e frigoríficos Existe um risco elevado de choque elétrico se o seu corpo estiver ligado à terra Mantenha as ferramentas elétricas afastadas de chu va e humidade A penetração de água na ferramenta elétrica aumenta o risco de um choq...

Page 98: ...ó deve ser reparada por pes soal especializado usando somente peças sobres selentes de origem Assim assegura se que a segu rança da ferramenta elétrica é mantida Aviso Esta ferramenta elétrica cria um campo ele tromagnético durante o funcionamento Esse campo poderá sob determinadas circunstâncias afetar im plantes médicos ativos e passivos Para reduzir o ris co de ferimentos graves ou mortais reco...

Page 99: ...e cima nos orifícios alinhados na mesa de serrar 21 3 Bascule a mesa de serrar 21 para o lado e fixe a porca fornecida no parafuso de sextavado in terno 4 Fixe a porca com uma chave de bocas não in cluída no âmbito de fornecimento Lâmina de serra 1141 x 13 x 0 65 Velocidade da lâmina de serra 0 7 2 4 m s Largura de corte 90 127 x 127 mm Largura de corte 45 127 x 41 5 mm Ângulo de rotação 0 45 Peso...

Page 100: ...e o LED 3 1 após o trabalho 8 2 Montar a máquina no braço de base 19 fig 15 1 Posicione os orifícios da serra de fita metálica 12 de modo alinhado com os orifícios no braço de base 20 2 Aparafuse os parafusos de sextavado interno fornecidos na serra de fita metálica através do braço de base 3 Aperte agora os parafusos de sextavado interno 8 3 Montar a fita de serra fig 7 11 1 Soltes os parafusos P...

Page 101: ...se mais lenta e a vida útil da fita é reduzida 7 Deve se apoiar peças finais que sejam tão pe sadas que provoquem ferimentos ao cair Reco menda se vivamente o uso de sapatos de segu rança Atenção as peças finais poderão estar quentes e ser afiadas 8 Ao serrar segure a serra de fita metálica com ambas as mãos 9 4 Roda de ajuste da velocidade fig 4 m CUIDADO Nunca altere a velocidade com o aparelho ...

Page 102: ... tensão correta da fita contribui significativamente para um corte retilíneo da fita de serra Verifique e corrija se necessário a tensão após a serragem Use luvas de proteção adequadas ao manusear fi tas de serra Antes do início dos trabalhos monte todos os dis positivos de proteção e segurança na máquina 9 Evite que a serra de fita metálica caia sobre a peça fixada ou apoiada após o corte 10 3 Ap...

Page 103: ...ento Nunca limpe a fita de serra ou os rolos guia da fita de serra com uma escova de mão ou espátula com a fita de serra em funcionamento As serras de fita resinosas comprometem a segurança no trabalho e devem ser limpas regularmente Para sua própria proteção use óculos de proteção e proteção auditiva durante os trabalhos No caso de cabelos compridos use uma rede para o cabe lo Enrole mangas larga...

Page 104: ...mento ou a mola ou o fio do shunt estiverem quei mados ou danificados deve se substituir ambas as escovas Se após a desmontagem as escovas forem consideradas operacionais pode voltar a monta las 1 Para a manutenção das escovas de carvão abra ambos os bloqueios tal como ilustrado na figura 22 no sentido oposto ao dos ponteiros do reló gio 2 Retire de seguida as escovas de carvão 3 Volte a colocar a...

Page 105: ...e ser en tregue num dos pontos de recolha previstos para o efeito Isto pode ser feito por ex mediante a entrega aquando da compra de um produto semelhante ou através da entrega num centro de recolha autorizado para a reciclagem de equipamentos elétricos e ele trónicos antigos Devido às substâncias potencialmen te perigosas frequentemente contidas nos equipa mentos antigos elétricos e eletrónicos o...

Page 106: ...icos na instalação de rede sobrecarregados lâmpadas outros motores etc Não utilize outros aparelhos ou motores no mesmo circuito elétrico O motor sobreaquece facilmente Sobrecarga do motor arrefecimento insuficiente do motor Evite uma sobrecarga do motor ao cortar Remova a poeira do motor para que fique assegurado um arrefecimento ótimo do motor Corte da serra áspero ou ondulado Fita de serra romb...

Page 107: ...www scheppach com 107 ...

Page 108: ...www scheppach com 108 ...

Page 109: ...www scheppach com 109 ...

Page 110: ...ropean Parliament and Council from 8th June 2011 on the restriction of the use of certain hazardous substances in electrical and electronic equipment L appareil décrit ci dessus dans la déclaration est conforme aux réglementations de la directive 2011 65 EU du Parlement Européen et du Conseil du 8 juin 2011 visant à limiter l utilisation de substances dangereuses dans la fabrication des appareils ...

Page 111: ...www scheppach com 111 ...

Page 112: ...rere dalla consegna in maniera tale che sostituiamo gratuitamente qualsiasi componente che entro tale periodo presenti dei vizi di materiale o di fabbricazione tali da renderlo inutilizzabile Per componenti non fabbricati da noi garantiamo solo nella misura nella quale noi stessi possiamo rivendicare diritti a garanzia nei confronti dei nostri fornitori Le spese per il montaggio dei componenti nuo...

Reviews: