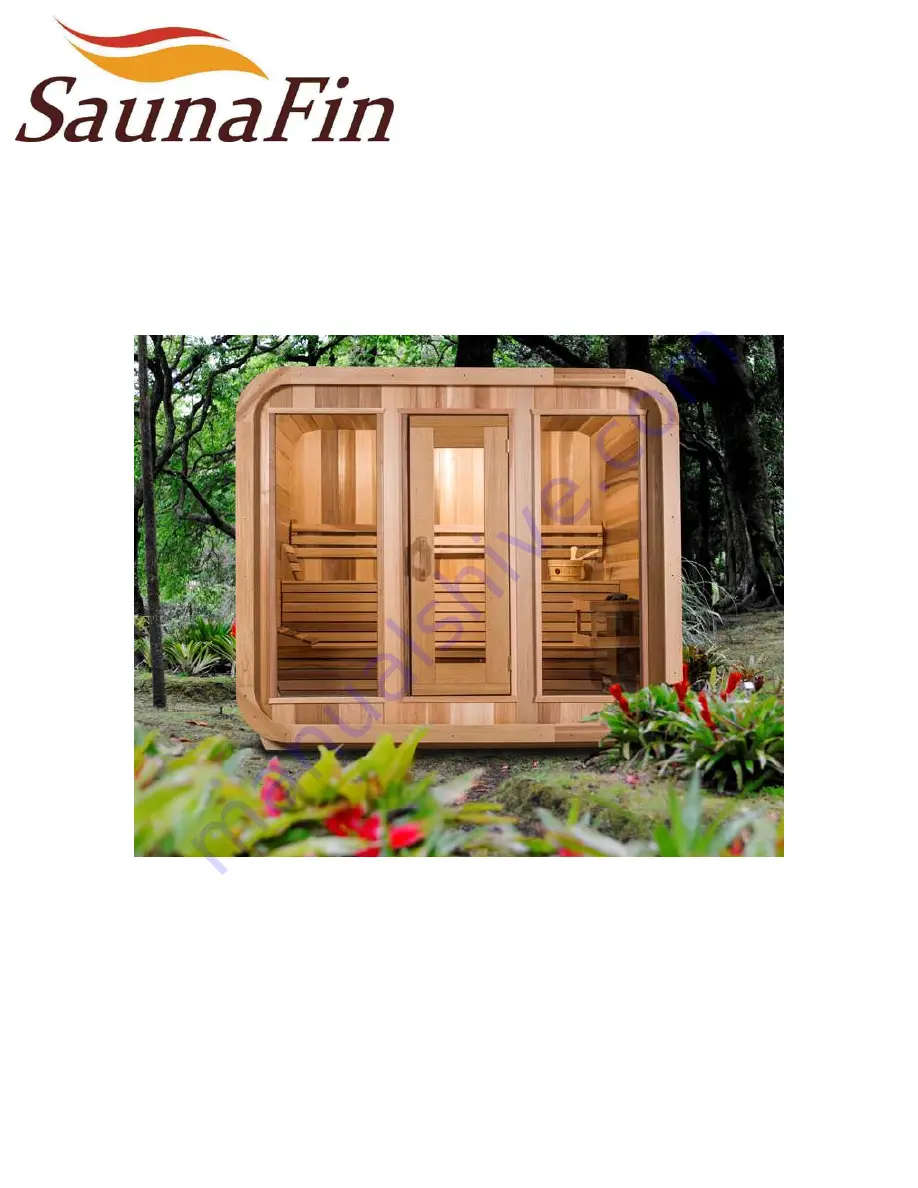
Luna Cedar Sauna
Assembly Instructions
Requirements:
* 2 People (recommended)
* Step or Extension Ladder
* Cordless Drill (we supply the bit)
* Tape Measure
* Staple Gun
* Utility Knife
Page 1: ...Luna Cedar Sauna Assembly Instructions Requirements 2 People recommended Step or Extension Ladder Cordless Drill we supply the bit Tape Measure Staple Gun Utility Knife ...
Page 2: ...tave will be rounded on both sides Center Stave should stick out 7 past front support There should be 40 from end of support to the middle of center stave Once in correct position secure center stave to front support using 2 screws repeat on back support Luna Cedar Sauna Assembly Instructions Lay out the 3 Bottom Supports like in Picture ...
Page 3: ...t bottom staves as shown When finished laying out bottom staves line them up flush with each other Use a tape measure to make sure they are all 7 from Support Once in proper position secure bottom staves to front support using 2 screws Now start laying out the back wall Luna Cedar Sauna Assembly Instructions ...
Page 4: ...eaded rods Thread the rods through the holes This will take some finessing Make sure the holes in the back wall staves line up with each other Secure both ends tightly with a washer and nut for each hole Cut off any excess threaded rod with a hacksaw Luna Cedar Sauna Assembly Instructions ...
Page 5: ...m staves Make sure both sides are sticking out equally to ensure wall is centered Gather all the front wall pieces and lay out like above Slide threaded rod through side stave as you continue to add the small top pieces You should have 5 small staves between the corner and middle stave Luna Cedar Sauna Assembly Instructions ...
Page 6: ...e door in same manner as window Repeat the same process for the other side window Make the nut and washer flush on 1 side Tighten other side and cut off excess with hacksaw With 2 people slide front wall into bottom staves in same manner as back wall Luna Cedar Sauna Assembly Instructions ...
Page 7: ...either side of the sauna Use any stave to brace the front and back walls Start inserting the wall staves on both sides starting from the bottom Follow the curvature of the walls Use the rubber mallet to help position the staves and then secure with a 2 screw Luna Cedar Sauna Assembly Instructions ...
Page 8: ...benches and brackets for easier installation Assemble benches as best you can without securing them Continue adding staves in same manner as before Once you reach the middle install the center stave without screwing it in The center stave with be concaved on both sides Luna Cedar Sauna Assembly Instructions ...
Page 9: ... staves snugly in place After staves are snug screw in middle stave then the outside ones Continue adding staves using only the mallet no screws at this time When you reach the middle use the mallet to finesse the last pieces in Once all the staves are in secure each stave with a 2 screw at each end ...
Page 10: ... secure the rubber membrane to the front of sauna as shown On the back secure it as shown with the roofing membrane draping down Using a utility knife cut off the excess rubber membrane Secure both sides with more staples Install the sauna trim starting at the front of the sauna ...
Page 11: ...he siding start at the bottom with the top of the siding flush with the bottom wall stave Start the next piece of siding 4 from the bottom of the previous piece Using small nails or staples secure each shingle at the bottom so that it catches the top of the shingle underneath Continue process for both sides ...
Page 12: ...sauna from getting water between the siding and the staves Now secure a shingle over the membrane as shown Cut off the excess at the bottom with a utility knife as shown Continue add the siding until you reach the top Attach the trim on the back of sauna in same manner as the front ...
Page 13: ...brackets to the wall and the bench supports using 2 screws Secure the bench brackets to the bottom bench covers as shown using 2 screws Screw bench brackets to floor using 2 screws Screw in between slats to secure the upper bench cover using 2 screws Repeat process to secure bottom bench to bench support ...
Page 14: ...ckets Fasten Bench brackets to top short bench from underneath using 2 screws Secure bottom short bench in same manner Screw in between slats to secure the upper short bench cover using 2 screws Repeat process to secure lower bench cover to bench support Assembly Instructions For 8 x7 and 8 x8 models with L shaped Benches If no L shaped bench please proceed to next page ...
Page 15: ...r to the frame 6 from the top and bottom of door using 2 screws Repeat on other side through middle holes on top and bottom hinges To install outside handle pre place 2 screws as shown Measure to ensure handle is centered both ways and screw to door Repeat process with inside towel bar handle ...
Page 16: ...ackets Attach heater brackets to the back wall of sauna using 1 screws Place Heater on wall brackets Remove the protective film from the heater before use Wash the rocks thoroughly before placing them into the heater Space rocks out evenly in top of heater Operate the heater for an hour with the sauna door fully open to burn off any residual coating from the ...
Page 17: ...de Assemble remaining front support to the 2 ends in the same manner as the previous step Place heater guard around electric heater Make sure heater guard is level before securing Using 2 1 2 screws in pre drilled holes fasten guard to back wall Place towel hanger in desired location and secure with 2 screws Repeat process with thermometer using a 2 screw ...
Page 18: ...Congratulations on the assembly of your new Luna Cedar Sauna ...
Page 19: ...or the first time Turn it on its highest setting and keep it like that for about 1 hour This is recommended to burn off any oils and impurities from manufacturing and it also cures the woodwork After about hour slowly pour about one litre of cold water on the rocks It should all turn to steam and not come out of the bottom of the heater If it does you re pouring too fast 3 It is considered good sa...