– 10 –
ASIC,
memory
CCD
8 bit
CPU
LCD
MONITOR
Power voltage
Power OFF
Play back
Shutter switch ON
LCD finder
3.3 V
5 V (A)
+15 V (A) etc.
3.2 V
(ALWAYS)
+15 V (L)
OFF
OFF
32KHz
OFF
OFF
ON
4 MHz
ON
ON
ON
4 MHz
ON
ON
ON
4 MHz
ON
ON
OFF
4 MHz
ON
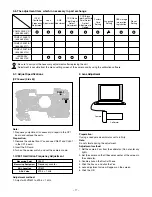
Table 5-3. Camera Mode (Battery Operation)
Note) 4 MHz = Main clock operation, 32 kHz = Sub clock operation
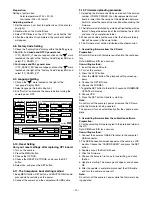
4. Power Supply Control
The 8-bit microprocessor controls the power supply for the overall system.
The following is a description of how the power supply is turned on and off. When the battery is attached, a regulated 3.2 V
voltage is normally input to the 8-bit microprocessor (IC301) by IC302, so that clock counting and key scanning is carried out
even when the power switch is turned off, so that the camera can start up again. When the battery is removed, the 8-bit micro-
processor operates in sleep mode using the backup lithium secondary battery. At this time, the 8-bit microprocessor only carries
out clock counting, and waits in standby for the battery to be attached again. When a switch is operated, the 8-bit microprocessor
supplies power to the system as required.
The 8-bit microprocessor first sets the P ON signal at pin (40) to high, and then turns on the DC/DC converter. After this, high
signals are output from pins (26) and (31) so that the ASIC is set to the active condition. Once it is completed, the ASIC returns
to the reset condition, all DC/DC converters are turned off and the power supply to the whole system is halted.
Power switch ON-
Auto power OFF
CAMERA
5. 16-bit A/D circuit (Audio)
This circuit converts the audio signals (analog signals) from the microphone to 16-bit digital signals.
6. 16-bit D/A circuit (Audio)
The audio signals which were converted to digial form by the 16-bit A/D circuit are temporarily to a sound buffer and then
recorded in the SSFDC card. During playback, the 16-bit D/A circuit converts these signals into analog audio signals.
Table 5-2. Key Operation
3. Key Operaiton
For details of the key operation, refer to the instruction manual.
0
1
2
0
1
2
3
SCAN
OUT
SCAN
IN
←
LEFT
1st
TELE
PW_TEST
↓
DOWN
WIDE
TEST
→
RIGHT
2nd
4
OK
PLAY
↑
UP
-
PW-ON
MENU


