PLC-WXU10
9
3.2 Disassembly
Procedure
Warning
♦
Put on the Static Electricity Ring when starting for repair.
♦
Repair Environment suggest in Clean-room class 10000. Do not remove Optical Engine or
LCD panel outside the clean room. Please return the optical engine to supplier if your repair
condition can not meet the requirement.
♦
While screwing or unscrewing screws, please keep the screwdriver straight. Keeping
screwdriver inclined will damage the screw holes.
♦
Please turn off the power before replacing any parts.
♦
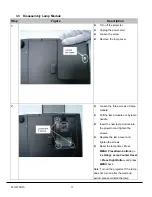
Please wait for the projector lamp cooling down and turn off the power before changing it.
Never touch or hit the lamp module when replacing the lamp.
♦
When you replace the projector lamp, never touch the new lamp with your bare hands. The
invisible residue left by the oil on your hands may shorten the lamp life. Use lint-free gloves
or finger cots are recommended.
Summary of Contents for PLC-WXU10B
Page 7: ...PLC WXU10 4 1 3 PLC WXU10 System Block Diagram ...
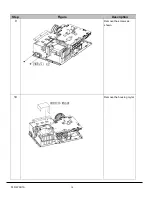
Page 17: ...PLC WXU10 14 Step Figure Description 9 Remove the screws as shown 10 Remove the housing mylar ...
Page 40: ...PLC WXU10 37 6 1 Mechanical Drawing M15 mylar 2 M12 ...
Page 41: ...PLC WXU10 38 6 2 Other drawing ...
Page 42: ...PLC WXU10 39 Projection Lens Assy L02 W07 ...
Page 43: ...PLC WXU10 40 W08 is the UV lens which is used to detect the temperature of panel W08 ...
Page 51: ......
Page 52: ... KJ3A Jan 2008 DC 300 Printed in Japan SANYO Electric Co Ltd ...


