


9
02
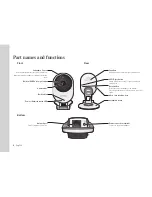
Installation & Network Connection
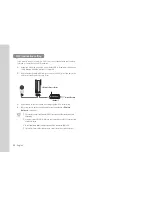
wall Mounting with Screws
Assembling
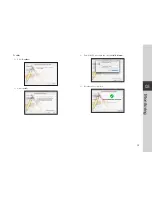
1.
Remove the two rubber packings on both
sides of the camera installation board.
2.
Take out screws (M3xL20), and anchors (Φ5x25mm).
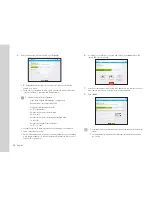
3.
On a wooden wall, use screws to fix the
wall-mount bracket as shown in the figure.
Using a driver on the wall to attach, fix the
screws in the two holes.
4.
If fixing on a concrete wall, use screws and anchors to fix wall-mount bracket.
First, mark on the wall as shown in the figure below.
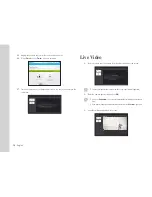
5.
Use drill bit of 5mm diameter and drill on the
marked positions, drill to have 3 cm depth
holes. Clean the holes after drilling.
J
`
Be careful not to get injured while drilling.
6.
Insert an anchor for each hole. Fully insert
anchors by hammering lightly the anchor
head with a hammer/rubber hammer.
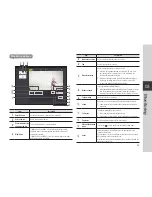
7.
Using a driver on the wall to attach, fix the
screws in the two holes.
8.
Connect the adaptor’s plug to the power terminal on the camera’s rear side.
n
`
When done, remove the protective film from the lens.