background image

31

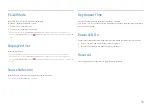
Size

Select the size and aspect ratio of the sub-screen.


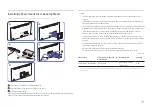
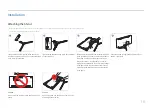
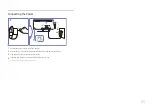
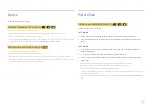
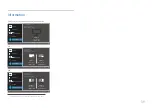
: Select the icon image if you want to use PBP mode where the optimum resolution for the left 

and right sides of the screen is 1720 x 1440 (width x height).


: Select the icon image if you want to use PIP mode where the optimum resolution for the sub-

screen is 720 x 480 (width x height).


: Select the icon image if you want to use PIP mode where the optimum resolution of the sub-

screen is 1280 x 720 (width x height).


: Select the icon image if you want to use PIP mode where the optimum resolution of the sub-

screen is 1720 x 720 (width x height).

Position

Select the position of the sub-screen from the available options.


 / 

 / 

 / 


Not available when PBP is selected.


The screen may flicker if the input signal is unstable.

Sound Source

Set which screen you want to hear the sound for.

PIP mode

 / 

PBP mode

 / 

Summary of Contents for S34J550WQ Series

Page 1: ...e copyright for this manual Use or reproduction of this manual in parts or entirety without the authorization of Samsung is prohibited Trademarks other than that of Samsung are owned by their respecti...

Page 2: ...g a Wall mount Kit or Desktop Stand 18 Installation 19 Attaching the Stand 19 Removing the Stand 20 2 Screen Setup SAMSUNG MAGIC Bright 25 Brightness 26 Contrast 26 Sharpness 26 Color 26 SAMSUNG MAGIC...

Page 3: ...ge caused by customer s fault 47 Others 47 Setup and Reset FreeSync 35 Eco Saving Plus 37 Off TimerPlus 37 PC AV Mode 38 DisplayPort Ver 38 Source Detection 38 Key Repeat Time 38 PowerLED On 38 Reset...

Page 4: ...lossy models can develop white stains on the surface if an ultrasonic wave humidifier is used nearby Contact your nearest Samsung Customer Service Center if you want to clean the inside of the product...

Page 5: ...g Do not use a damaged power cord or plug or a loose power socket Do not use multiple products with a single power socket Do not touch the power plug with wet hands Insert the power plug all the way i...

Page 6: ...roduct within the reach of young children The product may fall and injure children Edible oil such as soybean oil may damage or distort the product Keep the product away from oil pollution And do not...

Page 7: ...m power off the product and remove the power cable Do not drop objects on the product or apply impact Do not move the product by pulling the power cord or any cable If a gas leakage is found do not to...

Page 8: ...Keep the AC DC adapter in a well ventilated area If you place the AC DC power adapter so that it is hanging with the cord input facing upwards water or other foreign substances could enter the Adapter...

Page 9: ...use Do not touch the screen when the product has been turned on for an extended period of time as it will become hot Store small accessories out of the reach of children Exercise caution when adjustin...

Page 10: ...t or right or as Enter Power LED This LED is power status indicator and works as Power On Power button Off Power saving mode Blinking Power Off Power button On The power Indicator operation can be swa...

Page 11: ...tness Contrast Eye SaverMode LEFT RIGHT Adjust Volume PRESS ENTER Display Function Key Guide Direct Key guide The shortcut button screen OSD menu shown below is displayed only when the monitor screen...

Page 12: ...unction key guide screen The OSD On Screen Display of your Monitor s feature appears OSD control lock Maintain the current settings or lock the OSD control to prevent unintended changes to settings En...

Page 13: ...P Source Change DOWN PRESS ENTER for 2 seconds Power Off When the monitor displays the Main menu the JOG Button could be used as below JOG Button Action UP DOWN Move the option LEFT Exit the Main menu...

Page 14: ...PBP Mode is set to On and the Size is set to PBP Mode Changing the Volume setting You can adjust Volume by moving the JOG button left or right if no OSD menu is displayed Volume 50 Mute The displayed...

Page 15: ...actual product HDMI IN1 HDMI IN 2 DP IN DC 19V Port Description HDMI IN1 HDMI IN 2 Connects to a source device using an HDMI cable or HDMI DVI cable HDMI1 support 3440 x 1440 50 Hz HDMI2 support 3440...

Page 16: ...epend on the manufacturer Refer to the user guide provided with your anti theft locking device for details To lock an anti theft locking device 1 Fix the cable of your anti theft locking device to a h...

Page 17: ...ing the monitor Do not directly apply pressure on the screen Do not hold the screen when moving the monitor Do not hold the product upside down only by the stand Hold the lower corners or edges of the...

Page 18: ...cessive force The product may get damaged or fall and cause personal injury Samsung shall not be held liable for any damage or injury caused by using improper screws or attaching the wall mount kit or...

Page 19: ...ottom of the stand base Place the protective Styrofoam cushion included in the package on the floor and place the product facing down on the Styrofoam as shown in the image If Styrofoam is unavailable...

Page 20: ...facing down on the Styrofoam as shown in the image If Styrofoam is unavailable use a thick sitting mat While holding the monitorwith one hand pull the stand neck with your other hand to in detach the...

Page 21: ...ecting and Using a PC Select a connection method suitable foryour PC Connecting parts may differ in different products Provided ports may vary depending on the product Connection Using the HDMI Cable...

Page 22: ...available with an HDMI DVI cable Connection Using the DP Cable Check to make sure that the power cables for the monitor and external devices such as computers and set top boxes are not connected to th...

Page 23: ...lug to the AC DC adapter 2 Connect the AC DC adapter cable to the DC19V port on the back of the monitor 3 Plug the AC DC adapter into the power outlet 4 Press the JOG button on the back of the monitor...

Page 24: ...heart Do the Eye excercises or blink frequently then eye fatigue will be relieved Driver Installation You can set the optimum resolution and frequency for this product by installing the corresponding...

Page 25: ...st and brightness as required Standard Obtain a picture quality suitable for editing documents or using Internet Cinema Obtain the brightness and sharpness of TVs suitable for enjoying video and DVD c...

Page 26: ...me Mode is enabled Not available when PIP PBP Mode is set to On Color Adjust the tint of the screen This menu is not available when SAMSUNG MAGICBright is set to Cinema or Dynamic Contrast mode This m...

Page 27: ...able when PIP PBP Mode is set to On Normal Select this mode when there is no contrast ratio degradation Low Select this mode to reduce the black level and increase the white level when there is a cont...

Page 28: ...keep Game Mode enabled all the time select Always On This menu is not available when Eco Saving Plus is enabled Not available when PIP PBP Mode is set to On Response Time Accelerate the panel response...

Page 29: ...cutting off The function may not be supported depending on the ports provided with the product Changing the screen size is available when the following conditions are satisfied A digital output devic...

Page 30: ...en the optimum resolution is selected go to Control Panel Display Screen Resolution and click Detect on the PC Instructions are based on Windows 7 If the screen is blank when the resolution is set to...

Page 31: ...x 480 width x height Select the icon image if you want to use PIP mode where the optimum resolution of the sub screen is 1280 x 720 width x height Select the icon image if you want to use PIP mode whe...

Page 32: ...e Size PIP Mode available in PIP mode Size Select the image size for sub screen In PC mode Auto Display the picture according to the aspect ratio of the each screen input source Wide Display the pictu...

Page 33: ...the picture of the sub screen with the original aspect ratio without cutting anything off The function may not be supported depending on the ports provided with the product Changing the screen size i...

Page 34: ...ut notice to improve quality Transparency Set the transparency for the menu windows Position Adjust the menu position Language Set the menu language A change to the language setting will only be appli...

Page 35: ...te setting method please refer to Q A How can I change the frequency The FreeSync function is only enabled in HDMI2 or DisplayPort mode Use the HDMI DP cable provided by the manufacturerwhen using Fre...

Page 36: ...r When applying the FreeSync function via the HDMI interface it may fail to work due to the bandwidth limitation of certain AMD display cards AMD Radeon R9 300 Series AMD Radeon R9 Fury X AMD Radeon R...

Page 37: ...gy compared to the maximum brightness Off Timer Plus Configuring Off Timer Off Timer Turn on Off Timer mode Turn Off After The off timer can be set within a range of 1 to 23 hours The product will aut...

Page 38: ...r saving mode or is displaying the message Check Signal Cable press the icon to display the On Screen Display OSD You can select 1 1 or 1 2 Source Detection Select either Auto or Manual as the method...

Page 39: ...tion Information Exit LU S N HDMI1 x kHz Hz PIP Picture PIP PBP OnScreen Display System Information Information Exit LU S N HDMI1 x kHz Hz HDMI2 x kHz Hz PBP Picture PIP PBP OnScreen Display System In...

Page 40: ...nstallation The Easy Setting Box icon may not appear depending on the computer system and the product specifications If the shortcut icon does not appear press the F5 key Restrictions and Problems wit...

Page 41: ...esolution may vary depending on the computer system settings and cables Check the following Installation issue PC mode The screen keeps switching on and off Check the cable connection between the prod...

Page 42: ...istorted Change the Color settings White does not really look white Change the Color settings There is no image on the screen and the power LED blinks every 0 5 to1 second The product is operating in...

Page 43: ...gs How can I change the resolution Windows 7 Go to Control Panel Appearance and Personalization Display Adjust Resolution and adjust the resolution Windows 8 Windows 8 1 Go to Settings Control Panel A...

Page 44: ...ty 5 95 non condensing Plug and Play This monitor can be installed and used with any Plug and Play compatible systems Two way data exchange between the monitor and PC system optimizes the monitor sett...

Page 45: ...rding to the following table by referring to the graphics card user manual Resolution Horizontal Frequency kHz Vertical Frequency Hz Pixel Clock MHz Sync Polarity H V IBM 720 x 400 31 469 70 087 28 32...

Page 46: ...screen is called a horizontal cycle The reciprocal number of a horizontal cycle is called horizontal frequency Horizontal frequency is measured in kHz Vertical Frequency Repeating the same picture doz...

Page 47: ...m If customer requests software installation and setup for the product If a service technician removes cleans dusts or foreign materials inside of the product If customer requests an installation addi...

Reviews: