background image

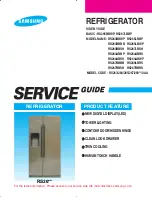
BOTTOM MOUNTED FREEZER TYPE

BASIC MODEL : RL60GG*

MODEL NAME :  RL56GE*/H*/P*/R*/S* 

RL58GE*/H*/P*/Q*/R*/W* 

RL60GE*/G*/H*/L*/Q*/S*/Z*/J*

REFRIGERATOR

REFRIGERATOR

CONTENTS

For the latest information, Please access to our service web site

•Europe,Mideast,Africa : http://gspn1.samsungcsportal.com

•Asia : http://gspn2.samsungcsportal.com

•North America : http://gspn3.samsungcsportal.com

1. PRECAUTIONS (SAFETY WARNINGS) .......... 4 

2. PRODUCT SPECIFICATIONS ......................... 6

3. DISASSEMBLY & REASSEMBLY ................. 13

4. TROUBLE SHOOTING .................................  31

5. PCB DAIGRAM ............................................  70

6. WIRING DIAGRAM ......................................  81

7. CIRCUIT DIAGRAM .....................................  86

8. REFERENCE INFORMATION ......................  93

RL60GQ*/G*/ 

Z*/H*/E*

RL60GL* /S*

RL58GQ*/R*/

H*/E*

RL58GP*/W*

RL56GR*/H*/E*

RL56GP*/W*

RL56GS*

Summary of Contents for RL56GE Series

Page 1: ... site Europe Mideast Africa http gspn1 samsungcsportal com Asia http gspn2 samsungcsportal com North America http gspn3 samsungcsportal com 1 PRECAUTIONS SAFETY WARNINGS 4 2 PRODUCT SPECIFICATIONS 6 3 DISASSEMBLY REASSEMBLY 13 4 TROUBLE SHOOTING 31 5 PCB DAIGRAM 70 6 WIRING DIAGRAM 81 7 CIRCUIT DIAGRAM 86 8 REFERENCE INFORMATION 93 RL60GQ G Z H E RL60GL S RL58GQ R H E RL58GP W RL56GR H E RL56GP W ...

Page 2: ...y attempt to repair a major appliance may result in personal injury and property damage The manufacturer or dealer cannot be responsible for the interpretation of this information All rights reserved This service guide may not be reproduced in whole or in part in any form without written permission from the SAMSUNG ELECTRONICS Company WARNING ...

Page 3: ...sembled state of parts It should be the same as the previous state Check out the surrounding conditions Change the location if the fridge is located at humid wet places or the installed state is unstable If needed ground the fridge Especially if there is a possibility of electric leakage ground is indispensable Do not allow consumers to overload a certain outlet Check out whether the power cord or...

Page 4: ...e replacement Check the correct model rated voltage rated current operating temperature and so on On repair make sure that the wires such as harness are bundled tightly Bundle tightly wires in order not to be detached by the external force and then not to be wetted Check if there is any trace indicating the permeation of water If there is that kind of trace change the related components or do the ...

Page 5: ...Opening or closing the door may cause things to fall down with may inflict a wound Prohibition Prohibition Prohibition Prohibition Warning Caution Do not allow users to disassemble repair or alter It may cause fire or abnormal operation which leads to injury Do not disassemble Do not allow users to insert the power plugs for many products at the same time May cause abnormal generation of heat or f...

Page 6: ...6 2 PRODUCT SPECIFICATIONS 2 1 Introduction of main function 7 2 2 Model Specification 8 2 3 Electiric Part Specification 10 2 4 Dimension mm 12 ...

Page 7: ...is frequently used The drawer type freezer minimize temperature variations and stores food cleanly and conveniently The operation switch is handy to switch the appliance on and off without pulling out the main plug Digital temperature control display The display shows all functions of the appliance so that you can easily control them Supply of cool water without door openning With the water dispen...

Page 8: ...115 1920 RL58GP 376 261 RL58GR 377 262 RL58GE 377 262 76kg RL58GQ 346 231 RL58GW 373 285 RL60GJ 370 255 2010 RL60GG RL60GH 401 286 79kg RL60GL RL60GQ 370 255 RL60GS 401 286 RL60GE RL60GZ 400 285 Item Models Total Refrigerator Freezer W mm D mm H mm Rated Voltage and Frequency Motor Rated Consumption Power Electric Heater Rated Consumption Power Kind of Refrigerator Refrigerant Refrigerant Amount F...

Page 9: ...9 2 PRODUCT SPECIFICATIONS NOTE This operation instruction covers various models The characteristics of your appliance may differ slightly from those described in this manual ...

Page 10: ...Oil 10 cst Forced 4TM308RFBYY 82 130 9 61 5 200 240V 50Hz 220V 60Hz G1538S12D1 Z W MSE4A1Q L1G RSCR Mineral Oil 5 cst Natural 450Vac 5uF 33Ω 20 330MD2 SMP189PHB 01 125 9 69 5 220 240V 50Hz P MSV4A1A L1J BLDC Mineral Oil 10 cst Forced 4TM308RFBYY 82 130 9 61 5 200 240V 50Hz 220V 60Hz R G NSBY001TE1 DC12V J MSV4A1A L1B BLDC Mineral Oil 10 cst 4TM308RFBYY 82 130 9 61 5 200 240V 50Hz 220V 60Hz Q Item ...

Page 11: ...RMISTOR Freezer sensor 502AT 23 C 20 5 25 5 20 C 19 0 21 0 17 C 16 0 18 0 Refrigerator Model Temperature Selection ON C OFF C THERMISTOR Fridge sensor 502AT 1 C 2 0 0 3 C 4 0 2 0 5 C 6 C 4 C Defrost Related Components Defrost Cycle First Defrost Cycle Concurrent defrost of F and F 6hr 10min Defrost Cycle FRE 6 53hr vary according to the conditions used Pause time Inv Comp model 8 1 min AC Comp mod...

Page 12: ...12 2 PRODUCT SPECIFICATIONS 592 1201 7 595 500 584 675 712 2010 2 4 Dimensions mm RL60 RL58 RL56 2010 1920 1850 ...

Page 13: ...RECAUTION 14 3 2 Assy Door 15 Removing the Refrigerator Door 15 Removing the Freezer Door 16 3 3 Door Sub parts 17 3 4 Refrigerator Compartments 19 3 5 Freezer Compartments 23 3 6 Machine Compartments 24 3 7 Reversing the Door swing 25 ...

Page 14: ...frigerator in a damp place or place where it may come in contact with water Deteriorated insulation of electrical parts may cause an electric shock or fire The refrigerator must be grounded You must ground the refrigerator to prevent any power leakages or electric shocks caused by current leakage from the refrigerator Do not put bottles or glass containers in the freezer When the contents freeze t...

Page 15: ...over Hinge B using a flat head screwdriver and philips head screwdriver and then disconnect the wires Be careful of injury 2 Remove hinge screws by turning to counter clockwise and take off the upper hinge along the arrow Take care when removing the door to ensure that it does not fall on you 3 Remove the door from the middle hinge by carefully lifting the door Be careful not to scratch ...

Page 16: ... floor Take care when removing the door to ensure that it does not fall on you 2 Take off the Foot front by turning to Foot front and then remove hinge screws by counter clockwise Take off the lower hinge by pulling out Take care when removing the door to ensure that it does not fall on you If you want to aseemble follow the reverse order ...

Page 17: ...sembling make sure the unit turned off Door Handle 1 Insert a flat head screwdriver on the slot as shown and unlock the caps 2 Remove screws by turning to counter clockwise and take off the Handle Assy by pulling out Door Gasket The door gasket is a molded gasket set into a channel located in the door liner 1 Open the doovr 2 Grasp the gasket and pull in an outward motion until the molded gasket s...

Page 18: ...E FIGURE DESCRIPTION Water Dispenser Frige Option Item 1 Hold the top as shown in the picture and remove it by pulling it forward Water Tank Frige Option Item 2 Hold it at both sides as shown in the picture and remove it by liftiing it up ...

Page 19: ...rlgerator Drawers are designed for storage of fruits vegetables and deli items The drawers are located in the lower portion of the refrigerator 1 Pull out the drawer as far as it goes 2 Tilt the drawer up and pull it out until it is removed Cool Select Zone 1 Remove 2 screws and pull the CoolSelect Zone drawer out and then disconnect the 2 wire connectors When diassembling make sure the unit turne...

Page 20: ...d Cool Select Zone drawer 2 Remove 2 screws of refrigerator and pull on one side of refrigerator as shown 3 Disconnect the 2 wire connectors as shown When diassembling make sure the unit turned off Refrigerator assembly order is the reverse of disassembly Refrigerator thermistor is located inside the refrigerator ...

Page 21: ... COVER LAMP while pressing down the threshold 2 Take off LED LAMP while pressing down CASE LAMP threshold 3 Separate LED and the cable Side LED 1 Remove the lamp cover with a flat blade screwdriver 2 Remove the LED panel by lifting the part of LED panel while pushing it to left Refer to pictrue 3 Separate LED and the cable ...

Page 22: ... Cool Select Zone Thermistor The CoolSelect Zone thermistor is located inside the back of CoolSelect Zone drawer The temperature signal is sent to the microprocessor Door Bin The door bins allow storage of perishable items 1 Push the bin up and slide it out ...

Page 23: ...wer portion of the refrigerator 1 Pull out the drawer as far as it goes 2 Tilt the drawer up and pull it out until it is removed Evapor ator Cover In Freezer 1 Pull out all drawers 2 Remove 4 screws 3 Pull out the Shelf Fre Upp as far as it goes 4 Pull out the cover evap with 2 hands from bottom to top in order When diassembling make sure the unit turned off Upper Drawer Mid Drawer Lower Drawer ...

Page 24: ...ION Evaporator In Freezer Accumulator Thermistor Evaporator is located in the bottom of freezer to produce cold air driven across the evaporator Coils 1 Take off the ductwork in Freezer 2 Disconnect the wire connector Heater Bimetal and Thermistor 3 Cut the pipes desoldering is dangerous with R600a charged appliances 4 Remove the evaporator 5 Take the same steps to seal the system as mentioned ear...

Page 25: ...o drop the doors during dissembling or assembling 3 7 Reversing the Door swing PART NAME FIGURE DESCRIPTION Disassembly of the refrigerator door 1 Afer removing screws disassemble the COVER HINGE B 2 Disconnect electric wires inside of the COVER HINGE B When diassembling make sure the unit turned off 3 With a 10mm socket wrench remove bolts on the top of the refrigeator 4 Disassemble the Fridge do...

Page 26: ...E SHAFT and then flip the HINGE and reattcah the HINGE SHAFT 8 Take out the COVER WIRE HINGE L from the underneath the COVER HINGE A Switch the position DOOR SWITCH and the GROMMET HINGE And then switch the direction of the electric wire as below 9 After rejoining the COVER WIRE HINGE L and the ASSY HINGE UPP and switching the position of the GROMMET HINGE and the CAP SPACE DOOR reposition the ASS...

Page 27: ... Be careful not to drop and scratch the Freezer Door 13 Lay the Refrigerator on the floor Be careful not to scratch 14 Disassemble the ASSY HINGE LOW as shown and put the AUTO GUIDE upside down switch the position of the SHAFT Door handle 15 Insert a flat head screwdriver on the slot as shwn and unlock the caps 16 Remove screws by turning to counter clockwise and take off the Handle Assy pulling o...

Page 28: ...other side of doors in reverse order Assembly of the freezer door 18 Exchange the positions of FOOT FRONT and ASSY HINGE LOW 19 Raise the Refrigerator Be careful not to scratch 20 Switch the position of the CAP HOLE HINGE MID and a screw 21 Switch the position of the STOPPER DOOR and the BRACKET STOPPER DOOR and the GROMMET HINGE as shown ...

Page 29: ...NGE MID with 2 bolts A screw will be remained after reversing freezer door And it does not affect performance of the refrigerator Assembly of the refrigerator door 24 Carefully put the Fridge door back on Be careful of injury 25 Secure the ASSY HINGE UPP with 3 bolts as shown Make sure the Fridge Door is firmly closed 26 Open the CAP CABI HIGH and then switch the position of the COVER HINGE A and ...

Page 30: ...side of the CABI HIGE HOOK 28 Reassemble the COVER HINGE A B after assuring the position of Wires 29 Detach the Fridge and Freezer gaskets and attach them after rotating 180 Make sure the door gaskets are properly arranged If not there can be a noise or dew can be formed which affects perfomance of the unit 30 Make sure the doors are working properly ...

Page 31: ...ion Forced Operation Forced Defrost 32 4 1 2 Self Diagnosis Function 34 4 1 3 Load Status Display Function 40 4 1 4 Restoration of Previous Settings upon Instant Power Outage 43 4 1 5 Demo Mode Function for Store Display 43 4 1 6 Option Setting Function 44 4 1 7 Option Table 47 ...

Page 32: ...tever button on the display panel is pressed 3 Each time the Test button is pressed it will change in the following order Forced Operation Forced F Defrost Cancellation Normal Operation Forced Operation 4 It is recommended that the unit be re plugged in to terminate the operation of the Test function 1 Test Mode Entering Process 4 1 Check List before Trouble Shooting 4 1 1 Test Function Forced Ope...

Page 33: ... work And when the Power Freeze function is selected the Power Freeze LED will go off in 10 seconds 1 6 When the Forced Operation or the Test function is cancelled within one minute after the Forced Operation being selected the set temperature will automatically change to the previously set temperature 1 7 The alarm sound during the Forced Operation 0 25 sec On and 0 75 sec Off keeps on until the ...

Page 34: ...ncel the Initial Self Diagnosis Function by pressing the Freezer and the Fridge button for 10 seconds 2 Self Diagnosis Function during Normal Operation 2 1 During the Normal Operation press the Freezer Fridge buttons for 6 seconds Then the entire Display Panel blinks at intervals of 0 5 seconds for 4 seconds When pressing the Freezer Fridge buttons for 10 seconds including the 4 second blinking ti...

Page 35: ...n Parts related to CSZ SENSOR 7 6 F FAN ERROR Defects in Parts related to F FAN MOTOR 21 7 C FAN ERROR Defects in Parts related to C FAN MOTOR 23 8 F DEF ERROR Defects in Parts related to F DEF HEATER 24 9 CSZ Damper Heater ERROR CSZ Damper Heater open Wire Defects 27 10 COMP START UP FAILURE ERROR When COMP fails starting up 81 11 COMP IPM FAULT ERROR COMP IPM FAULT ERROR 82 12 COMP OUT OF SPEC C...

Page 36: ...rgy consumption When it reads 0 Ohm check the Heater short and when it reads Ohm check if the Wire Thermal Fuse or the Bimetal is Open 9 CSZ Damper Heater ERROR It occurs when the Damper Heater is detected as open due to the slipped out connector the open contact or the open wire of the Damper Heater Remove the MAIN PCB CN75 connector from the MAIN PCB and read the continuity between BLK SKY BLUE ...

Page 37: ...id High LED 3 F SENSOR Defects in Parts related to F SENSOR Freezer Mid LED 4 R SENSOR Defects in Parts related to R SENSOR Freezer Low Mid LED 5 F DEF SENSOR Defects in Parts related to F DEF SENSOR Freezer Low LED 6 F FAN ERROR Defects in Parts related to F FAN MOTOR Fridge High LED 7 C FAN ERROR Defects in Parts related to C FAN MOTOR Fridge Mid High LED 8 COMP ERROR When the Compressor is defe...

Page 38: ...ontact Wire Cut or Short Circuited Abnormal Sensing Temp higher than 65 or lower than 50 The voltage between MAIN PCB CN30 3 PNK 8 Gray should within 4 5V 0 5V 4 R SENSOR The same as the above The voltage between MAIN PCB CN31 5 Red 8 Gray should within 4 5V 0 5V 5 F DEF SENSOR The same as the above The voltage between MAIN PCB CN30 4 Org 8 Gray should within 4 5V 0 5V 6 F FAN ERROR When the relat...

Page 39: ...Defects Check the resistance of R505 R506 R507 R508 R509 R510 R511 R512 and R513 for Short Check the status of Comp connection Check the Comp and the Cycle Comp Motor Locking Error Error occurs when the Comp is locked over 5 seconds the Comp rotates over 5000RPM for more than 10 seconds R308 Pins are shorted or COMP CYCLE is defective Check the resistance of R505 R506 R507 R508 R509 R510 R511 R512...

Page 40: ...t just indicates that there are MICOM signals coming out It does not necessarily mean that the related parts Loads are operating In other word even though it shows a certain load working the related part may not operate due to such as a defective PCB relay or the defective part itself it needs a confirmation 4 The Load Display function lasts for 30 seconds and then it goes back to the normal opera...

Page 41: ...e Fridge Digit g LED On when the unit is on Demo Mode 5 COMP Freezer 2nd Digit a LED On when Comp is running 6 F FAN HIGH Freezer 2nd Digit b LED On when the F Fan runs High 7 F FAN LOW Freezer 2nd Digit c LED On when the F Fan runs Low 8 F DEF HEATER Freezer 2nd Digit d LED On when the Freezer Defrost Heater is on 9 C FAN HIGH Freezer 2nd Digit e LED On when C FAN runs High 10 C FAN LOW Freezer 2...

Page 42: ...ED When the Ambient Temp is over 34 5 LOW TEMPERATURE Freezer Low LED When the Ambient Temp is under 21 6 NORMAL CONDITION Freezer Low Mid Low LED all Off When the Ambient Temp is between 22 33 7 Demo Mode Fridge High LED When the unit is under the Display Mode 8 F FAN HIGH Fridge Mid High LED When the F Fan runs in high 9 F FAN LOW Fridge Mid LED When the F Fan runs in low 10 C FAN HIGH Fridge Lo...

Page 43: ...for Store Display 1 At the normal operation press the Freezer Alam buttons for 6 seconds Then the Freezer and Fridge Temperature Display will blink in an interval of 0 5 second for 4 sec 2 At this time release the Freezer Alam buttons and press the Fridge button it sends out Ding Dong sound Then it shifts to the Demo Display mode 3 When the unit is in Demo Mode all the functions including the Disp...

Page 44: ...r Fridge buttons and press the Fridge button it sends out Ding Dong sound Then it shifts to the Option Setting Mode When there is no button press for 20 seconds at the Option Setting Mode it will go back to the normal display mode How to Shift to Option Setting Mode Press the Freezer Fridge buttons for 6 seconds at the same time and while the Display LEDs are blinking for 4 seconds release the but...

Page 45: ...value of the selected item Item Number Decrease Item Number Increase Set Value Increase Rotating The Bar Type Panel shows the set value with the following LED patterns Binary Type Value 0 1 2 3 4 5 6 7 8 9 10 11 12 13 14 15 High Mid High Mid Low Mid Low Value 16 17 18 19 20 21 22 23 24 25 26 27 28 29 30 31 High Mid High Mid Low Mid Low ...

Page 46: ...oduction the Default values may change When only 0 lights up on the Fridge compartment the Freezer temperature option can be set and the current set Freezer temperature will show on the display panel 3 If the Freezer temp code is set to 4 as the following table after setting the Fridge section to 0 the Freezer base temperature is to be lowered by 2 Refer to the Freezer temperature setting image In...

Page 47: ...ot handled in this manual Except those described in this manual do not change other values 1 Freezer Temp Shift Table Setting Item Freezer Temp Shift Option Item Location Fridge Temp LED 0 Setting Value Option Value Freezer Temp 0 0 1 0 5 2 1 0 3 1 5 4 2 0 5 2 5 6 3 0 7 3 5 8 0 5 9 1 0 10 1 5 11 2 0 12 2 5 13 3 0 14 3 5 15 4 0 Ex When shifting the Freezer default temp by 2 0 ...

Page 48: ...ing Item Fridge Temp Shift Option Item Location Fridge Temp LED 1 Setting Value Option Value Freezer Temp 0 0 1 0 5 2 1 0 3 1 5 4 2 0 5 2 5 6 3 0 7 3 5 8 0 5 9 1 0 10 1 5 11 2 0 12 2 5 13 3 0 14 3 5 15 4 0 Ex When shifting the Fridge default temp by 2 0 ...

Page 49: ... Inverter PCB Inverter Comp 59 4 2 7 When there is no Power in Main PCB AC Comp 60 4 2 8 When Compressor does not Operate Inverter Comp 61 4 2 9 When Compressor does not Operate AC Comp 62 4 2 10 When the unit keeps alarming Buzzer Sound 63 4 2 11 When PANEL PCB operates abnormally 65 4 2 12 When the Room Lamp LED does not light up 66 4 2 13 When Fridge Damper does not work 67 4 2 14 When CSZ Room...

Page 50: ... 59 138 2 0 706 1642 30 22 4 199 52406 15 59 2 111 7305 60 140 0 688 1594 29 20 2 4 165 49848 16 60 8 2 064 7032 61 141 8 0 670 1547 28 18 4 4 129 47431 17 62 6 2 019 6771 62 143 6 0 653 1502 27 16 6 4 093 45146 18 64 4 1 974 6521 63 145 4 0 636 1458 26 14 8 4 056 42984 19 66 2 1 929 6281 64 147 2 0 620 1416 25 13 4 018 40938 20 68 1 885 6052 65 149 0 604 1375 24 11 2 3 980 39002 21 69 8 1 842 583...

Page 51: ...tor CN30 is inserted properly F Sensor is normal Voltage between MAIN PCB Connector CN30 3 Pink and 8 Yel is normal Input Voltage at IC10 MICOM Pin 54 is normal Start PCB and Temp Sensor are normal Check the connector contact Connector contact defect Reconnect Replace Temp Sensor Check the wire connection Check Soldering Defect Short No No No NO 0 6V Value 4 6V No Yes Yes Yes Yes Sensor MICOM Conn...

Page 52: ... Connector contact defect Reconnect Replace Temp Sensor Check the wire connection Check Soldering Defect Short No No No NO 0 6V Value 4 6V No Yes Yes Yes Yes Sensor MICOM Connector R Between Connector CN30 5 Red and CN30 8 Yel Voltage Between 4 6V 0 6V Sensor Resistance Reading Location R Between CN30 5 and CN72 10 0Ω Short Ω Open Voltage at IC10 MICOM 58 is the same as the value between CN30 5 Re...

Page 53: ...t Connector contact defect Reconnect Replace Temp Sensor Check the wire connection Check Soldering Defect Short No No No NO 0 6V Value 4 6V No Yes Yes Yes Yes Sensor MICOM Connector F DEF Between Connector CN30 4 Orange and CN30 8 Yel Voltage Between 4 6V 0 6V Sensor Resistance Reading Location F DEF Between CN30 4 and CN72 10 0Ω Short Ω Open Voltage at IC10 MICOM 57 is the same as the value betwe...

Page 54: ...ontact defect Reconnect Replace Temp Sensor Check the wire connection Check Soldering Defect Short No No No NO 0 6V Value 4 6V No Yes Yes Yes Yes Sensor MICOM Connector Ambient Between Connector CN30 6 Yel and CN30 8 Yel Voltage Between 4 6V 0 6V Sensor Resistance Reading Location Ambient Between CN30 6 and CN72 10 Located in the PCB Box 0Ω Short Ω Open Voltage at IC10 MICOM 59 is the same as the ...

Page 55: ... input signals it keeps trying the above 4 times And if it still fails it runs the motor in 10 minutes It is implemented to prevent the motor from being overloaded due to restrictions by foreign substances such as ice built up around the motor Upon the initial power on the compressor and the F Fan operate for 7 minutes regardless of the conditions But when the Freezer temp is lower than 5 it will ...

Page 56: ...econds If there are still no input signals it keeps trying the above 4 times And if it still fails it runs the motor in 10 minutes It is implemented to prevent the motor from being overloaded due to restrictions by foreign substances such as ice built up around the motor Upon the initial power on the compressor and the C Fan operate But when there is an instance power failure it operates with the ...

Page 57: ... CN30 4 or Sensor Marking 2 R302 0Ω Short Ω Open Note When the temperature of the F DEF Sensor goes over 12 with the Defrost Heater heating up it stops heating and it goes back to Cooling Operation When the Freezer button is pressed after pressing the Freezer and the Fridge buttons at the same time for 6 seconds it will enter into the Test Mode And when any button is pressed twice it will enter in...

Page 58: ...rn and Replace BD1 Replace PCB ASS Y 1 Replace D103 RK49 2 Replace PCB ASS Y Replace REG1 7805 1 Check the Wire Connection and correct it if necessary 2 Replace PANEL PCB Check MAIN PCB Connectors Check Wire Connection between CABI and DOOR Check DOOR PANEL PCB Connection 1 Repair Related Parts or Replace PCB No No No No No No No Yes No Yes Yes Yes Yes Yes Yes Yes Yes No Caution There is AC230V or...

Page 59: ...erminals Start Normal Check the wire connectors Replace Fuse 250V 5A Check PCB Pattern and Replace BD1 Replace PCB ASS Y Replace PCB Assy Replace PCB Assy No No No No No No No Yes Yes Yes Yes Yes Yes Caution There is AC230V or DC300V at the MAIN PCB Power Circuit So be cautious when repairing the unit or measuring values To check the MAIN PCB refer to the Operation and Refer sections in this manua...

Page 60: ...V is applied at C110 terminals Yes 5V is applied at C113 terminals Yes Panel PCB operates normally Yes Loads such as Relay operate normally Yes Is there PCB Short or breakage No Replace PCB ASS Y Replace PCB ASS Y 1 Check the wire connections 2 Replace Panel PCB 1 Check Lead Wire connections 2 Replace Relay or PCB ASS Y 1 Do Re soldering 2 Replace PCB MAIN No No No No Yes Check the connection of D...

Page 61: ...tact at the COMP is normal Yes DIODE Voltage at SPM is normal Yes COMP ASS Y is normal Yes Yes Freezer Sensor is normal Yes The Temp Sensing Circuitry at MAIN PCB is normal Yes Check its connections Check the connector contact No Check the connector contact No Replace INVERTER PCB ASS Y No Replace COMP ASS Y No No Replace the Sensor No Replace MAIN PCB Forced Operation occurred Make sure to check ...

Page 62: ...about 0 8V Yes CN70 CN71 are normal Yes COMP ASS Y is normal Yes Yes Freezer Sensor is normal Yes The Temp Sensing Circuitry at MAIN PCB is normal Yes Check its connections Check the connector contact No Replace COMP ASS Y No No Replace the Sensor No Replace MAIN PCB Forced Operation occurred Make sure to check after performing Forced Operation Yes 1 Replace MICOM 2 Replace PCB 1 Replace IC71 Driv...

Page 63: ...orced Defrost mode Water penetrates into Door S W When the unit is plugged out and in again it keeps beeping MICOM 60 Voltage changes when the Door is open close Connector CN30 is inserted properly Door S W is in good condition Start Start Check if there is any obstacle pushing the Door open Cancel Forced Operation Defrost Replace Door S W MAIN PCB is normal Repair Wire Cut Door S W Insert the Con...

Page 64: ...ble to check when it is a closed built in environment and there is lots of noise around DingDong sound goes off when a button on the display panel is pressed Start Check Replace MAIN PCB BUZZER Select PANEL PCB Alarm On ICON Normal BUZZER Breakage Replacement Replace MAIN PCB Check the button pressing force and structural design Door Sensing No No Yes Yes Yes Yes PANEL PCB Alarm On ICON is selecte...

Page 65: ...ASS Y Correct any restrictions on the buttons Defective PANEL PCB Defective PANEL PCB No No Being Pressed When PANEL KEY is not selected No When being separated it works Yes Yes Yes Yes Yes Yes Yes No No Refer to Circuit Diagram attached in this manual and check the circuit diagram attached on the back of the unit When PANEL PCB does not light up or partially does When Panel PCB buttons are not wo...

Page 66: ...he MAIN PCB Connector CN76 is normal 10 12V The LED Lamp is connected properly The LED Lamp is ok Start Check Replace REED S W Magnet Ass y Replace Repair PCB Replace PCB Check Connector Terminal Replace PCB Check Connector Terminal Replace LED LAMP Normal No No No No No No Yes Yes Yes Yes Yes Yes Door MICOM State Door MICOM 34 Right and Left Close 0V Low Open 5V High MICOM State Door Right and Le...

Page 67: ... working condition MAIN PCB Connector CN75 is inserted normal Damper operates with DOOR S W closed Voltage is output from MICOM Pin 37 38 39 DOOR S W is good Fridge temp satisfies the set temp DAMPER is normal Shift Set Temp Set lower than the current temp Normal Replace PCB MAIN Forced Operation Temp Increased Check Connector CN75 DAMPER is good Check Cold Solder Replace PCB Replace DOOR S W Chec...

Page 68: ... 5V 5V 0V DAMPER is under a working condition MAIN PCB Connector CN75 is inserted normal CSZ temp satisfies the set temp Voltage is output from MICOM Pin 46 47 48 DAMPER is normal Shift Set Temp Set lower than the current temp Normal Replace PCB MAIN Forced Operation Temp Increased Check Connector CN75 Check Wiring PCB MAIN Check Cold Solder Replace PCB Replace DAMPER No No No No No Yes Yes Yes Ye...

Page 69: ...Failure Check if there is any short between Comp terminals IPM Fault Check IPM Voltage lower than 13 5V Check any short between IPM Pins 1 33 Location Detect Failure Check Comp and Cycle Check the continuity of the following resistances for Short Open R505 R506 R507 R508 R509 R510 R511 R512 R513 Check Comp Connector Motor Restriction Check Comp and Cycle Check the continuity of the following resis...

Page 70: ...receives various sensor signals and delivers them to MICOM after eliminating noises and it detects the door open 7 MAIN PANEL PCB Control 8 Fan Motor Driver It supplies 8V 12V to the motors depending on their types Option 9 Buzzer Alarm It sends out periodic alarm sounds when a button is pressed or when the door is open 10 MICOM Clock Generation Software Resetting 11 Main Micom CPU 12 LED LAMP Con...

Page 71: ...rates with the MICOM driving signals received from the Sink IC and there is the AC load connector 6 By receiving various sensor signals the MICOM eliminates noise and detects the door open close 7 It controls the operation of MAIN PANEL PCB 8 Fan Motor Driver It supplies 8V 12V to various motors Option 9 Buzzer Alarm Circuit Button Input Sound Door Open Alarm 10 MICOM Clock Generation Software Res...

Page 72: ...g signals received from the Sink IC and there is the AC load connector 6 By receiving various sensor signals the MICOM eliminates noise and detects the door open close 7 It controls the operation of MAIN PANEL PCB 8 Fan Motor Driver It supplies 8V 12V to various motors Option 8 Buzzer Alarm Circuit Button Input Sound Door Open Alarm 10 MICOM Clock Generation Software Reset Circuit 11 Main Micom CP...

Page 73: ...M High Phase Driving 3 Location Pick Up Circuit Detection of Rotor Location by monitoring the U V W Phase of Compressor 4 IPM It is a Power Module which consists of HVIC 1 LVIC 1 IGBT 6 and Diode 6 and drives the compressor with IGBT On Off controlling at the Micom 5 Shunt Resistor Compressor Current Detection Circuit It protects the compressor from over currents by monitoring the voltage applied ...

Page 74: ...r IPM High Phase Driving 3 Location Pick Up Circuit Detection of Rotor Location by monitoring the U V W Phase of Compressor 4 IPM It is a Power Module which consists of HVIC 1 LVIC 1 IGBT 6 and Diode 6 and drives the compressor with IGBT On Off controlling at the Micom 5 Shunt Resistor Compressor Current Detection Circuit It protects the compressor from over currents by monitoring the voltage appl...

Page 75: ...75 5 PCB DIAGRAM 5 3 Connector Layout and Description Main Board 5 3 1 Q G J OPTION ...

Page 76: ...76 5 PCB DIAGRAM 5 3 2 R P Z H Option ...

Page 77: ...77 5 PCB DIAGRAM 5 3 3 L Option ...

Page 78: ...78 5 PCB DIAGRAM 5 3 4 W E Option ...

Page 79: ...79 5 PCB DIAGRAM AC IN OLP Comp AC IN OLP Comp 5 4 Connector Layout Description Inverter Board G H L P R Z Option AC IN OLP Comp AC IN OLP Comp Q J OPTION ...

Page 80: ...80 5 PCB DIAGRAM IPM DIODE VOLTAGE 5 5 IPM Diode Voltage ...

Page 81: ...81 6 WIRING DIAGRAM 6 1 Q G J OPTION ...

Page 82: ...82 6 WIRING DIAGRAM 6 2 R P Z H Option ...

Page 83: ...83 6 WIRING DIAGRAM 6 3 L Option ...

Page 84: ...84 6 WIRING DIAGRAM 6 4 W E Option ...

Page 85: ...85 6 WIRING DIAGRAM 6 5 S Option ...

Page 86: ...86 7 CIRCUIT DIAGRAM 7 1 Schematic Diagram PBA Main 7 1 1 Q G J OPTION ...

Page 87: ...87 7 CIRCUIT DIAGRAM 7 1 2 R P Z H L Option ...

Page 88: ...88 7 CIRCUIT DIAGRAM 7 1 3 W E S Option ...

Page 89: ...89 7 CIRCUIT DIAGRAM 7 2 Schematic Diagram PBA Inverter ...

Page 90: ...90 7 CIRCUIT DIAGRAM 7 3 Block Diagram PBA Main ...

Page 91: ...91 7 CIRCUIT DIAGRAM 7 4 Block Diagram PBA Inverter G H L P R Z Option ...

Page 92: ...92 7 CIRCUIT DIAGRAM 7 5 Block Diagram PBA Inverter Q J Option ...

Page 93: ...93 8 REFERENCE INFORMATION 9 2 Nomenclatrue ...

Page 94: ... 950 6193 6896 FAX 82 62 950 6829 Samsung Electronics Co Ltd Refrigerator Division 2010 12 Printed in Korea This Service Manual is a property of Samsung Electronics Co Ltd Any unauthorized use of Manual can be punished under applicable International or domestic law ...

Reviews: