Loading originals
73
4. Media and tray
3
Close the RADF.
•
Leaving the
RADF
open while copying may affect copy quality and toner
consumption.
•
Dust on the scanner glass may cause black spots on the printout. Always
keep it clean.
•
If you are copying a page from a book or magazine, lift the
RADF
until its
hinges are caught by the stopper and then close the lid. If the book or
magazine is thicker than 30 mm (1 inch), start copying with the lid open.
•
Be careful not to break the scanner glass. You may get hurt.
•
Do not put hands on the scanner glass while closing the
RADF
. The
RADF
may fall on your hands and cause injury.
•
Do not look at the light inside of the scanner while copying or scanning.
It is harmful to eyes.
2
In the reverse automatic document feeder (RADF)
Preparing originals
•
Do not load paper smaller than 140 x 140 mm (5.5 x 5.5 inches) or larger than
297 x 432 mm (11.7 x 17 inches).
•
The RADF can automatically detect A5 LEF, Letters or A4 SEF, Legal SEF, A3
SEF.
•
Do not attempt to load the following types of paper, in order to prevent
paper jams, low print quality, and machine damage.
-
Carbon paper or carbon-backed paper
-
Coated paper
-
Onion skin or thin paper
-
Wrinkled or creased paper
-
Curled or rolled paper
-
Torn paper
•
Remove all staples and paper clips before loading.
•
Make sure any glue, ink, or correction fluid on the paper is completely dry
before loading.
•
Do not load originals that include different sizes or weights of paper.
•
Do not load booklets, pamphlets, transparencies, or documents with other
unusual characteristics.
Using the RADF, you can load up to 100 sheets of paper (80 g/m
2
, 20 lb bond) for
one job.
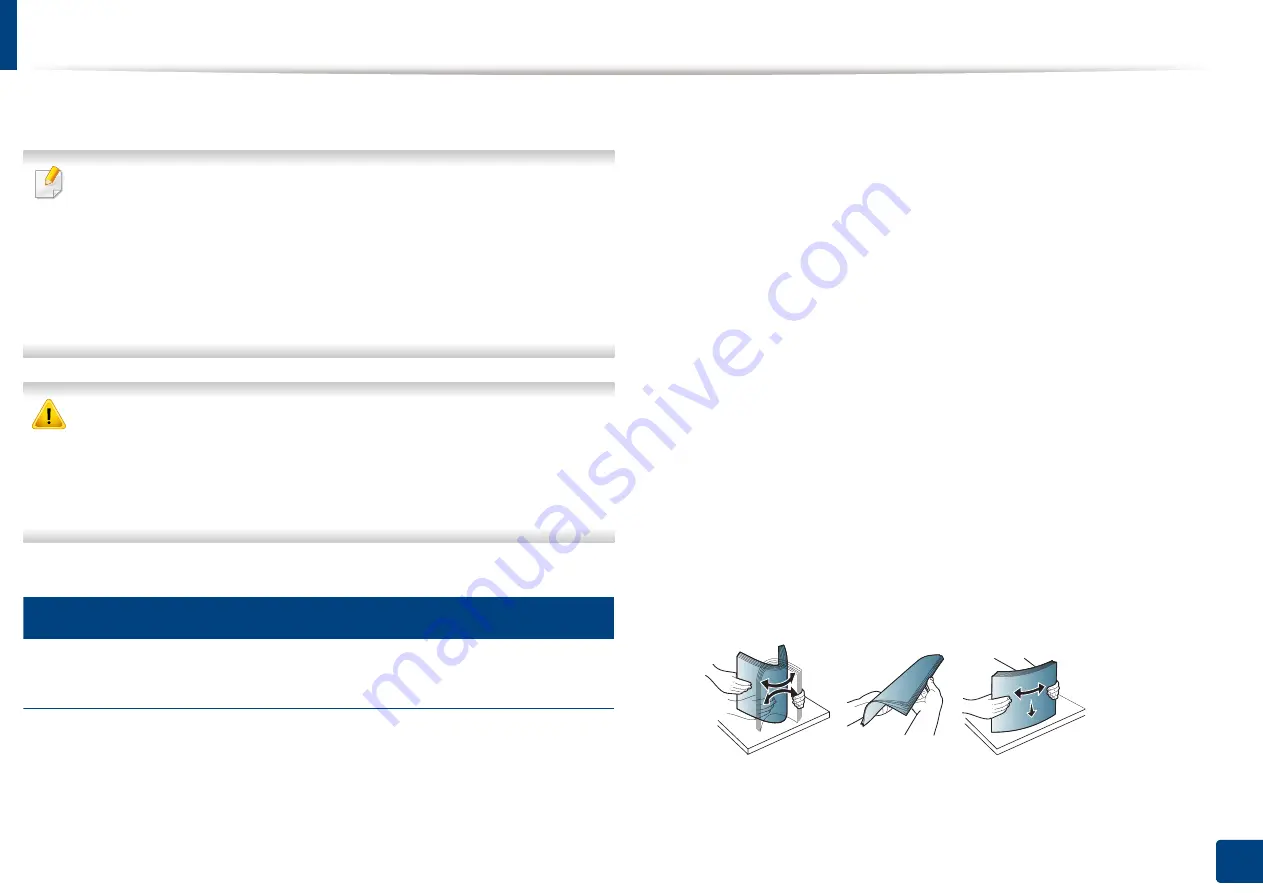
1
Flex or fan the edge of the paper stack to separate the pages before
loading originals.
Summary of Contents for Multifunction MultiXpress X322 Series
Page 295: ...Redistributing toner 295 14 Maintenance 4 X322x X328x series ...
Page 296: ...Redistributing toner 296 14 Maintenance 5 K325x K330x series ...
Page 298: ...Replacing the toner cartridge 298 14 Maintenance 6 X322x X328x series ...
Page 299: ...Replacing the toner cartridge 299 14 Maintenance 7 K325x K330x series ...
Page 301: ...Replacing the imaging unit 301 14 Maintenance 8 X322x X328x series ...
Page 302: ...Replacing the imaging unit 302 14 Maintenance 9 K325x K330x series ...
Page 303: ...Replacing the imaging unit 303 14 Maintenance ...
Page 305: ...Replacing the waste toner container 305 14 Maintenance 10 X322x X328x series ...
Page 306: ...Replacing the waste toner container 306 14 Maintenance 11 K325x K330x series ...
Page 312: ...Cleaning the machine 312 14 Maintenance X322x X328x series ...
Page 313: ...Cleaning the machine 313 14 Maintenance K325x K330x series ...
Page 315: ...Cleaning the machine 315 14 Maintenance X322x X328x series ...
Page 316: ...Cleaning the machine 316 14 Maintenance ...
Page 317: ...Cleaning the machine 317 14 Maintenance K325x K330x series ...
Page 318: ...Cleaning the machine 318 14 Maintenance ...
Page 320: ...Cleaning the machine 320 14 Maintenance K325x K330x series ...
Page 324: ...Cleaning the machine 324 14 Maintenance X322x X328x series ...
Page 325: ...Cleaning the machine 325 14 Maintenance ...
Page 326: ...Cleaning the machine 326 14 Maintenance K325x K330x series ...
Page 327: ...Cleaning the machine 327 14 Maintenance ...
Page 339: ...Clearing paper jams 339 15 Troubleshooting 3 In the multi purpose tray ...
Page 341: ...Clearing paper jams 341 15 Troubleshooting Jam feed 1 Jam feed 2 ...
Page 342: ...Clearing paper jams 342 15 Troubleshooting Jam feed 3 Jam feed 4 Optional device only ...
Page 357: ...Clearing paper jams 357 15 Troubleshooting 8 In the optional finisher area ...


