background image

RECORDING

37

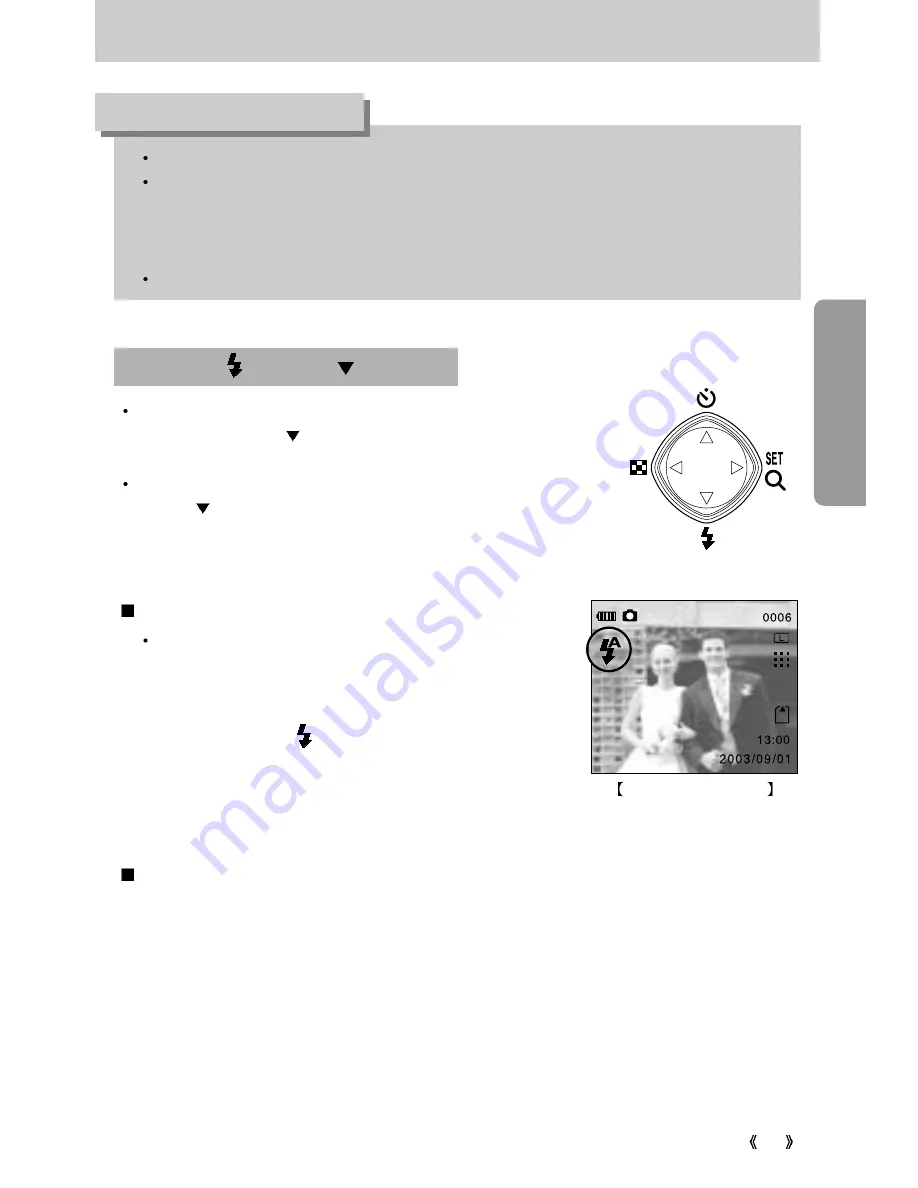
Selecting the Auto flash 

The default is OFF.
The self-timer LED lamp(red) will blink for 10 seconds after the SELF-TIMER button has
been pressed.

- For the first seven seconds, the LED blinks at 1 second intervals.
- For the final three seconds, the LED blinks quickly at 0.5 second intervals.

The remaining time to take an image will be shown on the LCD monitor.

INFORMATION

Selecting the flash mode

The flash activates only in the STILL IMAGE mode.

1. Do not turn the LCD monitor off.
2. Select the STILL IMAGE mode by rotating the mode

dial.

3. Press the FLASH(     )button until the desired FLASH

mode indicator displays on the LCD monitor. Use the
correct flash to suit the environment.

The default of each mode is listed below.

- STILL IMAGE mode : Auto flash
- MOVIE CLIP mode : Flash off(fixed)

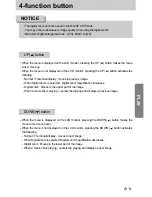
4-function button

FLASH(     )/ DOWN( ) button

When the menu is displayed on the LCD monitor,
pressing the DOWN ( )button  makes the menu cursor
move down or changes the sub menu.
When the menu is not displayed on the LCD monitor, the
DOWN ( ) button operates as the FLASH button.

Summary of Contents for DIGIMAX 300

Page 1: ...a Samsung Camera This manual will guide you through using the Digimax 300 including taking images downloading images and using the MGI PhotoSuite III SE software Please read this manual before using your new camera ENGLISH ...

Page 2: ...all the camera driver that is contained in the Application S W CD ROM p 76 Take a picture p 30 44 Insert the supplied USB cable into the PC USB port and the camera USB connection terminal p 66 Check the camera power If the power is turned off slide the camera switch to power it on p 32 Take a picture Check the camera power Check Removable Disk Open Window s EXPLORER and search for Removable Disk p...

Page 3: ... memory card 27 Instructions on how to use the SD memory card 27 Starting Recording Mode 30 Recording a still image 30 Recording a Movie clip 30 Using the camera button to adjust the camera 32 POWER switch 32 SHUTTER button 32 LCD button 32 MENU button 33 Focus switch 34 4 function button 35 SET RIGHT button 35 THUMBNAIL LEFT button 36 SELF TIMER UP button 36 FLASH DOWN button 37 Using the LCD mon...

Page 4: ...ing the camera and PC 66 Downloading stored images 67 Important notes 69 Warning indicator 70 Before contacting a sevice center 71 Specifications 73 About the software 75 Setting up the application software 76 Removing the USB Driver for Windows 98SE 83 Removable disk 85 Removing the removable disk 86 Setting up the USB Driver for MAC 88 Using the USB Driver for MAC 88 Digimax Viewer 89 MGI PhotoS...

Page 5: ...ut the icons This manual contains instructions on using this camera that will help you to use this camera safely and correctly This will help prevent danger and injury to others DANGER DANGER indicates an imminently hazardous situation which if not avoided will result in death or serious injury WARNING WARNING indicates a potentially hazardous situation which if not avoided could result in death o...

Page 6: ...ash too close to your subject s eyes may cause eyesight damage When taking photographs never point the lens of the camera directly into very strong light This may result in permanent damage to your eyesight For safety reasons keep this product and accessories out of reach of children or animals to prevent accidents e g Swallowing batteries or small camera accessories In case of accidents please co...

Page 7: ...r long periods always unplug the camera from its power source Do not fire the flash while it is in contact with hands or objects Do not touch the flash after using it continuously It may cause burns Do not move the camera while it is switched on if you are using the AC Power Adapter After use always switch off the camera before unplugging the adapter from the AC Power wall socket Then make sure th...

Page 8: ...can be used for Printing images using a dedicated printer DPOF compatible printer or DPOF equipped photo lab p 57 Down loading image files from camera to computer p 67 68 Editing images on a PC p 90 Taking a picture p 30 44 ...

Page 9: ...s directly into any electronic document Taking a self portrait and using the image to personalize name cards You can even create your own unique gift wrap paper by using your digital images Creation of a digital photo album Recording a movie clip refer to p 30 ...

Page 10: ...tallation This equipment generates absorbs and can emit radio frequency energy If it is not installed and used in accordance with the instructions it may cause harmful interference to radio communication There is however no guarantee that interference will not occur in a some situations Should any interference occur when this device is in operation please try one or more of the following measures ...

Page 11: ...line Batteries Pouch USB cable Camera strap Applications S W Driver CD ROM User manual Product warranty SD memory CARD AC adapter 3 3V Battery pack SBP 3603 marked contents are optional Please check that you have the correct contents before using this product ...

Page 12: ...es Product Exterior Front Top Bottom Shutter button Lens Self timer lamp Viewfinder Flash USB connection terminal DC input connection point Focus lever Mode dial Battery chamber Card cover Card slot Tripod socket Battery chamber ...

Page 13: ...on button LCD monitor MENU button Power switch Viewfinder LCD button Camera status LED Strap eyelet THUMBNAIL LEFT button FLASH DOWN button ZOOM SET RIGHT button SELF TIMER UP button Camera status LED Optimum picture area over 1 5m Camera status LED 4 function button ...

Page 14: ... second intervals For the final three seconds the LED blinks quickly at 0 5 second intervals When the camera power is on when the shutter button is released from pressing Red Blinking Blinking 1 time Beep Beep sound Camera condition Power beep When the camera power is turned on off Normal beep a short beep Rotating the mode dial pressing the shutter button pressing the camerabuttons Error beep Whe...

Page 15: ...7 White balance p 42 8 Exposure compensation 0 5 EV p 43 9 Digital zoom p 35 Number of available shots remaining Still image 0006 Available recording time Movie clip 00 10 11 Image size p 40 12 Quality p 41 13 SD memory card indicator p 26 14 Time 13 00 15 Date 2003 09 01 The LCD monitor displays information about the shooting conditions Recording mode Image Full Status 10 ...

Page 16: ...ge 1 Battery p 24 2 Protect p 56 3 4 Direction icons p 50 4 Print set indicator p 57 5 Digital zoom L X5 M X3 S I X2 p 50 6 Stored image number 100 0006 7 SD memory card indicator p 26 8 Movie clip indicator p 30 Still image Full Status Movie clip Full Status ...

Page 17: ...at protect number of prints setting and digital zoom in this mode MOVIE CLIP mode Movie clips are recorded for as long as the available recording time or pre set time allows in this mode The flash is changed to FLASH OFF when this mode is selected SETUP mode In this mode you can set up basic settings such as BEEP POWER OFF DATE IMPRINT DATE TYPE DATE TIME SETUP QUICK VIEW LANGUAGE RESET Mode dial ...

Page 18: ...ng the MENU button as below Power on STILL IMAGE mode STILL IMAGE mode menu MOVIE CLIP mode PLAY mode menu PLAY mode MOVIE CLIP mode menu Connecting USB cable PC mode Pressing the MENU button Pressing the MENU button Pressing the MENU button Rotating the Mode dial Rotating the Mode dial Rotating the Mode dial SETUP mode ...

Page 19: ... marked sub menu is the default setting Camera mode STILL IMAGE WHITE BALANCE QUALITY IMAGE SIZE 2048x1536 p 40 1600x1200 640x480 SUPER FINE p 41 FINE NORMAL AUTO p 42 DAYLIGHT SUNSET FLUORESCENT TUNGSTEN 2 0 0 0 2 0EV 0 5 EV steps p 43 Main menu Sub menu EXPOSURE 1024x768 ...

Page 20: ...PLAY DELETE NO DELETE IMAGE SLIDE SHOW 1 2 3 4 5 6 7 8 9 SEC OF PRINTS 0 1 2 3 4 5 6 7 8 9 PROTECT LOCK UNLOCK YES NO DELETE ALL YES NO FORMAT YES p 52 p 53 p 54 p 57 p 55 p 56 p 44 Main menu Sub menu MOVIE CLIP TIME 10 SEC 20 SEC 30 SEC MANUAL ...

Page 21: ... 21 LCD monitor menu indicator Camera mode SETUP 1 2 BEEP ON OFF DATE IMPRINT ON OFF DATE TYPE YYYY MM DD MM DD YYYY DD MM YYYY CANCEL 1 2 3 4 5 6 7 8 9 10MIN p 58 p 60 p 59 p 61 Main menu Sub menu POWER OFF ...

Page 22: ...03 01 01 2099 12 31 QUICK VIEW OFF 1 SEC 2 SEC 3 SEC p 62 p 63 LANGUAGE ENGLISH FRANÇAIS DEUTSCH ESPAÑOL ITALIANO p 64 RESET NO YES p 65 Main menu Sub menu There is no associated menu in the PC mode and the LCD monitor is always turned off in the PC mode INFORMATION ...

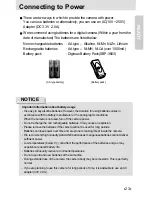
Page 23: ...facturer or the photographic conditions When the camera is not used turn off the camera power Do not recharge the non rechargeable batteries It may cause an explosion Please remove the batteries if the camera will not be used for long periods Batteries can lose power over time and are prone to leaking if kept inside the camera We recommend high capacity ALKALINE batteries as manganese batteries ca...

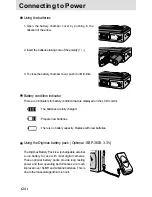
Page 24: ...push it until it clicks The batteries are fully charged Prepare new batteries There is no battery capacity Replace with new batteries Using the batteries The Digimax Battery Pack is a rechargeable external Li ion battery for use with most digital cameras These optional battery packs provide long lasting power and their operating performances are much improved over Ni MH and Alkaline batteries This...

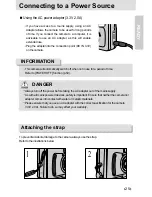
Page 25: ...ally switch off when not in use for a period of time Refer to POWER OFF function p 59 INFORMATION DANGER Always turn off the power before taking the AC adapter out of the mains supply As with all mains powered devices safety is important Ensure that neither the camera nor adapter comes into contact with water or metallic materials Please ensure that you use an AC adapter with the correct specifica...

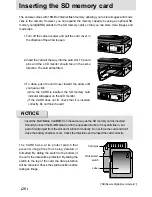
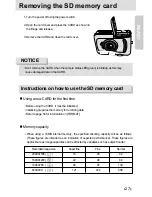
Page 26: ...over in the direction of the arrow to open 2 Insert the card all the way into the card slot The card pins and the LCD monitor should face in the same direction The card will be fitted 3 To close push the card cover toward the arrow until you hear a click Once the CARD is inserted the SD memory card indicator will appear on the LCD monitor If the CARD does not fit check that it is inserted correctl...

Page 27: ...efore using the CARD it must be initialized Initializing prepares the memory for recording data Refer to page 54 for information on FORMAT Using a new CARD for the first time When using a 16MB internal memory the specified shooting capacity will be as follows These figures are intended as an indication of expected performance These figures are approximate as image capacities can be affected by var...

Page 28: ...d to become dirty or to come into contact with any liquid Should this happen clean the memory card with a soft cloth Please keep the memory card in its case when not in use During and after periods of extended use you may notice that the memory card is warm This is perfectly normal Do not use a memory card that is used in another digital camera or memory card reader Do not use a memory card format...

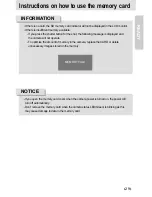
Page 29: ...lowing message is displayed and the camera will not operate To optimize the amount of memory in the camera replace the CARD or delete unnecessary images stored on the memory INFORMATION MEMORY FULL If you open the memory card cover when the camera power is turned on the power will turn off automatically Don t remove the memory card when the camera status LED Green is blinking as this may cause dam...

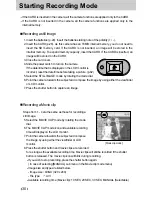
Page 30: ...ial 6 Point the camera towards the subject and compose the image by using either the viewfinder or LCD monitor 7 Press the shutter button to capture an image Recording a still image Steps from 1 4 are the same as those for recording a still image 5 Select the MOVIE CLIP mode by rotating the mode dial 6 The MOVIE CLIP mode icon and available recording time will display on the LCD monitor 7 Point th...

Page 31: ... image As there can be some differences between what is seen through the Viewfinder and the resulting image when taken at a range closer than 1 5m it is recommended that you use the LCD monitor to compose the shot Using the LCD monitor extensively will drain the batteries We recommend turning off the LCD monitor and using the optical viewfinder as often as possible in order to extend battery life ...

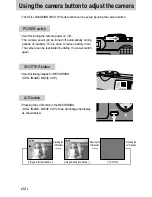
Page 32: ...periods of inactivity This is done to reduce battery drain The camera can be reactivated by sliding the power switch again SHUTTER button Used for taking images for RECORDING STILL IMAGE MOVIE CLIP LCD button Pressing the LCD button in the RECORDING STILL IMAGE MOVIE CLIP mode will change the display as shown below image full information Pressing the LCD button Pressing the LCD button Pressing the...

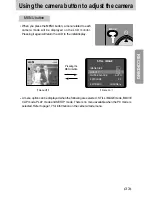
Page 33: ...l return the LCD to the initial display A menu option can be displayed when the following are selected STILL IMAGE mode MOVIE CLIP mode PLAY mode and SETUP mode There is no menu available when the PC mode is selected Refer to page 17 for information on the camera mode menu Pressing the MENU button menu off menu on STILL IMAGE IMAGE SIZE QUALITY WHITE BALANCE AUTO EXPOSURE 0 0 EXIT MENU CHANGE ...

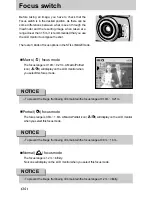
Page 34: ...s 0 19m 0 21m A Macro Portrait icon will display on the LCD monitor when you select this focus mode To prevent the image from being dim maintain the focus range at 0 19m 0 21m NOTICE To prevent the image from being dim maintain the focus range at 0 8m 1 6m NOTICE Portrait focus mode The focus range is 0 8m 1 6m A Macro Portrait icon will display on the LCD monitor when you select this focus mode N...

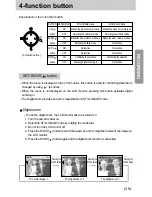
Page 35: ...HT button When the menu is displayed on the LCD monitor this button is used for confirming data that is changed by using buttons When the menu is not displayed on the LCD monitor pressing this button activates digital zooming in The Digital zoom provides 2x and 3x magnification in STILL IMAGE mode Digital zoom To use the digital zoom the LCD monitor has to be turned on 1 Turn the camera power on 2...

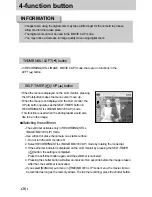
Page 36: ...elf timer The self timer activates only in RECORDING STILL IMAGE MOVIE CLIP mode Use a tripod or place the camera on a stable surface 1 Do not turn the LCD monitor off 2 Select RECORDING STILL IMAGE MOVIE CLIP mode by rotating the mode dial 3 If the self timer indicator is displayed on the LCD monitor by pressing the SELF TIMER button the setting is completed Press the self timer button again and ...

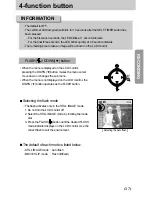
Page 37: ...tes only in the STILL IMAGE mode 1 Do not turn the LCD monitor off 2 Select the STILL IMAGE mode by rotating the mode dial 3 Press the FLASH button until the desired FLASH mode indicator displays on the LCD monitor Use the correct flash to suit the environment The default of each mode is listed below STILL IMAGE mode Auto flash MOVIE CLIP mode Flash off fixed 4 function button FLASH DOWN button Wh...

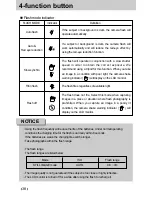
Page 38: ...less of available light The flash does not fire Select this mode when capturing images in a place or situation where flash photography is prohibited When you capture an image in a poorly lit condition the camera shake warning indicator will display on the LCD monitor Slow synchro Fill in flash Flash off Using the flash frequently will reduce the life of the batteries Under normal operating conditi...

Page 39: ...BALANCE O X p 42 DIGITAL ZOOM O X p 35 EV COMPENSATION O X p 43 MOVIE CLIP RECORDING TIME X O p 44 The menu will not be displayed on the LCD monitor in the following circumstances When another button is being operated While image data is being processed when the green LED next to the viewfinder blinks When there is no battery capacity When the menu is showing on the LCD monitor it is not possible ...

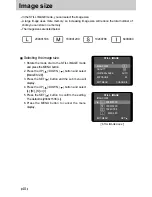
Page 40: ...dial to the STILL IMAGE mode and press the MENU button 2 Press the UP DOWN button and select IMAGE SIZE 3 Press the SET button and the sub menu will display 4 Press the UP DOWN button and select L M S or I 5 Press the SET button to confirm the setting The default is 2048x1536 L 6 Press the MENU button to cancel the menu display STILL IMAGE mode STILL IMAGE IMAGE SIZE QUALITY WHITE BALANCE AUTO EXP...

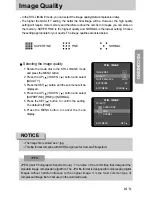
Page 41: ... will require more memory and therefore reduce the number of images you can store on the memory SUPER FINE is the highest quality and NORMAL is the lowest setting Choose the setting appropriate for your needs The image qualities are listed below JPEG Joint Photographic Experts Group The name of the committee that designed the standard image compression algorithm The JPG file format is designed for...

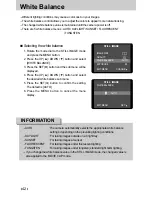
Page 42: ...on and select the desired white balance sub menu 5 Press the SET button to confirm the setting The default is AUTO 6 Press the MENU button to cancel the menu display STILL IMAGE WHITE BALANCE AUTO EXIT MENU SET STILL IMAGE IMAGE SIZE QUALITY WHITE BALANCE AUTO EXPOSURE 0 0 EXIT MENU CHANGE AUTO The camera automatically selects the appropriate white balance settings depending on the prevailing ligh...

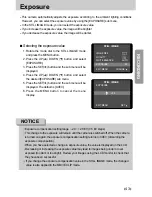
Page 43: ...nu will be displayed The default is 0 0EV 6 Press the MENU button to cancel the menu display STILL IMAGE IMAGE SIZE QUALITY WHITE BALANCE AUTO EXPOSURE 0 0 EXIT MENU CHANGE STILL IMAGE EXPOSURE 0 0 EXIT MENU SET Exposure compensation setting range 2 0 2 0 EV 0 5 EV steps This change to the exposure will remain until the camera is switched off When the camera is turned on again the exposure compens...

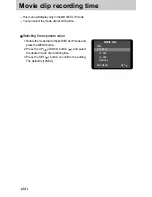
Page 44: ...cording time Selecting the exposure value 1 Rotate the mode dial to the MOVIE CLIP mode and press the MENU button 2 Press the UP DOWN button and select the desired movie clip recording time 3 Press the SET button to confirm the setting The default is 10SEC MOVIE CLIP TIME 10 SEC 20 SEC 30 SEC MANUAL EXIT MENU SET ...

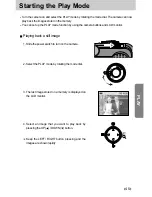
Page 45: ...e function by using the camera buttons and LCD monitor 1 Slide the power switch to turn on the camera 2 Select the PLAY mode by rotating the mode dial 3 The last image stored on a memory is displayed on the LCD monitor 4 Select an image that you want to play back by pressing the UP DOWN button Playing back a still image Keep the LEFT RIGHT button pressing and the images are shown rapidly ...

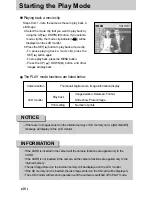
Page 46: ...nternal memory The last image stored on the internal memory will be displayed on the LCD monitor If the SD memory card is inserted the last image stored on the SD card will be displayed The LCD monitor will remain in operation until the camera is switched off in PLAY mode INFORMATION Playing back a movie clip Steps from 1 3 are the same as those to play back a still image 4 Select the movie clip t...

Page 47: ...IZE 2048x1536 Image size DATE 2003 09 01 Recording date TIME 13 24 07 Time FLASH FIRED FIRED SIZE Image size DATE Recording date TIME Time FLASH Using a flash image full information image basic information Pressing the LCD button Pressing the LCD button MENU button When you press the MENU button a menu related to each camera mode will be displayed on the LCD monitor Pressing it again will return t...

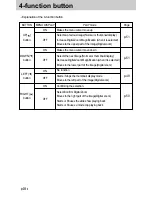
Page 48: ...image Digital zoom Selects the next image Normal or thumbnail display Decrease Digital Zoom Magnification when it is selected Moves to the lower part of the image Digital zoom Select Confirm Digital Zoom Moves to the right part of the image Digital zoom Starts or Pauses the slide show playing back Starts or Pauses a movie clip playing back Makes the menu cursor move up Makes the menu cursor move d...

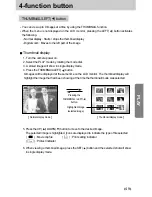
Page 49: ...he THUMBNAIL LEFT button 9 images will be displayed at the same time on the LCD monitor The thumbnail display will highlight the image that had been showing at the time the thumbnail mode was selected 5 Press the UP DOWN button to move to the desired image The selected image is highlighted Icons are displayed to indicate the type of file selected Movie clip file Print setting indicator Protect ind...

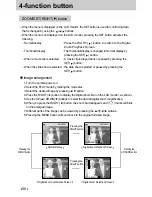
Page 50: ...essing the SET button Image enlargement 1 Turn the camera power on 2 Select the PLAY mode by rotating the mode dial 3 Select the desired image by pressing button 4 Press the RIGHT button to display the Digital Zoom Bar on the LCD monitor as shown 5 Use the UP DOWN buttons to select the desired digital zoom magnification 6 When you press the RIGHT button the zoom bar disappears and marks will blink...

Page 51: ...When Digital Zoom is selected Digital zoom magnification increases Digital zoom Moves to the upper part of the image When a movie clip is playing cancels the playing and displays a previous image UP button When the menu is displayed on the LCD monitor pressing the DOWN button makes the menu cursor move down When the menu is not displayed on the LCD monitor pressing the DOWN button activates the fo...

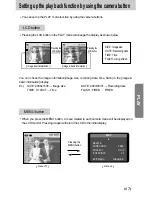
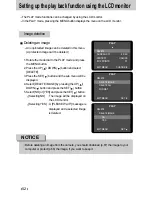
Page 52: ...E by pressing the UP DOWN button and press the SET button 5 Select NO or YES and press the SET button Selecting NO The image will be displayed on the LCD monitor Selecting YES A PLEASE WAIT message is displayed and a selected image is deleted Setting up the play back function using the LCD monitor PLAY DELETE SLIDE SHOW 2 SEC PROTECT UNLOCK OF PRINTS X1 EXIT MENU CHANGE PLAY DELETE DELETE IMAGE DE...

Page 53: ...g NO The image will be displayed on the LCD monitor Selecting YES A Please wait message is displayed and all of unprotected images are deleted If there are no protected images all of the stored images are deleted and a NO IMAGE message will display Delete all This enables you to clear all unprotected images from the memory Remember that this will permanently delete unprotected images Important sho...

Page 54: ...or Selecting YES A PLEASE WAIT message is displayed and all of images are deleted After all images have been deleted NO IMAGE will be displayed Format Internal memory format Remove the SD memory card to format the internal memory SD memory card format Insert the SD memory card to format the SD memory card All the files in the memory are deleted by the FORMAT function Before formatting the memory i...

Page 55: ...e and press the MENU button 2 Press the UP DOWN button and select SLIDE SHOW 3 Press the SET button and the sub menu will display 4 Press the UP DOWN button and select the desired slide show play back time Press the SET button and the slide show will start 5 To pause or restart the slide show press the SET button 6 If the slide show is finished the last stored image will be displayed PLAY SLIDE SH...

Page 56: ... select PROTECT 3 Press the SET button and the sub menu will display 4 Select LOCK or UNLOCK by pressing the UP DOWN button and press the SET button LOCK Sets up the PROTECT function UNLOCK Discards the protect function 5 When you protect an image the protect indicator will display on the LCD monitor An image in LOCK mode will be protected from DELETE or DELETE ALL functions but will NOT be protec...

Page 57: ...ode and press the MENU button 2 Press the UP DOWN button and select OF PRINTS 3 Press the SET button and the sub menu will display 4 Select the number that you want by pressing the UP DOWN button and press the SET button to confirm the setting 5 Print the setting indicator and the number of prints will be displayed on the LCD monitor after pressing the SET button Selectable the number of prints 0 ...

Page 58: ...nu will be displayed 3 Select BEEP by pressing the UP DOWN button 4 Press the SET button and the sub menu will be displayed 5 Press the UP DOWN button and select ON or OFF Press the SET button to confirm the setting 6 The default is ON Starting the SETUP mode SETUP 1 2 BEEP ON POWER OFF 10 MIN DATE IMPRINT ON DATE TYPE YMD MOVE PAGE SETUP 1 2 BEEP ON POWER OFF 10 MIN DATE IMPRINT ON DATE TYPE YMD ...

Page 59: ... show or playing a movie clip 1 Select the SETUP mode by rotating the mode dial 2 SETUP 1 2 menu will be displayed 3 Press the UP DOWN button and select POWER OFF 4 Press the SET button and the sub menu will be displayed 5 Select the desired sub menu by pressing the UP DOWN button Press the SET button to confirm the setting 6 The default is 1 MIN SETUP 1 2 POWER OFF 10 MIN EXIT MENU SET SETUP 1 2 ...

Page 60: ...tton to confirm the setting 6 The default is ON SETUP 1 2 DATE IMPRINT ON OFF EXIT MENU SET SETUP 1 2 BEEP ON POWER OFF 10 MIN DATE IMPRINT ON DATE TYPE YMD CHANGE This function is not available in the movie clip mode Date will be imprinted as DATE TYPE setting The DATE IMPRINT function is unaffected by the camera being switched on and off The date can be set in DATE SETUP Even though the DATE IMP...

Page 61: ...l 2 SETUP 1 2 menu will be displayed 3 Press the UP DOWN button and select DATE TYPE 4 Press the SET button and the sub menu will be displayed 5 Select your desired date type by pressing the UP DOWN button Press the SET button to confirm the setting 6 The default is YYYY MM DD SETUP 1 2 DATE TYPE YYYY MM DD MM DD YYYY DD MM YYYY EXIT MENU SET SETUP 1 2 BEEP ON POWER OFF 10 MIN DATE IMPRINT ON DATE...

Page 62: ...isplayed 3 To shift menu cursor to SETUP 2 2 press the RIGHT button 4 Press the UP DOWN button and select DATE SETUP 5 Press the SET button and the sub menu will be displayed You can change the date time on the LCD monitor display by pressing the UP DOWN LEFT RIGHT button LEFT RIGHT button you can select year month day hour minute by pressing these buttons UP button Increases the number of items D...

Page 63: ...To shift the menu cursor to SETUP 2 2 press the RIGHT button 4 Press the UP DOWN button and select QUICK VIEW 5 Press the SET button and the sub menu will be displayed 6 Select the desired review time by pressing the UP DOWN button Press the SET button to confirm the setting 7 The default is 1 SEC SETUP 2 2 DATE SETUP QUICK VIEW 1 SEC LANGUAGE ENGLISH RESET CHANGE SETUP 2 2 QUICK VIEW OFF 1 SEC 2 ...

Page 64: ... 2 SETUP 1 2 menu will be displayed 3 To shift the menu cursor to SETUP 2 2 press the RIGHT button 4 Press the UP DOWN button and select LANGUAGE 5 Press the SET button and the sub menu will be displayed 6 Select the desired language by pressing the UP DOWN button Press the SET button to confirm the setting SETUP 2 2 DATE SETUP QUICK VIEW 1 SEC LANGUAGE ENGLISH RESET CHANGE SETUP 2 2 LANGUAGE ITAL...

Page 65: ...OWN button and select RESET 5 Press the SET button and the sub menu will be displayed 6 Select NO or YES by pressing the UP DOWN button Press the SET button to confirm the setting Selecting NO The SETUP menu will display without resetting the camera system Selecting YES All the camera settings are changed to the camera default settings 7 The default is NO SETUP 2 2 DATE SETUP QUICK VIEW 1 SEC LANG...

Page 66: ...es to your PC through the USB cable There is no menu available when the PC mode is selected The camera status LED lamp blinks when the files are transferring via the USB connection Connecting the camera to a PC 1 Turn the PC power on 2 Turn the camera power on 3 Connect the PC and the camera with the USB cable Insert the small plug of the USB cable to the camera USB connection terminal Insert the ...

Page 67: ...C with the USB cable 2 On your computer s desktop display select My computer and double click Removable Disk DCIM 100SSCAM The image files will then be displayed 3 Select an image and press the right mouse button 4 A pop up menu will open Click the Cut or Copy menu Cut cuts a selected file Copy copies files 5 Click a folder where you want to paste the file ...

Page 68: ...o your PC By using Digimax Viewer you can see the stored images in the memory directly on the PC monitor and you can copy or move the image files When the memory card is inserted you can view the images that are stored in the memory card When the memory card is not inserted you can view the images that are stored in the internal memory ...

Page 69: ...e has dispersed If the digital camera is not used for a long period an electric discharge can occur It is a good idea to remove the batteries and the CARD the camera is not used for some time If the camera is exposed to electronic interference it will turn itself off to protect the CARD Maintenance Use a soft brush available from photo stores to GENTLY clean the lens and LCD assemblies If this doe...

Page 70: ...ory or the CARD Memory error USB error CARD FULL PROTECT CARD LOCKED NO IMAGE MEMORY ERROR USB ERROR Select UNLOCK in the play mode menu Unlock the card Take images Insert a CARD that is holding some images Insert a new card or format the memory Check the USB connection A battery indicator blinks There is no battery capacity Replace with new batteries Camera shake warning indicator The flash mode ...

Page 71: ...uickly Camera does not take images when pressing the Shutter button Insert fresh batteries Slide the power switch to reactivate camera Remove and re insert the plug Keep the camera in warm conditions i e inside a coat or jacket and only remove it in order to take images Insert fresh batteries all of which should be of the same type After turning the camera off insert a new card or delete a stored ...

Page 72: ...F Date is not displayed on the LCD monitor in the PLAY mode Switch the Date imprint function ON p 60 Incorrect file name Violation of DCF format The images don t play back Do not change the image file name Cable connection is incorrect The camera is off There are no batteries the batteries are exhausted or the AC adapter is not connected The operating system is not Windows 98 98SE 2000 ME XP Mac O...

Page 73: ...ing Time Approx 8 sec White Balance Auto Daylight Sunset Fluorescent Tungsten Size 320x240 Recording time Memory capacity dependent 10 20 30sec preset available Self timer 10 sec Internal memory 16MB flash memory External memory optional SD MMC card up to 256MB Guaranteed Still image JPEG DCF DPOF Movie Clip AVI MJPEG Image Size L 2048x1536 pixels M 1600x1200 pixels S 1024x768 pixels I 640x480pixe...

Page 74: ...3 or later Mac OS 9 0 10 2 Minimum 64MB RAM 110MB of available hard disk space USB port CD ROM drive QuickTime 4 0 or later for Movie Clip Image Play Single image Thumbnails Slide show Movie clip Digital output connector USB DC power input connector 3 3V Included 2 x Alkaline Battery Optional 2x Ni MH batteries AC adapter Included battery may vary depending on sales region Dimensions WxHxD 94x66x4...

Page 75: ...Windows is a registered trademark of Microsoft Macintosh Mac is the registered trademark of Apple computer USA Driver Storage Driver For connecting the camera to the PC All application programs Digimax Viewer 1 0 for viewing images MGI PhotoSuite III SE for editing images and DirectX 8 1 for playing back movie clips will be installed Image Viewer Digimax Viewer 1 0 Only Digimax Viewer 1 0 will be ...

Page 76: ... cancelled and a window for installing Digimax Viewer 1 0 will be displayed INFORMATION You can visit the Samsung web site through the internet http www samsungcamera com English http www samsungcamera co kr Korean 1 Click Storage Driver menu on the Autorun frame 2 A Welcome window will open Click the Next button ...

Page 77: ...r installing MGI PhotoSuite III SE will be displayed INFORMATION 3 Installation is complete Click the Finish button and the Digimax Viewer 1 0 installation will be started 4 The Digimax Viewer 1 0 installation window will be displayed as shown alongside Click Next button 5 The Software License Agreement window will display If you agree to it click Yes ...

Page 78: ...button and the MGI PhotoSuite III SE installation will be started 9 The Choose Setup Language window will open Select a language and click OK button If you installed a secure program in your computer the MGI PhotoSuite III SE installation can be delayed for about 10 20 seconds after clicking OK button at the step 8 or the installation can be cancelled INFORMATION ...

Page 79: ...RMATION 10 A Welcome window will be displayed Click Next to move to the next step 11 The Software License Agreement window will be displayed If you agree to this click Yes button 12 A Setup Type window will open Select setup type and click Next button 13 If the installation is completed correctly the autoplay is registered automatically into the start menu program as shown alongside Click Next but...

Page 80: ...Register button 16 Installation is complete Click the Finish button 17 Windows MGI PhotoSuite III window will open Read it and close the window 18 All application programs are installed correctly Check Yes I want to restart my computer now button and click Finish button According to your operating system the window as shown alongside may be displayed Should this be the case click the NO button INF...

Page 81: ...fully 21 If you can see Removable Disk under My computer the camera driver installation is successful Now you can transfer image files from the camera to PC via the USB cable You must restart your computer after the installation or your computer can t recognize the camera as a Removable disk If you have ever installed the DirectX program in your computer the following windows will open The DirectX...

Page 82: ...ver you have to restart your PC If you connect the camera to the PC before installing the camera driver the Found New Hardware Wizard will open In this case cancel the Found New Hardware Wizard and disconnect the camera Install the camera driver and connect the camera to the PC again Should the computer not find the camera driver after installation please try one or more of the following measures ...

Page 83: ...Start Setting and double click Controller Click 4 To uninstall the camera driver click the Yes button 5 Press OK button 2 Double click Add Remove programs 3 The Add Remove Programs Properties window will open Click Samsung Digimax 300 and click Add Remove button ...

Page 84: ... images directly from the removable disk may be subject to unexpected disconnection When uploading images from the PC to the camera ensure that the uploaded file names are not the same as those already stored on the memory When you upload a file that is not taken by this camera to Removable Disk the ERROR FILE message will be displayed on the LCD monitor in the PLAY mode and nothing is displayed i...

Page 85: ...ferring a file If the green camera status LED next to viewfinder blinks you have to wait until the LED is off 2 Double click the Unplug or Eject Hardware icon on the task bar 3 The Unplug or Eject Hardware window will open Select the Samsung USB Mass Storage Device and click the Stop button 4 The Stop a Hardware device window will open Select the Samsung D 300 USB Device and click the OK button 5 ...

Page 86: ...ompatible with MAC OS 9 0 10 2 3 Connect the camera to the Macintosh and turn the camera power on in PC mode 4 A new icon Untitled will be displayed on the desktop after connecting the camera to the MAC Using the USB Driver for MAC Setting up the USB Driver for MAC 1 Double click a new icon Untitled on the desktop and the folder in the memory will be displayed 2 Select an image file and copy or mo...

Page 87: ...ess the right mouse button A pop up menu will open Open allows you to view a selected sequence of images one at a time Copy copies files After copying a file select a folder where you want to paste the copied file Click the right mouse button and a pop up menu will open Select Paste and the copied file is pasted Paste pastes a copied file Cut cuts a selected file Delete deletes a selected file If ...

Page 88: ... MGI PhotoSuite lll SE and MGI PhotoSuite lll SE will then open Get Get images Prepare A number of photo editing activities can be performed within this module Compose Use your photos in a variety of fun creative and interesting ways Organize Organize your photos and other media files into albums Share Save your results to show to others Print Print hard copies of photos and projects ...

Page 89: ...window Get Get images Prepare A number of photo editing activities can be performed within this module Compose Use your photos in a variety of fun and interesting ways Organize Organize your photos and other media files into albums Share Save your results to show to others Print Print hard copies of photos and projects Browse Browse the web site ...

Page 90: ... 2 The Open file selector is displayed Click Look in to choose Removable Disk and click open for the open file window to be displayed To obtain images from the computer 1 To acquire images Click the large Get button on the Welcome screen or the Get button on the Navigation bar Click Computer from the list of options displayed on the activity panel 2 The Open file selector is displayed Now select t...

Page 91: ...available You will be able to obtain images from the digital camera INFORMATION 4 The Welcome screen will change to the next work step with the selected image displayed Computer and Album Only 1 To acquire images click the large Get button on the Welcome screen or the Get button on the Navigation bar Click Album from the list of options displayed on the activity panel Acquiring images from an Albu...

Page 92: ...for more information about creating an Album Prepare When the image is loaded the step changes to Prepare automatically Menu for PREPARE steps Rotate Crop You can rotate flip or crop images along with a host of others Touchup Remove Red eye Remove Scratches etc are available in this menu Special Effects A number of special effects can be applied Stitching Join a series of photos together to create...

Page 93: ...create items such as Gift Tags Greeting Cards Invitations Postcards and Sports Cards Calendars Use your photos to create a variety of calendars monthly quarterly seasonal yearly Collections Photos can also be used to create a variety of items for business purposes Fun stuff You can create magazine covers Backgrounds etc in this menu Business You can make business items such as business cards certi...

Page 94: ... action below Open Open selected image Delete Delete selected image Properties view image information Choose an action to manage your album Add click Add to add an image to an Album Sort click Sort to Sort saved images Search click Search to Search saved images Reset click Reset to reset the setting Update click Update to update images Create Slide Show click Create Slide Show to create a Slide Sh...

Page 95: ...lcome screen or the Organize button on the Navigation bar 2 Click Album in Choose a photo album to view or edit 3 The Master Album window will be displayed then click New 4 Put a new Album name in the New Album window and click OK A new album will now be created 5 A Master Album window will open Click the OK button ...

Page 96: ...lbum Add to add images to the album 2 Click Computer in Add Photos menu Digital Camera Direct Scanner TWAIN Digital Camera TWAIN sources can t be used Click Click 3 A Add photo to Album window will open Select images that you want to add Click the Add button 4 Adding images is complete Click ...

Page 97: ...ng or sharing images Share Print You can print images Menu for the PRINT steps Print Printing images Print Multiples Print multiple copies of a photo or project or one copy of each of the photos included in an album according to a predefined template Choose a printer an orientation the print size and the number of copies You can then print the images For more information please refer to the Help f...

Page 98: ...Case 3 The USB cable is not connected or you are using a cable with an incorrect specification Use a USB cable with the correct specification Case 4 Occasionally the computer recognizes the USB as another device Install the camera driver correctly Turn the camera power off and remove the USB cable Connect the USB cable again and turn the camera power on The computer should now recognize the camera...

Page 99: ...t Control Panel Performance and Maintenance System Hardware Device Manager Universal Serial Bus controller There must be USB Host Controller and USB root hub under Universal serial bus controller When all the conditions mentioned above are met the computer can support the USB interface Case 7 When using the USB hub There may be a problem in connecting the camera to the PC through the USB hub if th...

Page 100: ...KT16OPSU K TEL 44 0 1932455000 FAX 44 0 1932455325 SAMSUNGOPTO ELECTRONICSGMBH AMKRONBERGERHANG6 D 65824SCHWALBACH TS GERMANY TEL 49 6196665303 FAX 49 6196665366 SAMSUNGFRANCES A S BP51TOURMAINEMONTPARNASSE 33 AV DUMAINE 75755 PARISCEDEX15 FRANCE HOTLINEPHOTONUMÉRIQUE 0080022263727 NuméroVert AppelGratuit TEL 33 1 4279 2282 5 FAX 33 1 4320 4510 SAMSUNGTECHWINMOSCOWOFFICE KORP 1437 ALENNINGRADSKYPR...

Reviews: