background image

*

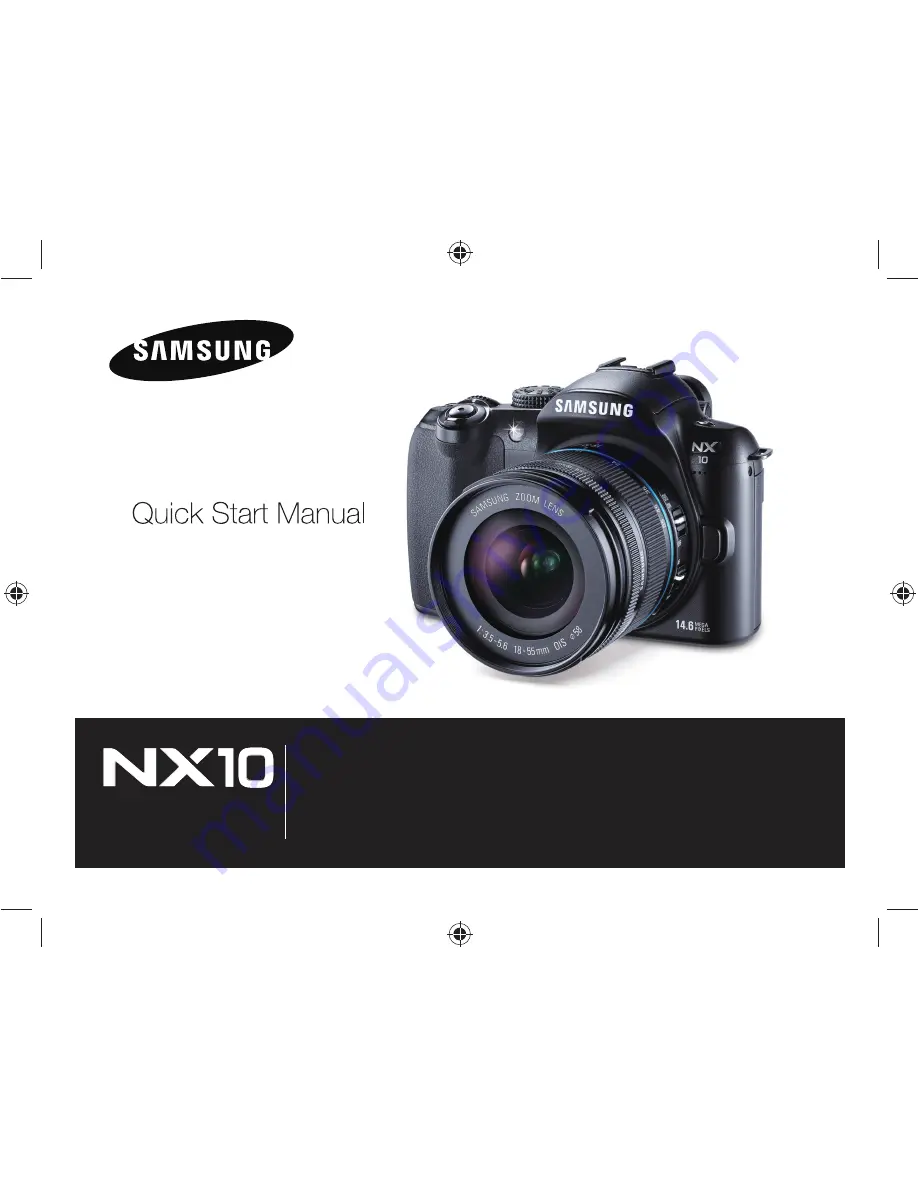
This Quick Start manual has been specially designed to guide you through


the basic functions and features of your device. Please read the Quick 
Start Manual and User Manual carefully to ensure safe and correct use.

ENG 

For more information, refer to the User Manual included on the supplied CD-ROM.

Summary of Contents for AD68-04519A

Page 1: ...igned to guide you through the basic functions and features of your device Please read the Quick Start Manual and User Manual carefully to ensure safe and correct use ENG For more information refer to the User Manual included on the supplied CD ROM ...

Page 2: ...rious injury if swallowed Moving parts and accessories may present physical dangers as well Prevent damage to subjects eyesight Do not use the flash in close proximity closer than 1 m 3 ft to people or animals Using the flash too close to your subject s eyes can cause temporary or permanent damage Handle and dispose of batteries and chargers with care Use only Samsung approved batteries and charge...

Page 3: ...orts connectors and accessories Do not insert foreign objects into any of your camera s compartments slots or access points Damage due to improper use may not be covered by your warranty Do not use broken power cord plug or wall outlet It may cause by electric shock or fire Protect batteries chargers and memory cards from damage Avoid exposing batteries or memory cards to very cold or very hot tem...

Page 4: ...eir intended purpose Exercise caution when using the camera in humid environments When transferring the camera from a cold environment to a warm and humid one condensation can form on the delicate electronic circuitry and memory card In this situation wait for at least 1 hour until all moisture has evaporated before using the camera Check that the camera is operating properly before use The manufa...

Page 5: ...on the camera The diagram below shows the status has been changed to Directional Keys in the User s Manual When explaining the steps needed for navigating the menu the up down left and right directional arrows are shown below Ex Executing the Play mode The user can check saved pictures and movies 1 Press Show most recently saved files 2 Check the following pictures sequentially by using X Adjustin...

Page 6: ... Display when selecting a menu or option within the step Example Select Shooting 1 1 Quality represents select Shooting 1 1 and then Quality Comment explaining symbols Abbreviations used in this manual Abbreviations Explanation AF Auto Focus Auto focus BKT Bracketing Bracketing DPOF Digital Print Order Format Printing order mark EV Exposure Value Exposure value OIS Optical Image Stabilization Opti...

Page 7: ...imal or still life Background the objects around the subject Composition the combination of a subject and background Subject Background Composition Exposure Brightness The amount of light that enters your camera determines the exposure You can alter the exposure with shutter speed aperture value and ISO speed By altering the exposure your photos will be darker or lighter Normal exposure Overexposu...

Page 8: ...ressing the shutter button 29 Getting your subject in focus 30 Setting the automatic manual focus function 32 Zooming 32 Optical Image Stabilization OIS 33 Using the OIS in the menu option 33 Depth preview 34 Using the Smart Auto mode 35 Using the Program mode 36 Using the Aperture Priority Shutter Priority or Manual mode 37 Using the Aperture Priority mode 37 Aperture value 37 Using the Shutter P...

Page 9: ...oting method 61 Successive shooting method and timer setup 61 Special effect photo retouching 63 Picture wizard 63 Finding more about the extended shooting function 64 Play picture movie 66 Viewing pictures in the play mode 66 View files in the smart album by category 68 Converting into the thumbnail view 68 File protection 69 Deleting a file 69 Enlargement reduction 70 View a movie 71 Transferrin...

Page 10: ... included USB cable Battery Strap Software installation CD including user s manual Quick Start Manual Charger AC power cable The actual components or optional parts may differ from the illustrations above For information about optional items see Accessories optional items CD ROM User manual page 123 ...

Page 11: ... adjustment dial Green button Drive mode button Use the green button The following setup values are initialized if the button is pushed once in the standby state for shooting Program shift Detailed setup of picture wizard Fine tuning of white balance Color Temp setting value Adjusting the colors of screen menu Timer Flash EV When selecting or setting AF shift the changed focus area to the center B...

Page 12: ...er Playback button Tripod mount Use of eye sensor This product will automatically convert to EVF when the users try to use the view finder EVF by operating the eye sensor in Auto Select mode and all the information will be shown on the view finder Do not cover the eye sensor with your hands or materials MENU button Memory card slot Status lamp Memory card cover Eye sensor ...

Page 13: ...ar view Eye cup Removal of Eye cup When the camera is shipped the eyecup is attached to the viewfinder Push the Eye cup up as shown in the figure for removal Eyesight adjustment dial Status lamp In the case of saving a picture or shooting a movie this shows the operating status of the camera by blinking the status indicator lamp Blinking When saving photos recording movies being read by a computer...

Page 14: ...center to verify the compatibility of the camera an lens This information in this user manual is based on the SAMSUNG 18 55mm F3 5 5 6 OIS lens Please refer to the lens user manual for more information about the lens Lens contacts Lens hood mount Zoom ring Lens mount connecting point OIS switch AF MF switch Focus ring Lens SAMSUNG 18 55mm F3 5 5 6 OIS SAMSUNG 30mm F2 Lens Lens hood mount Focus rin...

Page 15: ...rging status Red Charging Green Fully charged Turned off or Yellow Charging error To remove the battery from the charger lift slightly in the direction of the arrow Please use designated charger or batteries for proper use SAMSUNG is not responsible for any accident that may occur from using a product other than designated 2 INSERT AC power cord CHARGE INSERT Charging lamp INSERT 1 Charger ...

Page 16: ...Installing the battery When taking out the battery pull down slightly on the lock lever You can then remove the battery 2 Lock lever 1 Open by pushing in the direction of the arrow 3 Close by pushing down in the direction of the arrow ...

Page 17: ...y card push the card slightly in the direction of insertion Please do not remove the memory card or battery while the status indicator lamp is blinking It may cause loss of data or product damage After checking the direction of metal terminal you can insert the memory card 1 2 3 ...

Page 18: ...unting or dismounting the lens while the camera is powered off is desirable to ensure the stable operation of the lens SAMSUNG is not responsible for any accident damage or trouble caused by using other company s lens The body cap protects the product from scratches or dust when you transport it Change lenses in a clean low dust environment Foreign particles inside the body or lens of the camera c...

Page 19: ...19 Preparations before shooting Connecting the strap Connecting the strap to the camera body so you can carry the camera easily ...

Page 20: ...uage and then press The screen appears in the language you selected 3 Press S T to select Date and then press 4 Press S T W X to set the date and then press MENU Exit Change OK 2 Date Time Zone Time Language 2010 1 1 00 00 English Date Time MENU OK 2 Date Time Zone Time Language 2010 1 1 00 00 English Date Time Exit Change MENU OK 2 Date Time Zone Time Language 2010 1 1 00 00 English Date Time Exi...

Page 21: ...again to disable 8 Press to save 9 Press T to select Time and then press 10 Set desired time by pressing S T W X and then press 11 Press MENU to finish setting MENU OK 2 Date Time Zone Time Language 2010 1 1 00 00 English Date Time Exit Change MENU 2 Time Zone London GMT 00 00 2010 01 01 01 10 AM Back DST Turning on the power and initialization ...

Page 22: ... 12 00 2010 01 01 B 2 2 3 15 0001 12 00 12 00 2010 01 01 2010 01 01 ISO 14M SF RGB OIS AEL AFL A Information display Shooting mode Movie shooting mode Focus checking Flash 15 Shutter speed F3 5 Aperture value 3 2 2 3 1 1 0 Adjusted value of exposure AEL AFL setting 0001 Possible no of shots Battery information Displays no insertion of memory card Warning of camera shake 12 00 12 00AM AM 2010 01 01...

Page 23: ... Movie size SF Image quality Movie quality Focus area Flash Flash light adjustment RGB Color space Smart range OIS OIS Voice recording Fader Wind Cut C Shooting option display right Drive mode Timer AF mode White balance White balance adjustment ISO ISO Metering option Picture wizard ...

Page 24: ...ter speed priority mode this allows you to quickly adjust the desired shutter speed Example Using the dial in the S mode 1 Set the Mode dial to S 2 Adjust the shutter speed by turning the dial The camera sets aperture value automatically according to the shutter speed you set Option menu selection method After pressing MENU you can select an option or menu by pressing S T or The user can return to...

Page 25: ...mera 3 Select Flash using the W X or dial 4 Press S 5 Set the flash menu option using the W X or dial 6 Press S 7 Set the flash intensity using the W X or dial You can adjust the intensity of the flash by 2 levels 8 Align your subject in the frame and half press Shutter to focus 9 Press Shutter to take a photo Option menu selection method Flash 14M SF RGB OIS 2 1 1 2 0 Fill in 14M SF RGB OIS 2 1 1...

Page 26: ...ed aperture value ISO file in play and total number of files saved Setting user display You can add or remove shooting information from the display 1 Press MENU in the shooting mode 2 Select User setup 1 User Display an option About histogram A histogram is a graph that shows the brightness distribution of picture This represents a dark picture if the graph is inclined to the left and if the graph...

Page 27: ...ting 3 3 Select Display 3 Select desired option Auto Select Convert between Main Display and EVF by eye sensor Main Display The screen will be shown only through Main Display EVF The screen will be shown only through EVF MENU OK 3 1 2 1 1 2 Display Select Video Out Anynet HDMI CEC HDMI Size Firmware Update Auto NTSC On Auto 3 Auto Select Main Display EVF Back Set ...

Page 28: ... focus 4 Press Shutter to take a photo Simple picture taking method Using the Smart Auto mode you can take a picture easily with minimum setup Please refer to the Tips for getting a clearer photo p 29 to take a clear picture Press to see the saved images on the screen 14M SMART RGB WHITE Green Focus is set Red Focus is not set SMART 0001 OIS 14M RGB WHITE 0001 SMART ...

Page 29: ...e that your hand hair and strap do not interfere with the lens or flash In order to check in advance whether the focus of composition is set appropriately please use the half shutter function If you press the shutter half way down the focus and exposure will be adjusted automatically Focus frame If green take the picture by pressing the Shutter If red either change the composition or adjust the fo...

Page 30: ...too close to the camera Getting your subject in focus Under the following circumstances it may be difficult to get your subject in focus Please try to use the focus lock function Adjust the focus by using the half shutter function where the camera can focus easily Then simply press the Shutter button after moving the camera to a desired composition Keep pressing and holding down the half shutter u...

Page 31: ...d more accurately p 56 Use the AF MF control switch on the lens to switch the camera to manual focus If the lens doesn t have an AF MF switch switch you may be able to select Manual Focus in the AF mode menu The availability of this option differs depending on the lens you are using When you adjust the focus manually the picture may appear blurred if you don t set the focus accurately Take picture...

Page 32: ...sing the zoom ring you can enlarge telephoto angle or reduce wide angle the size of an image by changing the focal length value of the camera lens Adjust the image to the desired size and then take a picture 1 Check the focus and then turn the zoom ring to the left right x The focal length of the lens changes and the subject appears enlarged or reduced 2 Half press Shutter to focus 3 Press Shutter...

Page 33: ... take a picture while tracing a moving object When a big vibration occurs beyond the range of stabilization When the shutter speed is too slow due to a circumstance like night shooting When the battery capacity is not sufficient When you are shooting a close up shot When you use a tripod please disable the OIS function since the image can be shaken due to the vibration of OIS function If the camer...

Page 34: ...on a specific subject there is a range in which objects closer and further away are all in focus This focused range is called the depth of field The wider the wide angle lens the higher the aperture value the greater the depth of field For example the aperture stop f 11 is higher than f 2 8 Current position of the subject Current position of the subject 10 meters 6 meters 4 meters 2 meters 1 meter...

Page 35: ...t and leaves Close up shot for the subject with various colors Close up portrait shot With the camera on a tripod a shot of a subject that does not move for a period of time Shot of fast moving subject or subject that moves frequently 3 Half press Shutter to focus 4 Press Shutter to take a photo If the camera does not detect a type of scene it takes pictures with the basic settings of the mode Eve...

Page 36: ...us 4 Press Shutter to take a photo What is the program shift method If this function is used desired shutter speed and aperture value can be selected while maintaining the same brightness The shutter speed and aperture value are changed as in the following rules The available aperture numbers for exposure setting is different depending on the lens model Dial direction Changing the exposure value L...

Page 37: ...de dial to A 2 Rotate the dial to adjust the aperture value 3 Set options For a list of options refer to Extended shooting functions CD ROM User manual page 50 4 Align your subject in the frame and half press Shutter to focus 5 Press Shutter to take a photo Aperture value The aperture value of a lens can be adjusted to control the amount of light reaching the image sensor When opening the aperture...

Page 38: ...press Shutter to focus 5 Press Shutter to take a photo Shutter speed Shutter speed is the length of time the shutter is open You can creat many interesting effects by adjusting the shutter speed A low shutter speed blurs motion on the image You can feel the speed in the picture when the low shutter speed is used for a shot A fast shutter speed is essential for capturing the movement A faster shutt...

Page 39: ...oting functions CD ROM User manual page 50 5 Align your subject in the frame and half press Shutter to focus 6 Press Shutter to take a photo Using the Aperture Priority Shutter Priority or Manual mode EV button Dial In the P Program S Shutter Priority or A Aperture Priority modes when a value appears in red it is outside the range of values that produces good pictures P mode Shutter speed and aper...

Page 40: ... mode provides the optimal exposure and focus settings for natural landscapes 1 Rotate the mode dial to 2 Align your subject in the frame and half press Shutter to focus 3 Press Shutter to take a photo Using the Night Portrait Landscape mode When you use Night mode we recommended you also use a tripod shutter release or Timer function purchased separately to minimize camera shake In the portrait m...

Page 41: ...he frame and half press Shutter to focus 4 Press Shutter to take a photo If you have the camera set to Standby mode and the Mode dial set to you can directly select a desired scene by pressing Fn Using the Scene mode Since an appropriate option is set in advance by the scene the shot can be taken conveniently by selecting a scene appropriate for the situation MENU OK 1 Beauty Shot Back Set ...

Page 42: ...skin tone appear lighter 6 Select Shooting3 3 Face Retouch 7 Set options x Select a higher setting to make skin tone appear lighter 8 Align your subject in the frame and half press Shutter to focus 9 Press Shutter to take a photo In the Beauty Shot mode AF area is set to Face Detection AF or Self Portrait AF Using the scene mode MENU OK 3 1 2 1 1 2 3 Face Tone Face Retouch Level 1 Level 2 Level 3 ...

Page 43: ...Shutter to start recording 8 Press Shutter again to stop recording Pause while recording a movie By using the pause function you can shoot only desired scenes into one file without generating several movie files To pause during the recording press To continue on recording press again Movie frame speed is fixed at 30 fps 30 frames sec While shooting a movie push the Depth Preview button once to act...

Page 44: ...the movie by starting a new movie file When formatting a memory card always format using this camera If you format on another camera or a PC you can cause a change in the capacity of the card or make it incompatible with your camera If you remove the camera lens while recording a movie the recording will be interrupted Do not change the lens while recording While you shoot a movie the camera can r...

Page 45: ...aperture value when taking a movie Program Aperture Priority 48 To fade out the screen You can make the movie screen darker or brighter gradually in recording by using the fader function Off In Out In Out 48 Using the Wind Cut By using the wind noise removal function you can remove some surrounding noise in addition to the wind noise Off On 49 Default value Finding more about the basic shooting fu...

Page 46: ...ting photos on A3 size prints 2M 1920 x 1280 3 2 For printing photos on A5 size prints 4592 x 2584 16 9 When outputting to HDTV 16 9 or printing A1 size prints 3872 x 2176 16 9 When outputting to HDTV 16 9 or printing A3 size prints 3008 x 1688 16 9 When outputting to HDTV 16 9 or printing A4 size prints 1920 x 1080 16 9 When outputting to HDTV 16 9 or printing A5 size prints Setting video resolut...

Page 47: ... Normal RAW Save normal image and RAW file at the same time Setting the quality of a movie The camera saves movies in normal or high quality 1 In the Shooting mode press MENU 2 Select Shooting 1 2 Quality an option Normal Set normal quality HQ Set high quality The camera saves RAW file format images without data loss and only in the 14M 4592 x 3056 photo size Although settings for white balance co...

Page 48: ...ing the dial or pressing W X You can select the timer setting from 2 30 seconds 5 The shot is taken automatically after the time being set has passed by pressing Shutter Using the timer function The function can be set directly by pressing in the shooting mode To cancel the self timer function press one more time or press Shutter MENU 2 Timer Reset 10 2 30 Back ...

Page 49: ...he flash 1 In the Shooting mode press MENU 2 Select Shooting 2 2 Flash an option Off The flash light doesn t operate SMART Smart Flash The camera automatically adjusts the brightness of the flash according to the amount of light in the surrounding environment Auto The flash light operates automatically in the dark place Auto Red The flash light operates automatically and prevents the red eye effec...

Page 50: ... fix function When you take a portrait using the flash the bright burst of light can cause the red eye effect To prevent the red eye effect set the flash option to Auto Red or Fill in Red Taking a picture in a dark place You can take a better picture if the subject is located within the operational range of the flash Refer to the Guide Number in Specification You can set the auto flash option for ...

Page 51: ...ivity The ISO sensitivity as the film sensitivity established by the international standards organization ISO represents the degree of reaction when camera receives light Since it reacts more sensitively with greater ISO value a natural shot can be obtained in a dark place by raising the ISO value This reduces the degree of camera shaking with faster shutter speed 1 In Shooting mode press MENU 2 S...

Page 52: ...ction is not available in some shooting modes If an external flash unit has a flash control function the light control value of the external flash is applied when you connect it to the camera If the distance from the subject is quite close when taking images by using the built in flash part of the images may appear dark as the lens is interfered with the flash light Please check the distance betwe...

Page 53: ...ual Focus Adjust the focus manually by turning the focus ring If your lens has an AF MF switch you can set the lens to MF and adjust the focus manually If there is no AF MF switch on the lens you can switch to manual focus by selecting Manual Focus in the AF mode menu The selectable option may differ according to the lens in use When adjusting the focus manually the picture may appear blurred if y...

Page 54: ...ce places where focus is set correctly Face Detection AF Shows the areas that the focus is correctly set in the display Self Portrait AF When the sound effect is heard at the time of self shot you can check the position of the subject s face The available options may differ by Shooting mode When you set the AF MF switch on the lens to MF you can not change the AF area using the Shooting menu When ...

Page 55: ...U to return to the previous mode 4 In the Shooting mode press 5 Press S T W X to move the focus area 6 Adjust the size of focus area by using the dial 7 Align your subject in the frame and half press Shutter to focus 8 Press Shutter to take a photo Focusing methods MENU OK 2 1 1 1 2 3 AF Mode AF Area AF Priority MF Assist Drive Flash 3 Back Set Selection AF Multi AF Face Detection AF Self Portrait...

Page 56: ... automatically 1 Set the focus method to Manual Focus 2 Select Shooting 2 2 MF Assist 3 Select a desired option Off Does not enlarge the subject on screen when it is in Manual focus mode On Enlarge the subject on screen when you adjust the focus in Manual focus mode MENU OK 2 1 1 1 2 3 AF Mode AF Area AF Priority MF Assist Drive Flash 3 On Off On Back Set ...

Page 57: ...t is too bright or dark The subject is not facing the camera When part of the face is hidden by an object like sunglasses Part of the subject s face is hidden by sunglasses or similar objects The subject makes a large facial expression The light or backlight on the subject s face is not uniform Depending on the Picture Wizard option the camera may not recognize the subject s face The options avail...

Page 58: ...F on the camera chirps rapidly when your face is in focus 1 In the Shooting mode press MENU 2 Select Shooting 2 2 AF Area Self Portrait AF 3 Press Shutter if having an info sound of shooting Check the focus of the subject in Shooting mode Face detection ...

Page 59: ...er button to take a picture When the exposure value is set it may be excessively bright or dark depending on the shooting environment Adjust and take a picture by changing the exposure value appropriate for the environment When it is difficult to judge an appropriate value of exposure please set the detailed setting of AE BKT successive shots of exposure increase decrease This takes 3 pictures suc...

Page 60: ...oors on a clear day Cloudy For shooting outdoors on a cloudy day Fluorescent White Daylight fluorescent lamp suitable especially for the white fluorescent light with the color temperature of about 4 200K Fluorescent NW Daylight fluorescent lamp suitable especially for the daylight fluorescent lighting with the color temperature of about 5 000K Fluorescent Daylight Daylight fluorescent lamp suitabl...

Page 61: ... you press the shutter Continuous Take shots successively while pressing and holding down the shutter possible to take 3 shots per second Burst Press the shutter button and the camera takes up to 30 shots in a row Timer Press the shutter button and the camera takes a picture within 2 to 30 seconds in increments of 1 second AE BKT When you press the shutter the camera takes 3 consecutive shots the ...

Page 62: ...ed at 1472x976 Also when you are shooting using the Burst option the camera can take longer to save the images With the Burst shooting option the camera can not save images in the RAW file format Also you can not set the ISO to 100 Both the built in and external flash do not fire when you use the Burst shooting option The shutter speed can be set to 1 30 Sec or faster when the Burst shooting optio...

Page 63: ... 2 Select Shooting 1 1 Picture Wizard an option 3 Adjust the detailed items of picture wizard that were selected by using S T W X You can control the color saturation sharpness and contrast 4 Set to a desired value The option can be set directly by pressing the button of camera in the shooting mode MENU Vivid P L R Cool F CA Color 0 0 0 V Saturation Sharpness Contrast Exit Move ...

Page 64: ...using an external flash unit SEF20A or SEF42A 55 Focus change AF priority shot The AF priority function is the function that the shutter does not work if the focus is not set appropriately when the user sets the focus manually Off On 60 AF assist light You can use the auto focus function more accurately in the dark place by using the AF lamp Off On 61 Finding more about the extended shooting funct...

Page 65: ...justing the color temperature 70 Color space This allows setting the color space to use sRGB Adobe RGB 71 Smart range This smoothly corrects the loss of bright part that can occur due to the differences in the shading of picture Off On 72 Changing the shooting method Detailed bracket setup The details for the exposure white balance and picture wizard of bracket shot can be set AE BKT Set WB BKT Se...

Page 66: ...s The display information appears by pressing DISP in the play mode 1 RAW file indicator 2 File that includes development info 3 Protected file indicator 4 File no 5 Meta value of picture 6 Shutter speed info 7 Aperture value 8 ISO setup value info 9 File playing total no of files stored battery information Play picture movie 00004 00009 1 250 F5 1 100 ISO 100 0001 100 0001 4 5 6 7 8 9 3 2 18mm AW...

Page 67: ...tion Movie playback information screen 1 Volume control display 2 Protected file 3 File no 4 Meta value of movie 5 Fast forward 6 Total play time of selected file 7 Current play time 8 Rewind OK 00 00 01 00 100 0001 100 0001 1280 X 720 2010 01 01 Video size Date Play picture movie 3 4 1 7 6 5 8 2 Play Capture 00004 00009 1 40 F3 5 100 ISO 0 0 4592 X 3056 2010 01 01 R G B 1 2 3 4 18mm Y RAW ...

Page 68: ...rn to the previous function Converting to the thumbnail view Since several files can be shown on one dis play files can be searched quickly To have a thumbnail view of 9 images press two times or press three times to have a thumbnail view of 20 images Press to cancel Play picture movie When you start Smart Album or change the filter method the time it takes for the camera to clas sify and display ...

Page 69: ... 1 After selecting the file to be deleted in the play mode press 2 From the popup window select Yes Deleting selected file 1 After selecting the file to be deleted in the play mode press 2 From the popup window select Multiple Delete 3 After selecting a file to be deleted press To cancel your selection press again 4 Press 5 From the popup window select Yes Deleting all files All the files saved in...

Page 70: ...tion To play without selecting an option go to step 4 Images Select the pictures you want in the slide show All Include all the saved pictures in the slide show Date Include pictures taken on a specific date in the slide show Select Select pictures and see them in the slide show Effect Select the transition effects between pictures In order not to use the changing effect select the off option Inte...

Page 71: ... Pause Play Press the button View a movie While a movie is being played back you are able to select and cut a desired part of the scene 1 After selecting a desired movie in the play mode press 2 Enjoy movie Rewind Press W Pause Play Press Fast rewind Press X Volume control Turn the dial to the left right Stop Press S Play picture movie OK 00 04 01 00 01 00 100 0001 100 0001 Pause Stop ...

Page 72: ...rt of a movie 1 Press in the play mode 2 Select the start point to cut by pressing while playing a movie 3 Select the end point of cutting by pressing 4 From the popup window press Yes Play picture movie The resolution of the captured image is the same as the movie resolution The captured file is saved as a separate file under a new file name The cut file is saved by using a different file name ...

Page 73: ...ded Microsoft Direct X 9 0c or later Programs contained on the CD Program Purpose Samsung Master Edit photos and videos QuickTime Player 7 6 View videos H 264 MPEG 4 AVC files on a PC Samsung RAW Converter Convert RAW files into the desired file format Adobe Reader View the user manual Requirements for QuickTime Player 7 6 Intel Pentium 4 3 2 GHz or higher AMD Athlon 64FX 2 6 GHz or higher Windows...

Page 74: ...te the installation and then restart your computer Transferring files to your PC When you connect the camera to your PC the PC recognizes the camera as a removable drive 1 Connect your camera to your PC with the USB cable You must plug the end of the cable with the correct connection plug into your camera If the cable is reversed it may damage your files The manufacturer is not responsible for any...

Page 75: ...he USB cable for Windows 2000 and Vista is similar 1 It the status lamp on your camera is blinking it means the data transfer is in progress Please wait until the status lamp stops blinking 2 Click on the tool bar at the bottom right of your PC screen 3 Click the pop up message 4 Remove the USB cable Transferring files to your computer If the Folder Type is set to Date the folder name appears as X...

Page 76: ... downloaded files Click to download the selected files Thumbnails of files click an image to download Using the Samsung Master Interface No Description Toolbar Menus Click for more information about the program Click to enlarge or reduce the thumbnails in the list Change the mode View mode Edit mode for photos Edit mode for videos Preview information about the selected file The photos in the folde...

Page 77: ...age editing tools Exposure bias Compensates the exposure value White balance Adjusts the white balance value Color Adjusts the color of the image Tone Changes the color tone Sharpness Noise reduction Adjusts the sharpness Development Previewing is available for the final output Highlight controller Adjusts the saturation and highlights of the selected image Histogram Displays the color layers of t...

Page 78: ...onfiguring print settings Images Select whether to print the current photo or all photos Size Specify the size of the print Layout Create thumbnail prints Type Select the type of paper Quality Set the printing quality Date Set to print the date File Name Set to print the name of the file Reset Reset the print options If your printer has the mass storage feature you must first set the USB mode to P...

Page 79: ...it menu 87 Red eye fix You can minimize the red eye effect of pictures 88 Adjusting the backlight You can adjust the dark side of a picture taken in the backlight mode 88 Picture style You can express various moods of emotional picture by selecting the picture style 88 Face retouching You can retouch the face of portrait shot softly 88 Setting the print options DPOF no of copies index print size T...

Page 80: ...return to the previous mode Camera settings menu You can set the camera use environment using the setup menu Setup menu items MENU OK 2 1 2 1 1 3 Quickview Display Adjust Display Save Power Save Date Time Sound 1sec 3min 1min 3 Exit Change MENU OK 2 Sound System Volume AF Sound Button Sound Medium On On Exit Change ...

Page 81: ... brightness auto brightness setting or display color Display Brightness You can adjust the display brightness using the S T to one of five brightness levels Auto Brightness Adjust the brightness of screen Display Color Depending on whether the user uses the screen or the viewfinder the display color can be adjusted by using the S T W X Display Save Sets the display off time Off 0 5min 1min 3min 5m...

Page 82: ...ge taken by setting Jan 01 sRGB is saved in 0101xxxx jpg File Number This sets the method of designating file number Series Reset The folder name that has taken pictures for the first time becomes 100PHOTO and the filename will be SAM_0001 when the color space is sRGB The filename number is increased by 1 in the range of SAM_0001 SAM_9999 File name numbers are increased by 1 from SAM_0001 to SAM_9...

Page 83: ...er Save may not work if the camera is connected to a computer TV or printer playing a slide show or movie Date Time This sets the date and time Type Date Time Zone Time Imprint Only the date is shown on the lower right side of the picture in play When printing a picture the date may not be printed appropriately from certain manufacturer or printer model Camera settings menu Default value Normal se...

Page 84: ...o attach the lens cap to the lens when not using it Video Out Select the video output signal appropriate for your country when connecting the camera to an external video device such as a monitor or TV NTSC US Canada Japan Korea Taiwan Mexico etc PAL supporting only the BDGHI method Australia Austria Belgium China Holland Finland Germany England Italy Kuwait Malaysia New Zealand Singapore Spain Swe...

Page 85: ...he camera body and lens and upgrades the firmware Body Firmware Upgrades the firmware of the camera body Lens Firmware Upgrades the firmware of the lens You can download firmware upgrades from www samsungimaging co kr or www samsung com You can not run a firmware upgrade without a fully charged the battery Recharge the battery fully before running a firmware upgrade or attach the adaptor to provid...

Page 86: ...battery Memory Full Delete unnecessary files or insert a new memory card No Image File Take photos or insert a memory card that has some photos Error message Suggested remedies Check the lens Check whether dust or foreign substances between Lens contacts and Lens mount index Remove either dust or foreign substances if dirt or foreign substances are appeared Please be care for avoid getting dirt fo...

Page 87: ...wer quickly The battery may lose power more quickly in low temperatures below 0 C Keep the battery warm by putting it into your pocket Using the flash or recording videos depletes the battery quickly Recharge if needed The ability of a Lithium battery to hold a charge dimishes over time If your battery looses its charge rapidly on a regular basis purchase a new battery Cannot take photos There is ...

Page 88: ... memory card has not been reset Format the card p 82 Cannot play back files If you change the name of a file your camera may not be able to play the file the name of the file should meet the DCF standard If you encounter this situation play back files on your computer The photo is blurry If the subject is out of focus the photo may be blurry Make a change to the shooting condition If the camera is...

Page 89: ... distorted The wide angle lens may distort the image This is a normal feature of the wide angle lens The TV does not display your photos Make sure that the camera is correctly connected to the TV with the A V and HDMI cable Make sure that your memory card contains photos Your computer does not recognize your camera Make sure that the USB cable is connected correctly Make sure that your camera is s...

Page 90: ... QuickTime Player 7 6 1 Install QuickTime Player 7 6 which supports MP4 H 264 MPEG 4 AVC 2 Play videos using QuickTime Player Using Codec Pack Full 1 Install the latest version of Codec Pack Full 2 Play videos using the media player Media Player Classic or Windows Media Player 11 recommended Install QuickTime Player 7 6 or K Lite Codec Pack Full on Windows XP SP2 or later Depending on your compute...

Page 91: ...Type Super sonic drive Display Type AMOLED Size 3 0 Resolution VGA 640x480 614k dots PenTile Live view Field of view Approx 100 Specification Viewfinder Type EVF Resolution VGA 640x480 921k dots Field of View Approx 100 Magnification Approx 0 86x APS C 50mm 1m 1 Eyepoint About 20 2mm Diopter Adjustment Approx 4 0 2 0m 1 Focusing Type Contrast AF Focusing point Selection 1point Free selection Multi...

Page 92: ...ering range EV0 18 ISO100 30mm F2 0 Compensation 3 EV 1 2EV 1 3EV step AE Lock AEL button ISO Equivalent Auto 100 200 400 800 1600 3200 1EV step Specification Drive Mode Modes Single Continuous Burst Self timer Bracket AE WB PW Continuous JPEG 3fps up to 10shots Burst mode 30fps 30shots by 1 released RAW 3fps up to 3shots Bracket Auto Exposure Bracket 3EV White Balance Bracket 3step Picture Wizard...

Page 93: ... Less than 1 180sec Flash Compensation 2 2EV 0 5EV step External Flash Samsung External Flash available SEF 42A SEF 20A optional Synchro Flash attachment Hot Shoe Specification White Balance Modes Auto Daylight Cloudy Fluorescent W N D Tungsten Flash Custom K Manual Micro adjustment Each 7steps in Amber Blue Green Magenta axis Picture Wizard Modes Standard Vivid Portrait Landscape Forest Retro Coo...

Page 94: ...80 RAW 14M 4592x3056 Quality Super fine Fine Normal RAW Format SRW Color Space sRGB Adobe RGB Specification Movie Format MP4 H 264 Compression Movie H 264 Sound AAC Movie Clip With Audio or without Audio user selectable recording time 25 minutes Image size 1280x720 640x480 320x240 Frame rate 30fps Sound Mono Sound Movie Editing Still Image Capture Time Trimming Image Play Type Single image Thumbna...

Page 95: ...ine 197 Fine 382 Normal 724 6M Super Fine 322 Fine 615 Normal 1128 2M Super Fine 738 Fine 1334 Normal 2238 Burst 1 4M Super Fine 1201 Fine 2092 Normal 3320 12M W Super Fine 168 Fine 328 Normal 630 8M W Super Fine 234 Fine 454 Normal 860 5M W Super Fine 381 Fine 727 Normal 1334 2M W Super Fine 872 Fine 1573 Normal 2638 Movie 1280x720 High Quality 15min Normal 22min 640x480 High Quality 44min Normal...

Page 96: ...300mAh Charger BC1310 AC Adaptor AD9NX01 Optional Included battery may vary depending on sales region Specification Physical Specification Dimensions WxHxD 123 87 39 8mm excluding the projecting parts of the camera Weight 353g without batteries and card Operating Temperature 0 40 C Operating Humidity 5 85 Software Application Samsung Master Samsung RAW Converter QuickTime Player 7 6 Specifications...

Page 97: ... Circular Aperture Diaphragm F3 5 5 6 Min F22 Number of Blades 7 Circular Aperture Diaphragm F4 5 6 Min F22 Number of Blades 7 Circular Aperture Diaphragm Mount Type Samsung NX Mount Samsung NX Mount Samsung NX Mount Optical Image Stabilizer No Yes Yes Minimum Focus Distance 0 25m 0 28m 0 98m Maximum Magnification Approx 0 16X Approx 0 22X Approx 0 2X Lens Hood Optional Included Included Filter Si...

Page 98: ...t dial 13 Display type 26 Depth Preview 34 Depth of field 34 Deleting a file 69 Display 81 Date Time 83 E Eye sensor 12 Eye cup 13 EV button 39 External flash 64 Error message 86 F Fn 25 Flash popup button 49 Focusing methods 53 Face detection 54 File protection 69 Face retouching 79 Format 82 File name 82 File number 82 Folder type 82 Firmware update 85 H Half shutter 29 HDTV 79 HDMI Size 85 I Ic...

Page 99: ... Smart Auto mode 35 Shutter Priority mode 38 Shutter speed 38 Scene mode 41 Self portrait face Setting the flash option 49 Single AF 53 Selection AF detection 54 Setting the MF Assist 56 Shooting method 61 Spot metering 65 Smart range 65 Smart album 68 Slide show 70 Samsung Master 73 Samsung Raw Converter 73 Sound 81 System volume 81 Sensor cleaning 84 T Title and role of each part 11 Turning on t...

Page 100: ...Please refer to the warranty that came with your product or visit our website http www samsungimaging com for after sales service or inquiries AD68 04519A 1 2 ...

Reviews: