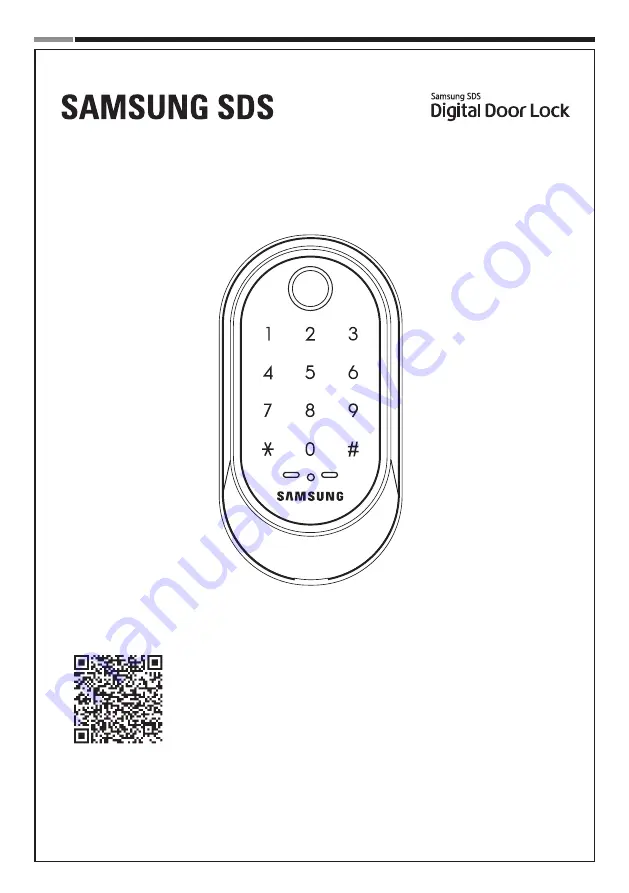
Samsung SDS SHP-A30 User Manual Download Page 1


Please review all included documentation and use the product as intended. Before installing this product, 
fully read and understand this user guide. Safety precautions must be followed to avoid personal injury 
or property damage.

Samsung SDS Digital Door Lock

User Guide

SHP-A30

Summary of Contents for SHP-A30

Page 1: ...ion and use the product as intended Before installing this product fully read and understand this user guide Safety precautions must be followed to avoid personal injury or property damage Samsung SDS...

Page 2: ...y and peace of mind Introduction Table of Contents Introduction 2 Safety Precautions 3 4 Installation 5 11 Components Tools 5 Door Preparation 6 7 Preparing the parts 8 Installing Lock 9 11 Programmin...

Page 3: ...terference may occur when this product is used or from other devices If this radio system has radio interference during operation it may not function properly Much dew condensation may affect the perf...

Page 4: ...nt may not be recognized If your finger is too small or thin the fingerprint recognition rate may decrease If you bend your finger or use only your fingertip with the fingerprint recognition sensor yo...

Page 5: ...dbolt D Strike Parts E Screw for Interior unit F4 Batteries I WiFi Module Pack H User Manual K Please review all included documentation and use the product as intended Safety precautions must be follo...

Page 6: ...ction of the deadbolt attach the drilling template page 43 on the side of the door and mark on it with a pen 1 Align the horizontal line across the door 2 Align the vertical line over the door 3 Mark...

Page 7: ...the deadbolt mortise hole 2 Measure half the thickness of the door Now measure that distance from where the door stops at the frame when the door is closed toward the door jamb and mark a straight ve...

Page 8: ...dead bolt to adjust the backset of the dead bolt It can be 60mm 2 3 8 or 70mm 2 3 4 OR Rectangle faceplate No need to change 2 Changing the faceplate of the dead bolt Change the faceplate of the dead...

Page 9: ...ock check your Wi Fi environment Depending on the indoor Wi Fi environment an IoT door lock may not be installed or its service may not be supported To check your Wi Fi environment you need a smartpho...

Page 10: ...ews C E F2 C F3 B B 1 Pull the exterior unit cable out through the cable hole of the interior mounting plate and push the cable into the cable hook 2 Connect the cable from the exterior unit to the in...

Page 11: ...eries A Melody will sound when all 4 batteries are inserted correctly After that insert the battery bracket to secure the battery 2 Once the batteries are connected the dead bolt is automatically set...

Page 12: ...is used to complete number entry Enter the Master PIN Code 4 12 digits Factory Default 1234 Enter the User PIN Code 4 12 digits REG Open the battery cover of the Interior Unit and press the REG butto...

Page 13: ...cur the lock will disable the keypad for 3 minutes for security reasons The lock is re activated again automatically after 3 minutes Low Battery Indicator Refers to the state when the operating voltag...

Page 14: ...mber User ID Numbers are used to help manage User PIN Codes Fingerprints Each User PIN Code Fingerprint will be assigned to a User ID Number 1 50 User ID Numbers are used during the deletion of User P...

Page 15: ...fin gers to lock the door Basic Lock Operation Overview Opening the Door with a PIN Code Opening the Door with a Fingerprint The door is now open Enter the PIN Code and press the button Touch the Touc...

Page 16: ...User PIN Codes 50 User Fingerprints 50 Registration menu No 1 50 R DeletingaUserPINCode DeletingAllUserPINCode RegisteringaUserFingerprint DeletingaUserFingerprint DeletingAllUserFingerprint 2 2 2 No...

Page 17: ...er of the Interior Unit and press the REG button once No 1 50 DeletingaUserPINCode DeletingAllUserPINCode RegisteringaUserFingerprint DeletingaUserFingerprint DeletingAllUserFingerprint 2 2 2 No 1 50...

Page 18: ...Managing User PIN Codes Enter a new User PIN Code and press button Note User PIN Code must be 4 12 digits When the touchscreen is il luminated enter the current Master PIN Code default is 1234 and pr...

Page 19: ...e Interior Unit and press the REG button once Press 2 followed by to manage user PIN codes Enter a User PIN Code and press button Enter the User ID Number 1 50 to be deleted followed by button go to S...

Page 20: ...50 2 3 3 3 2 No 1 50 3 3 Fingerprint 1 Fingerprint R R R R R R No 1 50 Deleting All User PIN Code Open the battery cover of the Interior Unit and press the REG button once Press 2 followed by to manag...

Page 21: ...tion gradually until it is recognized When a beep sound is heard and the recognition count is displayed on the keypad remove the finger from the fingerprint sensor and place it back again total of thr...

Page 22: ...you don t enter the User ID Number and press button you can place the fingerprint to be deleted directly on the fingerprint sensor go to Step 7 Press 2 followed by for individual deletion Enter anoth...

Page 23: ...ed by to manage user fingerprints When the touchscreen is il luminated enter the current Master PIN Code default is 1234 and press the button Press 3 followed by for all deletion DeletingAllUserFinger...

Page 24: ...lock 30s 3 2 Auto lock 120s 5 2 Step Authentication 2 Activation 1 Deactivation 3 Default 4 Randomizer 2 Activation 1 Deactivation 3 Default 3 Wi Fi Setting 2 Activation 1 Deactivation Default 3 WPS M...

Page 25: ...ation 1 Deactivation 3 Default 3 Wi Fi Setting 2 Activation 1 Deactivation Default 3 WPS Mode 5 9 R 2 Silent 1 Low Default 2 Mid 3 High 4 R 2 1 2 Default Manual lock 1 2 Auto lock 10s 2 2 Auto lock 60...

Page 26: ...2 Activation 1 Deactivation Default 3 WPS Mode 5 9 R 2 Silent 1 Low Default 2 Mid 3 High 4 R 2 1 2 Default Manual lock 1 2 Auto lock 10s 2 2 Auto lock 60s 4 2 Auto lock 30s 3 2 Auto lock 120s 5 R 2 Ac...

Page 27: ...Default 4 R 2 Activation 1 Deactivation Default 3 WPS Mode 5 9 R 2 Left Handed 1 Right Handed 3 5 Open the battery cover of the Interior Unit and press the REG button once When the touchscreen is il...

Page 28: ...settings R 2 Silent 1 Low Default 2 Mid 3 High 4 R 2 1 2 Default Manual lock 1 2 Auto lock 10s 2 2 Auto lock 60s 4 2 Auto lock 30s 3 2 Auto lock 120s 5 R 2 Activation 1 Deactivation 3 Default 3 R 2 Ac...

Page 29: ...for door direction settings Press 1 followed by for left side setting Press 3 followed by for right side setting Press 2 followed by for other settings R 2 Silent 1 Low Default 2 Mid 3 High 4 R 2 1 2...

Page 30: ...enable Wi Fi module Press 3 followed by to disable Wi Fi module Press 5 followed by for WPS mode Default Activation Press 2 followed by for other settings R 2 Silent 1 Low Default 2 Mid 3 High 4 R 2...

Page 31: ...e keypad Enter the master or user PIN Code followed by button Or place the registered fingerprint on the fingerprint sensor Activating Away mode After a user goes out this function generates the alarm...

Page 32: ...fingerprint it is time to replace the batteries The low battery indicator lights up when the voice sounds Replace all 4 batteries within a week of the first alarm sound Note The lock will stop operat...

Page 33: ...of the WiFi module install the app in your smartphone Caution When mounting the WiFi module pack do not push the pack forcibly If so the module pack pin may be damaged or malfunction Press the REG but...

Page 34: ...o Factory Default Restart Function Note Restarting does not delete registered information If there is no response after touching the Touchscreen use a pin to press the Restart button on the left of th...

Page 35: ...aster PIN Code section in the user manual and try again Ensure that the Master PIN Code is 4 12 digits long Page 17 I can t register the User PIN Code The User Number has already been used Delete the...

Page 36: ...ed when the bat teries are completely discharged Check if the batteries are discharged Page 15 There is no response when I touch the Touch screen Use a pin to press the hole on the front of the Exteri...

Page 37: ...37 Samsung SDS Digital Door Lock SHP A30 User No PIN CODE FINGERPRINT User Name User No PIN CODE FINGERPRINT User Name User Registration Table...

Page 38: ...x 136 mm H x 32 7 mm D 2 3 4 W x 5 1 2 H x 1 9 32 D Interior Unit 77 mm W x 184 1 mm H x 50 3 mm D 3 1 32 W x 7 H x 2 D The content of this manual is subject to change without prior notice to the use...

Page 39: ...r television reception which can be determined by turning the equipment off and on the user is encouraged to try to correct the interference by one or more of the following measures Reorient or reloca...

Page 40: ...ce flood fire or acts of God or on which any serial numbers have been altered defaced or removed SAMSUNG SDS and its distributor will not be responsible for any dismantling reassembly or reinstallatio...

Page 41: ...ment of limitations of liability for ordinary or gross negligence so the above limitations or exclusions may not apply to you This Warranty gives you specific legal rights and you may also have other...

Page 42: ...42 Samsung SDS Digital Door Lock SHP A30 42 Samsung SDS Digital Door Lock SHP A30...

Page 43: ...43 Samsung SDS Digital Door Lock SHP A30 Drilling Template Sheet 2 3 8 60mm Backset 5 32 Deep Bore 1 DIA Latch Hole 2 3 8 2 1 8...

Page 44: ...44 Samsung SDS Digital Door Lock SHP A30...

Page 45: ...45 Samsung SDS Digital Door Lock SHP A30 Drilling Template Sheet 2 3 4 70mm Backset 2 3 4 2 1 8 5 32 Deep Bore 1 DIA Latch Hole...

Page 46: ...46 Samsung SDS Digital Door Lock SHP A30...

Page 47: ...47 Samsung SDS Digital Door Lock SHP A30...

Page 48: ...ts design construction and or its materials Copyright 2019 SAMSUNG SDS Co Ltd All right reserved Reproduction in whole or in part without the express written permission of SAMSUNG SDS is prohibited GC...

Reviews: