background image

Site technical documentation B2005

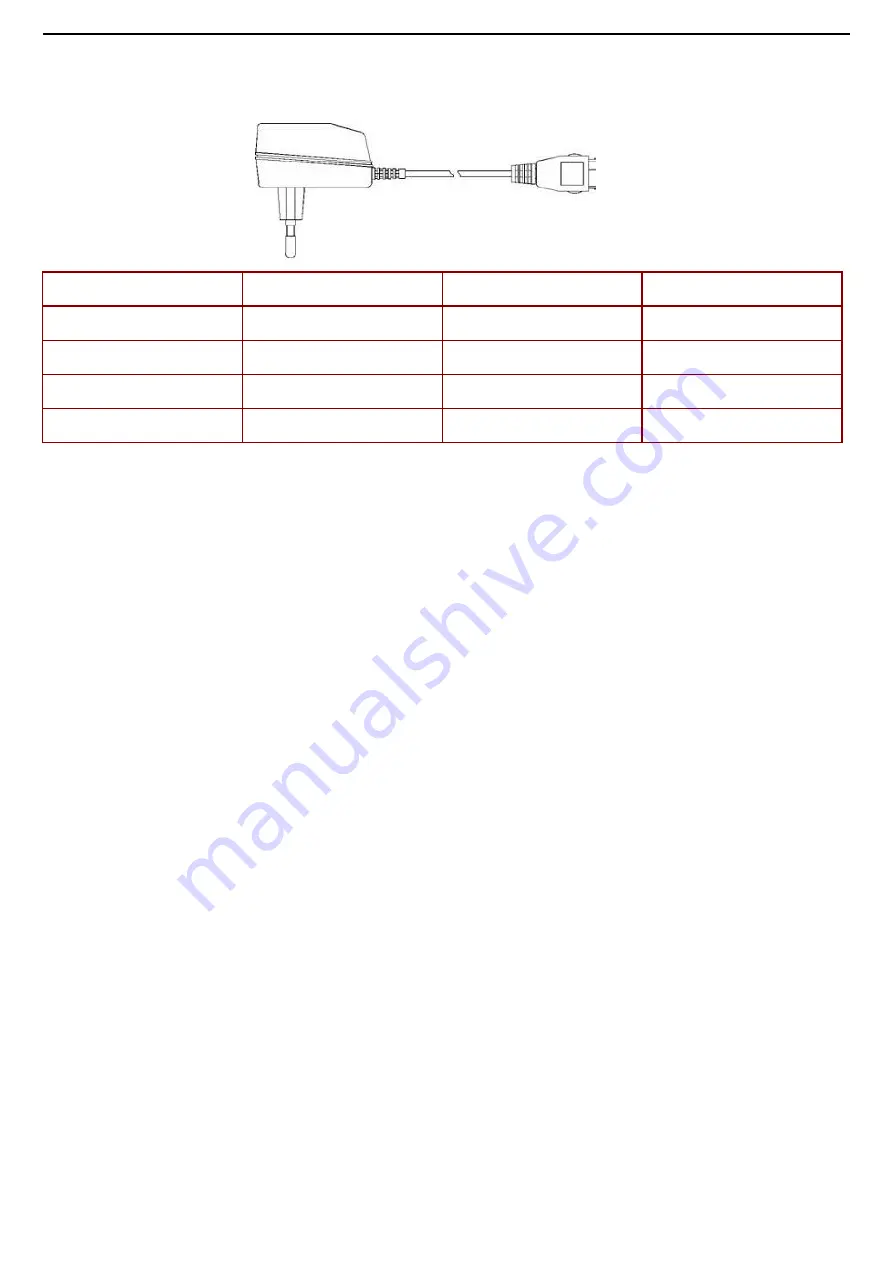
2.6.2.2 Simple mains modules

Designation

Weight (g)

Volume (cm3)

Voltage

AUS Main module

190

105

230 V

CE Main module

180

85

230 V

UK Main module

180

120

230 V

US Main module

210

105

110 V

Contents

REF MTB DTS 2- Indice A - December 21 2005

Page 2-13

Summary of Contents for B2005

Page 1: ...te December 21 2005 Produced by SAGEM COMMUNICATION GROUPE SAFRAN ZI NORD Chemin de Baillot BP 357 82003 Montauban cedex France Tel 33 5 63 21 21 21 Fax 33 5 63 21 21 54 Copyright 2005 SAGEM Montauban...

Page 2: ...Site technical documentation B2005 Contents REF MTB DTS 2 Indice A December 21 2005 Page 2...

Page 3: ...l documentation B2005 CONFIDENTIALITY This document is SAGEM s limited company property It can not be reproduced or communicated without the written license Contents REF MTB DTS 2 Indice A December 21...

Page 4: ...k diagram 2 5 2 Standards and environment 2 6 EQUIPMENTS 2 6 1 Battery packs 2 6 1 1 Charact ristics 2 6 1 2 Description 2 6 1 3 Charging time 2 6 2 Mains modules 2 6 2 1 Description 2 6 2 2 Travel ma...

Page 5: ...EETS CHAPTER 6 ACCESSORIES 6 1 PEDESTRIAN HANDSFREE KIT 6 1 1 Description 6 1 2 Charact ristics 6 2 DATA CABLE PC USB 6 2 1 Description 6 2 2 Charact ristics 6 3 6 3 1 Description CHAPTER 7 TECHNICAL...

Page 6: ...veral sheets may have to be used in order to determine the complete procedure to be applied A troubleshooting chapter chapter 3 is provided and is sorted according to the type of reported fault to det...

Page 7: ...tion on the DTS one can use the contents which consists of bonds hypertext and in bottom of each page one finds a bond which makes it possible to return until the contents For the paper use an index e...

Page 8: ...WiFi Wireless Fidelity WSP Wireless Session Protocol 1 3COMMENTS SHEET Broad experience is very beneficial in several respects Please let us know your comments so that we can improve the contents and...

Page 9: ...__________________________ ____________________________________________________________________________ _____________________________________________________________ Would you like to discuss the prob...

Page 10: ...80 Modulation speed kbit s 271 Speech throughput kbit s 13 5 6 Maximum data throughput kbit s 12 Multiple access Frequency and temporal multiplexing frequency duplexing Cell radius km 0 3 to 30 0 1 t...

Page 11: ...Power management Battery type 75 Connector type Li Ion 850mAh Charging time Clam Talk time 3hrs Standby time 4hrs User interface Screen type 350h Colours CSTN Number of lines 65K Screen size 8 Screen...

Page 12: ...em Operating System HR EFR FR AM Connectivity Radio GPRS NA EDGE Oui UMTS no Internet Browser Non Push Wap Fax modem yes Data transfer Serial yes IrDA no Bluetooth yes USB yes Wifi Oui PC synchronisat...

Page 13: ...io Recorder only for ringtones FM radio AMR up to 30s Polyphonic ringtones no Audio formats 32 Entertainement Wallpaper AMR NB WAV iMelody 1 2 Midi Screensaver 14 Clock display 3 Icons digital or anal...

Page 14: ...uction dossier Yes Real time dowload Flux audio Yes Flux video No Special features No Call management Voice features Mute mode Numerotation vocale yes Integrated handsfree mode no Adress book features...

Page 15: ...l features Keyboard features Scroll key yes Programable key Yes Side key Yes Direct access key Yes Keypad lock Yes Silent key yes International access key Yes Menu key Yes Personnal management feature...

Page 16: ...umentation B2005 Memory Memory Internal phone book Yes up to 8 languages Memoire message 500 Redial List 100 Additional multimedia memory 20 Embedded memory no Contents REF MTB DTS 2 Indice A December...

Page 17: ...SUPPLY IMAGE VOLTAGE connect this signal to CHARGER pin n 1 to switch the module on INTI2C 6 Interrupt signal reserved for sagem specific accessories CTS 7 Link v24 suit for accessory data RTS 8 Link...

Page 18: ...raphique de fabrication f Date code Niveau de fabrication Ex F250 05 F lieu de fabrication F Foug res 250 jour de fabrication dans l ann e 05 dernier digit de l ann e de fabrication g Logo et ou agr m...

Page 19: ...301 489 1 EN 301 489 7 Voltage 73 23 EEC Network 3GPP TS 51 010 1 v 5 2 0 with included GCF CC V 3 10 0 Requirements GT01 v 4 7 0 TBR 19 edition 5 TBR 20 edition 3 TBR 31 edition 2 TBR 32 edition 2 E...

Page 20: ...ble using mains power supply module Batteries caution use Store the batteries in a dry and cool place excessive cold and heat damage the batteries reliability They must never be stored in bulk even th...

Page 21: ...power supply modules accept large dynamic variations in the power supply network They are available for a number of connector types E E C United Kingdom United States Australia 2 6 2 2 Travel mains mo...

Page 22: ...2 2 Simple mains modules Designation Weight g Volume cm3 Voltage AUS Main module 190 105 230 V CE Main module 180 85 230 V UK Main module 180 120 230 V US Main module 210 105 110 V Contents REF MTB DT...

Page 23: ...or maintenance These flow charts should be followed in full After a reference to a removal replacement sheet or to a test to be carried out you should return to the initial flow chart and continue the...

Page 24: ...test Software inspection Update Customer fault verification Delivery to customer Return to Sagem Repairing symptom sheet Default found Yes No Mobile OK Default Level 2 Return to Sagem No No Yes Yes Ye...

Page 25: ...battery SIM card position Oxidation Charger test Standard test Display test Hot Line menu Contrast control All keypad keys test check bips keys Audio and radio test Battery charge test Vibrating devic...

Page 26: ...ontact battery Symp sheet 01 B2 Defective charger connector Proc sheet 1 20 Proc sheet 3 01 B3 Defective board power supply Proc sheet 1 20 Proc sheet 3 01 B4 Defective charge icon display Proc sheet...

Page 27: ...oc sheet 1 20 Proc sheet 3 01 D3 EEPROM problem Proc sheet 1 20 Proc sheet 3 01 D4 Untuned mobile Proc sheet 1 20 Proc sheet 3 01 D5 Hard failure Proc sheet 1 20 Proc sheet 3 01 D6 SIM lock Proc sheet...

Page 28: ...all failure Symp sheet 02 G1 Broken or damaged window Proc sheet 1 13 G2 Broken or damaged cover Proc sheet 1 01 Proc sheet 1 13 G5 Broken or damaged keypad Proc sheet 1 04 H1 Accessory problem Proc s...

Page 29: ...OCKED Number of seizures of sim locked code exceeded SAGEM Factory ReturnNot repair under warranty SIM BLOCKED Three bad PIN codes have been input Contact the operator SIM LOCKED with SIM SIM card not...

Page 30: ...r division by zero NOT AVAIL Not available PIN ERROR PIN input problems PIN2 BLOCKED Following input errors PUK ERROR Following input errors PUK2 BLOCKED Following input errors CODE ERROR The phone co...

Page 31: ...2 ways are possible The problem is already known by SAGEM then the mobile have to follow the normal process in ARC with eventual additional data given by AM or SE Return of mobile to MTB is requested...

Page 32: ...Site technical documentation B2005 SYMPTOM SHEETS Contents REF MTB DTS 2 Indice A December 21 2005 Page 3 10...

Page 33: ...rn to SAV LFKH 3URF RX 3URF No yes End No yes LFKH 3URF Symptom Symp 01 Symp 02 Symp 03 Symp 04 Symp 05 Symp 06 Symp 07 Symp 08 Symp 10 Proc dure Proc 0 01 Proc 1 01 Proc 1 02 Proc 1 04 Proc 1 13 Proc...

Page 34: ...tom Symp 01 Symp 02 Symp 03 Symp 04 Symp 05 Symp 06 Symp 07 Symp 08 Symp 10 Proc dure Proc 0 01 Proc 1 01 Proc 1 02 Proc 1 04 Proc 1 13 Proc 1 15 Proc 1 16 Proc 1 18 Proc 1 19 Proc 1 20 Proc 1 23 Proc...

Page 35: ...Found defect Yes End No No No No Found defect Found defect Found defect Test the video photos functions 7HVW 6KHHW 7HVW VKHHW No Found defect End No Symptom Symp 01 Symp 02 Symp 03 Symp 04 Symp 05 Sym...

Page 36: ...HHW Ok yes No Return to SAGEM SAV 3URF 6KHHW RU en d Symptom Symp 01 Symp 02 Symp 03 Symp 04 Symp 05 Symp 06 Symp 07 Symp 08 Symp 10 Proc dure Proc 0 01 Proc 1 01 Proc 1 02 Proc 1 04 Proc 1 13 Proc 1...

Page 37: ...BIP touch Return to SAV 3URF 6KHHW RU Symptom Symp 01 Symp 02 Symp 03 Symp 04 Symp 05 Symp 06 Symp 07 Symp 08 Symp 10 Proc dure Proc 0 01 Proc 1 01 Proc 1 02 Proc 1 04 Proc 1 13 Proc 1 15 Proc 1 16 Pr...

Page 38: ...RX 3URF yes end No Ringtone Ok Symptom Symp 01 Symp 02 Symp 03 Symp 04 Symp 05 Symp 06 Symp 07 Symp 08 Symp 10 Proc dure Proc 0 01 Proc 1 01 Proc 1 02 Proc 1 04 Proc 1 13 Proc 1 15 Proc 1 16 Proc 1 18...

Page 39: ...HOT LINE menu 7HVW 6KHHW Return to SAV LFKH 3URF RX 3URF Symptom Symp 01 Symp 02 Symp 03 Symp 04 Symp 05 Symp 06 Symp 07 Symp 08 Symp 10 Proc dure Proc 0 01 Proc 1 01 Proc 1 02 Proc 1 04 Proc 1 13 Pro...

Page 40: ...e a Wavetek Test 7HVW 6KHHW No yes end No Symptom Symp 01 Symp 02 Symp 03 Symp 04 Symp 05 Symp 06 Symp 07 Symp 08 Symp 10 Proc dure Proc 0 01 Proc 1 01 Proc 1 02 Proc 1 04 Proc 1 13 Proc 1 15 Proc 1 1...

Page 41: ...AGEM SAV 3URF6KHHW RU Symptom Symp 01 Symp 02 Symp 03 Symp 04 Symp 05 Symp 06 Symp 07 Symp 08 Symp 10 Proc dure Proc 0 01 Proc 1 01 Proc 1 02 Proc 1 04 Proc 1 13 Proc 1 15 Proc 1 16 Proc 1 18 Proc 1 1...

Page 42: ...e retrofit cable the mains power supply module Retrofit adapter the radio test bench provided with SIM card of test B2005 calibration tool Adjustable regulate power supply 0 15V 4A Wavetek 4107 CADEX...

Page 43: ...d to the system connector 4 3 3 SMT functions The SMT maintenance software can Download new software if needed Configure default values and checks them Unblocked the PHONE CODE Delete the customer dir...

Page 44: ...Site technical documentation B2005 TEST SHEETS Contents REF MTB DTS 2 Indice A December 21 2005 Page 4 3...

Page 45: ...st 05 Test 06 Proc dure Proc 0 01 Proc 1 01 Proc 1 02 Proc 1 04 Proc 1 13 Proc 1 15 Proc 1 16 Proc 1 18 Proc 1 19 Proc 1 20 Proc 1 23 Proc 1 33 Proc 1 34 Proc 1 35 Proc 3 01 Symptom Symp 01 Symp 02 Sy...

Page 46: ...c 0 01 Proc 1 01 Proc 1 02 Proc 1 04 Proc 1 13 Proc 1 15 Proc 1 16 Proc 1 18 Proc 1 19 Proc 1 20 Proc 1 23 Proc 1 33 Proc 1 34 Proc 1 35 Proc 3 01 Symptom Symp 01 Symp 02 Symp 03 Symp 04 Symp 05 Symp...

Page 47: ...Procedure Proc 0 01 Proc 1 01 Proc 1 02 Proc 1 04 Proc 1 13 Proc 1 15 Proc 1 16 Proc 1 18 Proc 1 19 Proc 1 20 Proc 1 23 Proc 1 33 Proc 1 34 Proc 1 35 Proc 3 01 Symptom Symp 01 Symp 02 Symp 03 Symp 04...

Page 48: ...Procedure Proc 0 01 Proc 1 01 Proc 1 02 Proc 1 04 Proc 1 13 Proc 1 15 Proc 1 16 Proc 1 18 Proc 1 19 Proc 1 20 Proc 1 23 Proc 1 33 Proc 1 34 Proc 1 35 Proc 3 01 Symptom Symp 01 Symp 02 Symp 03 Symp 04...

Page 49: ...Procedure Proc 0 01 Proc 1 01 Proc 1 02 Proc 1 04 Proc 1 13 Proc 1 15 Proc 1 16 Proc 1 18 Proc 1 19 Proc 1 20 Proc 1 23 Proc 1 33 Proc 1 34 Proc 1 35 Proc 3 01 Symptom Symp 01 Symp 02 Symp 03 Symp 04...

Page 50: ...cedure Proc 0 01 Proc 1 01 Proc 1 02 Proc 1 04 Proc 1 13 Proc 1 15 Proc 1 16 Proc 1 18 Proc 1 19 Proc 1 20 Proc 1 23 Proc 1 33 Proc 1 34 Proc 1 35 Proc 3 01 Symptom Symp 01 Symp 02 Symp 03 Symp 04 Sym...

Page 51: ...re Proc 0 01 Proc 1 01 Proc 1 02 Proc 1 04 Proc 1 13 Proc 1 15 Proc 1 16 Proc 1 18 Proc 1 19 Proc 1 20 Proc 1 23 Proc 1 33 Proc 1 34 Proc 1 35 Proc 3 01 Symptom Symp 01 Symp 02 Symp 03 Symp 04 Symp 05...

Page 52: ...oc dure Proc 0 01 Proc 1 01 Proc 1 02 Proc 1 04 Proc 1 13 Proc 1 15 Proc 1 16 Proc 1 18 Proc 1 19 Proc 1 20 Proc 1 23 Proc 1 33 Proc 1 34 Proc 1 35 Proc 3 01 Symptom Symp 01 Symp 02 Symp 03 Symp 04 Sy...

Page 53: ...st 04 Test 05 Test 06 Proc dure Proc 0 01 Proc 1 01 Proc 1 02 Proc 1 04 Proc 1 13 Proc 1 15 Proc 1 16 Proc 1 18 Proc 1 19 Proc 1 20 Proc 1 23 Proc 1 33 Proc 1 34 Proc 1 35 Proc 3 01 Symptom Symp 01 Sy...

Page 54: ...roc dure Proc 0 01 Proc 1 01 Proc 1 02 Proc 1 04 Proc 1 13 Proc 1 15 Proc 1 16 Proc 1 18 Proc 1 19 Proc 1 20 Proc 1 23 Proc 1 33 Proc 1 34 Proc 1 35 Proc 3 01 Symptom Symp 01 Symp 02 Symp 03 Symp 04 S...

Page 55: ...st 05 Test 06 Proc dure Proc 0 01 Proc 1 01 Proc 1 02 Proc 1 04 Proc 1 13 Proc 1 15 Proc 1 16 Proc 1 18 Proc 1 19 Proc 1 20 Proc 1 23 Proc 1 33 Proc 1 34 Proc 1 35 Proc 3 01 Symptom Symp 01 Symp 02 Sy...

Page 56: ...est 04 Test 05 Test 06 Proc dure Proc 0 01 Proc 1 01 Proc 1 02 Proc 1 04 Proc 1 13 Proc 1 15 Proc 1 16 Proc 1 18 Proc 1 19 Proc 1 20 Proc 1 23 Proc 1 33 Proc 1 34 Proc 1 35 Proc 3 01 Symptom Symp 01 S...

Page 57: ...01 Proc 1 01 Proc 1 02 Proc 1 04 Proc 1 13 Proc 1 15 Proc 1 16 Proc 1 18 Proc 1 19 Proc 1 20 Proc 1 23 Proc 1 33 Proc 1 34 Proc 1 35 Proc 3 01 Symptom Symp 01 Symp 02 Symp 03 Symp 04 Symp 05 Symp 06 S...

Page 58: ...ck if the product received has to be treated according to the short loop process Controls on the warranty conditions and DOA conditions if the Repair Centre is authorised communicated by Sagem 3 Tests...

Page 59: ...Level 0 L0 The Repair Centre shall capture all the information required for issuing and sending the Repair Reports and Status reports according to the Contractual frequency defined The Reports shall i...

Page 60: ...which operation In which circumstances o What is the state of the battery and the charger before shipment to the repair centre If the mobile shuts down by itself must he enter his code pin adjust the...

Page 61: ...B2005 Gloves Tweezers Screw driver Unscrew driver Barphone Couple 0 23Nm Code NC B2005 my301X CALIBRATION TOOL Code 252465425 B2005 my301L CALIBRATION TOOL Code 252465199 Contents REF MTB DTS 2 Indice...

Page 62: ...Site technical documentation B2005 LEVEL 0 MAINTENANCE Contents REF MTB DTS 2 Indice A December 21 2005 Page 5 5...

Page 63: ...tery 1 by first extracting the stop pins 2 Placement procedure 1 Place the battery by first inserting the upper section 2 Place the back cover Fiche proc 1 01 Procedure Proc 0 01 Proc 1 01 Proc 1 02 P...

Page 64: ...Site technical documentation B2005 LEVEL 1 MAINTENANCE Contents REF MTB DTS 2 Indice A December 21 2005 Page 5 7...

Page 65: ...e SAGEM logo of the right drill plate must be positioned on the upper part of the front cover 2 Position the drill plate on the front cover 3 Stick the drill plate on the front cover BAS Procedure Pro...

Page 66: ...ymp 08 Symp 10 Test Test 01 Test 02 Test 03 Test 04 Test 05 Test 06 Proc sheet 1 01 B2005 REMOVING REPLACING THE BACK COVER 2 2 Removal procedure 1 Unclip the back cover 2 Pull up the back cover begin...

Page 67: ...ssociate the equipped plate from its antenna Antenna Equipped plate Procedure Proc 0 01 Proc 1 01 Proc 1 02 Proc 1 04 Proc 1 13 Proc 1 15 Proc 1 16 Proc 1 18 Proc 1 19 Proc 1 20 Proc 1 23 Proc 1 33 Pr...

Page 68: ...n the elastomer keypad with compressed air 2 Place the elastomer keypad in the locating tips from the front cover Further operation 1 Place the front cover Proc sheet 1 13 2 Place the battery Proc she...

Page 69: ...the front cover 1 Etamine Audio stick 2 Window stick Procedure Proc 0 01 Proc 1 01 Proc 1 02 Proc 1 04 Proc 1 13 Proc 1 15 Proc 1 16 Proc 1 18 Proc 1 19 Proc 1 20 Proc 1 23 Proc 1 33 Proc 1 34 Proc 1...

Page 70: ...T COVER 2 2 Preliminary operation 1 Remove the back cover Proc sheet 1 01 2 Remove the battery Proc sheet 0 01 Removal procedure 1 Unclip the front cover in the right sence see arrow 2 Remove the Elas...

Page 71: ...cuit board PCB of the assembled plate Placement procedure 1 Position the printed circuit board on the equipped module 2 Position and clip the flange Proc sheet1 23 3 Srew the equipped module screw cou...

Page 72: ...6 Symp 07 Symp 08 Symp 10 Test Test 01 Test 02 Test 03 Test 04 Test 05 Test 06 Proc sheet 1 15 B2005 REMOVING REPLACING THE EQUIPPED MODULE 2 2 Further operations 1 Place the keyboard Proc sheet 1 04...

Page 73: ...set keypad board base band shielding Proc sheet 1 33 Removal procedure 1 Unclip the display 2 Put a window protect Placement procedure 1 Remove the window protect 2 Clip the display on the PCB Procedu...

Page 74: ...est 03 Test 04 Test 05 Test 06 Proc sheet 1 16 B2005 REMOVING REPLACING THE DISPLAY 2 2 Further operations 1 Place the set keypad board base band shielding Proc sheet 1 33 2 Place the flange Proc shee...

Page 75: ...Remove the microphone rubber Proc sheet 1 34 7 Remove the electronic board Proc dure de pose 1 Poser le joint microphone Fiche proc 1 34 2 Place the colour display Proc sheet 1 16 3 Place the set key...

Page 76: ...mp 04 Symp 05 Symp 06 Symp 07 Symp 08 Symp 10 Test Test 01 Test 02 Test 03 Test 04 Test 05 Test 06 Proc sheet 1 18 B2005 REMOVING REPLACING THE ELECTRONIC BOARD 2 2 Further operations 1 Place the keyb...

Page 77: ...ide key with Brussels Further operations 1 Place the color display Proc sheet 1 16 2 Place the set keypad board base band shielding Proc sheet 1 33 3 Place the flange Proc sheet 1 23 4 Place the equip...

Page 78: ...ctive board should display the defect code written on a sticker placed on the shielding and written on the ESD bag label too printed with SMT Note On the defective boards it is necessary to check visu...

Page 79: ...e Proc 1 20 B2005 Equipped electronic board exchange 2 3 Example of equipped electronic boards packaging ESD shielding bag closed by the product label SAGEM electrostatic shielding box Reference 20 bo...

Page 80: ...mentation Check oxidation under the metal dome Display test Hot Line Menu Keypad test Vibrating device test See Technical documentation test sheet 05 Audio parameters written on the new swap board Fol...

Page 81: ...emoval procedure 1 Unclip the flange Placement procedure 1 Position the flange on the equipped module 2 Clip the flange on the equipped module Arrows Procedure Proc 0 01 Proc 1 01 Proc 1 02 Proc 1 04...

Page 82: ...p 06 Symp 07 Symp 08 Symp 10 Test Test 01 Test 02 Test 03 Test 04 Test 05 Test 06 Proc sheet 1 23 B2005 REMOVING REPLACING THE FLANGE 2 2 Further operation 1 Place the equipped module Proc sheet 1 15...

Page 83: ...oard assembly procedure 1 Position and clip the keypad board on the shielding on keypad connector side 1 2 Pull down and clip 2 Removal procedure 1 Unclip the set Keypad board shielding on IRDA side P...

Page 84: ...Test 04 Test 05 Test 06 Proc sheet 1 33 B2005 REMOVING REPLACING THE KEYPAD BOARD 2 2 Placement procedure 1 Clip the set Keypad board shielding on the CIE Further operation 1 Place the flange Proc sh...

Page 85: ...the microphone rubber Further operations 1 Place the color display Proc sheet 1 16 2 Place the set keypad board base band shielding Proc sheet 1 33 3 Place the flange Proc sheet 1 23 4 Place the equi...

Page 86: ...place the vibrating speaker Further operations 1 Place the equipped module Proc sheet 1 15 2 Place the keyboard Proc sheet 1 04 3 Place the front cover Proc sheet 1 13 4 Place the battery Proc sheet 0...

Page 87: ...Site technical documentation B2005 LEVEL 3 MAINTENANCE Contents REF MTB DTS 2 Indice A December 21 2005 Page 5 30...

Page 88: ...5283 6 5 1 Follow the Proc Sheet 1 20 3DFNDJLQJ IRU VZDS RU PRELOH FRPSRQHQWV VWRUDJH The swap and the mobile components must be stored with a particular care especially for the most sensible componen...

Page 89: ...ENTE BROKEN MISSING ANTENNA CONTACT BATTERIE DU M OBILE DEFECTUEUX CONNECTEUR DE CHARGE DU M OBILE DEFECTUEUX ALIM ENTATION CARTE DEFECTUEUSE AFFICHAGE CHARGE DEFECTUEUX CONSOM M ATION MODE ETEINT PRO...

Page 90: ...1 35 Proc 3 01 Symptom Symp 01 Symp 02 Symp 03 Symp 04 Symp 05 Symp 06 Symp 07 Symp 08 Symp 10 Test Test 01 Test 02 Test 03 Test 04 Test 05 Test 06 Proc sheet 3 01 B2005 RETURN TO SAGEM 2 2 This docu...

Page 91: ...RIES 6 1 PEDESTRIAN HANDSFREE KIT 6 1 1 Description Ear support with microphone on the cable for handsfree conversation 6 1 2 Caract ristiques Comment Length 1 25 m Dist micro loudspeaker 25 cm Conten...

Page 92: ...tation B2005 6 2 DATA CABLE PC USB 6 2 1 Description Data cables are used for transferring data through standard equipment 6 2 2 Caract ristiques Packaging Blister Contents REF MTB DTS 2 Indice A Dece...

Page 93: ...Site technical documentation B2005 6 3 6 3 1 Description Contents REF MTB DTS 2 Indice A December 21 2005 Page 6 3...

Page 94: ...product following it s evolution 7 2 APPLICATION The Technical Information Bulletin TIB are reference and must be applied by the repair centers The Technical Information Bulletin TIB will be sent onl...

Page 95: ...er 10 1 Upper cover 15 1 Keypad 50 1 Battery 65 1 LCD pane 85 1 Main board 140 1 Assembled antena plate 155 1 Side key 165 1 Color display 170 1 Display flange 175 1 Screw 190 1 Drill plate 235 1 Keyp...

Page 96: ...Site technical documentation B2005 Contents REF MTB DTS 2 Indice A December 21 2005 Page 8 2...

Page 97: ...CONNECTOR DESCRIPTION 2 8 2 3 2 SIGNAL DESCRIPTION 2 8 2 4 IDENTIFICATION 2 9 2 4 1 ILLUSTRATION 2 9 2 4 2 DESCRIPTION 2 9 2 4 3 DESCRIPTION AFTER REPARATION 2 9 2 5 PHONE BLOCK DIAGRAMS 2 10 2 5 1 B...

Page 98: ...LAY PROBLEM 3 14 Symp Sheet 05 Keypad problem 3 15 Symp Sheet 06 Ring tones problem 3 16 Symp Sheet 07 vibrating device problem 3 17 Symp Sheet 08 Audio problem 3 18 Symp Sheet 10 LOUDSPEAKER PROBLEM...

Page 99: ...c Sheet 1 13 REMOVING REPLACING THE FRONT COVER 5 12 Proc Sheet 1 15 REMOVING REPLACING THE EQUIPPED MODULE 5 14 Proc Sheet 1 16 REMOVING REPLACING THE DISPLAY 5 16 Proc Sheet 1 18 REMOVING REPLACING...

Page 100: ...CABLE PC USB 6 2 6 2 1 DESCRIPTION 6 2 6 2 2 CHARACT RISTICS 6 2 6 3 6 3 6 3 1 DESCRIPTION 6 3 CHAPTER 7 TECHNICAL INFORMATION BULLETIN 7 1 PURPOSE 7 1 7 2 APPLICATION 7 1 CHAPTER 8 ILLUSTRATED PARTS...

Reviews: