


700-9700
7.14.2022
11
UNPACKING & ASSEMBLY INSTRUCTIONS
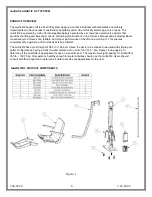
REFER TO THE DIAGRAMS (
Figures 2-4
) FOR PARTS IDENTIFICATION.
READ THESE INSTRUCTIONS IN THEIR ENTIRETY BEFORE BEGINNING
INSTALLATION
Prior to opening the shipping container, carefully inspect the external condition of the shipping materials
for any visible damage. It is important that any damage be noted on the Bill of Lading prior to signing for
the delivery. Contact either S.R.Smith or your dealer immediately to notify us of any damage or missing
parts.
Ensure mounting anchors have been installed in the correct location in the pool deck for proper lift
operation. It is recommended that the deck anchors be installed by a person familiar with installing pool
deck equipment. The multiLift2 can be installed using existing
multiLift™ and ML300 anchors.
The multiLift2 is shipped partially assembled. Position container(s) close to deck anchors for easier assembly
and set up.
Unpacking & Assembly Procedure for the multiLift2:
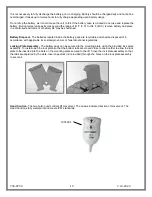
1. Carefully remove all lift components from packaging.
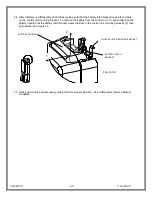
2. Remove seat assembly and footrest and set aside for attachment.
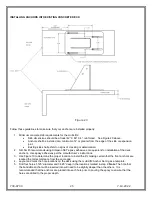
3. Align slotted holes in the base mounting plate with deck anchors. Position the front edge of the lift base
plate so that it is located 8.75
” minimum and 13.75” maximum from the pool edge. See Figure 19 on
page 24.
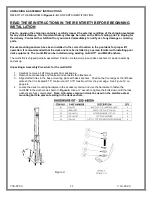
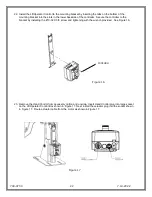
4. Locate the deck mounting hardware in the accessory carton and use the hardware to fasten the
multiLift2 to the anchors as shown in
Figure 4.
Use a ¾” wrench to tighten the bolts down until the lock
washers are fully compressed.
Note: Anti-seize compound must be used on the stainless-steel
mounting bolts to prevent seizing in the deck anchors.
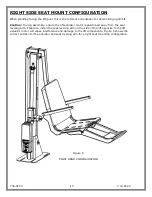
Figure 4