13
5 Operation
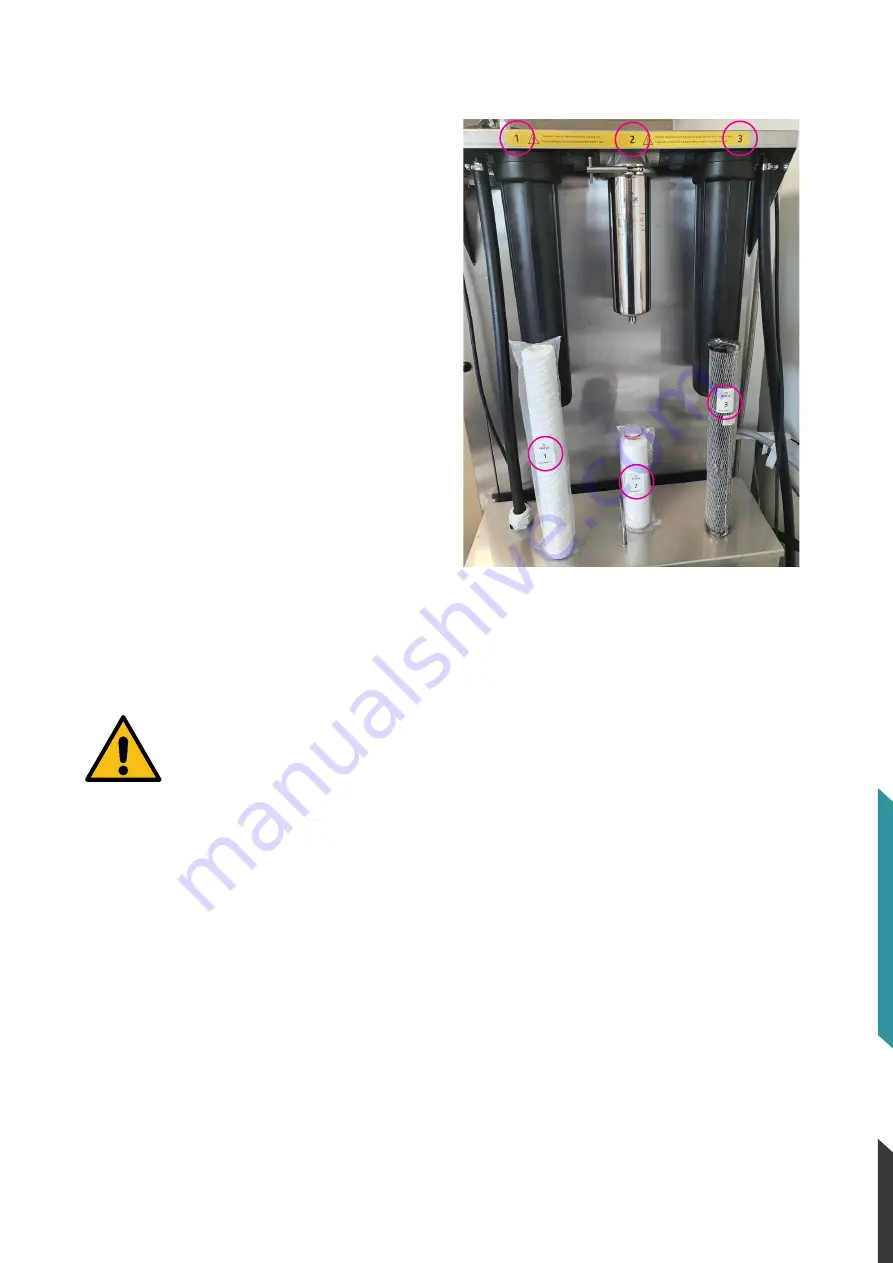
Figure 22
4.4 Filter cartridge installation
1. Unscrew the filter sumps and fit the filter
cartridges in their correct positions as
displayed in Fig. 22. Each filter housing and
corresponding filter cartridge is marked
with identical numbers to indicate its correct
position.
2. Remove the transparent wrapping on each
cartridge before it is mounted.
3. Filter cartridge #1 and #3 is mounted in the
center of the bottom of their corresponding
sumps. The sumps are then mounted to the
filter housing head by gently pushing the sump
upwards while rotating it clockwise.
4. When the cartridge is correctly mounted,
tighten the sump with a gentle twist.
5. To fit filter cartridge #2, use some water to
lubricate the O-rings on the top of the cartridge
and push it by hand all the way to the top of
the center socket of the #2 filter housing head.
Mount the sump with the clamp and tighten it by
hand.
NOTE
: Filter break in – it takes a couple of water
changes from the Solo Rescue before the new filter
cartridges reaches their full filtering performance.
5 Operation
The
DeconFilter™
Pro S is designed and built to be
connected at all time and it operates without human
interaction. It is advised to frequently keep an eye
on the system pressure gauge while draining your
Solo Rescue Decon Washers to make sure it is
running correctly.
Once the filter tank gets filled up with water from
IMPORTANT NOTE:
If the filter cartridges are
incorrectly mounted or mounted in the wrong place,
it will have a negative impact on the performance of
the filter system.
the connected Solo Rescue Decon Washers, a
built-in float switch automatically starts the pump,
transferring the water from the tank through the filter
cartridges and eventually out into the drain. Once
the tank is emptied the pump will automatically
come to a stop.


