background image

INSTALLATION

ENSEMBLE DE DOUCHE COZI  / COZI SHOWER PIPE 

- RCZ66

Doc. # DR069-1 / 29-06-2017

www.rubi.ca - 1.888.988.RUBI (7824)

11

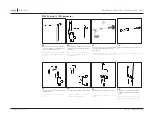
Percez un trou au centre de la marque, insérez 
un ancrage mural et appliquez du silicone 
autour du trou.

Drill a hole in the center of the mark, insert a 
wall anchor and apply silicone around the hole.

15

Vissez le flexible de douchette sous la valve.

Assemble the flexible handshower hose under 
the valve.

12

Fixez la pièce de fixation murale à l'aide d'une 
vis.

Secure the wall mounting bracket with a screw.

16

Assemblez la douchette à l'autre extrémité 
du flexible et installez la douchette dans le 
crochet.

Assemble the handshower at the other end of 
the hose and install the hand shower in the 
hook.

ÉTAPES (suite) / STEPS (continued)

10

Retirez la barre de la valve et retirez la pièce 
de fixation murale de l'extrémité de la barre 
horizontale.

Remove the bar from the valve and remove 
the wall mounting bracket  from the end of 
the horizontal bar.

14

Serrez les vis allen à la tête et prêt de la valve.

Tighten the allen screws at the end of the 
horizontal bar and below the valve.

09

Marquez la position de la barre horizontale 
au mur en s'assurant que l'installation est à 
niveau dans toutes les directions.

Mark the horizontal bar position on the wall 
making sure the installation is levelled in all 
directions.

13

Replacez la barre sur la valve et sur la pièce 
de fixation murale.

Replace the bar on the valve and the wall 
bracket.

Summary of Contents for RCZ66 Series

Page 1: ...emove the caps and the o ring protective sleeves 06 FR Assemblez les barres verticales et horizontales EN Assemble horizontal and vertical bars 01 FR Installez les raccords selon les instruc tions fournies dans la boîte de ceux ci EN Install the fittings as per instructions provided with the rough box RCZ66IR RCZ66TA RCZ66LT 05 FR Serrez les vis allen sous les 2 raccords en prennant soin de bien a...

Page 2: ...het Assemble the handshower at the other end of the hose and install the hand shower in the hook ÉTAPES suite STEPS continued 10 Retirez la barre de la valve et retirez la pièce de fixation murale de l extrémité de la barre horizontale Remove the bar from the valve and remove the wall mounting bracket from the end of the horizontal bar 14 Serrez les vis allen à la tête et prêt de la valve Tighten ...

Page 3: ...ÉRATURE EN TEMPERATURE PUSH BUTTON RCZ66IR FR INSTALLATION DE LA TÊTE DE DOUCHE EN SHOWER HEAD INSTALLATION 02 FR Dévissez la vis de retenue du bouton EN Unscrew the button retaining screw 01 FR Si vous désirez changer le bouton pous soir dévissez la poignée de température EN If you wish to replace the push button start by unscrew the temperature handle 01 FR Vissez la tête de douche au bour de la...

Page 4: ...et asséchez avec un linge doux et sec pour retrouver le lustre original de votre tête pluie La garantie sera nulle et non avenue dans les cas d utilisation de produits nettoyants inadaptés particulièrement ceux contenant des agents abrasifs cires alcools ammoniaques javelisants acides des solvants ou autres produits chimiques corrosifs qu ils soient utilisés par l acheteur ou par un tiers pour l a...

Page 5: ...u verso de cette page Prepare the wall fixing structure To do this determine the ideal height of the shower valve refer to the image on the back of this page 08 PIÈCES PARTS ÉTAPES STEPS 02 Installez des coudes à angle 90 au bout des raccords Prendre soin de bien étancher les filets Install elbows at the end of the fittings Take care to properly seal the threads 06 Effectuez le branchement des arr...

Page 6: ...ner la hauteur de la douche de sorte que le jet du haut arrive environ à la hauteur des épaules Nous suggérons que le robinet soit fixé à une distance de 30 à 35 du niveau du plancher Before installation we recommend that you determine the height of the shower so that the top stream reaches approxi mately shoulder height We suggest that the valve be fixed at a distance of 30 to 35 from the floor l...

Reviews: