37
Explanation of the panels
Explanation of the panels
fig.MeterBtn.eps
This button accesses the METER screen where you can view the
meters. It will light red while this screen is shown.
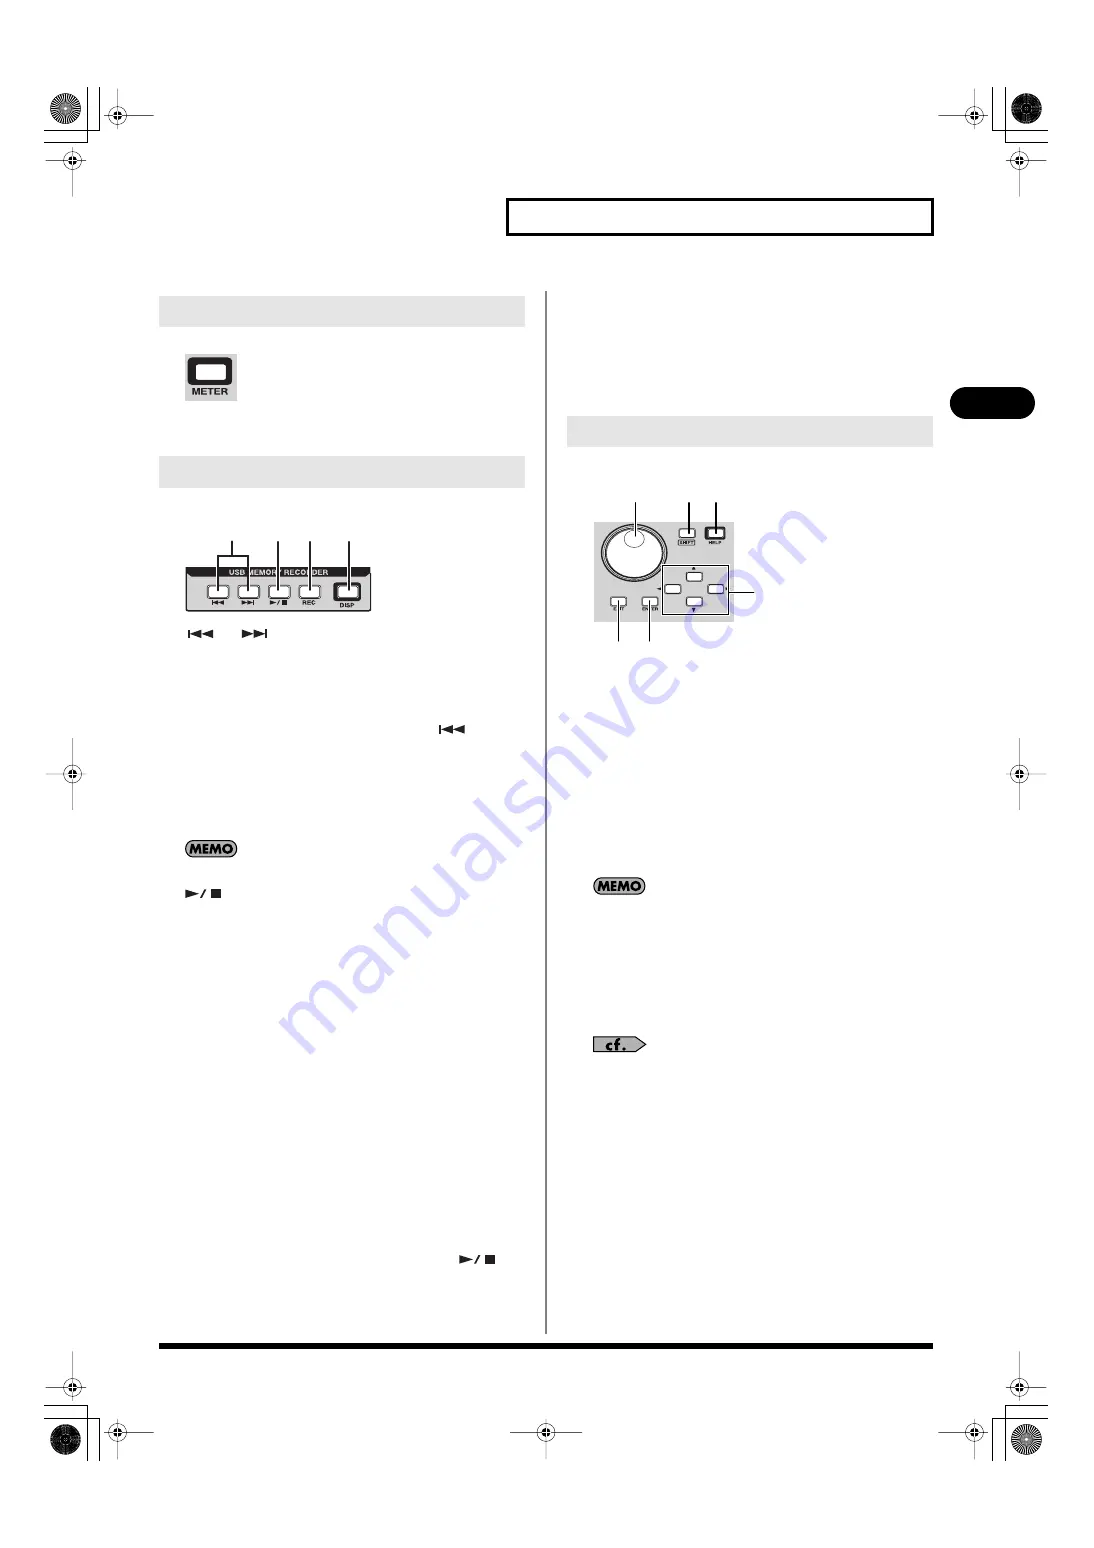
fig.RecorderSectGuide.eps
A.
and
buttons
Here you can select the song to play, and rewind or fast-forward the
playback.
•
Selecting a song
By pressing these buttons, you can jump to the beginning of the
preceding or following song. During playback,
button
takes you back to the beginning of the currently playing song.
•
Rewinding or fast-forwarding during playback
By pressing and holding these buttons while a song is playing,
you can rewind or fast-forward. Normal playback will resume
when you release the button.
These buttons will not function while a song is being recorded.
B.
button
Use this button to start or stop playback, or to start recording.
•
Playing a song
When you press this button while the recorder is stopped, the
currently selected song will play.
•
Stopping a song
When you press this button while the song is playing, playback
will stop.
•
Starting recording
When you press this button in recording-standby mode,
recording will start.
•
Stopping recording
When you press this button while recording a song, recording
will stop.
C.
REC button
Use this button to put the recorder in recording-standby mode, or to
divide the song currently being recorded.
•
Recording-standby mode
When you press this button while the recorder is stopped, the
recorder will enter recording-standby mode. Press [
] to
start recording.
•
Dividing the song currently being recorded
When you press this button while a song is being recorded,
recording of the song currently being recorded will be
completed, and recording of a new song will begin.
D.
DISP button
This button accesses the RECORDER screen where you can make
recorder settings and manage the song list. It will light red while this
screen is shown.
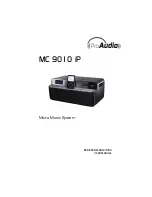
fig.GenCtrlSectGuide.eps
A.
Value dial
This adjusts the value of the parameter at which the cursor is located.
B.
SHIFT button
This button has the following two functions.
• Some buttons change their function while [SHIFT] is held
down. The function obtained while [SHIFT] is held down is
printed above the button, enclosed by a line.
• You can hold down [SHIFT] to modify the range by which a
value will change when you operate the CHANNEL EDIT
section’s knob or the value dial, allowing you to adjust the
setting in finer detail.
You can use the user preference SHIFT LOCK (p. 178) to change
the behavior of the SHIFT button.
C.
HELP button
This button accesses the HELP CONTENTS popup. If you hold
down [HELP] and press another button, an explanation of that
button will appear in the HELP popup. This button will light red
while the popup is shown.
For more about using HELP, refer to the “Help function” (p. 208).
D.
Cursor buttons
These buttons move the cursor up/down/left/right in the screen.
E.
EXIT button
If you press this button while another screen is shown, you will
return to the HOME screen. If you press this button while a popup is
shown, the popup will close.
F.
ENTER button
Use this button to turn an on-screen button on/off, or to confirm a
change you’ve made to the settings.
8. METER button
9. USB MEMORY RECORDER section
A
B
C
D
10. Screen controller section
E F
A
B C
D
M-400_v15_e.book 37 ページ 2008年6月20日 金曜日 午後4時5分


