background image


E.2 Connection  Page 

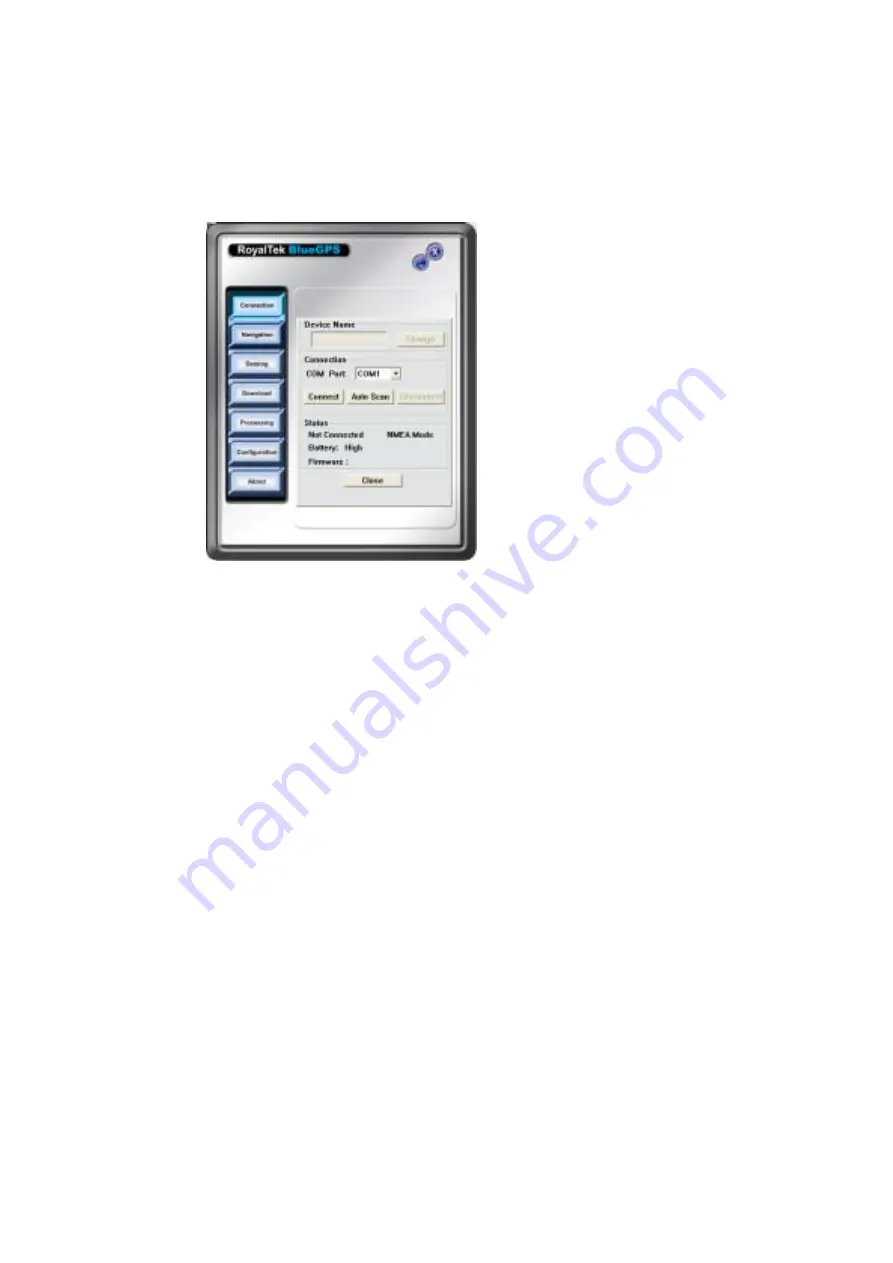
User has to set up a connection with BlueGPS device by this dialog. 


E.2.1 

Device Name: 


When connection is successful, will show the Device’s ID Name 

automatically. 


E.2.2 

Change:


When connection is successful, the “Change” Button will be workable. 

If you want to change the Device’s Name, please enter the new Device’s 

ID Name in the BlueGPS ID field, then click “Change” button to upload 

the Device’s ID Name to BlueGPS. 


E.2.3 

COM Port: 


Set up the BlueGPS COM Port.   


E.2.4 

Connect:


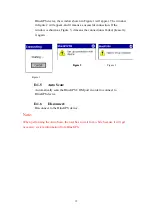
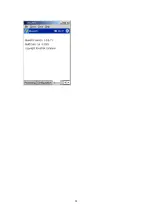
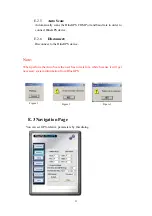
Connect to the BlueGPS device. When you try to connect to Bluetooth 

enabled device, the window, shown, as Figure 1 will appear. 

And will change to the Figure 2 means connecting successful. 

If the window is shown as Figure 3, it means the connection failed, please 

try again. 


30 

Summary of Contents for BlueGPS

Page 1: ...BlueGPS Software User Manual v 1 0 Prepared by RoyalTek Company LTD All Right Reserved i ...

Page 2: ...alled or used in accordance with the instructions may cause harmful interference to radio communications However there is no guarantee that interference will not occur in a particular installation If this equipment does cause harmful interference to radio or television reception which can be determined by switching the equipment off and on The user can try to correct the interference by the follow...

Page 3: ...Port 5 B 3 4 Bluetooth Status LED Blue 5 B 3 5 GPS Status LED Green 5 B 3 6 Battery Status LED Red Yellow 5 B 4 Getting Started 5 B 4 1 STEP 1 Charge the Battery 5 B 4 2 STEP 2 Turn on Receiver and Wait for GPS Fix 6 B 4 3 STEP 3 Connect to Bluetooth Enabled Devices 6 B 4 4 STEP 4 Use GPS Application 6 C Installation 7 C 1 Install PDA Software Application 8 C 2 Install PC Software Application 14 D...

Page 4: ...D 3 4 Speeding Limit km hr 21 D 3 5 Include Altitude Info 21 D 3 6 When Flash Full 21 D 3 7 OK 22 D 4 Download data 22 D 4 1 File Name 22 D 4 2 Progress Bar 22 D 4 3 Recorded Number 22 D 4 4 Remaining Space 23 D 4 5 Process Data After Download 23 D 4 6 Start 23 D 4 7 Stop 23 D 5 Data Process 23 D 5 1 File Name 23 D 5 2 Data Type 23 D 5 3 Set Working Time 24 D 6 Convert To NMEA 24 D 6 1 File Name 2...

Page 5: ...m Password 27 D 9 4 OK 27 D 9 5 Cancel 27 D 10 About 27 E PC Software Application User Manual 29 E 1 Application User Interface 29 E 2 Connection Page 30 E 2 1 Device Name 30 E 2 2 Change 30 E 2 3 COM Port 30 E 2 4 Connect 30 E 2 5 Auto Scan 31 E 2 6 Disconnect 31 E 3 31 E 4 Navigation Page 31 E 4 1 NMEA Mode SiRF Mode 32 E 4 2 Degraded Mode 32 E 4 3 Elevation mask 32 E 4 4 DOP Mask 32 E 4 5 SBAS ...

Page 6: ... E 6 7 Stop 35 E 7 Data Process 36 E 7 1 File Name 36 E 7 2 Data Type 36 E 7 3 Set Working Time 36 E 8 Convert To NMEA 37 E 8 1 File Name 37 E 8 2 Start 37 E 8 3 Stop 37 E 8 4 Close 37 E 9 Connect To Map 38 E 9 1 Auto Replay 38 E 9 2 GPS Port 38 E 9 3 Baud rate 38 E 9 4 Play Interval Unit 1 sec 38 E 9 5 Play 38 E 9 6 Pause 39 E 9 7 Stop 39 E 9 8 Close 39 E 10 Configuration 39 E 10 1 Map Applicatio...

Page 7: ...E 11 2 New Password 41 E 11 3 Confirm Password 41 E 11 4 OK 41 E 11 5 Cancel 41 E 12 About 42 vi ...

Page 8: ... keep best GPS receiving performance and can provide excellent navigation to any kind of mobile devices A 1 2 Mobile Data logger BlueGPSTM also provides mobile off line GPS data logging capability with RoyalTek s technology in BlueGPSTM And we also provide many useful applications in host for keeping more than 30 000 records of data bank for analysis It can be integrated as wireless and mobile dat...

Page 9: ... range 0 ºC to 40 ºC Battery Storage temperature range 20 ºC to 50 ºC The life cycle of built in Li ion battery is 500 times after 500 times charging the capacity of battery will reduce Humidity range up to 95 No condensing A 4Application Navigation Data Logging Fleet Management Dangerous goods monitoring Personal locator Consumer wireless GPS 2 ...

Page 10: ...B B Q Qu ui ic ck k S St ta ar rt t B 1 Surface Illustration Power Switch Power Jack Extension Antenna MCX Connector Port 3 ...

Page 11: ... 2 LEDs Display Battery Status LED Bluetooth Status GPS Status Blue Twinkle for Bluetooth in connection Green for power on Green Twinkle for position fixed Yellow for charging Red Twinkle for low power 4 ...

Page 12: ... B 3 5 GPS Status LED Green Twinkle Position is fixed Steady light Device is on and position is not fixed B 3 6 Battery Status LED Red Yellow None Running on battery power and battery has adequate power supply Red Running on battery power which is low Charge immediately Yellow Connected to power charger LED off Battery is fully charged B 4 Getting Started B 4 1 STEP 1 Charge the Battery 1 Before y...

Page 13: ...r Bluetooth enabled device for instructions 2 After connection is creating between Bluetooth enabled device and BlueGPS the LED will twinkle blue light B 4 4 STEP 4 Use GPS Application 1 Load your GPS mapping or routing software along with the corresponding maps of the areas that you are occupying and plan to travel to 2 Start the application Make sure the application is set for the COM port that ...

Page 14: ...stall the PC software application Click the Driver for PocketPC to install the PDA software application Click the User Manual to open the user manual of BlueGPS Click the View Our Website to link our http www royaltek com please make sure your PC connect to Internet first Click the Browse CD Contents to open the explorer to browse the files within the CD 7 ...

Page 15: ...PDA Software Application Install the pc software application from CD When screen shows the installation window as follows Click Next to continue Or click Back to back last stage or Cancel to give up installation 8 ...

Page 16: ...ue Enter User Name and Company Name then click Next Or click Back to back last stage or Cancel to give up installation You can choose the Complete installation or Custom installation in this window Click Next Or click Back to back last stage or Cancel to give up installation 9 ...

Page 17: ...If you choose the Complete installation you will see the window as above or you can see the window as below if you choose the Custom installation 10 ...

Page 18: ...tion by click Change and select the folder from your hard disk The default folder is C Program Files RoyalTek BlueGPS Or click Back to back last stage or Cancel to give up installation Click Next to continue Or click Back to back last stage or Cancel to give up installation 11 ...

Page 19: ...o start installation Or click Back to back last stage or Cancel to give up installation Then start installation And after finishing installation system will ask you to restart your computer as the following window 12 ...

Page 20: ... click Yes I want to restart my computer now and click Finish to finish the Installation Note About to install the software application to your PDA please refer to your user manual of your PDA manufacturer 13 ...

Page 21: ...PC Software Application Install the pc software application from CD When screen shows the installation window as follows Click Next to continue Or click Back to back last stage or Cancel to give up installation 14 ...

Page 22: ...r click Back to back last stage or Cancel to give up installation You can select the folder to install the PC version BlueGPS software application by click Change and select the folder from your hard disk The default folder is C Program Files RoyalTek BlueGPS Or click Back to back last stage or Cancel to give up installation 15 ...

Page 23: ...Click Next to continue Or click Back to back last stage or Cancel to give up installation Click Install to start installation Or click Back to back last stage or Cancel to give up installation 16 ...

Page 24: ...restart your computer as follow window Please click Yes I want to restart my computer now and click Finish to finish the Installation And your desktop will appear the BlueGPS i You can con double click the BlueGPS icon to execute the BlueGPS software application 17 ...

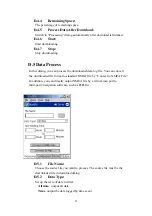
Page 25: ...ce s ID Name D 1 2 Change ssful the Change Button will be workable D 1 3 COM Port ort D Set up the connection with BlueGPS device When you try to connect to When nection is successfu automatically When connection is succe If you want to change the Device s Name please enter the new Device s ID Name in the BlueGPS ID field then click Change button to upload the Device s ID Name to BlueGPS Indicate ...

Page 26: ...t to D nect Disconnect to the BlueGPS device Note erforming the Auto Scan the user has to wait for a while because it will get y system information from BlueGPS in figure 2 will appear and it means a successful connection If the window is shown as Figure 3 it means the connection is failed please try it again Figure 3 D 1 5 BlueGPS device 1 6 Discon When p necessar ...

Page 27: ...Elevation mask setting D 2 4 DOP Mask DOP mask type and DOP mask value setting D 2 5 SBAS Mode Enable or disable SBAS function D 2 6 Default Reset values of this dialog into default value It has not changed the setting of device yet You still need to push OK button if you want to change the setting of device D 2 7 OK Upload the parameters to the BlueGPS D 3Data Logger Parameters In this dialog you...

Page 28: ... to log the data once The unit of distance is meter D 3 3 Constant Time Enable disable the logging function according to the value of DD HH MM and SS Set up how long to log the data once D 3 4 Speeding Limit km hr Enable disable the logging function according to the speed value in right field Set up the speeding limitation of BlueGPS If over the speed limitation the BlueGPS will log the data once ...

Page 29: ...cally after download is finished Mode Download delete Download and delete the data logs Download only Download data logs but not delete them Delete only Just delete the data logs Query Datalog info Only get how many data is stored in BlueGPS device and the percentage of remaining space D 4 1 File Name Select the folder and the file name to save the data D 4 2 Progress Bar Show the downloading prog...

Page 30: ...wnloaded data log file You can convert the downloaded file format to standard NMEA file by Convert to NMEA File In addition you can directly output NMEA file by a virtual com port to third party navigation software such as PaPaGo D 5 1 File Name Choose the source file you want to process The source file must be the downloaded file in download dialog D 5 2 Data Type Set up the term of data to filte...

Page 31: ...working time Then the process result will show the data log excluding working time Note Exceed Working Time only provide regular setting It can not take holiday into account D 6Convert To NMEA You can convert the downloaded data into NMEA file D 6 1 File Name Select the folder and the file name to save the data RMC GGA GLL and VTG Select which sentence will be converted D 6 2 Start Start convertin...

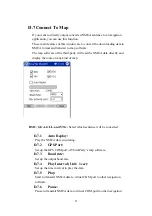
Page 32: ...ly and display the route on any kind of map RMC GGA GLL and VTG Select which sentence will be converted D 7 1 Auto Replay Play the NMEA data circulating D 7 2 GPS Port Set up the GPS COM port of Third Party s map software D 7 3 Baud rate Set up the output baud rate D 7 4 Play Interval Unit 1 sec Set up the time interval to play the data D 7 5 Play Start to transmit NMEA data to virtual COM port to...

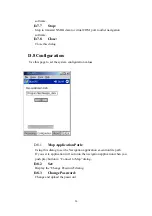
Page 33: ... to set the system configuration values D 8 1 Map Application Path Using this dialog to set the Navigation application execution file path If you set it application will auto run the navigation application when you push play button in Connect to Map dialog D 8 2 Set Display the Change Password dialog D 8 3 Change Password Change and upload the password 26 ...

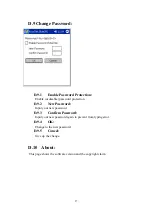
Page 34: ... protection D 9 2 New Password Input your new password D 9 3 Confirm Password Input your new password again to prevent from typing error D 9 4 OK Change to the new password D 9 5 Cancel Give up the change D 10 About This page shows the software version and the copyright claim 27 ...

Page 35: ...28 ...

Page 36: ... your desktop to run the software after install the BlueGPS software Then you can see the BlueGPS window as Figure 1 Figure 1 You can choose the button in the left side to open the dialogs for each function setting such as Connection Navigation Datalog Download Processing Mode Configuration About And use the left up buttons to minimize or close the window 29 ...

Page 37: ...ange the Device s Name please enter the new Device s ID Name in the BlueGPS ID field then click Change button to upload the Device s ID Name to BlueGPS E 2 3 COM Port Set up the BlueGPS COM Port E 2 4 Connect Connect to the BlueGPS device When you try to connect to Bluetooth enabled device the window shown as Figure 1 will appear And will change to the Figure 2 means connecting successful If the w...

Page 38: ...ct BlueGPS device E 2 6 Disconnect Disconnect to the BlueGPS device Note When perform the Auto Scan the user has to wait for a while because it will get necessary system information from BlueGPS Figure 1 Figure 2 Figure 3 E 3 Navigation Page You can set GPS relative parameters by this dialog ...

Page 39: ...sk To set the parameter of the Elevation mask E 3 4 DOP Mask DOP mask type and DOP mask value setting E 3 5 SBAS Mode Enable or disable SBAS function E 3 6 Default Reset values of this dialog into default value It has not changed the setting of device yet You still need to push OK button if you want to change the setting of device E 3 7 OK Upload the parameters to the BlueGPS 32 ...

Page 40: ...Excluding the When Flash Full menu E 4 2 Constant Distance Enable disable the logging function according to the value in right field Set up how far to log the data once The unit of distance is meter E 4 3 Constant Time Enable disable the logging function according to the value of DD HH MM and SS Set up how long to log the data once E 4 4 Speeding Limit km hr Enable disable the logging function acc...

Page 41: ...oad the setting to the BlueGPS E 5 Download data By this dialog you can download the GPS datalog from BlueGPS device The saved file format is a more readable but proprietary file format If you choose view data after download application will switch to Processing dialog automatically after download is finished Action Type Download delete download and delete the data logs Download only Download data...

Page 42: ... Show the downloading progress In the right side of progress bar you can see the downloaded percentage E 5 3 Recorded Number The total number of datalog records in device E 5 4 Remaining Space Shows the percentage of remaining space E 5 5 Process Data After Download Switch to Processing dialog automatically after download is finished E 5 6 Start Start downloading E 5 7 Stop Stop downloading 35 ...

Page 43: ...o process The source file must be the downloaded file in download dialog E 6 2 Data Type Set up the term of data to filter All data output all data Time output the data logged by time event Distance output the data logged by distance event Speeding data output the data logged by exceeding the speed limit Overtime data output the data exclude the working time E 6 3 Set Working Time If you choose Ov...

Page 44: ... 4 Close Note Exceed Working Time only provide regular setting It can not take holiday into account E 7 Convert To NMEA You can convert the downloaded data into NMEA file E 7 1 File Name Select the folder and the file name to save the data Start converting Stop converting Close this dialog ...

Page 45: ...f the third party will read the NMEA data directly and display the route on any kind of map RMC GGA GLL and VTG Select which sentence will be converted E 8 1 Auto Replay Play the NMEA data circulating E 8 2 GPS Port Set up the GPS COM port of Third Party s map software E 8 3 Baud rate Set up the output baud rate E 8 4 Play Interval Unit 1 sec Set up the time interval to play the data E 8 5 Play St...

Page 46: ...ort to other navigation software E 8 8 Close Close this dialog E 9 Configuration Use this page to set the system configuration values E 9 1 Map Application Path Using this dialog to set the Navigation application execution file path If you set it application will auto run the navigation application when you push play button in Connect to Map dialog 39 ...

Page 47: ...E 9 2 Set Display the Change Password dialog E 9 3 Change Password Change and upload the password 40 ...

Page 48: ... Protection Enable or disable password protection E 10 2 New Password Input your new password E 10 3 Confirm Password Input your new password again for fear of typing error E 10 4 OK Change to the new password E 10 5 Cancel Give up the change 41 ...

Page 49: ... 1071 Chung Cheng RD Suite 9F 1 Tao Yuan City Taiwan R O C Tel 886 3 256 9666 FAX 886 3 358 0050 Branch Office Sales Department 8F 256 Yang Guang St Nei Hu Chiu Taipei Taiwan R O C Tel 886 2 7721 5000 FAX 886 2 7721 5666 Http www royaltek com Sales sales royaltek com FAE fae royaltek com ...

Reviews: