www.royal-leisure.co.uk
1. Starting and Cleaning
1.1 Installation
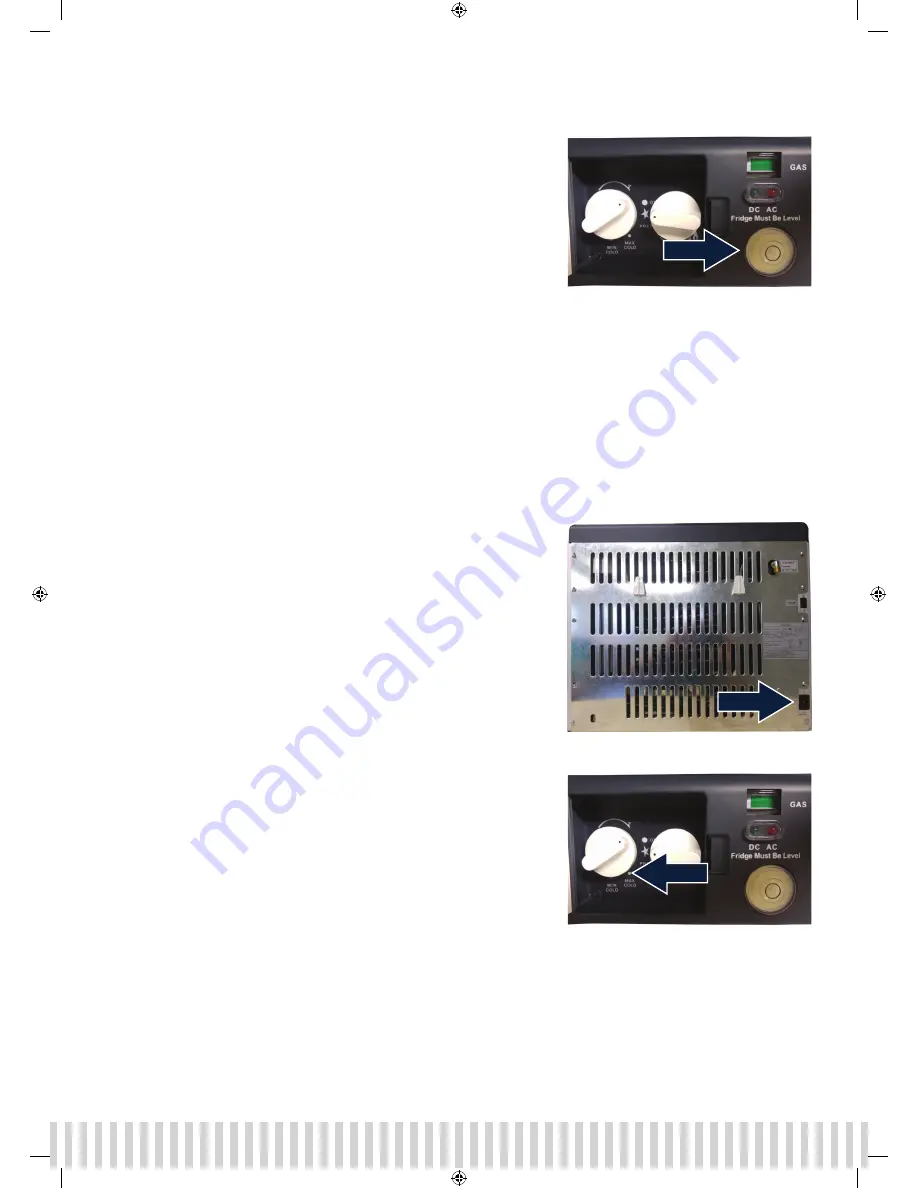
Place the cooler firmly on the ground or use an appropriate base. Position
the appliance by means of the level indicator situated next to the controls.
When the small bubble is visible in the medium ring the cooler is placed in
the exact horizontal position (Fig. 1).
The minimum distance between the rear of the cooler to a wall must be 10cm
in order to guarantee sufficient ventilation. Avoid placing the cooler in direct
sunlight or close to any source of heat. Never cover the ventilation slots on
the upper side of the cooler in order to guarantee good air ventilation. This is
important for achieving best cooling performance.
1.2 Cleaning
Before first use, after defrosting or following a long period of non-use, clean the cooling compartment and the lid with
lukewarm soapy water. Do not use any abrasive detergents. Dry the surface after cleaning. The gasket of the lid should only
be cleaned with clean water. For best results keep fridge and apertures clean and dry at all times.
Useful Hints:
Do not pour/put any liquids directly into the cooling compartment but store all food and beverages in closed containers and
bottles.
2. Operation with 230V AC mains supply
Before connection and operation verify that the mains voltage corresponds
to the operating voltage of the cooler specified on the ratings label at the
back of the appliance.
If the electrical specifications are correct, plug the safety connector into the
back of the cooler and the 3-pin BS plug into an earthed wall socket, which is
wired according to the ruling regulations (Fig. 2).
Under the small flap on the top of the cooler are two knobs. The left knob
with the marking ‘Min Cold’ and ‘Max Cold’ serves for switching on the unit
when operating with 230V mains supply.
Turn the knob clockwise to position ‘Max Cold’. After about one hour the
cooling effect becomes noticeable and the temperature can then be adjusted
by means of the thermostat knob (Fig. 3).
At first use leave the thermostat knob for approx. 5 hours at the ‘Max Cold’
position, afterwards set the temperature at a medium/interim level.
At ‘Min Cold’ position cooling function is turned off.
For turning off the appliance completely disconnect the plug from the wall
socket.
Fig. 1
Fig. 2
Fig. 3
772835 - 3-Way Cooler Instructions.indd 2
21/08/2017 09:06


