background image

Fuel System

103

2

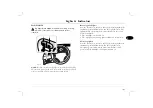
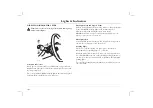
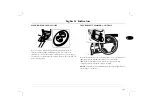
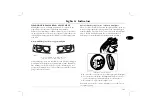
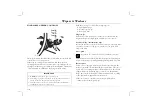
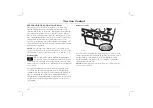
FUEL CUT-OFF SWITCH

ALWAYS check for fuel leaks before resetting the fuel cut-off 
switch.

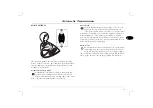
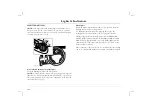
In the event of a collision or sudden impact, an inertia switch 
automatically cuts off the fuel supply to the engine and, providing 
the alarm is disarmed, unlocks the doors.

When the switch operates, the interior lights illuminate until the 
system is reset by pressing the rubber top of the cut-off switch 
(arrowed in illustration). In addition, the hazard warning lights 
flash until switched off. 

The inertia switch is located behind the glovebox and can be 
reached from underneath by removing the four fixings securing 
the access cover.

The switch must be reset before the engine can be started.

H2803a

Summary of Contents for 75 Saloon

Page 1: ...1 2 3 4 5 6 7 1 2 3 4 5 6 Before you Drive Driving Controls Audio System Maintenance Emergency Information Technical Data ...

Page 2: ...e publication which enables a record to be kept of the routine services and inspections carried out on the car This section also provides a facility for the dealer to record brake fluid and coolant changes and the fitting of any major replacement components needed during the life of the car Finally always remember that if you have any queries concerning the operation or specification of your car y...

Page 3: ...ly has been disconnected Without this code the radio unit will not operate Never leave the security card inside the car when it is left unattended Keep the card on your person in case of emergencies IN AN EMERGENCY IMPORTANT When the time comes to sell your car please remember to pass this handbook and the Security Card to the new owner Both must be considered part of the car and essential to its ...

Page 4: ......

Page 5: ...7 Seats 21 Seat Belts 25 Child Restraints 27 Airbag SRS 33 Steering Column 34 Mirrors 36 Windows 37 Sunroof 38 Heating Ventilation 46 Parking Heater 53 Interior Equipment 59 In Car Telephones 60 Load Carrying Saloon 62 Load Carrying Tourer 69 Towing ...

Page 6: ...cators 5 Instrument panel 6 Starter switch 7 Horn 8 Wiper washer controls 9 Clock 10 Heating air conditioning controls 11 Audio system 12 Interior door locking switch 13 Hazard warning lights switch 14 Cruise control switches 15 Steering column adjustment lever 16 Remote audio controls 17 Bonnet release 18 Boot release saloon models 19 Instrument dimmer control 20 Electric window controls ...

Page 7: ...ystem There are also a number of additional security features some of which are selectable options In order to ensure maximum security and operating convenience you are strongly advised to gain a full understanding of the features and alternatives available by thoroughly reading this section of the handbook NOTE FOR MAXIMUM SECURITY ALWAYS SUPERLOCK THE VEHICLE USING THE REMOTE HANDSET except when...

Page 8: ...ress the lock padlock symbol button once all doors are superlocked see Superlocking page 9 perimetric alarm activated protects the doors bonnet and luggage compartment interior space protection activated 3 The direction indicator lights flash three times to confirm that the car is securely locked and the anti theft alarm indicator light in the instrument panel starts to flash With the key 1 Insert...

Page 9: ...es will be protected but an open door will not As soon as the open aperture is closed the system will automatically revert to an armed state NOTE If a mislock occurs as a result of an open door the superlocking and interior space protection features will not be activated until the door is closed and the locking process is repeated Anti theft alarm indicator light The light provides information abo...

Page 10: ...disabled by an MG Rover dealer This is a personal security feature which enables the driver s door alone to be unlocked leaving the other doors in a locked state It can be operated by the remote handset as follows Press the unlock button once or turn the key in the driver s door lock towards the front of the car to unlock the driver s door Press the unlock button or turn the key a second time to u...

Page 11: ...her means interior locking switch on the centre console for example will disable the speed related locking function for the remainder of the journey or until the starter switch is turned off and on again Interior space protection Never activate interior space protection if passengers or animals are to be left inside the car any movement will activate the alarm Interior space protection ultrasonics...

Page 12: ...h on automatically when the boot lid is opened The luggage compartment is automatically locked when the boot lid is closed NOTE The interior release button is not operational when the alarm system is armed For convenience with the alarm system armed the luggage compartment can be unlocked and opened USING THE KEY without activating the alarm the rest of the car will remain protected and the engine...

Page 13: ...se the two hand grips set into the trim panel on the inside of the tailgate arrowed in illustration to pull the tailgate down When the tailgate is partially closed release the hand grips and apply light downward pressure on the outside of the tailgate below the number plate to close NOTE The luggage compartment and interior lights illuminate automatically when either the tailgate or tailgate windo...

Page 14: ...tion twice operate the switch concealed beneath the rear wiper mounting to open see illustration Tailgate emergency release If the battery is disconnected or discharged the tailgate can be opened manually as follows Fold the rear seat cushion forward to gain access to the loadspace Remove the loadspace cover cassette see LOADSPACE COVER page 66 Twist the two turnbuckles a quarter turn anti clockwi...

Page 15: ...sed in the car Move the locking levers on the rear doors down to engage the child locks With the child proof locks engaged the rear doors cannot be opened from inside the car thereby avoiding the risk of a door being opened accidentally while the car is moving H2691 ...

Page 16: ...the key Lift off the back of the handset 3 Use the screwdriver to prise the battery from its mounting taking care to avoid touching the circuit board or the metal battery contacts NOTE Finger marks will adversely affect battery life if possible avoid touching the flat surfaces of the battery and wipe them clean before fitting 4 Fit the new battery ensuring that correct polarity is maintained side ...

Page 17: ... restraint can considerably reduce the risk of neck and head injuries Make sure your driving position is comfortable and enables you to maintain full control of the vehicle A properly adjusted seat helps reduce the risk of injury from sitting too close to an inflating airbag Your car is fitted with side impact airbags Refer to the Airbag SRS section of this handbook before fitting seat covers or c...

Page 18: ...sure the seat is locked in position before driving 2 Height adjustment Driver s seat only Lift the lever and apply weight to lower the seat rearwards or allow the seat to rise forwards as required 3 Backrest adjustment Rotate the handwheel to adjust 4 Lumbar support adjustment Rotate the handwheel to adjust HB0230 1 3 2 4 ...

Page 19: ...e switch up or down to tilt the seat cushion 3 Seat cushion height Driver s seat only Push the switch up or down to raise or lower the cushion 4 Backrest adjustment Twist the switch forward or backwards until the desired angle is achieved 5 Lumbar support Rotate the handwheel to adjust Heated seats For information on operating the heated front seats see Heated seats page 45 HB0231 1 3 5 4 2 ...

Page 20: ...the seat to move This is to prevent inadvertent operation of the memory pre sets which could cause the seat to move into a position in which the driver is unable to drive safely To recall a stored position after the seat has been moved by another driver open the driver s door and press the appropriate memory pre set button The seat will return to the position stored by that memory pre set a double...

Page 21: ... seat belts to secure large items of luggage that are to be carried on the seats in the event of an accident unsecured items become flying missiles capable of causing serious injury DO NOT use a seat belt that is twisted or obstructed in any way that could impede its smooth operation DO NOT allow front seat occupants to travel with the seat backs reclined steeply rearwards Optimum benefit is obtai...

Page 22: ...here possible rear seat passengers should adjust their position to enable the seat belt webbing to cross the shoulder without pressing on the neck Seat belts are designed to bear upon the bony structure of the body pelvis chest and shoulders and can only be worn safely with the seats in a near upright position DO NOT allow the front passenger to travel with the seat steeply reclined see Seating po...

Page 23: ...be activated by minor impacts The airbag SRS warning light on the instrument panel will alert you to any malfunction of the seat belt pre tensioners see Airbag SRS warning light page 31 NOTE After any impact always have the seat belts and pre tensioners checked and if necessary replaced by an MG Rover dealer If the pre tensioners have been activated the seat belts will still function as restraints...

Page 24: ...ith the seat belt fastened give the webbing nearest the buckle a quick pull the buckle should remain securely locked 2 With the seat belt unfastened unreel the webbing to the limit of its travel Check that unreeling is free from snags and snatches and further check the webbing for visual signs of wear or fraying Allow the webbing to retract checking that retraction is smooth continuous and complet...

Page 25: ...d to be secured in the car by means of a standard seat belt DO NOT install a rearward facing child seat in the front passenger seat an inflating airbag could impact with the seat Failure to follow this advice could result in serious injury or even death for the child When installing and using any infant or child restraint system always follow the manufacturer s instructions Failure to properly sec...

Page 26: ...ckaging Front Passenger Rear Outboard Rear Centre 0 Up to 10 kg 0 9 months X U U 0 Up to 13 kg 0 18 months X U U I 9 to 18 kg 9 months 4 years X U U II III 15 to 36 kg 4 12 years X U X U Suitable for Universal category restraints approved for this mass group X Seat position NOT suitable for children of this mass group ...

Page 27: ...ere fitted will afford additional protection to the side of the head facing the impact in the event of a severe side collision Do not allow a front seat passenger to obstruct the operation of the airbag by placing feet knees or any other part of the person or any other objects in contact with or in close proximity to an airbag module The front airbags are located in the centre pad of the steering ...

Page 28: ...atomy in contact with or in close proximity to a side airbag Items of clothing or cushions draped over the part of the front seat containing the airbag or hanging from the grab handle attached to the roof Non approved seat covers fitted over a front seat in particular be aware that seat covers approved for other cars will NOT be suitable for this car If in doubt seek advice from an MG Rover dealer...

Page 29: ...rbag on the impact side of the vehicle will inflate However there may also be impact conditions whereby one set of side and both front airbags deploy at the same time or where front and side airbags respond separately as a result of a secondary impact occurring after the initial collision has taken place An inflating airbag can cause facial abrasions and other injuries Minimise the risk of injury ...

Page 30: ...e car breaks through the seat covering rapidly inflating to form a cushion between the occupant and the side of the car The airbag on the non impact side of the car will not be deployed Note that a part of the outer side of the seat trim identified by the woven airbag label is specially constructed to enable the airbag to deploy NOTE The manufacture and materials of the seat are critical to the pe...

Page 31: ...isher as it inflates The side head impact airbag remains inflated for longer than the other airbags to provide additional head protection in the event of a secondary impact Airbag SRS warning light A warning light mounted on the instrument panel will alert you to any malfunction of the airbag SRS and seat belt pre tensioners The light will illuminate as a bulb and system check when the starter swi...

Page 32: ...wiring or component in the vicinity of the airbag SRS components including the steering wheel steering column front seats fascia and instrument panel Installation of electronic equipment such as a mobile phone two way radio or in car entertainment system Attachment of accessories to or modification of the front or side of the vehicle Removal replacement or retrimming of a front seat or seat cover ...

Page 33: ...eel in both hands and tilt the steering column up or down to move the wheel into the most comfortable position NOTE If it is difficult to move the steering column into a new position disengage the steering lock by turning the starter switch to the first position and align the front wheels straight ahead 3 Pull or push the steering wheel closer to or further away from your body 4 Once a comfortable...

Page 34: ...lding The body of each door mirror is designed to fold flat against the side of the car on impact The mirrors can also be folded back manually towards the side windows into a park position to enable the car to negotiate narrow openings On some cars the park position can be achieved electrically as follows With the starter switch turned on press the mirror fold switch 3 both mirrors will fold back ...

Page 35: ...ror Move the lever at the base of the mirror forward to dip the mirror Normal visibility is restored by pulling the lever back again NOTE In some circumstances the view reflected in a dipped manual mirror can confuse the driver as to the precise location of following vehicles Remember to take additional care VANITY MIRROR The driver s vanity mirror should only be used when the car is stationary Pi...

Page 36: ...wer and lift the switch up to raise the window The window will stop moving as soon as the switch is released unless the one touch feature is active ENSURE children are kept clear when raising or lowering a window Rear window isolation switch Press the switch to isolate the rear window controls an indicator light in the switch illuminates press again to restore control NOTE ISOLATE the rear window ...

Page 37: ...upwards Sunroof movement can be stopped at any time by pressing the tilt button for a second time Push the sunroof switch forward to lower the tilt and return the roof to the closed position To OPEN the roof Push the sunroof switch rearwards releasing when the sunroof is in the desired position Push the switch forward to close the sunroof One touch operation Firmly push the switch rearwards and re...

Page 38: ... grille in the rear window shelf uncovered to enable air flow through the whole of the interior Cars fitted with Automatic Temperature Control ATC are equipped with an additional outlet which supplies unheated or cooled air to the rear of the passenger compartment Face level vents Rotate the thumbwheel down to close or up to open the vents Direct the air flow by moving the control in the centre of...

Page 39: ...side window vents Windscreen and side window vents 3 Blower switch Turn the switch clockwise to increase the blower speed NOTE With the blower switched off the volume of air entering the car is dependent on driving speed alone 4 Recirculated air supply button Press to operate the indicator light in the switch illuminates With this button pressed the heater recirculates the air already inside the c...

Page 40: ...e air conditioning will not operate without the engine running nor when the blower switch is turned to position O NOTE Because the system dehumidifies the air supplied to it surplus water is produced and expelled via drain tubes beneath the car This may result in a small pool of water forming under the car when stationary and is not a cause for concern 6 Rear screen demister The demister will only...

Page 41: ... control s to the BLUE segment Select IV on the blower switch adjust as required Switch on air conditioning where fitted Heater bypass control Air supply from the face level vents is further controlled by the heater bypass control in the centre of the fascia panel The enables cooler air to be directed towards the face at those times when the heater is required to provide hot air to keep the interi...

Page 42: ...combined filter requires replacement every 12 months or 25 000 km AUTOMATIC TEMPERATURE CONTROL ATC Auto mode The system features automatic temperature and air distribution control which is programmed to maintain optimum levels of comfort within the car in all but the most severe climatic conditions In brief Press the AUTO button for fully automatic operation Press the temperature control switches...

Page 43: ... top of the fascia panel must not be covered Temperature control Operate the rocker switches on either side of the display to set the required temperature for the corresponding side of the passenger compartment left hand switch for the left side of the car and right hand switch for the right side The system will not achieve temperatures on the passenger side of the car more than 5 C greater or les...

Page 44: ...d to zero in economy mode NOTE If the air distribution and blower controls are operated independently the system may not be able to achieve or maintain the required temperature settings Air distribution control Press the button to adjust Air distribution changes sequentially with each press of the control as follows Face level vents only Foot and face level vents Foot level vents Foot level windsc...

Page 45: ...ar screen heater will operate for 20 minutes before switching off automatically If the outside temperature is 10 C or greater the rear screen heater operates for 12 minutes before switching off NOTE The heated rear screen will not operate unless the engine is running The heating elements on the inside of the rear screen are easily damaged DO NOT scrape or scratch the glass DO NOT stick labels over...

Page 46: ... 20 minutes of normal driving to recover the charge expended during 30 minutes operation of the parking heater sometimes longer in extremely cold conditions NOTE The parking heater operates independently of the car s ignition system there is no need to leave the starter key in the starter switch and do not leave the car with the starter switch turned on DO NOT operate the parking heater in enclose...

Page 47: ...er on or off 2 Display Shows the current time or preset time and preset number Indicates whether manual operation has been selected 3 Clock control Press to enable the current time to be changed Change the clock using the timer adjustment controls 5 4 SET control Press to cycle through the parking heater time presets Change the presets using the timer adjustment controls 5 5 Timer adjustment contr...

Page 48: ...4 in the timer unit the display illuminates showing a preset programme number on the right hand side of the display and previously programmed start time associated with that preset If the desired preset is not displayed press and release the SET control again This cycles through the presets repeat until the desired preset number is displayed To adjust the start time for that preset use the timer a...

Page 49: ...utes has elapsed To manually switch off the heater press the control again the flame symbol and the display extinguish USING THE REMOTE HANDSET The remote handset supplied with your parking heater has an approximate unobstructed range of 300 metres but this range can be substantially reduced by buildings obstructions or mountainous terrain NOTE If the handset is operated within 2 metres of the car...

Page 50: ...ng see REPLACING THE HANDSET BATTERIES page 52 for further information To deactivate the parking heater at any time during operation press and hold the OFF button for approximately 1 second or until the indicator light illuminates constantly The indicator light should then stop flashing Checking the preset running time The preset running time can be adjusted in 10 minute increments between 10 minu...

Page 51: ...perate automatically see SETTING OPERATING THE PARKING HEATER page 47 If the car battery is disconnected or discharged for a prolonged period of time the remote handset may lose synchronisation with the control unit Although this is unlikely the handset can be resynchronised by following the procedure detailed below SYNCHRONISING THE HANDSET PROGRAMMING ADDITIONAL HANDSETS If the remote handset ha...

Page 52: ...ccurs place the handset somewhere warm a pocket for example until the batteries have warmed sufficiently to work correctly Battery replacement With the back of the remote handset facing uppermost slide off the battery compartment cover and remove the discharged batteries Replace with two MN21 12V alkaline batteries ensuring that the correct battery polarity is maintained After replacing the batter...

Page 53: ...rter switch is turned on After driving the courtesy lights will fade and then extinguish 20 seconds after the last door is closed or as soon as the car is locked NOTE If a door or the boot is left open for longer than 16 minutes a time out function will extinguish the interior lights automatically to prevent the battery from discharging Permanent off If necessary the automatic illumination feature...

Page 54: ...he appropriate switch to illuminate the relevant map reading light press again to switch off CLOCK To adjust the clock use a ball point pen or similar probe to advance or retard the hands by pressing the right or left hand buttons at the bottom of the clock bezel NOTE The clock will need to be reset if the battery has been disconnected H2677 1 2 3 4 5 6 8 9 10 11 12 H2678 ...

Page 55: ...eject and can then be withdrawn for use NOTE DO NOT plug accessories into the cigar lighter socket an auxiliary power socket is available as an accessory consult your dealer The cigar lighter cover will not close again until it has been allowed to open fully ASHTRAYS Front ashtray Press the leading edge of the ashtray to open To empty the front ashtray press the tray eject catch see inset and lift...

Page 56: ...ides and carefully pull out CUBBY BOX Lift the release catch arrowed to open the lid The cubby box is designed to securely hold tapes or compact discs and the accessory torch available from an MG Rover dealer NOTE If an auxiliary power socket is fitted to the vehicle it will be located in the cubby box H2721 H2697 ...

Page 57: ...spaces are provided for a pen memo pad and cup rests for use when the car is stationary Space is also provided for the optional first aid kit CUP HOLDERS Front cup holder Press the passenger side panel to open The cup holder should not be used while the car is in motion H2718 H3030a ...

Page 58: ...t Rear cup holder Press the front of the cup holder to open REAR SUNBLIND Press the switch to raise or lower the blind Ensure that passengers are warned to keep clear of the sunblind while it is being operated H2729 H2779a ...

Page 59: ...his occurrence Using any hand held appliance while driving can be dangerous Always stop the car before making or receiving a call and ensure the telephone is switched off while you are driving For your safety always note the following precautions before fitting or using an in car telephone or any electrical equipment Only use an installation kit incorporating an aerial external to the vehicle Ensu...

Page 60: ...d Note that only one of the backrest release catches needs to be depressed in order to fold the seat Latch secure indicators Ensure that the rear seat backrests are securely latched in the upright position when the seat is in use and when loads are carried in the luggage area behind The release catches pop up when the rear seat is folded forward revealing a red band around the catch When returning...

Page 61: ...ident or sudden stop On saloon models always ensure heavy items are placed as low and as far forward as possible preferably pushed against the rear seat squab ROOF RACKS To ensure absolute safety only fit accessories that have been designed and tested for your car Your MG Rover dealer will provide details of approved tow bars and roof racks The total load must NEVER exceed that given in TOWING WEI...

Page 62: ...curely latched in the upright position when the seat is in use and when loads are carried in the loadspace behind After returning either or both parts of the backrest to the upright position check to ensure that the RED band on each release catch arrowed in inset is no longer visible this will confirm that the latches retaining the backrest have engaged and that the backrest is secure When returni...

Page 63: ...to the loadspace area Ensure that all long loads which project into the passenger compartment are securely restrained Lashing rings Luggage carried in the loadspace will shift position in the event of an accident or sudden stop Four lashing rings are set into recesses in the loadspace floor and wheel arches where shown Raise the rings from the floor see inset and secure all loads before driving DO...

Page 64: ...lable as an accessory from MG Rover dealers or to restrain the movement of fluid containers Side storage compartments Some cars are equipped with enclosed storage compartments one on each side of the loadspace To remove a storage compartment cover pull the catch down see inset When replacing ensure the catch is pushed up fully to secure the cover in position NOTE On cars equipped with a navigation...

Page 65: ...able as an accessory from MG Rover dealers Twist the two turnbuckles shown in upper inset a quarter turn anti clockwise to release the cover Underfloor storage Raise the hinged portion of the loadspace floor see SPARE WHEEL TOOLS Tourer page 224 to reveal the shallow underfloor storage tray A deeper circular storage compartment is set into the centre of the tray HB0030 HB0029a ...

Page 66: ...ace cover cassette from the car depress the two catches shown in upper inset When refitting push the cassette firmly into position and ensure the catches are fully engaged DO NOT carry luggage on top of the loadspace cover Loose items could become dangerous projectiles in the event of an accident or emergency manoeuvre For the same reason it is not wise to store the loadspace cover cassette loose ...

Page 67: ...ts folded 1 Detach the safety net loadspace cover cassette from its normal position behind the rear seats 2 Fold the rear seat backrests forward 3 Turn the cassette round through 180 so that the loadspace cover faces towards the FRONT of the car 4 Align the base of the cassette with the two mounting blocks on the seat backs one of these is shown in the inset below noting that the two flat plates o...

Page 68: ... lining above the cassette these are integral with the rear seat passenger grab handles ROOF RACKS To ensure absolute safety only fit accessories that have been designed and tested for your car Your MG Rover dealer will provide details of approved tow bars and roof racks The total load must NEVER exceed that given in TOWING WEIGHTS page 269 and must include the weight of the roof rack within the l...

Page 69: ...alised skills and knowledge It is therefore essential that only a tow bar approved for use with your car is fitted and that it is fitted by qualified personnel The following information locating the mounting points is for reference only and does not include details of the tow bar installation process The mounting points shown are for the installation of an approved tow bar no other means of attach...

Page 70: ...s left and right side mounting points The inset shows the additional mounting points on the underside of the car underside mounting points on the right side are similar If a towing hitch with a detachable tow bar is fitted always detach the tow bar when the car is not being used for towing HB0501 ...

Page 71: ... recommended by the trailer manufacturer Check the operation of trailer brakes and lights For maximum stability ensure that trailer loads are properly secured and unable to shift position during transit Also position loads so that most of the weight is placed close to the floor and where possible immediately above or close to the trailer axle s After loading the trailer check that the weight on th...

Page 72: ......

Page 73: ...ng Lights 82 Message Centre 88 Starting Driving 92 Catalytic Converter 93 Environmental Driving 95 Automatic Transmission 99 Manual Gearbox 100 Fuel System 104 Lights Indicators 110 Wipers Washers 112 Cruise Control 114 Brakes 118 Traction Control 119 Parking Aid ...

Page 74: ...n kilometres per hour 4 Fuel gauge The pointer falls to zero when the starter switch is turned off but quickly rises to show the level of fuel in the tank when the switch is turned to the second position An indicator light in the fuel gauge will illuminate when the fuel level is low approximately 9 litres remaining if the light illuminates refuel at the earliest opportunity Never allow the car to ...

Page 75: ...maining until the next service is due are displayed for approximately four seconds after which the display reverts to show the odometer trip recorder and external temperature readings NOTE After the completion of each service the dealer will reset the distance display to commence the countdown to the next service Three types of service information can be notified to the driver 1 Distance until nex...

Page 76: ...elections Trip distance 2 Range distance to tank empty Average consumption fuel Average speed Limit overspeed By pressing and holding the button for longer than 2 seconds the selected display can be reset not range When a trip computer feature is selected it will be displayed until another trip computer feature is selected or until the trip computer is switched off However note that the message ce...

Page 77: ...h has been turned on The average speed display can be reset at any time to begin calculating a new average speed value for a particular journey or driving condition Limit overspeed The overspeed warning function is an aid to keeping within speed limits set by the driver Press and hold the trip computer button to increase the set speed by increments of 5 km h Whenever the set speed is exceeded an a...

Page 78: ...mperature are the same for both the standard instrument panel and the panel with message centre included Direction indicators GREEN The left and right direction indicators 3 are represented by directional arrows located at the top of the instrument panel The warning lights flash in time with the left or right direction indicator lights whenever they are operating If the hazard warning lights are o...

Page 79: ...ghts are switched to main beam Check engine YELLOW petrol models only This warning light is used to indicate faults detected by the engine management system The indicator illuminates as a system check when the starter switch is turned to the second position and should extinguish when the engine is started If an engine operation or emissions problem occurs while the car is being driven the indicato...

Page 80: ...inate stop the car as soon as safety permits and seek qualified assistance urgently Battery charging RED The light illuminates as a bulb check when the starter switch is turned to the second position and extinguishes as soon as the engine is running If the light remains on or illuminates when driving a fault with the battery charging system is indicated Seek qualified assistance urgently UPPER CEN...

Page 81: ...tion Also illuminates as a warning while driving if an engine malfunction is detected If this occurs the car can still be driven but engine power will be reduced Drive with extra care e g when overtaking Seek qualified assistance as soon as possible Traction control YELLOW On cars equipped with the standard instrument panel no message centre the light flashes while the traction control system is o...

Page 82: ...nnet boot or tailgate open RED Small icon used to warn that the bonnet or boot is still open after the main warning display has timed out Close the bonnet boot securely before attempting to drive the car Door open RED A large vehicle icon showing the relevant door opened with the words DOOR OPEN is displayed If more than one door is open during the status check this will be shown on the display If...

Page 83: ...bulb Brake light fail YELLOW A large vehicle icon with an active brake light with the message BRAKE LIGHT FAIL is displayed The icon shows a brake light on the same side of the car as the bulb failure The message will be displayed for 4 seconds approx after pressing the brake pedal and the bulb failure being detected Replace the failed bulb NOTE Failure of the high mounted stop lamp bulb will not ...

Page 84: ...t reduces to a small icon while the lights remain on Low fuel level YELLOW This icon is displayed in addition to illumination of the low fuel warning light in the fuel gauge when fuel in the fuel tank is down to the reserve level The icon is displayed with the message LOW FUEL and illuminates for 4 seconds Refuel at the earliest opportunity High engine coolant temperature RED This message is displ...

Page 85: ...rted as a reminder to the driver to ensure that all occupied seat belts are securely fastened The icon is displayed with the message SEAT BELT PLEASE Brake pad low YELLOW This icon is displayed with the message BRAKE PADS LOW and alerts the driver that the brake pads are worn and need to be serviced The message and large icon are displayed for 4 seconds after which time a small icon is displayed f...

Page 86: ... and illuminates continuously while traction control is manually disabled The icon is displayed with the message TRACTION CONTROL If the warning stays on a fault with the system is indicated seek qualified assistance Trailer light fail YELLOW This warning message only functions when a trailer has been electrically connected to the car s exterior light circuit using the dedicated socket The warning...

Page 87: ...ayed when the battery voltage is less than 10V and extinguishes when the battery voltage rises above 11V The display is extinguished during engine cranking and for a further five seconds after cranking The icon is displayed with the message LOW BATTERY If the message remains illuminated recharge battery or seek qualified assistance Engine disabled YELLOW Displayed if the engine has been disabled i...

Page 88: ...dividual electrical equipment and accessories can now be operated Position 2 All instruments warning lights and electrical circuits are operational Position 3 Starter motor operates release the key immediately the engine starts the key will automatically return to the second position The operation of some electrical functions will be interrupted during engine cranking NOTE On automatic models gear...

Page 89: ...ed NOTE Continued use of the starter will not only discharge the battery but may damage the starter motor and the catalytic converter DO NOT press the accelerator pedal while starting and DO NOT operate the starter for more than 15 seconds at a time If the engine fails to start switch off and wait for at least 10 seconds before trying again What to do if the engine fails to start or starts but wil...

Page 90: ...r DO NOT press the accelerator pedal during starting and release the key as soon as the engine is running NOTE Continued use of the starter will not only discharge the battery but may damage the starter motor and the catalytic converter If the engine stalls you MUST turn the starter switch fully off before turning the starter switch back to the second position Then wait until the glow plug warning...

Page 91: ...the handbrake and select neutral P for automatic transmission before releasing the foot brake and switching off the engine Towing switching off After periods of strenuous towing particularly at high altitude or in hot weather it is good practice to allow the engine to idle for a few minutes before switching off This will enable the engine cooling system to continue operating for a while in order t...

Page 92: ...pected and do not attempt to clear a misfire by pressing the accelerator pedal Do not attempt to push or tow start the car Driving NOTE Any engine misfire loss of engine performance or engine run on could seriously damage the catalytic converter For this reason it is vital that unqualified persons do not tamper with the engine and that regular maintenance is carried out in accordance with the car ...

Page 93: ...style The way in which you drive your car has a significant bearing on environmental pollution as well as affecting the amount of fuel you use Avoid full throttle acceleration Steady rather than rapid acceleration uses considerably less fuel reduces exhaust pollutants and also minimises the wear to mechanical components Avoid driving at maximum speed Fuel consumption exhaust emissions and noise le...

Page 94: ... which in turn increases fuel consumption Over or under inflated tyres wear out more rapidly and also have a detrimental effect on the car s handling characteristics Do not carry unnecessary loads The additional weight of unnecessary loads wastes fuel especially in stop start conditions where the car is frequently required to set off from stationary Remove roof racks The additional air resistance ...

Page 95: ...dle of the selector lever arrowed in illustration while moving the lever Do not press the trigger when changing gear except when necessary The following gear changes will be inhibited unless the trigger is used P to R D to 4 4 to 3 3 to 2 N to R R to P Selector lever positions Always leave the car with the gear selector in P Park position when parked P Park In this position the transmission is loc...

Page 96: ...es applied until you are ready to move an automatic will tend to creep forward or backward without throttle application as soon as the brakes are released Never rev the engine while selecting a drive gear or while the car is stationary with a drive gear selected an automatic will move immediately the accelerator pedal is pressed Gear change speeds With D selected the road speeds at which gear chan...

Page 97: ... to select S appears in the trip recorder display With Sport mode selected the gearbox is more responsive to accelerator pedal movement downshifts occur earlier and upshifts are delayed to make optimum use of the engine s power while accelerating Select sport mode when increased engine acceleration is required or when negotiating long inclines but note that driving in sport mode will increase fuel...

Page 98: ...celerator pedal is fully released and when some braking effort has been applied but a certain amount of acceleration is still occurring The precise operating parameters of hill decent mode will differ according to engine type NOTE Hill descent mode is not designed to be driver activated or to replace the good practice of selecting an appropriate low gear for steep descents or making normal use of ...

Page 99: ...in the centre of the gate between 3rd and 4th gears Precautions while driving Do not rest your hand on the gear lever while driving pressure from your hand may cause premature wear to the gear selector mechanism Do not rest your foot on the clutch pedal when driving excessive wear to the clutch will result Do not hold the car stationary on a hill by slipping the clutch This will wear out the clutc...

Page 100: ...r for advice The RON value quoted above is a MINIMUM requirement for the United Kingdom and most European markets and can be safely exceeded For optimum engine performance 98 RON unleaded petrol should be used IN AN EMERGENCY and only if the correct fuel is unavailable lower octane rated fuel can be used for very limited periods of moderate low speed motoring provided engine knocking does not occu...

Page 101: ...ll not secure the fuel flap Fuel filler cap Unscrew the filler cap anti clockwise and allow any pressure inside the tank to escape before removing the cap Stow the filler cap where shown in the illustration Emergency fuel filler release Tourer models only If for any reason the fuel filler flap automatic unlocking mechanism fails the flap can be released manually by pulling a release cord in the lo...

Page 102: ...ill the tank if the vehicle is to be parked in direct sunlight or high ambient temperature expansion of the fuel could cause spillage Diesel engines The diesel fuel filling system on garage forecourts is designed to fill at a maximum of 45 litres per minute Use of commercial vehicle diesel pumps with a higher fill rate may result in premature pump cut off and fuel spillage Empty fuel tank Never al...

Page 103: ... disarmed unlocks the doors When the switch operates the interior lights illuminate until the system is reset by pressing the rubber top of the cut off switch arrowed in illustration In addition the hazard warning lights flash until switched off The inertia switch is located behind the glovebox and can be reached from underneath by removing the four fixings securing the access cover The switch mus...

Page 104: ... on cars equipped with a message centre bulb failures are identified on the instrument panel display Headlights With the starter switch turned to the second position turn the lighting switch to the second position To illuminate the driveway after stopping the engine the headlight courtesy delay feature can be operated as follows Having stopped the car turn the starter switch off BEFORE turning off...

Page 105: ...rd lights Press the switch 1 to switch on and off the warning light in the instrument panel will illuminate when the fog lights are on The lights will only operate when the starter switch is in the second position and when The headlights are switched on The sidelights and front fog lights if fitted are switched on Front fog lights Press the switch 2 to switch on and off the warning light in the in...

Page 106: ...ht in the instrument panel illuminates when the headlights are on main beam NOTE Main beam selection is cancelled automatically whenever the lighting or starter switches are turned off Headlight flash To briefly flash the main beams on and off pull the lever part way towards the steering wheel and then release Parking lights The near or off side tail and side lights can be switched on independentl...

Page 107: ...ion or is in a hazardous situation Remember to switch off before driving away INSTRUMENT DIMMER CONTROL Rotate the control up to increase and down to decrease instrument illumination The instrument dimmer also controls the illumination of switches audio system message centre trip computer and the satellite navigation system NOTE Instrument and switch illumination will automatically dim when the si...

Page 108: ...ing load conditions NOTE Any failure of the automatic levelling system will be apparent from the headlight beams maintaining their lowest position regardless of vehicle load in which case the vehicle should be taken to a dealer for rectification at the earliest opportunity Manual adjustment Using the following load conditions as a guide adjust the headlights by rotating the adjuster wheel see inse...

Page 109: ...n the lens will act as a guide Alternatively use a proprietary masking kit or accessory of the type available at many garages and service stations Cars with Halogen projector or Xenon headlights These cars have an adjuster built into the light unit which can be moved to adjust the beam spread pattern of the outboard dipped beam headlights The adjuster lever is located in the inboard light unit on ...

Page 110: ...n speed will reduce the delay Auto park Auto park can be selected or deselected by an MG Rover dealer If the starter switch is turned off while the wipers are operating the wipers will continue operating until the parked position is reached Rain sensor Some cars are equipped with an optical rain sensor fitted to the inside of the windscreen behind the rear view mirror The sensor is able to detect ...

Page 111: ... WASHERS When the headlights are illuminated the headlight washers operate automatically in conjunction with every fifth operation of the windscreen washers REAR SCREEN WIPER AND WASHER Tourer models only 1 Rotate the switch clockwise to the first position after three initial wipes the wiper continues operating intermittently 2 Rotate the switch further clockwise to the second position and hold ag...

Page 112: ...ontrol system has three switches a master switch on the centre console and two control switches marked SET and RES mounted on the steering wheel 1 Press the master switch the switch indicator light and the warning light in the instrument panel illuminate whenever cruise control is operating 2 Accelerate until the desired cruising speed is reached This must be above the system s minimum operational...

Page 113: ...d incrementally by tapping the SET switch Each operation of the switch will increase the speed by approximately 1 5 km h Disengaging cruise control Cruise control will automatically disengage if the brake or clutch pedals are depressed or if N neutral is selected on an automatic gearbox Cruise control can also be disengaged by operating the RES switch To re engage cruise control at the previously ...

Page 114: ...essure will be required to operate them Electronic brake force distribution Your car is equipped with Electronic Brake force Distribution EBD which in order to maintain braking efficiency automatically proportions the distribution of braking forces between front and rear axles under all load conditions For example under light loads EBD applies less effort to the rear brakes in order to maintain ve...

Page 115: ...affic conditions and safety permit and seek qualified assistance before continuing DO NOT drive with the warning light illuminated Brake pads Brake pads require a period of bedding in For the first 800 km you should avoid situations where heavy braking is required Remember that regular servicing is vital to ensure that all the brake components are examined for wear at the correct intervals and cha...

Page 116: ...imitations of stopping the car in too short a distance cornering at too high a speed or the danger of aquaplaning i e where a layer of water prevents adequate contact between the tyres and the road surface The fact that a car is fitted with ABS must never tempt the driver into taking risks that could affect his her safety or that of other road users In all cases it remains the driver s responsibil...

Page 117: ...l in front which assists the car to stop No matter how hard you brake you should be able to continue steering the vehicle as NORMAL However always remember that anti lock braking operates only AFTER the driver has already lost control ABS cannot reliably compensate for driver error or inexperience ABS Warning light The ABS incorporates a monitoring system which checks that all the electrical compo...

Page 118: ...d Warning light On cars equipped with the standard instrument panel no message centre the light flashes while the traction control system is operating cars equipped with a message centre feature a traction control message which appears for a minimum of 4 seconds The light also illuminates as a bulb check for approximately 3 seconds when the starter switch is turned on and illuminates continuously ...

Page 119: ...ing aid in operation With the starter switch turned to the second position the parking aid operates automatically whenever reverse gear is selected and is switched off as soon as reverse is deselected When reverse is selected a short bleep will sound to confirm that the system is working Note that a one second delay will occur before the bleep sounds NOTE If a longer higher pitched sound is emitte...

Page 120: ......

Page 121: ...ion 124 Radio Data System 125 Remote Audio Controls 126 CD32 Audio System 141 Harmony Audio System 150 Symphony Audio System 162 CD Changer Unit 164 Care of Cassette Player and Tapes 165 Satellite Navigation 178 Satellite Navigation System Settings 180 Security Code ...

Page 122: ...ur dealer before you took delivery of your car In this case you will have received an additional operating manual detailing the features and operation of your audio system which should be used in place of the instructions that follow You are requested to read the audio operating instructions carefully in order to gain maximum enjoyment from the system CD32 Audio System Harmony Audio System Symphon...

Page 123: ...ood clear signals will only be received in the immediate area of the transmitter When travelling it may be necessary to re tune the radio from time to time to offset the effects of moving from one transmitter area to another While RDS automatic retuning eases this problem some manual retuning may still be needed especially for local stations in areas of weak reception The broadcast range for good ...

Page 124: ...DS station is received these features will not be available Receiving RDS stations Harmony and Symphony audio units are automatically in the RDS mode whenever the FM waveband is selected On the CD32 audio RDS is selectable see RADIO CONTROLS page 130 With RDS active whenever an RDS radio station is received the station name illuminates in the display The audio constantly scans all alternative freq...

Page 125: ...oaded Search control NOTE On some cars those equipped with a high line navigation unit a single brief operation of the search control either up or down will activate a change of pre set Lift or press down to change to the next or previous radio station on the selected waveband During tape or CD play lift the control to move forward to the next track or press down to return to the start of the curr...

Page 126: ...panel is replaced NOTE If a CD is loaded it need not be ejected before removing the control panel Replacing the control panel Place the right side of the panel into position then push the left hand side into the front of the audio unit until it clicks into place AS0028 IMPORTANT DO NOT subject the control panel to severe shocks or expose it to direct sunlight or other sources of heat Avoid direct ...

Page 127: ... sound page 128 3 Audio selection control Use in conjunction with the and controls 5 to adjust bass treble balance and fader levels Note that different bass and treble levels can be set for each sound source e g radio or CD Bass To increase or reduce bass response 1 Press the AUDIO control BASS shows in the display 2 Press or to adjust bass response BASS 7 maximum bass BASS 0 normal bass BASS 7 mi...

Page 128: ... without further adjustment all audio settings are stored and the selection mode including X BASS cancels automatically Muting the sound Briefly press the on off button 1 MUTE appears in the display The volume will instantly reduce to a preset level The preset volume level can be adjusted as follows 1 Press the MENU button 6 2 Press the control until MUTE LVL is displayed 3 Press the controls to a...

Page 129: ...til PEAK LVL is displayed 3 Press or to select PEAK ON or PEAK OFF 4 Press the MENU button twice to store the setting Treble reduction feature HICUT FM only HICUT improves reception in poor operating conditions If interference occurs the treble is automatically reduced The feature can be enabled or disabled as follows 1 Press the MENU button 6 2 Press the control until HICUT is displayed 3 Press t...

Page 130: ...ING page 133 Radio frequencies can also be selected using the remote switches on the steering wheel see REMOTE AUDIO CONTROLS page 125 3 Pre set buttons Use to store up to 6 radio stations on each waveband or memory bank see Programming the pre sets page 135 Press briefly to select a stored frequency Press and hold to store a frequency 4 Traffic information RDS control Traffic information Press br...

Page 131: ...sed Fast search With a CD playing press and hold the appropriate or control to play forward or back through the current track at a greatly increased speed volume reduces 3 Pausing playback To pause playback press pre set button 3 PAUSE appears in the display Press again to cancel pause 4 Repeat play Press pre set button 4 RPT to repeat the current track RPT TRCK is displayed and the RPT indicator ...

Page 132: ...NS page 140 7 CD mode selection CD eject control Press briefly to change to or from CD or radio modes With the audio unit switched on press and hold for two seconds or more to eject a disc Changing the display The information appearing in the display can be set to show either the track number e g T18 PLAY or the track number and elapsed time display e g T12 2 39 as follows 1 Press the MENU button ...

Page 133: ... press the or tuning control 3 The radio searches the frequency range up or down depending upon which tuning control was pressed for a radio station of acceptable strength Once a suitable station is found the search stops To continue searching press one of the tuning controls again Tuning sensitivity The sensitivity with which automatic tuning takes place can be adjusted For example the tuner can ...

Page 134: ...or station name flashing To stop scanning Briefly press the MENU button again NOTE The scan time can be adjusted to suit your requirements see MENU CONTROL FUNCTIONS page 140 MONO STEREO Whenever the FM waveband is selected the radio automatically reproduces stereo sound provided a suitable signal is available However if a signal becomes too weak for good stereo reception only mono sound is produc...

Page 135: ...uttons 3 The radio will mute briefly while the frequency is being stored If BEEP ON has been selected see MENU CONTROL FUNCTIONS page 140 an audible beep will confirm that the frequency has been stored Release the pre set as soon as radio sound is restored and the new frequency details are displayed Operating the pre sets Once the pre set buttons have been programmed select the desired waveband th...

Page 136: ...stations the display shows for any unoccupied pre sets and the radio reverts to the last recalled pre set frequency on the FM waveband NOTE Travelstore overwrites any stations already stored on the FMT memory bank NOTE If Travelstore is programmed with traffic information active then programming will be limited to those stations capable of providing traffic information In some areas this could sev...

Page 137: ...g table 2 Press one of the controls The radio will search for and then tune to the next radio station on the waveband broadcasting the desired programme type During the search the display will alternately show SEARCH and the programme type If no station of the desired programme type can be found the display will briefly show NO PTY and then return to the previously tuned station However if the tun...

Page 138: ...ceived While listening to a CD the car leaves the reception area of the traffic information station currently tuned and the subsequent automatic search cannot find a new traffic information station The radio is retuned from a traffic information station to a station that does not broadcast traffic information In each case either switch off the traffic information feature or tune to a station that ...

Page 139: ...ress the MENU button 1 2 Press the or control until 12H MODE or 24H MODE appears in the display 3 Press the controls to switch between displays 4 Press the MENU button to store your selection Clock displays when the audio is switched off With the starter turned ON The audio unit can be programmed to display the time as follows 1 With the audio switched on press the MENU button 1 2 Press the or con...

Page 140: ...ure is not recommended for use with Rover 75 and MGZT models Set to AUX OFF SENS Adjusts sensitivity of radio tuning press or to increase or reduce tuning sensitivity SCANTIME Select to adjust scanning time for radio and CD play press or to adjust between 5 and 30 seconds PTY ON PTY OFF Select to enable or prohibit programme type PTY selection press the controls to toggle between PTY ON and PTY OF...

Page 141: ... audio settings display shows FLAT Bass Press once then operate the or buttons to reduce or increase bass response The display shows BASS 6 minimum bass BASS 0 normal bass BASS 6 maximum bass Treble Press twice then operate the or buttons to reduce or increase treble response The display shows TREB 6 minimum treble TREB 0 normal treble TREB 6 maximum treble Fader Press three times then operate the...

Page 142: ...ning buttons see Manual tuning page 145 Press again to return to automatic tuning The frequency can also be selected using the remote switches on the steering wheel see REMOTE AUDIO CONTROLS page 125 NOTE Manual tuning defaults to automatic tuning if unused for more than 8 seconds 7 Pre set buttons Use to store up to 6 radio stations on each waveband Press briefly to select a stored frequency Pres...

Page 143: ...wo buttons To stop tape winding half press the remaining unlocked button Tape play will automatically resume To reverse the direction of tape play half press both buttons simultaneously To eject the tape FULLY press both buttons simultaneously The unit returns to radio mode selecting the waveband and frequency last in use 11 Tape mode selector Press to select tape play display shows SIDE 1 or SIDE...

Page 144: ...k commences playing If a disc has been inserted the wrong way up or an empty compartment is selected the display shows NO DISC and the next available disc is selected instead 14 Track search buttons Skip Briefly press the appropriate button to skip to the beginning of the next track or return to the start of the current track the display shows disc and track numbers Press the search buttons as oft...

Page 145: ...tuning Select the required waveband FM or AM then briefly press one of the tuning buttons 5 The radio automatically searches the frequency range either up or down depending upon which of the tuning buttons is pressed looking for a radio station of acceptable strength Once a suitable station is found the search stops unless you choose to continue by pressing the tuning button again NOTE If you have...

Page 146: ... stored on the pre set The display briefly shows the frequency and station name where appropriate of the radio station previously stored on the pre set and then the new frequency and station name Release the pre set as soon as radio sound is restored and the new frequency details are displayed NOTE Once the pre sets have been programmed they will be retained by the unit until either they are re pr...

Page 147: ...uttons in order of signal strength Radio sound is restored once the operation is complete If auto store is unable to find six strong stations the remaining pre sets are not used display shows NO STATION NOTE Auto store overwrites any stations already stored on the FM2 or MW2 pre set buttons NOTE If FM auto store is programmed with the traffic facility armed then programming will be limited to thos...

Page 148: ...at cannot provide traffic information the message STATION SEEK flashes in the display while the radio searches the waveband and then tunes to a radio station that does provide traffic information broadcasts In remote areas it may be impossible to find a traffic information station The radio will search the waveband twice if a station cannot be found the radio displays NO TRAFFIC and returns to the...

Page 149: ...roadcasts during tape or CD play When the radio is in either traffic or news information mode CD or tape play will be interrupted by information broadcasts automatically as and when they occur Volume for Traffic and News announcements The volume of traffic and news information broadcasts can be set independently from the volume required for other audio output e g radio cassette tape and CD as foll...

Page 150: ...ncreases or decreases according to road speed thereby combating any additional road or wind noise that may be experienced NOTE If you have a car telephone with a mute signal output connected to the stereo system radio tape or CD play automatically mutes when the telephone is in use IMPORTANT The audio unit has a 20 minute time out function This enables the unit to be switched on and then used for ...

Page 151: ...twice then rotate to left or right to reduce or increase treble response Display shows TREB 9 minimum treble TREB 0 normal treble TREB 9 maximum treble Balance Press three times then rotate to adjust balance between left and right speakers Display shows BAL R9 max sound from RIGHT BAL 0 equal balance BAL L9 max sound from LEFT Fader Press four times then rotate to adjust balance between rear and f...

Page 152: ...E page 159 5 Tuning buttons Briefly press either button to search up or down the frequency range see RADIO TUNING page 157 6 Manual tuning selector Press to select manual tuning mode MAN is displayed use in conjunction with the tuning buttons see Manual tuning page 157 Press again to return to automatic tuning The frequency can also be selected using the remote switches on the steering wheel see R...

Page 153: ...ormation Press briefly to switch on or switch off Traffic information mode FM waveband only see Selecting traffic information page 160 Press and hold for 2 seconds to switch on or switch off News mode FM waveband only see Selecting news information page 160 Press briefly to return to normal radio tape or CD reception during a traffic or news announcement NOTE Both traffic and news information can ...

Page 154: ...nd selection buttons FM or AM tape play will stop and the radio automatically selects the frequency last in use on whichever waveband was selected To return to tape play press the tape mode button NOTE The remote switches on the steering wheel can also be used to change to or from radio or tape play see Remote audio controls 12 Cassette eject button Press to eject the tape display shows TAPE EJECT...

Page 155: ...tion and also may be confused by excessive background noise very soft musical passages and intermittent pauses in music or speech NOTE The skip function can also be controlled using the remote switches on the steering wheel see Remote audio controls 15 Dolby1 B type noise reduction Press pre set 1 when playing tapes recorded using Dolby B NR the display shows DD 16 Tape scan button Press the SCAN ...

Page 156: ... of the current track Press either button repeatedly to select other tracks on the disc If a button is pressed and held the CD player continues to skip tracks forwards or backwards until the button is released Search Press the manual mode button MAN then press and hold the appropriate search button to move forward or backward through the disc in play mode but at increased speed volume reduces and ...

Page 157: ...buttons is pressed looking for a radio station of acceptable strength Once a suitable station is found the search stops unless you choose to continue by pressing the tuning button again NOTE If you have a car telephone with a mute signal output connected to the radio the radio automatically mutes when the telephone is in use Waveband scan Select the desired waveband FM or AM and press the SCAN but...

Page 158: ...tuning Press and hold one of the pre set buttons until a bleep sounds The frequency is now stored the display shows the waveband and frequency or name of the station to which you have tuned NOTE Once the pre sets have been programmed they will be retained by the unit until either they are re programmed or power to the audio unit is disturbed car battery disconnection for example Operating the pre ...

Page 159: ...or MW2 pre set buttons in order of signal strength Radio play restores once the operation is complete If auto store is unable to find six strong stations the remaining pre sets are not used NOTE Auto store overwrites any stations already stored on the FM2 or MW2 pre set buttons NOTE If FM auto store is programmed with the traffic facility armed then programming will be limited to those stations ca...

Page 160: ... too weak to provide traffic information the message STATION SEEK is displayed while the radio searches the waveband and tunes to a signal that is strong enough to broadcast traffic information In remote areas it may be impossible to find a traffic information station The radio will search the waveband twice if a station cannot be found the radio switches off traffic and returns to the station to ...

Page 161: ...D play When the radio is in either traffic or news information mode CD or tape play will be interrupted by information broadcasts automatically as and when they occur Volume for Traffic and News announcements The volume of traffic and news information broadcasts can be set independently from the volume required for other audio output e g radio cassette tape and CD as follows Wait for a traffic or ...

Page 162: ...azine as shown arrow on magazine casing uppermost remove each CD tray in turn Place a disc label side uppermost onto each tray holding ONLY the outside edge and centre hole of the disc Load only one disc in each tray Correctly align the tray with the parallel slots on each side of the magazine and slide the tray into the magazine To unload the magazine hold the magazine with the arrow uppermost pu...

Page 163: ...e cleaner Dust or dirt should be removed from the playing surface by wiping with a clean dry lint free cloth always wipe in a straight line from the centre to the edge of the disc IMPORTANT Use standard 12cm CDs only DO NOT use irregularly shaped or damaged CDs these may damage the compact disc changer 8cm CD singles must NOT be used even if a CD adaptor is fitted If temperatures in excess of 70 C...

Page 164: ...irections The tape will require more frequent cleaning in winter as contamination is greater in conditions of low temperature and increased humidity However the use of good quality tapes keeps the build up to a minimum Cassette tapes Always store cassettes in their boxes when not in use Never leave cassettes in the vehicle during extremes of temperature In particular do not leave tapes in direct s...

Page 165: ...ver s footwell Visual instruction is displayed in the message centre in the upper centre of the instrument pack General information on destination and present location hotels restaurants parking etc An address book to store frequently needed destinations There are 24 GPS satellites in orbit at a height of 21 000 km around the earth The GPS navigation system will pick up and utilise any available s...

Page 166: ...updated approximately every 6 months and you will automatically receive the first update free along with information on how to order further updates Under normal operating conditions the satellite navigation system requires approximately 8 seconds to confirm the car s position using the satellites If the car battery has been disconnected or if the car has been transported to a new location on anot...

Page 167: ... loaded it is unnecessary to remove it unless the following applies You are travelling in an area not covered by the current CD another country for example Obtain the correct CD for the new country and install it at the appropriate time If you are updating the computer with the latest version of the navigation CD the CDs are updated approximately every 6 months To eject the navigation CD press the...

Page 168: ...ress the control to select the highlighted option 3 Audio mute control Press to mute the audio navigation instructions the switch indicator light illuminates Press again to reactivate audio instructions 4 Re route control Press to select the re route function then rotate the menu select control to set the detour distance to avoid roadworks or traffic queues for example Press the menu select contro...

Page 169: ...lect control clockwise to scroll up to the next screen This symbol indicates that there is an additional screen below the display currently being viewed Rotate the menu select control anti clockwise to scroll down to the next screen This symbol indicates that there are additional screens both above and below the display currently being viewed Use the menu select control to scroll up or down to the...

Page 170: ...lection the right pointing arrow creates a space and a dot replaces an invalid letter or number As an aid to the selection process when entering a name the navigation computer automatically displays only the letters that according to the computer could follow the preceding letter to give a valid name Once the navigation computer has been provided with enough information the system may suggest a co...

Page 171: ...tered Change the destination town if necessary as described in ENTERING A DESTINATION page 170 then highlight and select DEST INFO Scroll through the list until the desired category is highlighted and press to select A list of all available entries for the chosen category is displayed Scroll through the list to highlight and select your chosen destination see INFORMATION ON LOCATIONS page 177 ADDR...

Page 172: ...is selection plots your route using the fastest roads and avoiding town centres etc VIA MOTORWAYS motorways and main arterial roads are given priority AVOID MOTORWAYS motorways are avoided wherever possible to select AVOID MOTORWAYS it is necessary to scroll down to the next screen of the menu Highlight and select your preferred choice of route NOTE The navigation system plots routes according to ...

Page 173: ...kwise to view the route information screen which provides the following information Distance to destination Remaining time to destination estimated Route preference via motorways etc Rotate the menu select control clockwise for two notches to view the vehicle position screen which states the country town and road of the car s current position 350 m HOWARD ST H2874F REM TIME 0 16 DISTANCE 6 5 ROUTE...

Page 174: ...for the address If this is the address that you want to enter highlight and select NAME use the alphanumerical menu to programme the chosen name and then highlight and select ENTER Then from the enter address menu highlight and select ENTER the address is now listed in the address book If you want to enter a different address highlight and select each part of the address in turn and enter using th...

Page 175: ...estination guide screen is then displayed DEST GUIDE see Route preference page 172 Deleting an address To delete an entry from the address book highlight and select DELETE ADDRESS in the address book menu Use the menu select control to scroll through the addresses until the correct one is displayed then highlight and select DELETE The display returns to the address book menu If you decide not to d...

Page 176: ...on computer stores the last ten destinations programmed into the system To recall an address highlight and select LAST DESTINATION from the address book menu The computer asks if you want to retrieve or delete an address from the list if you do highlight and select the appropriate prompt A list is then displayed with either RECALL or DELETE at the bottom of the display Scroll through the list unti...

Page 177: ... GUIDE if you wish to alter your route to the destination see Route preference page 172 Information on your destination Having entered a destination town or city highlight and select the escape icon to return to the main menu Highlight and select DESTINATION INFO from the main menu to display the destination and DEST INFO Highlight and select DEST INFO to display an alphabetical list of facilities...

Page 178: ...X the computer needs you to confirm the name if there are two towns of the same name within the area covered by the navigation CD for example If this is the case select INDEX and then highlight and select the correct name from the list If the display highlights ENTER simply press the menu select control to enter the name Repeat the above procedure to enter the name of the road where you are curren...

Page 179: ... computer voice is heard at the changed volume as each adjustment is made Press the menu select control to enter the new setting Changing the language setting This setting changes the language of all menu and audible instructions Highlight and select LANGUAGE to display all available languages Highlight and select the chosen language to enter the new setting or highlight and select the escape icon...

Page 180: ...hip It is VERY IMPORTANT that you keep a safe record of the security code and heed the following advice NEVER keep a record of the security code in the car If you lose your code number contact an MG Rover dealer who will be able to obtain this information for you ENTERING THE SECURITY CODE If power to the audio unit has been interrupted car battery disconnected for example the code MUST be entered...

Page 181: ...e third digit again using the tuning buttons until the correct digit is displayed Press pre set 1 to store the third digit Select the final digit the display now shows the full four digit code Press pre set 1 to store the final digit If the correct code has been selected the radio will commence operating immediately NOTE If an incorrect code has been entered the first time delay period commences D...

Page 182: ......

Page 183: ...ance 188 Bonnet Opening 189 Engine Compartment 192 Engine 194 Cooling System 196 Brakes 198 Power Steering 200 Battery 203 Washers 204 Wipers 206 Tyres 209 Cleaning Vehicle Care 212 Identification Numbers 214 Parts Accessories ...

Page 184: ...stance and time related intervals of 24 150 km or 12 months by measuring fuel consumption the car s monitoring system is also able to assess the owner s driving style and the type of motoring to which the car is subjected These additional factors will affect the point at which the service should be carried out For example a car subjected predominantly to short journey motoring will consume more fu...

Page 185: ...nti freeze and water solution needs to be replaced every four years regardless of the distance the car has travelled Your dealer will replace the coolant at the scheduled oil service or inspection nearest to the conclusion of each four year period to avoid the need for an additional dealer visit NOTE Coolant replacement will be an additional cost EMISSION CONTROL Your car is fitted with emission a...

Page 186: ...tion of seat belts and brakes Look for fluid deposits underneath the car that might indicate a leak Weekly checks Engine oil level NOTE The engine oil level should be checked more frequently if the car is driven for prolonged periods at high speeds Coolant level Brake fluid level Power steering fluid level Screen washer fluid level Tyre pressures and condition Operate air conditioning SPECIAL OPER...

Page 187: ...pport Ensure sparks and naked lights are kept away from the engine compartment Wear protective clothing including where practicable gloves made from an impervious material Remove metal wrist bands and jewellery before working in the engine compartment DO NOT allow tools or metal parts of the car to make contact with the battery leads or terminals Poisonous fluids It is illegal to pollute drains wa...

Page 188: ...et locking platform towards the rear of the car B Lift the lever which protrudes through the front grille 3 Raise the bonnet Closing the bonnet Lower the bonnet When the bonnet is approximately 150 mm from its closed position push down evenly using the palms of both hands on the leading edge of the bonnet on either side of the radiator grille After closing the bonnet check that the lock is fully e...

Page 189: ...e engine compartment always observe the safety precautions listed under SAFETY IN THE GARAGE page 187 H2831a 1 4 5 6 2 3 1 Power steering reservoir black cap 2 Brake reservoir black cap 3 Cooling system reservoir 4 Engine oil filler yellow cap 5 Engine oil dipstick yellow 6 Washer reservoir blue cap ...

Page 190: ...ent always observe the safety precautions listed under SAFETY IN THE GARAGE page 187 H2837a 1 2 3 4 5 6 1 Engine oil dipstick yellow 2 Brake reservoir black cap 3 Engine oil filler yellow cap 4 Cooling system reservoir 5 Power steering reservoir black cap 6 Washer reservoir blue cap ...

Page 191: ...nt always observe the safety precautions listed under SAFETY IN THE GARAGE page 187 H2838a 1 2 3 4 5 6 1 Engine oil filler yellow cap 2 Brake reservoir black cap 3 Engine oil dipstick yellow 4 Cooling system reservoir 5 Power steering reservoir black cap 6 Washer reservoir blue cap ...

Page 192: ...ling engine oil onto a hot engine a fire may result Diesel engines Petrol engines 1 Withdraw the dipstick and wipe the blade clean 2 Slowly insert the dipstick and withdraw again to check the level which should NEVER be allowed to fall below the lower mark on the dipstick 3 To top up remove the oil filler cap and add oil to maintain a level between the upper and lower marks on the dipstick As a ge...

Page 193: ...C if climatic temperature falls outside these limits seek advice from your dealer NOTE Mixing oil additives with the engine oil is not recommended and could damage the engine Model engine Approved viscosity Minimum oil specification 75 1 8 petrol models 10W 40 ACEA A1 ACEA A2 75 1 8 petrol turbo models 10W 40 ACEA A3 75 2 0 petrol models 10W 40 ACEA A2 75 2 5 petrol models 10W 40 ACEA A2 75 2 0 di...

Page 194: ...ler cap before the system has fully cooled loosen the cap slowly allowing the air pressure to escape gradually before removing the cap completely If the level is below the MAX mark top up with a 50 mix of water and ethylene glycol based anti freeze containing no methanol with Organic Acid Technology OAT corrosion inhibitors meeting BTC coding type 4E NOTE When topping up avoid spillage on body pan...

Page 195: ...hould be checked by your dealer once a year and the coolant completely renewed every four years regardless of distance travelled NOTE DO NOT add rust inhibitors or other additives to the coolant these may not be compatible with the coolant or engine components Coolant specification Use ONLY a 50 mix of water and Havoline Extended Life Coolant XLC or any ethylene glycol based anti freeze containing...

Page 196: ...nd will need to be topped up from time to time If there is any appreciable drop in level over a short period consult your dealer DO NOT drive if the fluid level is below the minimum mark on the reservoir Contact your dealer immediately if brake pedal travel is unusually long or if there is any appreciable drop in fluid level Remove the detachable mesh panel on the driver s side of the car to acces...

Page 197: ...spillage with an absorbent cloth immediately and wash the area with a mixture of car shampoo and water Use only new fluid from a sealed container old fluid from uncapped containers or fluid previously bled from the system will have absorbed moisture and or air and adversely affect braking performance Brake fluid specification Any proprietary brand of brake fluid or brake and clutch fluid meeting D...

Page 198: ...should be done before the engine is started when the system is cold and with the front wheels pointing straight ahead Wipe the filler cap clean to prevent dirt from entering the reservoir Remove the filler cap and using a clean lint free cloth wipe the dipstick clean Refit the cap fully and remove again to check the fluid level If necessary top up with a fluid meeting Dexron III specification unti...

Page 199: ...n Emergency operation Any frequent or regular need to top up the fluid should be investigated by a qualified dealer Under no circumstances should the car be driven with the fluid level below the lower mark on the dipstick or if a rapid or significant loss of fluid is detected However if it can be established that fluid loss is slow then the reservoir may be topped up to the upper level mark to ena...

Page 200: ...lean the top of the battery to ensure a clear view of the condition indicator Use a torch if natural light is poor If the indicator shows clear or yellow tap the indicator with a screwdriver to disperse any air bubbles if the indicator colour is unchanged the battery must be replaced Battery safety Batteries contain sulphuric acid which is both corrosive and poisonous If spillage occurs On clothin...

Page 201: ...replacement battery of the same type and specification as the original other batteries may differ in size and shape or have different terminal positions which could cause damage to the battery leaking acid or fire When replacing ensure the battery is fitted the right way round with the terminal posts facing towards the left side of the car Make sure both the battery clamping plate and retaining st...

Page 202: ...o cause serious injury While charging always heed the following precautions Before charging disconnect and remove the battery from the car charging the battery with the cables connected may damage the car s electrical system Make sure the battery charger leads are securely clamped to the battery terminals BEFORE switching on the battery charger Do not move the leads once the charger is switched on...

Page 203: ... water solution in the washer reservoir anti freeze will damage painted surfaces while vinegar can damage the windscreen washer pump Note that body panels may suffer discoloration as a result of screenwash spillage Take care to avoid spillage particularly if an undiluted or high concentration of screenwash is being used If spillage occurs wash the affected area immediately with water WASHER JETS O...

Page 204: ...urely locked before returning the wiper assembly to the windscreen NOTE The wiper blade on the driver s side is equipped with an anti lift airfoil IMPORTANT Grease silicon and petrol based products impair the blade s wiping capability Wash the wiper blades in warm soapy water and periodically check their condition If signs of hardness or cracking in the rubber are found or if the wipers leave stre...

Page 205: ...r blade Tourer models only Lift the wiper arm away from the rear screen The blade is a press fit onto the arm Grasping the arm firmly with one hand ease the blade away from the arm Fitting a replacement blade is a reversal of this process HB0018 ...

Page 206: ...the car s road handling characteristics and fuel consumption as well as increasing the risk of tyre failure Over inflated tyres give a harsher ride wear unevenly and are more prone to damage Check the pressures including the spare wheel at least every week when the tyres are cold be aware that it only takes approximately 1 6 km of driving to warm up the tyres sufficiently to affect the tyre pressu...

Page 207: ...peed immediately and drive with caution until the spare wheel can be fitted or repairs undertaken A puncture of this kind will eventually cause the tyre to lose pressure which is why regular and frequent checking of tyre pressures is important Punctured or damaged tyres must be permanently repaired or replaced as soon as possible Replacement tyres DO NOT replace wheels with any type other than gen...

Page 208: ...commended by an MG Rover dealer and approved by MG Rover for use on your car In use always observe the following precautions Fit snow chains to the front wheels only Always adhere to the snow chain fitting and retensioning instructions and the speed limitations for varying road conditions DO NOT exceed speeds of 50 km h Avoid tyre damage and excessive chain wear by removing snow chains when drivin...

Page 209: ...f water to ensure that grit is flushed from the surface and not ground into the paintwork After washing rinse the bodywork with clean water and dry off with a chamois leather Removing tar spots Use white spirit to remove tar spots and stubborn grease stains from the paintwork then wash the area immediately with soapy water to remove all traces of the spirit Cleaning the underside From time to time...

Page 210: ... remove surface contamination without removing or damaging the paint Filling compounds that will fill scratches and reduce their visibility Wax to provide a protective coating between the paint and the elements If possible avoid applying polish or wax products to window glass and rubber seals Wiper blades Wash in warm soapy water DO NOT use spirit or petrol based cleaners Windows and mirrors Regul...

Page 211: ...ntrol panel Periodically clean the electrical contacts on the back of the control panel and the matching contacts on the audio unit with a clean dry lint free cloth Use methylated spirits if available Airbag module covers To prevent damage to the airbag SRS the following areas should be cleaned sparingly with a damp cloth and upholstery cleaner ONLY Steering wheel centre pad Area of dashboard cont...

Page 212: ...he left of the spare wheel housing and beneath the floor trim panel all models Identification number locations 1 Vehicle identification number VIN 2 Engine number 1 8 petrol models Stamped horizontally into the centre front face of the cylinder block 2 0 2 5 petrol models Stamped vertically into the right side of the cylinder block when viewed from the front Diesel models Stamped vertically into t...

Page 213: ...errent to car thieves and to help the police the VIN is stamped into a plate visible through the bottom left hand corner of the windscreen The VIN plate on the door pillar contains the following information A Vehicle Identification Number VIN B Type approval C Gross vehicle weight where required D Gross train weight where required E Maximum front axle load where required F Maximum rear axle load w...

Page 214: ...d development programme and will help to guarantee continued reliability safety and performance An airbag SRS is fitted to your car ALWAYS consult an MG Rover dealer before fitting any accessory Genuine MG Rover parts are the ONLY parts built to original equipment specifications AND approved by MG Rover designers this means that every single part and accessory has been thoroughly tested by the sam...

Page 215: ...5 Emergency Information 216 Emergency Starting 219 Vehicle Recovery 222 Puncture Repair Wheel Changing 233 Fuse Replacement 237 Bulb Replacement ...

Page 216: ... of starting a car with a flat battery Push or tow starting is NOT recommended DO NOT disconnect the discharged battery Make sure that BOTH batteries are of the same voltage 12 volts and that the booster cables are approved for use with 12 volt car batteries If the battery from a donor vehicle is to be used the vehicles should be parked with their battery locations adjacent to one another Ensure t...

Page 217: ... both batteries NOTE On cars fitted with a quick release battery clamp it may not be possible to connect the booster cable securely to the terminal In this case attach the booster cable to the head of the bolt provided arrowed in illustration 2 Connect the BLACK booster cable from the negative terminal of the donor battery A to a good earth point an engine mounting or other unpainted surface for e...

Page 218: ...o minutes before switching off the engine of the donor vehicle and disconnecting the booster cables DO NOT switch on any electrical circuits on the previously disabled vehicle until AFTER the booster cables have been removed 6 Disconnecting the booster cables must be an exact reversal of the procedure used to connect them i e disconnect the BLACK cable from the earth point on the disabled vehicle ...

Page 219: ...firmly on the bottom left corner then screw the towing eye into its mounting behind the bumper see illustration Ensure the towing eye is fully tightened NOTE The towing eye cover may be secured to the bumper by a plastic cord If this is not the case store the cover in the glove box where it will not be lost Both towing points are intended for use by qualified recovery specialists to assist in the ...

Page 220: ... electrical fault it is considered unsafe to turn the starter switch to the first position disconnect the battery before turning the switch 2 Place the gear lever in neutral N for cars with automatic transmission 3 Release the handbrake While being towed observe the following Without the engine running greater effort will be required to operate the brake pedal and turn the steering wheel Longer st...

Page 221: ...e lashing points to tow a trailer or caravan If your car is to be transported on the back of a trailer or transporter use the recommended lashing points at the front and rear of the car only DO NOT secure lashing hooks T bars or trailer fixings to any other part of the car NOTE The rear towing hook doubles as a lashing point H2788c ...

Page 222: ...re sealant canister 1 2 5 3 4 HB0639 1 Tyre sealant canister 2 Safety goggles 3 Wheel bolt cover removal tool 4 Locking wheel bolt removal tool 5 Screwdriver NOTE ITR is standard equipment for most cars and is designed to provide a temporary repair solution for most tyre tread punctures For information on how to use ITR please refer to INSTANT TYRE REPAIR ITR page 225 ...

Page 223: ... saver or full size spare wheel and associated tools is available as an option at the time of manufacture and replaces the Instant Tyre Repair ITR system If a spare wheel is supplied the specification will vary according to model type If a space saver spare wheel is supplied remove the spacer fitted beneath the spare wheel clamp before stowing a full size road wheel For information on how to chang...

Page 224: ...ment of a space saver or full size spare wheel and associated tools is available as an option at the time of manufacture and replaces the Instant Tyre Repair ITR system If a spare wheel is supplied the specification will vary according to model type If a space saver spare wheel is supplied remove the spacer fitted beneath the spare wheel clamp before stowing a full size road wheel For information ...

Page 225: ...lation of canister vapours may cause drowsiness and dizziness Keep the tyre sealant canister out of the reach of children Store the canister in its correct location beneath the loadspace floor temperatures in other locations may exceed safe storage conditions DO NOT puncture or incinerate the canister or expose to heat flame or direct sunlight this may cause the canister to rupture Under no circum...

Page 226: ...from the breakdown services 9 Drive immediately to a service station and inflate the tyre to the correct pressure see TYRE PRESSURES page 191 If the required pressure cannot be reached then the tyre is too severely damaged and you should seek assistance from the breakdown services DO NOT DRIVE THE CAR 10 If the correct tyre pressure was achieved continue driving Drive carefully and do not exceed 8...

Page 227: ...chocks at the front and rear of the wheel diagonally opposite the one to be removed NEVER jack the car with passengers inside or with a caravan or trailer connected NOTE The stowage compartment set into the inside of the tailgate on Tourer models is designed to accommodate the accessory warning triangle available from MG Rover dealers Accessing the spare wheel and tools Saloon models Raise the car...

Page 228: ... the spare wheel and tools Tourer models Raise the recessed handle set into the rear of the loadspace floor and raise the floor Remove the underfloor storage tray and unscrew the spare wheel clamp Lift the wheel from the loadspace HB0203 HB0028b ...

Page 229: ...ad wheels before raising the car from the ground Before positioning the chock it must be assembled as follows 1 Pull the two halves of the chock slightly apart 2 Rotate one half of the chock 180 3 Push the two halves back together Always chock the wheel diagonally opposite the one to be removed chocking the front of a front wheel or the back of a rear wheel as shown HB0044a 1 2 3 4 ...

Page 230: ...ion to the tool to prise the trim from the wheel NOTE When refitting the wheel trim ensure that the valve stem is located between the valve stem guides plastic lugs arrowed in illustration Removing the wheel bolt cover alloy wheels Insert the hooked end of the removal tool into the small rectangular aperture in the wheel bolt cover arrowed in illustration Pull the cover from the wheel to gain acce...

Page 231: ...ch of the wheel bolts half a turn anti clockwise refer to the pages that follow for information about locking wheel bolts 2 Attach the jack handle and turn the jack screw clockwise to raise the car until the tyre is clear of the ground 3 Remove the wheel bolts and place them in the tool tray to prevent them from being lost 4 Remove the road wheel NOTE Avoid placing wheels and wheel trims face down...

Page 232: ...lt 1 Use the wheel wrench to twist the wheel bolt cap 1 slightly anti clockwise and remove 2 Insert the adaptor 2 firmly into the locking wheel bolt 3 3 Using the wheel wrench unscrew the wheel bolt and adaptor Keep the adaptor in the space provided in the tool tray The following precautions must be observed when the space saver spare wheel is in use The space saver spare wheel is for temporary us...

Page 233: ...lue of each fuse is shown on the charts attached to the underside of the fuse box covers They are also shown on the following pages Spare fuses are provided in the interior fuse box however these are not numbered in the following illustration Fuse colours In both fuse boxes the fuses are colour coded to identify their amperage ratings as follows Spare fuses A separate module containing spare fuses...

Page 234: ...he starter switch and all electrical equipment 2 Press the removal tweezers located in the fuse box onto the head of the fuse and pull to remove A blown fuse can be recognised by a break in the wire 3 Replace a blown fuse with another of the same or lower rating Note that there are a number of spare fuses located along the lower side of the fuse box If a replacement fuse fails almost immediately r...

Page 235: ...ed washers mirror 19 10A Traction control 20 Not used 21 10A ABS 22 Towing accessory 23 5A Reverse lights 24 5A Engine cooling turbo 25 5A Light switch module 26 10A Cruise control 27 5A ATC seat belt sensor 28 30A Fuel pump 29 5A Instruments 30 20A Rear windows 31 15A Horn 32 5A Remote door locking interior lights 33 15A Audio system 34 5A Air recirculation windows 35 30A Windows 36 5A Alarm soun...

Page 236: ...15 10 30 10 20 15 15 30 H3258a 20 Fuse number Rating AMPS Circuit protected 1 15A Exhaust gas recirculation injection pump pressure regulator diesel models Oxygen sensors petrol models Engine management all models 2 20A Ignition coils petrol models Engine management all models 3 15A Camshaft and oxygen sensors petrol models 4 15A Automatic transmission air conditioning cooling fan cruise control d...

Page 237: ...ignificantly improved visibility especially during adverse weather and driving conditions The operational life of a Xenon light is significantly longer than that of a conventional or Halogen bulb However the very high voltage required to ignite the gas and metal vapour used to power Xenon lights could cause very serious injury Replacement or maintenance of Xenon light units should only be carried ...

Page 238: ...set and detach from the bulb When refitting note that the connector fits one way round only Replacement of the bulb is a reversal of the above process Sidelight Replacement bulb 5 watt On cars equipped with Xenon headlights the sidelight bulbs are positioned inside the inboard headlight units The sidelight bulb holder is immediately below the main beam headlight bulb see inset in bottom corner of ...

Page 239: ...the clips on either side of the electrical connector see inset and detach from the bulb When refitting note that the connector fits one way round only Replacement of the bulb is a reversal of the above process Sidelight Replacement bulb 5 watt blue vision The sidelight bulb holder is immediately below the inboard headlight bulb see small inset on previous illustration With the circular rubber cove...

Page 240: ...ulb is refitted correctly Note the square tab on the bulb mounting plate and its relationship with the tab projecting from the mounting plate on the bulb holder arrowed in lower inset The bulb MUST be fitted the correct way round with both mounting plates in full contact Similarly the bulb holder assembly must be fitted into the light unit the correct way round in order for the bayonet pins to eng...

Page 241: ...m the back of the headlight bulb 3 Unhook the wire securing clip 4 Remove the bulb When replacing the bulb the following tips will make the job easier Always remove the electrical connector BEFORE unhooking the wire securing clip Examine the illustration carefully to see how the wire securing clip 3 works Before replacing the electrical connector refer to the illustration to check which way round ...

Page 242: ...h the panel upwards as far as it will go The smaller protrusion at the bottom of the panel can then be clipped into the corresponding cut out at the bottom of the wheel arch liner aperture Finally engage the turnbuckle screw and turn a quarter turn to left or right to fully secure the access panel Inboard headlights main beam Replacement bulb H1 55 watt 1 Remove the rubber cover from the rear of t...

Page 243: ...d enable the light unit to be pulled from the front of the bumper Alternatively use a flat bladed screwdriver to carefully lever the inboard side of the light unit from the bumper aperture Twist the bulb holder a quarter turn anti clockwise to release it from the light unit Push and twist the bulb one eighth of a turn to release When replacing the light unit insert the outboard side first nearest ...

Page 244: ...Philips type screws which must be removed before the panel can be released see illustration for location of the five screws Detach the electrical connector from the rear of the bulb holder by squeezing the clips on both sides of the connector and pulling the connector away from the light unit Twist the bulb holder a quarter turn anti clockwise to release it from the light unit Push and twist the b...

Page 245: ...e bulb holder NOTE It may be necessary to insert the blade of a small screwdriver under the metal flange at the base of the bulb and use as a lever to separate the bulb from the holder When replacing the bulb note that the circular flange has a flat on one side The flat must align with the lug on the matching face of the bulb holder Similarly note the three tabs on the perimeter of the bulb holder...

Page 246: ...only the metal part of the bulb pull to remove it from the bulb holder NOTE It may be necessary to insert the blade of a small screwdriver under the metal flange at the base of the bulb and use as a lever to separate the bulb from the holder When replacing the bulb note that the circular flange has a flat on one side The flat must align with the lug on the matching face of the bulb holder Similarl...

Page 247: ...connector from the rear of the light unit by depressing the release catch on the underside see inset in following illustration at the same time pulling the connector free Replacement bulbs 1 Brake light 21 watts 2 Tail light 5 watts 3 Fog guard light 21 watts 4 Reversing light 21 watts 5 Direction indicator light 21 watts amber Press the lever arrowed in main illustration towards the side of the c...

Page 248: ... the light unit firmly onto the car taking care to ensure that the two plastic lugs at the base of the light unit fit smoothly into the receiver guides arrowed in second illustration on the car Replacement bulbs 1 Brake light 21 watts 2 Tail light 5 watts 3 Direction indicator light 21 watts amber 4 Fog guard light 21 watts 5 Reversing light 21 watts Twist the bulb holders one eighth of a turn ant...

Page 249: ...should point towards the rear NUMBER PLATE LIGHTS Tourer Replacement bulb 5 watt To access a bulb use a small flat bladed screwdriver to ease the lens from the underside of the applique see upper inset the lever action of the screwdriver will compress the spring retaining clip and enable the lens to be pulled free Prise the connectors apart to remove the bulb When replacing the lens fully insert t...

Page 250: ...socket When refitting the light unit first locate the two tabs arrowed in illustration ensuring that they are pointing towards the rear of the car then push the remainder of the light unit into the aperture GLOVEBOX LIGHT Replacement bulb 5 watt Insert a small flat bladed screwdriver preferably with a short handle due to limited access into the indent on the left hand side of the light unit and ca...

Page 251: ...lex the lens to locate and position the remaining four prongs into the light unit Push the lens upwards into the light unit until it clicks into position REAR COURTESY LIGHTS Replacement bulb 3 watt Insert a small flat bladed screwdriver into the indent at the rear of the lens see inset and gently prise the lens from the light unit Pull the bulbs from their mountings to remove When replacing locat...

Page 252: ...its location Push and twist the bulb to remove LOADSPACE LIGHT Tourer Replacement bulb 5 watt Insert a small flat bladed screwdriver into the indent on the rear edge of the lens see inset and carefully prise the lens from the light unit Gently spread the flexible contacts to release the bulb When replacing locate one side of the lens then push firmly on the other side until the lens clicks into po...

Page 253: ...t bulb 5 watt Insert a small flat bladed screwdriver into the indent on one of the short sides of the lens see inset in illustration and carefully prise the lens and bulb carrier from its location Ease open one of the bulb connectors and pull the bulb to remove HB0027 ...

Page 254: ......

Page 255: ...6 Technical Data 256 Technical Data 271 Fuel Consumption 274 Declaration of Conformity ...

Page 256: ...Non turbo engines 10 5 1 Ignition system MEMS3 breakerless electronic Spark plugs GSP 66527 Spark plug gap 1 0 mm 0 05 Unleaded fuels of 95 98 RON can be used Fuel UNLEADED 95 RON to EN 228 specification is recommended Capacity 1997 cm3 Firing order 1 6 5 4 3 2 Idle speed 750 50 rev min Bore 80 mm Stroke 66 2 mm Number of cylinders 6 V arrangement Compression ratio 10 5 1 Ignition system Siemens e...

Page 257: ...troke 82 8 mm Number of cylinders 6 V arrangement Compression ratio 10 25 1 Ignition system Siemens engine management system Spark plugs GSP 66527 Spark plug gap 1 0 mm 0 05 Unleaded fuels of 95 98 RON can be used Fuel Diesel to EN 590 specification Capacity 1951 cm3 Firing order 1 3 4 2 Idle speed 780 50 rev min Bore 84 0 mm Stroke 88 0 mm Number of cylinders 4 in line Compression ratio 18 0 1 ...

Page 258: ... not applicable Automatic gearbox refill 4 0 litre Cooling system fill from dry 1 8 petrol engines 6 2 litre 2 0 2 5 petrol engines 7 5 litre 2 0 diesel engines 8 2 litre Washer reservoir 6 0 litres Battery type 1 8 litre petrol engines with manual transmission H5 sealed for life All other engines H6 sealed for life Battery rating 1 8 litre petrol engines with manual transmission 63 amp hr All oth...

Page 259: ...e saver spare wheel is for temporary use only with maximum road speed limited to 80 km h Only one space saver spare wheel should be used at any one time Wheel size Tyre 6 0J x 15 steel 6 5J x 15 steel alloy 195 65 R15 91V or 195 65 R15 91H 6 5J x 15 alloy steel spare 195 65 R15 91V or 195 65 R15 91H 6 5J x 15 alloy steel spare 205 65 R15 94V 6 5J x 16 alloy 215 55 R16 93W or 215 55 R16 93V 7 0J x ...

Page 260: ...Front 2 1 2 1 2 1 2 2 2 2 2 2 Rear 1 9 1 9 1 9 2 2 2 1 2 2 Tourer derivatives Manual transmission Front 2 2 2 2 2 2 2 2 2 2 2 3 2 2 Rear 2 2 2 2 2 2 2 2 2 2 2 3 2 2 Automatic transmission Front 2 2 2 3 2 3 2 2 2 3 2 2 Rear 2 2 2 3 2 3 2 2 2 3 2 2 All derivatives Space saver spare All 4 2 4 2 4 2 4 2 4 2 4 2 4 2 4 2 The space saver spare wheel is for temporary use only with maximum road speed limit...

Page 261: ...2 3 Rear 2 1 2 5 2 5 2 2 2 3 2 2 Tourer derivatives Manual transmission Front 2 3 2 6 2 6 2 2 2 2 2 5 2 2 Rear 2 2 2 5 2 5 2 2 2 2 2 3 2 2 Automatic transmission Front 2 3 2 6 2 6 2 3 2 5 2 3 Rear 2 2 2 5 2 5 2 2 2 3 2 2 Tyre pressures bar Model 1 8 2 0 2 5 160 180 190 2 0 Diesel CDTi Tourer derivatives with self levelling suspension only Manual transmission Front 2 2 2 2 2 2 2 3 Rear 2 3 2 3 2 3 ...

Page 262: ...ont 2 1 2 1 2 1 2 2 2 2 2 2 2 2 Rear 2 3 2 3 2 3 2 2 2 2 2 3 2 2 Automatic transmission Front 2 1 2 1 2 1 2 2 2 4 2 2 Rear 2 3 2 3 2 3 2 2 2 3 2 2 Tourer derivatives Manual transmission Front 2 2 2 2 2 2 2 2 2 2 2 3 2 2 Rear 2 3 2 3 2 3 2 2 2 2 2 3 2 2 Automatic transmission Front 2 2 2 3 2 3 2 2 2 3 2 2 Rear 2 3 2 3 2 3 2 2 2 3 2 2 ...

Page 263: ...c mirrors B 1970 mm Overall height sunroof closed C 75 models 1424 mm ZT models 1417 mm Wheelbase D 2746 mm Front overhang E 914 mm Rear overhang F 1087 mm Ground clearance between axles G 155 mm Maximum overhang of coupling point 1157 mm Turning circle 11 36 m Approach angle 18 6 Departure angle 19 5 ...

Page 264: ...s B 1970 mm Overall height with roof bars C 75 models 1477 mm ZT T models 1470 mm Wheelbase D 2746 mm Front overhang E 914 mm Rear overhang F 1131 mm Ground clearance between axles G 155 mm Maximum overhang of coupling point 1208 mm Turning circle kerb to kerb 11 36 m Approach angle 18 6 Departure angle 19 5 ...

Page 265: ...n kg 1400 1515 1415 1530 1470 1590 1470 1590 1510 1635 Automatic transmission kg 1430 1550 1450 1570 1505 1625 1505 1625 1530 1655 Maximum laden vehicle weight Manual transmission kg 1940 1940 2000 2000 2030 Automatic transmission kg 1940 2000 2000 2000 2030 Maximum front axle load Manual transmission kg 1010 1010 1070 1070 1100 Automatic transmission kg 1070 1070 1100 1100 1100 Maximum rear axle ...

Page 266: ...0 Automatic transmission kg 1520 1660 1570 1655 Maximum laden vehicle weight Manual transmission kg 1940 2030 2030 2030 Automatic transmission kg 2030 2030 Maximum front axle load Manual transmission kg 1010 1100 1100 1100 Automatic transmission kg 1100 1100 Maximum rear axle load all models kg 1000 1000 1000 1000 1000 Unladen vehicle weight is calculated with no occupants and fuel tank 90 full ...

Page 267: ... 1620 1575 1680 1575 1680 1595 1705 Maximum laden vehicle weight Standard suspension Manual transmission kg 1980 1980 2050 2050 2090 Automatic transmission kg 2010 2010 2090 2090 2120 Maximum laden vehicle weight Self levelling suspension Manual transmission kg 2050 2050 2130 2130 2150 Automatic transmission kg 2080 2080 2150 2150 2180 Maximum front axle load Manual transmission kg 990 990 1060 10...

Page 268: ...omatic transmission kg 1585 1715 1620 1705 Maximum laden vehicle weight Manual transmission kg 2010 2090 2090 2090 Automatic transmission kg 2090 2120 Maximum front axle load Manual transmission kg 1030 1100 1100 1100 Automatic transmission kg 1100 1100 Maximum rear axle load Standard suspension kg 1060 1060 1060 1060 1060 Unladen vehicle weight is calculated with no occupants and fuel tank 90 ful...

Page 269: ...6 2 0 CDTi Maximum trailer weight unbraked all models kg 750 750 750 750 750 Maximum trailer weight braked Manual transmission kg 1200 1450 1450 1600 1600 Automatic transmission kg 1400 1450 1600 1600 1600 Maximum nose weight Tow hitch downward load all models kg 100 100 100 100 100 Maximum roof rack load Saloon models kg 80 80 80 80 80 Tourer models kg 100 100 100 100 100 Gross train weight maxim...

Page 270: ... 190 2 5 V6 130 2 0 CDTi Maximum trailer weight unbraked all models kg 750 750 750 750 750 Maximum trailer weight braked Manual transmission kg 1450 1600 1600 1600 Automatic transmission kg 1600 1600 Maximum nose weight Tow hitch downward load all models kg 100 100 100 100 100 Maximum roof rack load Saloon models kg 80 80 80 80 80 Tourer models kg 100 100 100 100 100 Gross train weight maximum lad...

Page 271: ...peed attained during the test is 50 km h with an average speed of 19 km h Extra urban cycle The extra urban test cycle is carried out immediately after the urban test Approximately half of the test comprises steady speed driving while the remainder consists of a series of accelerations decelerations and engine idling The maximum test speed is 120 km h and the average speed 63 km h The test is carr...

Page 272: ...6 8 9 214 2 0 V6 manual 13 9 7 0 9 6 228 2 0 V6 automatic 15 0 7 5 10 3 245 2 5 V6 manual 14 0 7 0 9 6 229 2 5 V6 automatic 15 5 7 5 10 5 249 160 1 8 Turbo manual 11 4 6 2 8 1 194 160 2 5 V6 manual 13 6 7 0 9 4 225 180 automatic 16 0 7 9 10 9 259 190 manual 14 4 7 4 9 9 239 2 0 CDT diesel manual 7 7 4 7 5 8 163 2 0 CDT diesel automatic 10 0 5 2 6 9 190 2 0 CDTi 130 diesel manual 8 1 4 4 5 8 163 2 ...

Page 273: ...0 V6 manual 13 9 7 0 9 6 228 2 0 V6 automatic 15 6 7 7 10 6 254 2 5 V6 manual 14 0 7 0 9 6 229 2 5 V6 automatic 15 8 7 6 10 6 254 160 1 8 Turbo manual 11 4 6 2 8 1 194 160 2 5 V6 manual 13 6 7 0 9 4 225 180 automatic 16 2 8 1 11 1 264 190 manual 14 4 7 4 9 9 239 2 0 CDT diesel manual 7 7 4 7 5 8 163 2 0 CDT diesel automatic 10 0 5 2 6 9 190 2 0 CDTi 130 diesel manual 8 1 4 4 5 8 163 2 0 CDTi 130 d...

Page 274: ...274 Declaration of Conformity Declaration of Conformity HB0199 ...

Page 275: ...Declaration of Conformity 275 6 HB0200 ...

Page 276: ......

Page 277: ...ture control 42 Audio equipment 122 125 Automatic car washes 209 Automatic gearbox 95 Automatic temperature control ATC 42 Autostore Harmony 147 Autostore Symphony 159 B Battery 258 Battery handset 16 Battery vehicle 200 Battery charging 202 Battery check 200 Battery disconnection 201 Battery replacement handset 16 Battery safety 200 Blower ATC 44 Blower heater 39 Body number 212 Bonnet opening 18...

Page 278: ...t bulbs 251 Courtesy lights 53 Cover loadspace 66 Cruise control 112 Cubby box 56 Cup holders 57 D Data 256 Defrosting 41 43 Demisting 41 43 Dimensions 263 264 Dimmer switch 107 Dipped beam headlights 106 Dipstick 192 Direction indicator bulb front 243 244 Direction indicator bulb rear Saloon 247 Direction indicator bulb rear Tourer 248 Direction indicator lights 106 Distance recorder 74 Door lock...

Page 279: ...56 Glovebox light bulb 250 H Halogen lights 237 Handbrake 116 Handset 7 8 Handset battery 16 Handset battery replacement 16 Handset resynchronisation 16 Hazard warning lights 107 Head restraints 17 Headlight beam height adjuster 108 Headlight beam spread adjustment 109 Headlight bulb blue vision dipped beam 240 Headlight bulb dipped beam 238 241 Headlight bulb main beam 238 239 242 Headlight bulbs...

Page 280: ...Lazy seats 20 Lighting switch 104 Load carrying 60 62 Loadspace restraint strap 64 Loadspace safety net 67 Loadspace side storage compartments 64 Loadspace tailgate storage 65 Loadspace underfloor storage 65 Loadspace carrying hooks 64 Loadspace cover 66 Loadspace lashing rings 63 Loadspace light bulb Saloon 252 Loadspace light bulb Tourer 252 253 Locking 8 Locking speed related 11 Locking wheel b...

Page 281: ...214 Phones 59 Poisonous fluids 187 Polishing the paintwork 210 Pollen filter 42 Power steering fluid 198 Power operated seats 19 Pre tensioners 23 Puncture repair system 225 Punctured tyres 207 R Radio controls CD32 126 Radio controls Harmony 141 Radio controls Symphony 150 Radio data system RDS 124 Radio reception 123 Radio tuning CD32 133 Radio tuning Harmony 145 Radio tuning Symphony 157 Rain s...

Page 282: ...eat belts 22 Seat heaters 45 Seating position 17 Seats manual 18 Seats memory 20 Seats power operated 19 Security card 3 Security code 180 Selector lever 95 Service information 184 Service information airbag SRS 32 Service interval display 75 Service portfolio book 184 Servicing 184 Side airbags 30 Side head impact protection 31 Side repeater light bulb 250 Sidelight bulb 238 239 242 Sidelights 10...

Page 283: ...ic news information Symphony 160 Traffic information CD32 138 Trailer lashing 221 Transmission 95 99 Travelstore CD32 136 Trip computer 75 Trip recorder 74 76 Tyre pressures 206 260 Tyre wear indicators 207 Tyres 206 259 Tyres puncture repair system 225 Tyres punctures 207 U Ultrasonics 11 Underfloor loadspace light bulb Tourer 253 Underfloor storage loadspace 65 Unlocking 10 V Vanity mirror 35 Ve...

Page 284: ...Wheel trim steel wheels 230 Wheels 259 Windows 36 Windows cleaning 210 Windscreen washer top up 203 Windscreen washers 111 Windscreen wipers 110 Wiper blade cleaning 210 Wiper blade replacement 204 205 Wiper controls 110 X Xenon light units 238 Xenon lights 237 ...

Page 285: ...END OF OWNER S HANDBOOK ...

Reviews: