


d0
45
2
9
.f
m
MAINTENANCE MANUAL
BRP-Powertrain
Effectivity: 914 Series
Edition 2 / Rev. 0
12-10-00
page 9
January 01/2010
4) Lubrication system
4.1)
Oil level check/Replenish
General note
Preparatory tasks
Before checking the oil level, make sure that there is not excess residue
oil in the crankcase.
Instruction
.
For checking and before replenish proceed as follows.
WARNUNG
WARNING
Risk of Burns!
Hot engine parts!
Always allow engine to cool down to ambient tempera-
ture before start of any work.
WARNUNG
WARNING
Risk of electric shock!
Ignition “OFF“ and system grounded! Disconnect neg-
ative terminal of aircraft battery.
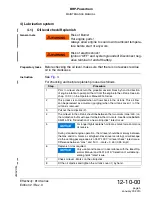
Step
Procedure
1
Prior to oil level check, turn the propeller several times by hand in direction
of engine rotation to pump all the oil from the engine to the oil tank. See also
chap. 10.3.3) in the Operators Manual 914 Series.
2
This process is completed when air flows back to the oil tank. This air flow
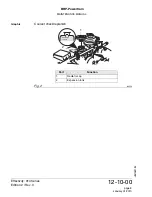
can be perceived as a murmur (gurgling) when the oil tank cover (1) of the
oil tank is removed.
3
Pull out the oil dipstick (2).
4
The oil level in the oil tank should be between the two marks (max./min.) on
the oil dipstick, but must never fall below the min. mark. See Service Bulletin
SB-914-026, "Introduction of a new oil dipstick", latest issue.
5
For longer flights replenish oil to max. mark to warrant more
oil reserve.
During standard engine operation, the oil level should be mid-way between
the max. and min. marks, as at higher oil level (over servicing), oil will escape
via the venting passage see also SI-27-1997, “oil level check“, latest issue.
Difference between “max.“ and “min“. - mark = 0.45 l (0.95 liq.pt)
6
Replenish oil as required.
Only use brand name oil in accordance with the latest Op-
erators Manual and SI-914-019, “Selection of suitable op-
erating fluids“ latest issue.
7
Check oil level - Marks on the oil dipstick.
8
Fit the oil dipstick and tighten the oil tank cover (1) by hand.
NOTICE
NOTICE
Summary of Contents for 914 series
Page 183: ......


