AC-015
Single-Door Access Control Programmer
Hardware Installation and Programming Manual
Page 1: ...AC 015 Single Door Access Control Programmer Hardware Installation and Programming Manual...
Page 2: ...l property rights covering the subject matter in this manual TEXTS IMAGES AND ILLUSTRATIONS INCLUDING THEIR ARRANGEMENT IN THIS DOCUMENT ARE SUBJECT TO THE PROTECTION OF COPYRIGHT LAWS AND OTHER LEGAL...
Page 3: ...2 Environmental Characteristics 12 2 3 Mechanical Characteristics 12 3 Installation 13 4 Mounting the Controller 14 5 Wiring 16 6 Modes of Operation 18 6 1 Normal Mode 18 6 2 Bypass Mode 19 6 3 Secure...
Page 4: ...ng the Programming Code 27 10 6 Changing the Normal Secure Code 28 10 7 Changing the Normal Bypass Code 28 10 8 Changing the Fail Safe and Fail Secure Operations Alarm Sound Time and Door Release Time...
Page 5: ...e Installation and Programming Manual v List of Figures Figure 1 AC 015 Controller Layout 15 Figure 2 Power Wiring 16 Figure 3 Typical Lock and Option Wiring 16 Figure 4 Reader Wiring 17 Figure 5 Conn...
Page 6: ...List of Tables vi AC 015 Hardware Installation and Programming Manual List of Tables Table 1 Programming Menu Quick Reference Guide 24...
Page 7: ...uture options Therefore not all functions described in this manual may be available in the specific system and or product configuration you purchased Incorrect operation or installation or failure of...
Page 8: ...to a database Codes entries and their consequences are visible in Online mode of the software The Employees menu is used to describe enter and associate employee code numbers with employee name and de...
Page 9: ...Bit interface type and may be a proximity card reader for proximity codes keyboard for PIN type codes or combined PIN proximity reader A PIN reader connected to indoor reader input can perform all the...
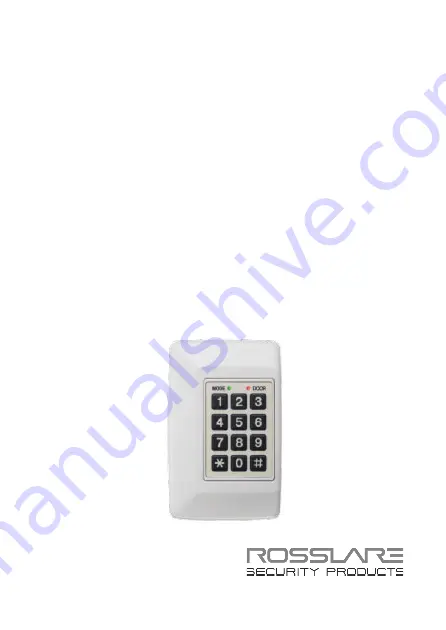
Page 10: ...ogramming keypad Battery charger Built in case tamper Bell Chime and Strobe annunciator Programmable Lock Strike release time Built in Lock Strike suppressor diode Comes with mounting template for eas...
Page 11: ...ery Charger 12 VDC Lead Acid Battery Up to 7 AH recommended 2 1 2 Outputs Lock Strike Relay Output 5 A Relay Lock Strike Power Supply 12 VDC constant voltage 1 2 A current limit N O or N C option Tamp...
Page 12: ...g Manual 2 2 Environmental Characteristics Operating Temperature Range 31 C to 63 C 25 F to 145 F Operating Humidity Range 0 to 95 non condensing 2 3 Mechanical Characteristics Dimensions L x W x D 13...
Page 13: ...location You will learn how to wire the controller to its power source which includes attaching the controller to a rechargeable Lead Acid battery Wiring diagrams are also provided for attaching the c...
Page 14: ...mount the controller If you are attaching the AC 015 to a US Gang Box skip to Step 2 1 Find the mounting template label that is provided in your AC 015 packaging and place it at the location that you...
Page 15: ...nstallation Kit or use the screws provided with your US Gang Box when mounting to a US Gang Box 5 Wire the controller according to the diagrams on the next few pages 6 Return and secure the front case...
Page 16: ...ing figures show various wiring scenarios Figure 2 Power Wiring 0 8 5 2 1 4 6 3 9 7 MODE DOOR POWER SUPPLY FROM TRANSFORMER 16V AC 1 5A 25VA 12V DC LEAD ACID BATTERY UP TO 7 AH RECOMMENDED Figure 3 Ty...
Page 17: ...g Manual 17 Figure 4 Reader Wiring 0 8 5 2 1 4 6 3 9 7 MODE DOOR IN READER OUT READER 12V DO D1 12V DO D1 V DO D1 12V DC Max 300mA 12V DC Max 300mA Figure 5 Connecting a Controller to a PC 0 8 5 2 1 4...
Page 18: ...mal level of security Only those codes that the controller recognizes activate the Lock Strike The controller s keypad is used for programming changing modes of operation and activating the Lock Strik...
Page 19: ...as Normally Open it can be activated in the following ways Pressing the REX button Entering a valid code from an outside reader only using a proximity code or a PIN code 6 3 Secure Mode The Mode LED...
Page 20: ...the 4 digit Normal Secure code Mode LED flashes red 2 Press to confirm the mode change The Mode LED turns red 7 2 Changing from Secure Mode to Normal Mode The default factory setting for the Normal S...
Page 21: ...Bypass code Mode LED flashes orange 2 Press to confirm the mode change Mode LED turns orange 7 4 Changing from Bypass Mode to Normal Mode See Section 10 7 to create modify the Normal Bypass code To ch...
Page 22: ...isconnected from the AC 015 reader input terminal A tamper data signal is received from one of the reader sensors 8 2 Clearing Tamper Events To clear a tamper event enter a valid employee or Lock Stri...
Page 23: ...Relay is programmed for Fail Safe Operation or Fail Secure Operation Fail Secure Operation From the moment the REX button is pressed the door is unlocked until the Lock Strike Release Time has passed...
Page 24: ...Table 1 Programming Menu Quick Reference Guide Menu Number Menu Description Initial Setting Section 1 Changing Lock Strike Code 1 2580 10 3 2 Changing Lock Strike Code 2 0000 10 4 3 Changing Program...
Page 25: ...from the onboard keyboard or from the external reader Programming proximity employee codes requires using a proximity reader and proximity cards 10 1 Entering Programming Mode To begin programming the...
Page 26: ...rt press on may also return the controller to Normal mode accompanied by a long beep 10 3 Changing Lock Strike Code 1 The Lock Strike code 1 is mainly used as a method to quickly test the Lock Strike...
Page 27: ...re is no default code for Lock Strike Code 2 To change Lock Strike Code 2 1 Enter Programming mode 2 Press 2 The Door LED remains green The Mode LED turns orange 3 Enter the new 4 digit code you wish...
Page 28: ...e is 3838 To change the Normal Secure code 1 Enter Programming mode 2 Press 4 to enter Menu 4 The Mode indicator flashes red 3 Enter the new Normal Secure code You hear three beeps The system returns...
Page 29: ...de and disable the door chime enter any code ending with 0 Enable Bypass code and enable the door chime enter a code not ending with 0 You hear three beeps The system returns to Normal mode 10 8 Chang...
Page 30: ...ctivated The default door open time is 4 seconds For example 0 5 1 2 means fail secure with a 5 minute tamper alarm sound time and a 12 second door release You hear three beeps The system returns to N...
Page 31: ...d designated for this slot number to the reader If the PIN entered or user card presented is valid the Mode LED stops flashing and the controller is ready for you to enter the next 3 digit slot number...
Page 32: ...r Programming mode 2 Press 8 The Mode indicator turns red The Door indicator turns orange 3 Enter the 3 digit user slot code to be deleted The Mode indicator flashes red indicating the controller is w...
Page 33: ...ng code to confirm This last step confirms that you intentionally want to delete all your initial settings and employees from the system If the Programming code is valid three beeps are heard and the...
Page 34: ...It is recommended to program Facility code once before programming any employee codes Changing the Facility code after codes are programmed causes previous codes with different Facility codes to disap...
Page 35: ...ure Code In the event that your Normal or Secure code is lost and you are locked in Secure mode perform the following procedure to re enter Normal mode so that you may program a new Normal Secure code...
Page 36: ...ual A Limited Warranty The full ROSSLARE Limited Warranty Statement is available in the Quick Links section on the ROSSLARE website at www rosslaresecurity com Rosslare considers any use of this produ...
Page 37: ...sslaresecurity com Europe Rosslare Israel Ltd Rosh HaAyin Israel Tel 972 3 938 6838 Fax 972 3 938 6830 support eu rosslaresecurity com Latin America Rosslare Latin America Buenos Aires Argentina Tel 5...