


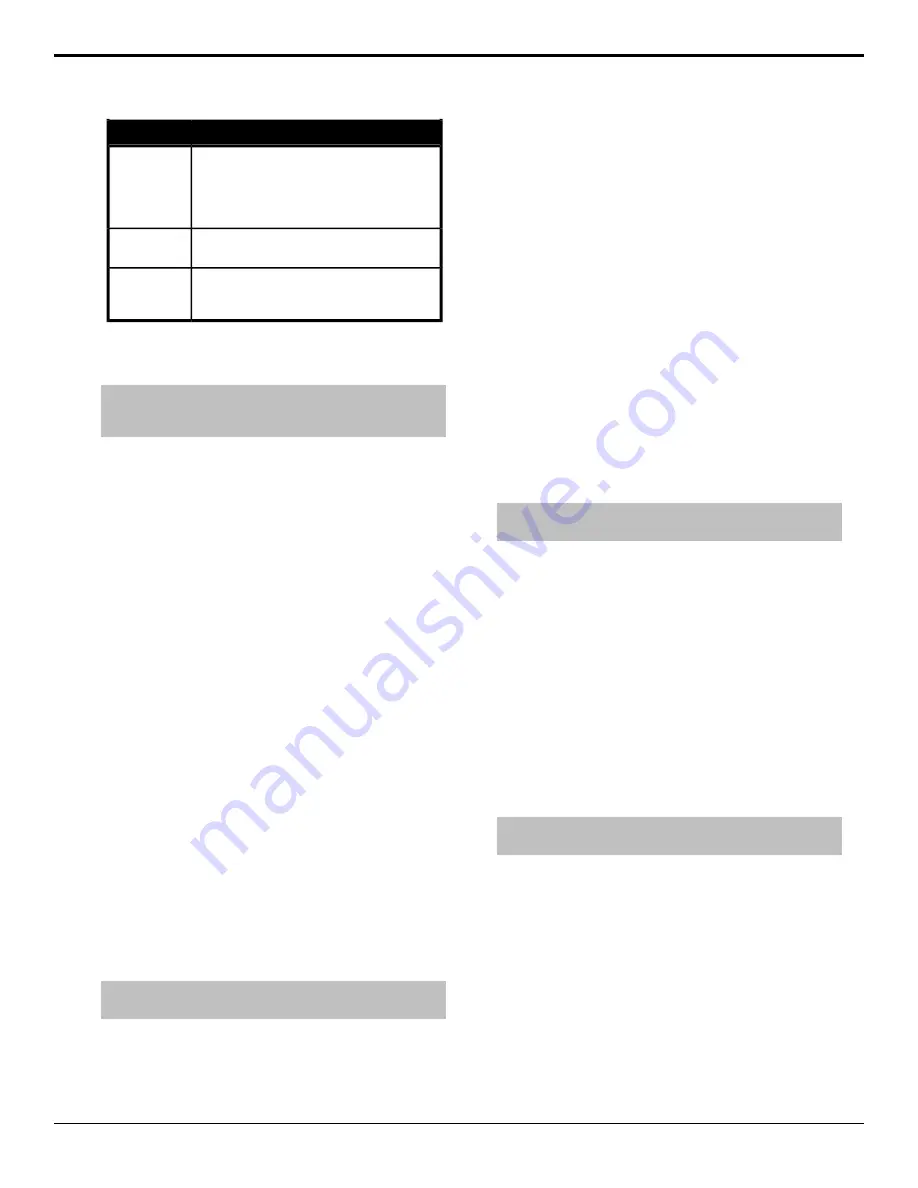
Value
Option
Select whether the switcher request timecode
information from the VTR (
Yes
), or not (
No
). If
the timecode information is returned from the
VTR, it is displayed on the
Remote Control
menu and preview overlay.
Request TC
Select the video server that you are assigning
to the selected communications port.
TargetMachine
Select the length of time the switcher waits
before assuming that a Play command failed,
or was not received by the VTR.
Wait nFields
FlexDevice Drivers
Note:
FlexDevice drivers have been integrated into the switcher
software. Individual FlexDevice drivers are no longer supported
in v9.2a or higher.
Individual FlexDevice drivers are uploaded to the
switcher using the web interface. Once a driver has been
uploaded to the switcher, an instance of that driver is
initialized and assigned to the port that the device is
connected to. A single instance of a FlexDevice driver
controls a single device. If you are connecting multiple
devices of the same type to the switcher, you must
activate multiple instances of that driver.
To Install a FlexDevice Driver
1.
Open a web browser and navigate to the IP address
of the switcher frame. You are prompted to enter a
user name and password. The defaults are
user
and
password
.
2.
Click
Other
>
FlexDevices
.
The
FlexDevices
page lists all the FlexDevice
drivers that are installed on the switcher, their
version, and status. If a driver is not compatible with
the current version of switcher software, the status
will be Obsolete (OBSOL) or Unsupported
(UNSUPP)
3.
Click
Browse
and locate the FlexDevice driver you
want to install in the switcher.
4.
Click
Open
/
Choose
to select the file.
5.
Click
Install Driver
.
To Initialize a FlexDevice Driver
Note:
You must initialize a separate instance of a driver for each
device you want to control from the switcher.
1.
Press
HOME
>
Setup
>
Installation
>
Com
Setup
>
More
>
Flex Devices
.
2.
Press
Start Driver
3.
Use the
Interface
knob to select the control panel
or frame that you want to initialize the FlexDevice
driver on.
For example, if you want to control the device from
a serial port on the back of the master control panel,
you must select
Panel0
.
4.
Use the
Type
knob to select the type, or class, of
driver you want to initialize.
5.
Use the
Driver
knob to select the driver that you
want to initialize an instance of.
If the driver you want to initialize does not appear
on the menu, ensure that the driver has been
installed.
6.
Press
Accept
.
A popup notifying you that an instance of the driver has
been started appears on the menu.
Stopping a FlexDevice Driver
Note:
Before you can stop a FlexDevice driver, the instance of
the driver that you want to stop cannot be assigned to a port.
1.
Press
HOME
>
Setup
>
Installation
>
Com
Setup
>
More
>
Flex Devices
.
2.
Press
Stop Driver
.
3.
Use the
Interface
knob to select the control panel
or frame that the FlexDevice driver you want to stop
is running on.
4.
Use the
Type
knob to select the type of driver you
want to stop.
5.
Use the
Driver
knob to select the driver that you
want to stop an instance of.
6.
Press
Accept
.
To Delete a FlexDevice Drive
Note:
Before you can delete a FlexDevice driver, all instances
of that driver must be stopped.
1.
Press
HOME
>
Setup
>
Installation
>
Com
Setup
>
More
>
Flex Devices
.
2.
Press
Delete Driver
.
3.
Use the
Type
knob to select the type of driver you
want to delete.
4.
Use the
Driver
knob to select the driver that you
want to delete.
5.
Press
Accept
.
Clip Setup
To recall clips on the VTR or Video Server from the
switcher, you must store the clips you want to use to Clip
68
• Device Control — Acuity Setup Manual (v9.2)
Summary of Contents for Acuity 4410AR-020
Page 1: ...Acuity Setup Manual v9 2...


