


motion playback and jagged edges in paused
images.
•
Field
— select this option if the clip was shot
in an interlaced video format and you don't want
to apply vertical interpolation (VI) to it.
Note:
The server does not support video format conversion.
If a clip is in a different video format than the server is
operating in you will not be able to load it into a channel
transport.
5.
In the
Play Repeat
area, select the repeat mode
you want to use for the clip.
•
OFF
— play repeat is turned off by default when
the clip is loaded.
•
Loop
— play repeat loop is turned on by default
when the clip is loaded. When the clip starts
playing, it immediately seeks to the
Play
Repeat IN
point and plays until it reaches the
Play Repeat OUT
point. When it reaches the
Play Repeat OUT
point it seeks back to the
Play Repeat IN
point and plays again.
•
Ping Pong
— play repeat ping-pong is turned
on by default when the clip is loaded. When the
clip starts playing, it immediately seeks to the
Play Repeat IN
point and plays until it reaches
the
Play Repeat OUT
point. When it reaches
the
Play Repeat OUT
point it starts playing in
reverse until it reaches the
Play Repeat IN
point again.
•
Loop To
— play repeat loop to play is turned
on by default when the clip is loaded. The clip
starts playing from the beginning passing through
the
Play Repeat IN
point and continues playing
until it reaches the
Play Repeat OUT
point.
When it reaches the
Play Repeat OUT
point
it seeks back to the
Play Repeat IN
point and
plays again.
•
Ping Pong To
— play repeat ping pong is
turned on by default when the clip is loaded.
When the clip starts playing, it immediately seeks
to the
Play Repeat IN
point and plays until it
reaches the
Play Repeat OUT
point. When it
reaches the
Play Repeat OUT
point it starts
playing in reverse until it reaches the
Play
Repeat IN
point again..
6.
Use the
Play Repeat IN
and
Play Repeat OUT
fields to the set the timecode for the in and out points
of the clip.
•
Play Repeat IN
— the first inclusive
field/frame of the repeated portion of the clip.
By default this is the first field/frame of the clip.
•
Play Repeat OUT
— the field/frame before
the last field/frame of the repeated portion of the
clip. By default this is one field/frame beyond
the end of the clip.
7.
Click
OK
.
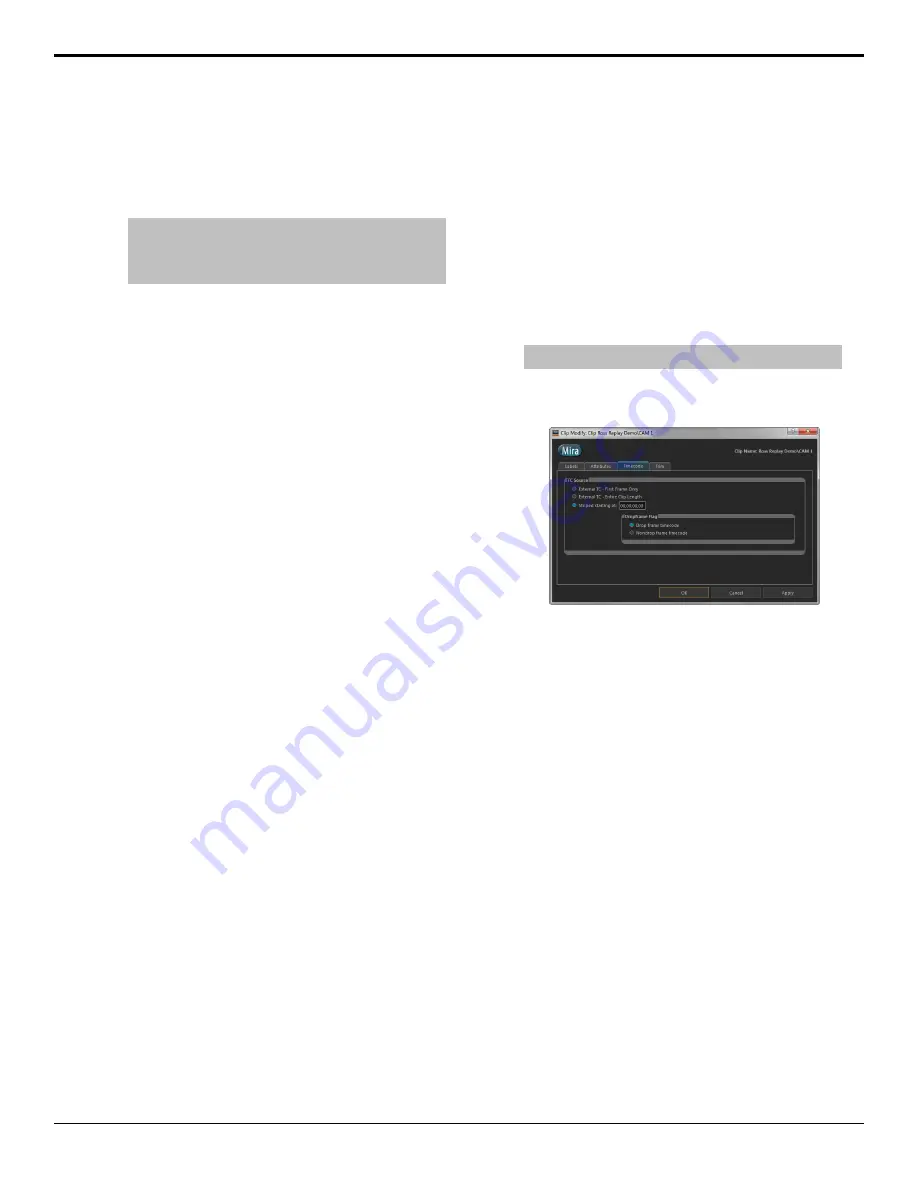
To Edit the Timecode Metadata of a Clip
The timecode metadata sets the source of the timecode
information for the clip.
1.
Select the clip in the Clip Library you want to edit
the metadata for.
Note:
You cannot edit the metadata of a clip if it is locked.
2.
Click
Clip Library
>
Modify...
.
3.
Click on the
Timecode
tab.
4.
In the
TC Source
area, select the timecode source.
•
External TC - First Frame Only
— the clip
uses the external timecode data of the first
field/frame that was originally recorded with the
clip. The timecode for the remainder of the clip
is synthesized. This option is useful if there was
a break or interruption in timecode data during
recording.
•
External TC - Entire Clip Length
— the clip
uses the external timecode data that was
originally recorded with the clip. This option is
useful if the clip has different segments in it with
different timecode ranges that you want to use.
•
Striped
— the clip uses the internally generated,
or synthesised, timecode starting at a defined
point. Enter the numeric timecode value that you
want to use for the start of the clip.
5.
In the
Dropframe Flag
area, select if you want to
use
Drop frame timecode
or
Nondrop frame
timecode
.
This option is only available if the clip was recorded
in a 59.94Hz video format.
6.
Click
OK
.
Mira Manual (v6.1) — Clip Library •
37
Summary of Contents for Abekas Mira
Page 1: ...Mira Manual v6 1 ...


