8
horizontally. Leave a small gap between the head of the screw and
the wall. The gap should be big enough for the screw heads to
slide into the screw slots and the connection cables to run down
the back of the switch.
2.
Align the holes on the back of the switch with the screws on the
wall. Hang the switch on the screws.
Warning!
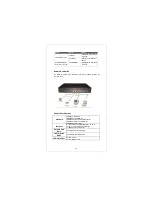
Do not wall mount the product vertically or it will be dangerous. Please
attach the product on the wall horizontally! See the image below for
reference:
Rack-mount Installation
The switch can be mounted on an EIA standard size, 19-inch rack or in a
wiring closet with other equipment. Follow the steps below to mount your
switch on a standard EIA rack using a rack-mounting kit.
Rack-mounted installation requirements
1.
Two mounting brackets
2.
Eight M3 flat head screws and #2 philips screwdriver.
3.
Four M5 flat head screws and #2 philips screwdriver.
Procedures to Rack-Mounting the Switch in the rack:
1.
Disconnect all the cables from the switch before continuing.
2.
Place the unit the right way up on a hard, flat surface with the front
facing you.
3.
Locate a mounting bracket over the mounting holes on one side of
the unit.
4.
Insert the screws and fully tighten with a suitable screwdriver.


