

Electronic temperature controller installation
and operation manual
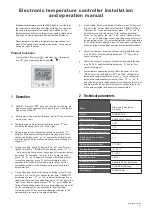
Product functions:
Electronic temperature controller KJRP-86A1-E is suitable for
the industrial, commercial and civilian buildings.It controls the
fan coils in the terminal of the central air conditioner. This
temperature controller has a large screen liquid crystal display,
and it can be easily operated and has stable performance.
Room temperature Setting, temperature compensation, four
kinds of fan speed mode,working mode switch, timing on and
timing off , clock functions .
M
Key functions: Power key( ), mode key ( ), fan speed
key ( ),key of adjusting the setting ( , ).
▲
ON/OFF: Press the “ ” key once, then the unit and the dis-
play screen will be operated; press again, the unit and the dis-
play screen will be off.
Setting mode: Under default interface, press “M” key, switch the
mode (Heat, Cool).
Setting fan speed: Under default interface, press “ ” key,
switch the fan speed (Auto, Low, Med, High).
Setting temperature: Under default interface, press the “
▼
”
button to decrease the setting temperature (long press 3s for
continue adjusting), press “
▲
” to increase the setting temper-
ature (long press 3s for continue adjusting); each pressing will
change 1
℃
.
Timing on setting: Press “M” key, until the “hh” in the “hh:mm”
flashes (at the time “TIMING ON” icon display), press “
▼
” or
“
▲
”to adjust the timing on hour (long press 3s for continue adjust-
ing); press “ ” key again, the “mm” in the “hh:mm” flashes ,
press “
▼
” or “
▲
” to adjust the timing on minute (long press 3s
for continue adjusting), press “M” key for confirmation (no key
operation for 5s will be auto confirmed, press “M” key before
confirmation will enter to the timing off setting) and back to the
default interface.
Timing off setting: Enter to the timing on setting, press “M” key,
until the “hh” in the “hh:mm” flashes (at that time “TIMING OFF”
icon display), press “
▼
” or “
▲
” to adjust the timing off hour
(long press 3s for continue adjusting); press “ ” key again, the
“mm” in the “hh:mm” flashes , press “
▼
” or “
▲
” to adjust the
timing off minute(long press 3s for continue adjusting), press “M”
key for confirmation (no key operation for 5s will be auto
confirmed, press “M” key before confirmation will enter to the
clock setting) and back to the default interface.
Clock setting: Enter to the timing off setting, press “M” key, until
the “hh” in the “hh:mm” flashes (at that time “TIMING ON” and
“TIMING OFF ” icons will not display), press “
▼
” or “
▲
” to
adjust the clock hour (long press 3s for continue adjusting);
press “ ” key again, the “mm” in the “hh:mm” flashes , press
“
▼
” or “
▲
” to adjust the clock minute (long press 3s for cont-
inue adjusting), press “M” key for confirmation (no key operation
for 5s will be auto confirmed, press “M” key before confirmation
will enter to the clock setting) and back to the default interface.
Cancel the timing on: during the timing on setting, adjust the time
to be “00:00” or under default interface press “ ” key for 3s to
cancel the timing on.
Cancel the timing off: during the timing off setting, adjust the time
to be “00:00” or under default interface press “ ” key for 3s to
cancel the timing off.
Temperature compensation setting: Under the power off, press
“
▼
&
▲
” key for 3s, the display of “
SETTING TEMP
” will display the
temperature compensation value; press “ ” key to change the
temperature compensation plus-minus, press “
▼
” or “
▲
” to
adjust the temperature compensation value (long press for continue
adjusting), press “M” key for confirmation (no key operation for 5s
will be auto confirmed) and back to the power off state.
2 Technical parameters
1
Operation
1
installation manual
Name
Model
Power voltage
Power consumption
Loaded current
Accuracy of control temperature
Display accuracy of indoor
temperature
Setting temperature range
Storage temperature
Working temperature
Relative humidity
Installation method
Surface material
Surface size
Electronic temperature
controller
<2W
<1A
<92%
standard 86 box installation
PC+ABS antiflaming
86×86×15mm
KJRP-86A1-E
AC220V±10
%
,50Hz
±1
℃
1
℃
17
~
30
℃
-5
~
55
℃
5
~
45
℃