Sound to Sight Showtime™ 22870, March 2018
Copyright ROMPA®Ltd
Sound to Sight Showtime™
Instruction Manual
Page 1: ...Sound to Sight Showtime 22870 March 2018 Copyright ROMPA Ltd Sound to Sight Showtime Instruction Manual...
Page 2: ...hat s in the Box Compatible Rompa Products 7 Operation Modes Touch Screen Illuminated Push Buttons External Switches Microphone Input Shapes Patterns and Colours Rompa Wireless Operation 19 Installati...
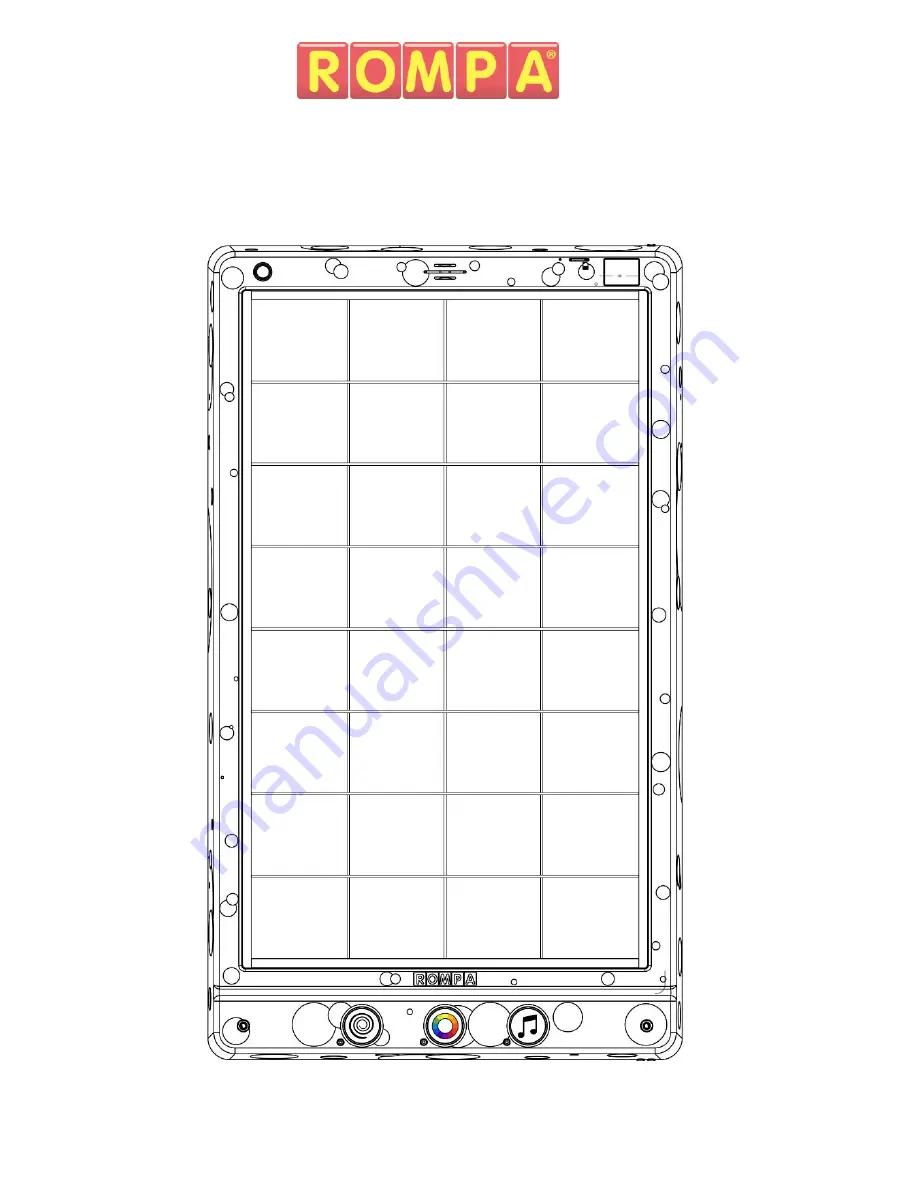
Page 3: ...3 At a Glance Panel Overview...
Page 4: ...4 Colour The Panel is available in 4 colours Black White Cream and Blue...
Page 5: ...in pitch and volume to create an ever changing sensory experience Engaging interactive and rewarding Encourages learning exploration and fosters a feeling of empowerment Why not try whistling humming...
Page 6: ...6 Dimensions All dimensions in mm...
Page 7: ...s Lead Compatible Rompa Products 20848 Sensory Magic 21098 Sensory Magic Portable 19847 Deluxe 8 Colour Wirefree Controller 21006 8 Colour Wirefree Switch 19847 WiFi Interactive Carpet Switch Set 1887...
Page 8: ...d will fill the panel with colour Mode 3 Frequency The panel reacts only to the frequency of a sound whether the sound is high or low pitched Why not try and fill certain areas of the panel practicing...
Page 9: ...to control in detail how the panel behaves as well as view statistics of panel usage Upon booting the panel up it will revert to its default settings Mode 1 Amplitude and Frequency Volume 2 Screen Br...
Page 10: ...skip forward to play the next track or skip back to play the previous Press the Red forward or back buttons to cycle through the other menu options An SD Card with compatible mp3 files must be insert...
Page 11: ...or off Sound effect refers to the sounds made when the user activates the illuminated push buttons Press the Red forward or back buttons to cycle through the other menu options Wireless Pressing the p...
Page 12: ...on the panel has been used for To return to the main page Press the Red forward or back buttons to cycle through the other menu options Illuminated Push Buttons The Sound to Sight Showtime has 3 illum...
Page 13: ...e panel has 10 unique sound effects which can be played by pressing the Sound Effect illuminated push button or an external switch plugged into the Sound effect input jack This is an alternate way to...
Page 14: ...m right of the panel When a microphone is inserted the panel will automatically detect its presence and turn to Microphone Mode The panel also acts as a karaoke and sounds spoken through the microphon...
Page 15: ...he direction of travel is reversed with each column Half the bars travel up when a sound is detected and the other half travel downwards 4 Equaliser Mirrored Single Block A single block of light moves...
Page 16: ...respond in the same way regardless of mode 8 Light Show The panel performs a light show cycling through 5 pre set patterns Inward Spiral Outward Spiral Random Fill Vertical Fill and Horizontal Fill Th...
Page 17: ...17 7 Yellow 8 Orange 9 Pink 10 Purple 11 White Sound Effect 1 Cartoon Twisting 2 Referee Whistle 3 Cartoon Jump 4 Power Down 5 Knock 6 Arpeggio 7 Harp 8 Organ 9 Clapping 10 Bubbles...
Page 18: ...in a passive mode where it continue cycling through colours and patterns after 60 seconds Pressing the central function button acts as pressing the pattern button on the panel Pressing the function b...
Page 19: ...Wall Mount Brackets Panel Due to the size of the product it is recommended that two people are required to install the product Recommended Tools Drill Spirit Level Pencil Tape Measure Appropriate Fix...
Page 20: ...screw the 4x M4 screws which secure the 2x brackets to the panels The brackets are secured to avoid any damage during transit Be sure to place the 4x M4 screws in a safe place as they will be required...
Page 21: ...21 2 Remove the brackets from the panel by sliding the bracket down and then lift them out of panel Place the brackets safely to one side as they will be required later...
Page 22: ...here you would like it to be mounted ensuring it is level Whilst in position mark where the centre of the bracket mounting holes are on the wall Do this for all 4x bracket mounting holes Place the pan...
Page 23: ...up with the marks just made ensure the bracket it level when mounting it to the wall The top bracket mounting holes should line up with the top 2x marks and the bottom bracket mounting holes should l...
Page 24: ...m any dust and debris which may have been created whilst mounting the brackets Place the panel on brackets To do this have the panel slightly higher than its final resting position When you feel the p...
Page 25: ...and whether they should be seated or standing should dictate the height the panel is mounted Operation Panel must always be supervised during use Do not strike the panel The panel is built robustly b...
Page 26: ...o local recycling centre Visit RecycleNow com to find your local recycling centre Some councils offer a household recycling collection service Contact your local authority for more details Troubleshoo...
Page 27: ...44 0 1246 211 777 External Switch Unresponsive Ensure the switch inlet is clear of any dust or debris Ensure the switch is fully inserted into the inlet Ensure panel buttons are not locked via the to...
Page 28: ...Sound to Sight Showtime 22870 March 2018 Copyright ROMPA Ltd...