Printing with Crop Marks
This section describes how to specify settings when using the BN-20 driver. When using VersaWorks, re-
fer to the [VersaWorks Help].
Procedure
1.
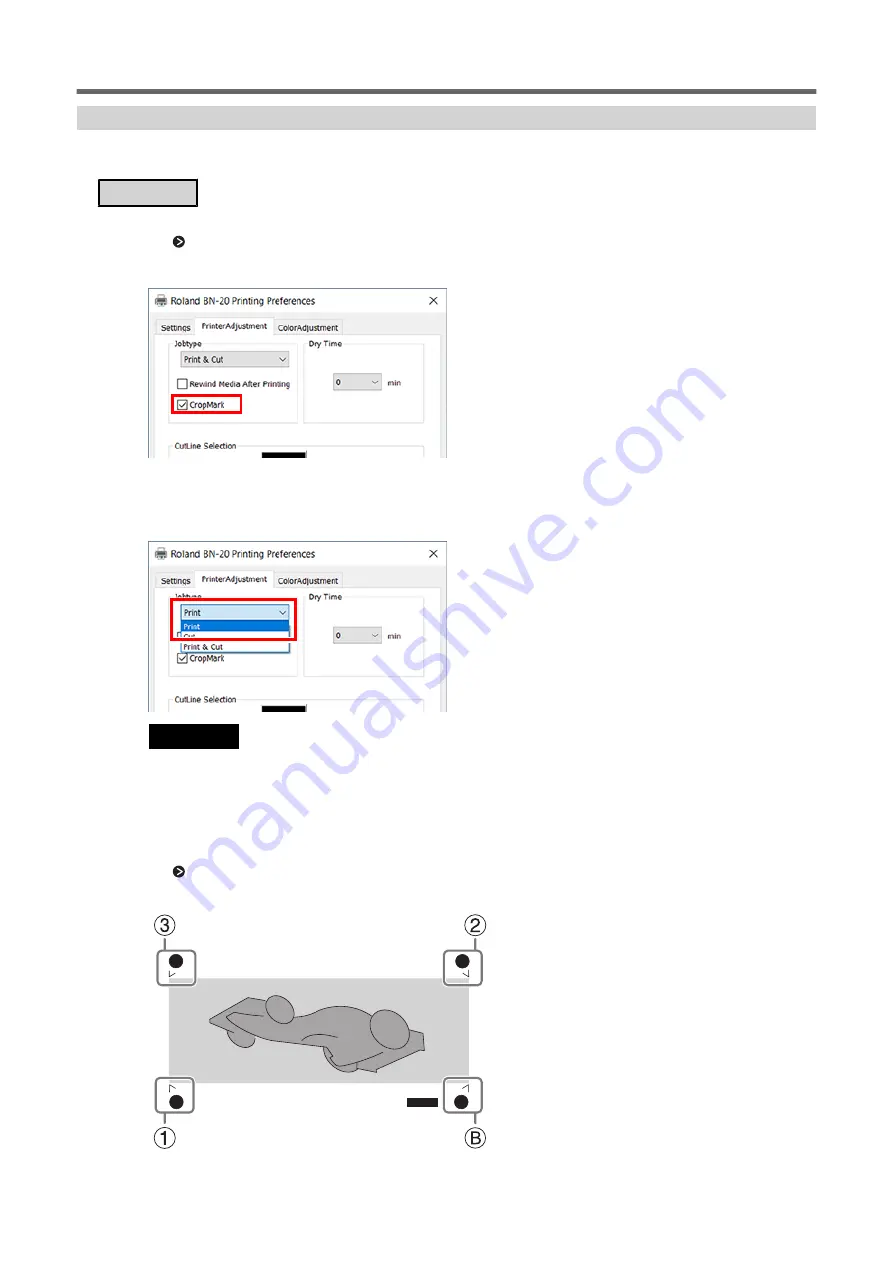
Display the BN-20 driver's Printing Preferences screen.
P. 10 "How to Open the BN-20 Driver's Printing Preferences Screen"
2.
Select [CropMark] on the [Printer Adjustment] tab.
3.
Select [Print].
When [Printing & Cut] is selected, pull back the media after printing the crop mark to start
cutting immediately. Cutting is performed by following the crop mark.
IMPORTANT
Before you start printing, check the media size in the [Settings] tab of Printing Preferences Screen and write
it down. When you perform cutting, set the same media size as the printing. If not, misalignment between
the printing results and the cut lines might occur.
4.
Click [OK].
5.
Start printing.
P. 32 "Step 5: Starting Print Output"
The crop marks are printed as shown in the figure.
Performing Printing and Cutting Separately
Optimizing the Output Quality
47
Summary of Contents for VersaSTUDIO BN-20A
Page 6: ...The Basics 5...
Page 27: ...Printing 26 Basic Operations...
Page 37: ...Fully Utilizing the Machine 36...
Page 57: ...Maintenance 56...
Page 80: ...Troubleshooting Methods 79...
Page 109: ...Appendix 108...
Page 117: ...Unit mm Dimensional Drawing 116 Main Specifications...
Page 120: ......


