background image

Practicing

12

Matching the Striking Strength of the 

Right and Left Hands

<

C-8

> Stroke Balance

This practice lets you reduce the volume discrepancy between your 

right and left hands, so that the sound is more consistent.  

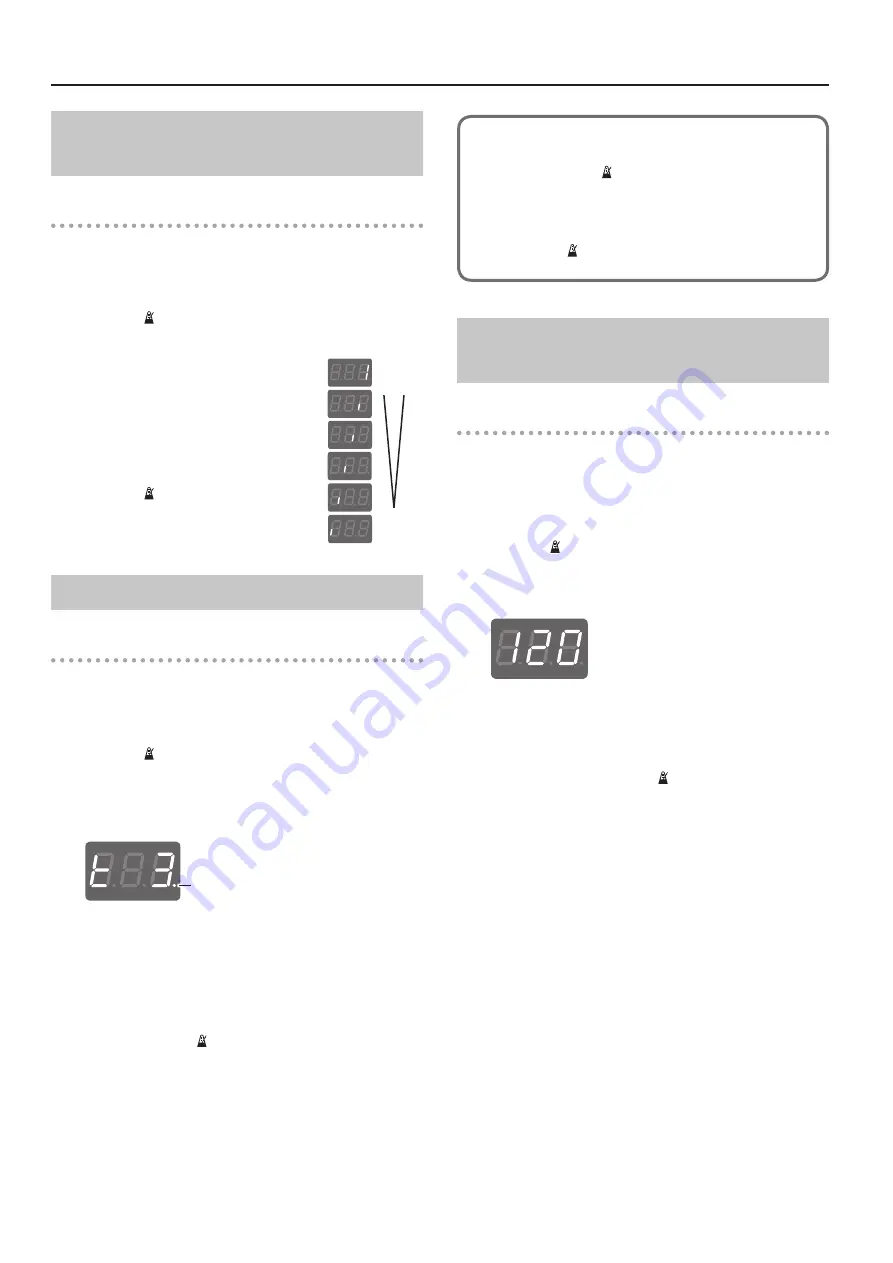
The display shows the strength of your strikes.

1. 

Press the [ ] (metronome) button to start practicing.

2. 

Strike the pad in time with the 

metronome.

The strength of your strikes on the pad is 

shown in the display.

*  You can use the [-][+] buttons to adjust 

the tempo even while you practice.

3. 

Press the [ ](metronome) button 

to return to the Coach mode menu 

screen.

Practicing for a Specified Time

<

C-g

> Timer

An alert tone informs you when the specified time has elapsed. You 

can use this to specify a daily time goal for practicing the basics.  

The default value is three minutes. 

1. 

Press the [ ] (metronome) button to start practicing.

The timer starts.

2. 

Practice as desired, in time with the metronome.

The display shows the approximate remaining time.

Remaining time: 3 minutes

Blinks while the 

timer is running.

When the specified time has elapsed, the alarm sounds and the 

metronome stops.
The Coach mode menu screen reappears.

*  You can use the [-][+] buttons to adjust the tempo even while 

you practice.

*  If you want to stop the timer before the specified time has 

elapsed, press the [ ] (metronome) button once again.

*  The timer continues to operate even if you use the [Select] 

button to select a different menu.

Changing the time

1. 

Long-press the [ ] (metronome) button.

2. 

Press the [-][+] buttons to change the value.

Value: 1–99 minutes 

(

t 1

tgg

)

3. 

Press the [ ] (metronome) button.

Recording and Checking Your Own 

Performance

<

C10

> Recording

This function lets you easily record your own performance. This 

is a very useful practice tool, recording and then checking your 

drumming.

Recording

1. 

Press the [ ] (metronome) button.

The metronome sounds, and the TD-1KV/TD-1K will enter 

recording-standby mode.

*  You can use the [-][+] buttons to adjust the tempo.

2. 

Strike the pad to start recording.

*  The metronome sounds constantly during recording.
*  A signal input via the MIX IN jack won’t be recorded.

3. 

To stop recording, press the [ ] (metronome) button once 

again.

Playback

1. 

Press the [+] button to play back the recorded data.

When the performance ends, playback stops automatically.

2. 

To stop playback, press the [-] button.

Strength of Striking

Hard

Soft

Summary of Contents for V-Drums TD-1K

Page 1: ...About Drums 2 Drum Set Elements 2 The Basics of Playing 2 Assembly 4 Kit Assembly 4 Connecting the Cables 7 Quick Start 8 Connecting Your Equipment 8 Front Panel 8 Switching the Power On and Off 8 Pla...

Page 2: ...rash CR1 Hi hat HH Hi hat pedal HHC Kick pedal KIK Snare SNR Ride RD The illustration shows the TD 1K The TD 1KV has a different snare pad The Basics of Playing Drums are played using both hands and b...

Page 3: ...c drum set the hi hat consists of two cymbals placed facing each other vertically on a hi hat stand The two cymbals can be closed together by pressing the pedal A variety of playing techniques are pos...

Page 4: ...If you set up this unit in an unstable location it may fall over Be sure to set it up in a stable and level location When you operate the kick pedal or hi hat pedal please be careful not to get your f...

Page 5: ...of the pad Snare pad Snare pad 2 3 TD 1KV Adjusting the head tension Use the drum key to evenly tighten the tuning bolts a little at a time in the order shown in the illustration Adjust the tension s...

Page 6: ...overturning The unit may overturn if a child pushes it or hangs on it Make sure that an adult is supervising and providing guidance 7 1 2 3 Underside of the pad Tom pad Cymbal arm Cymbal arm Cymbal ar...

Page 7: ...mbal If you re not adding a cymbal CR2 is not used Use the included cable clips to secure the cables Connecting the Cables Connect the cable to the sound module and each pads as shown in the illustrat...

Page 8: ...off You must turn off the power by pressing the L power button Turning the Power On and Off metronome button Starts or stops the metronome The light flashes with the tempo buttons Use this button to...

Page 9: ...me with the metronome tempo Even in Drums mode you can press the metronome button to sound the metronome 3 Press the buttons to change the tempo You can also specify the tempo with Tap tempo function...

Page 10: ...return to the Coach mode menu screen Changing the number of measures to score You can change the number of measures after which the Time Check result is shown You can also make settings so that the s...

Page 11: ...again The value indicates the percentage by which you played at an accurate tempo You can use the buttons to adjust the tempo even while you practice 3 Press the metronome button to return to the Coa...

Page 12: ...ed the alarm sounds and the metronome stops The Coach mode menu screen reappears You can use the buttons to adjust the tempo even while you practice If you want to stop the timer before the specified...

Page 13: ...networking tool that lets you use the V Drums and your computer to enjoy practicing competing with friends around the world Practice songs can be automatically downloaded from the Internet and are al...

Page 14: ...ers default Pad Note number KIK 36 SNR Head 38 SNR Rim 40 T1 48 T2 45 Pad Note number T3 43 HH open Bow 46 a HH open Edge 26 b HH closed Bow 42 a 4 HH closed Edge 22 b 4 HH foot closed 44 a 2 CR1 Bow...

Page 15: ...e same stand the vibration of a strike can be transmitted to another pad causing it to sound inadvertently Reattach the pad at a different location Two or more notes are sounded when you strike once I...

Page 16: ...switching to mesh heads This instrument is designed to minimize the extraneous sounds produced when it s played However since sound vibrations can be transmitted through floors and walls to a greater...

Page 17: ...8 13 Electronic 14 Reggae 15 Percussion Song List Song name Tempo Recommended kit 1 Rock 1 130 2 2 Rock 2 150 6 3 Pop 1 120 1 4 Pop 2 75 1 5 Jazz Funk 128 1 5 10 6 Funk 1 118 3 7 Funk 2 110 3 8 Acid J...

Reviews: