background image

 2.5 Valve Noise (Advanced)

V-Accordion 

r

67

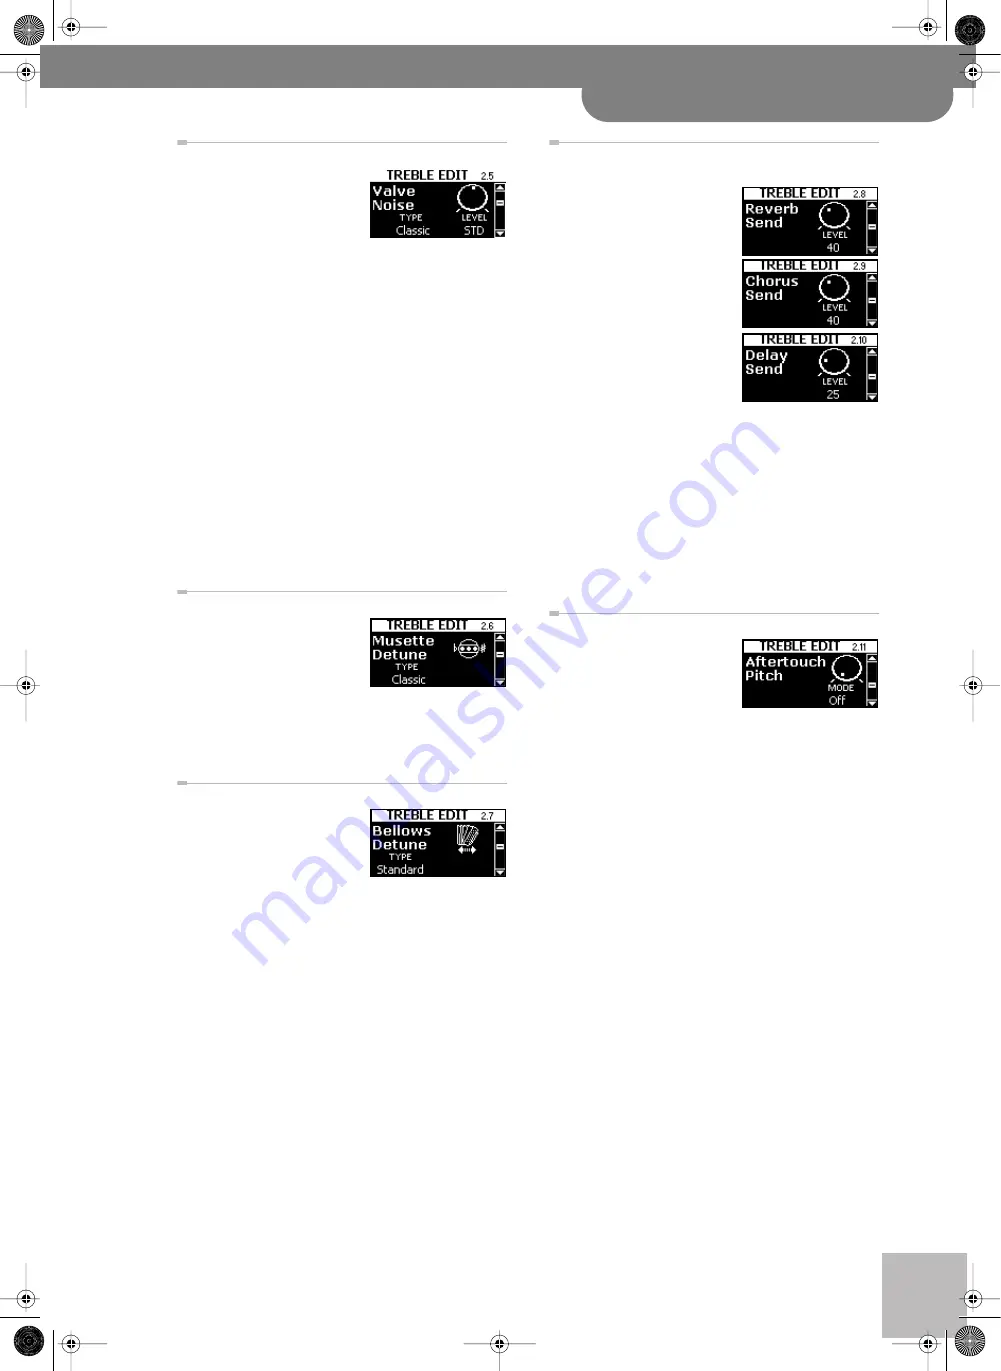
2.5 Valve Noise

This is a more elaborate ver-
sion of the “Noise” parameter 
discussed on page 37. It allows 
you to not only set the level of 
the “typical” valve noises, but 
also to specify what kind of instrument should generate 
the noise. 

You are free to experiment with any noise type you like, 
but using the noise related to the selected instrument 
(see “2.1 Reed Type” on p. 65) is usually more realistic. 

There is only one “

TYPE

” for the entire register (i.e. all 7 

reeds). The options are: Bandoneon, I-Folk, I-Folk2, 
Classic, Cajun, Jazz, F-Folk, D-Folk, Organetto, F-Folk2, 
Classic2, Studio, Tradition, Steierische, OldItaly, TexMex, 
Trikitixa, F-Jazz, Classic3, Bajan.

Use the 

LEVEL

 parameter to specify how prominent the 

noise should be (Off, –40~“Std”~40, Default setting: 
Std).

Note: 

Whenever you select “ALL” for “2.1 Reed Type” and set a 

different reed type, this noise setting is automatically adapted 
to the reed type. It would therefore be a good idea to first 
select the reed type and only then change the noise type.

2.6 Musette Detune

This parameter allows you to 
choose the system used for 
detuning the 8’ reeds. See 
page 35 for details. 
The options are: Off, Dry, Clas-
sic, F-Folk, American_L, American_H, North_Eur, 
German_L, D-Folk_L, Italian_L, German_H, Alpine, 
Italian_H, D-Folk_H, French, Scottish.

2.7 Bellows Detune

(Off, Low, Standard, High, 
Default setting: Standard)
This parameter further adds to 
the realism of the sounds 
emulated by your FR-7x. Here, 
you can specify how strongly the pitch of the simulated 
Treble reed(s) changes when you open or close the bel-
lows faster than usual. 

If the “Standard” setting seems too mild, try “High”. If it 
is too strong, use “Low”. If you don’t want any detuning 
effect, select “Off”. The most convincing setting usually 
depends on the selected instrument(s) (see “2.1 Reed 
Type” on p. 65).

2.8 Reverb Send, 2.9 Chorus Send, 
2.10 Delay Send

(0~127 for all three) 
Use these parameters to set 
the Reverb, Chorus or Delay 
send levels (how much effect 
should be applied to the Treble 
section). The higher the value 
you set, the more the Treble 
section is processed by the 
effect in question.

It works much the same way 
as a cathedral: the louder you 
sing, the more reverb (chorus 
or delay) you hear. In the case 
of the cathedral, singing louder means that you increase 
the effect send level, i.e. the level of the signal (your 
voice) that will be processed by the acoustic environ-
ment.

The other sections (Bass, Free Bass, etc.) have the same 
parameters, so that you can create a sound image with 
various “levels” (foreground, background).

The effects themselves can be edited on separate pages 
(see p. 82).

2.11 Aftertouch Pitch

(Off, 1/4 Down, 1/2 Down, 1/4 
Up, 1/2 Up, Default setting: 
Off)
As stated earlier, the treble 
keyboard of the piano-type 
model also generates aftertouch messages (on the but-
ton-type model, aftertouch can be generated with the 
Master bar). “Aftertouch” refers to the fact that you 
press a key even further down after playing a note. This 
effect allows you to bend the pitch down (temporarily 
lower the note) by a quarter tone (“1/4 Down”) or a 
semi-tone (“1/2 Down”). Select “1/4 Up” or “1/2 Up” to 
bend the notes up a quarter or a semi-tone. 

Select “Off” to switch off the treble section’s aftertouch 
recognition.

Note: 

This aftertouch effect applies to all notes that are 

sounding simultaneously. If you play a chord and then only 
press down one key of the chord’s constituent notes even fur-
ther, all notes are bent by the same amount. (MIDI buffs call 
this “channel aftertouch”.)

FR-7x GB.book  Page 67  Tuesday, August 25, 2009  10:58 AM

Summary of Contents for V-Accordion FR-7X

Page 1: ...r Owner s Manual FR 7x GB book Page 1 Tuesday August 25 2009 10 58 AM...

Page 2: ...cluding amplifiers that produce heat 9 Do not defeat the safety purpose of the polarized or ground ing type plug A polarized plug has two blades with one wider than the other A grounding type plug has...

Page 3: ...e service we urge you to read through this Owner s Manual thoroughly The explanations in this manual include illustrations that depict what should typically be shown by the display Note however that y...

Page 4: ...t servicing by your retailer the nearest Roland Service Center or an authorized Roland distributor as listed on the Information page when The power supply cord or the plug has been damaged or If smoke...

Page 5: ...of dust between the power plug and the power outlet can result in poor insulation and lead to fire Try to prevent cords and cables from becoming entan gled Also all cords and cables should be placed...

Page 6: ...f you attempt to use the unit in this condition Therefore before using the unit you must allow it to stand for several hours until the condensation has completely evaporated Do not allow rubber vinyl...

Page 7: ...er usable dispose of it in accor dance with all applicable local laws and regulations If the battery pack leaks fluid changes color or shape or changes in any other way do not use it otherwise it may...

Page 8: ...0 96 112 128 160 192 224 256 320kbps VBR variable bit rate Copyrights MPEG Layer 3 audio compression technology is licensed from Fraunhofer IIS Corporation and THOMSON Multimedia Corpora tion Copyrigh...

Page 9: ...rd section left hand 25 Using the FR 7x s digital effects 26 Playing in Free Bass mode 27 Playing the bass part with your right hand Bass to Treble 28 9 Playing the FR 7x s orchestral sounds 29 Orches...

Page 10: ...Bass Edit parameters 81 9 Set Common parameters 82 10 System parameters 86 11 Utility parameters 97 17 Saving settings using the WRITE function 103 Saving your changes automatic approach 103 Saving yo...

Page 11: ...sounds to the bass and chord buttons Sound expansion The FR 7x provides two internal memories that allow you to add new sounds Sophisticated bellows response Faster response and higher sensitivity an...

Page 12: ...vol ume G SET buttons These two buttons allow you to choose among 80 accordion Sets Each Set contains suitable settings for all sections accordion orchestral tonewheel organ drums H Treble Orchestra...

Page 13: ...e and air button This wheel allows you to specify the bellows inertia the force needed to push and pull it See page 21 By pressing it you can purge the air that still remains in the bellows after play...

Page 14: ...ies Connecting a pair of headphones mutes the internal speakers Connection panel of the FBC 7 A POWER ON switch Press it to switch the FBC 7 on and off Note This switch only switches on the FBC 7 To s...

Page 15: ...can connect an optional EV series expression pedal see p 58 F TO V ACCORDION socket Use the supplied 19 pin cable to connect this socket to your FR 7x Note See also Using the FBC 7 on p 58 for additi...

Page 16: ...establish firm contact between the compartment cover and the instrument Otherwise you won t be able to use your FR 7x Connecting the FR 7x to the supplied FBC 7 Your FR 7x comes with an FBC 7 footswit...

Page 17: ...V Accordion to the FBC 7 using the supplied cable That cable powers the FR 7x transmits pedal messages and sends the FR 7x s audio signals to the OUTPUT L MONO R sockets on the FBC 7 While using the F...

Page 18: ...1 Turn the VOLUME knob all the way to the left to minimize the volume 2 Press the FR 7 s POWER button to switch it on it lights 3 Adjust the volume to an appropriate level Turning the power off 1 Turn...

Page 19: ...without disturbing those around you such as at night 1 Plug the optional headphones into the PHONES socket located on the FR 7x s connection panel Note The FR 7x s speakers are switched off when you c...

Page 20: ...llowing display page Playback starts automatically with the first demo song there are 35 demo songs in all See the table on page 126 3 Use the SET buttons to select another demo song 4 Use the VOLUME...

Page 21: ...ing and closing movements The bellows inertia can be set with the resistance regulation and air button Master bar On a traditional accordion the Master bar recalls the Master register The FR 7x allows...

Page 22: ...H fields however are always there A Orchestra mode B Name and number of the currently selected Set C Battery level power source indicator Shows whether the FR 7x is working on the battery pack or conn...

Page 23: ...rgan sounds and or drum sounds Unlike its predecessor the FR 7 the FR 7x allows you to assign any of the 49 orchestral sounds to whichever register you like see p 51 Let us now look at how to select S...

Page 24: ...n an acoustic accordion Note When the FR 7x is controlled via MIDI or when the 10 2 Bellows Curves parameter on p 86 uses a Fixed setting there is no need to move the bellows 3 Press one of the 14 reg...

Page 25: ...e name of this section The real bass notes are assigned to the two circled rows The remain ing buttons are used to play chords The sound the bass section produces is determined by the register you pre...

Page 26: ...vel of de corresponding effect Turn it counterclockwise towards the small dot if you don t need the effect in question Turn it clockwise towards the big dot to increase the effect s volume The display...

Page 27: ...S registers again to return to the normal Bass mode Reference caps The FR 7x is supplied with several reference caps con cave and with lines designed to help you locate the bass and chord buttons with...

Page 28: ...elect the desired bass to treble sound There are seven accordion sounds and seven orches tral sounds The numbers in the table below refer to the Treble registers you need to press Note Bass to Treble...

Page 29: ...t The display changes The arrow moves from the TREBLE to the ORCH line This means that the Treble registers can now be used to select orchestral sounds Note The sound name may be different on your ins...

Page 30: ...nd keep holding the corresponding button while you gently press the Master bar For some orchestral sounds and the treble accordion section this effect allows you to bend the pitch down temporarily low...

Page 31: ...when the ORCHESTRA section is off see the illustration below Look which field contains a keyboard icon then press the Master bar again and look at the display Play a few notes to understand what happ...

Page 32: ...asterisk can only be controlled by bellows movements Those sounds are not velocity sensitive For the other sounds see also 10 16 Orchestra Bs Ch Touch on p 92 3 Press the three ORCH BASS registers aga...

Page 33: ...to normal chord mode Setting the volume of the ORCH CHORD sound There may be times when the orchestral chord sound is too loud or too soft with respect to the other avail able sections In that case yo...

Page 34: ...times when the orchestral Free Bass sound is too loud or too soft with respect to the treble accor dion and or orchestral sound In that case you can change its volume 1 On the main page press the DOW...

Page 35: ...ob to select the desired key transposition The setting range is 6 5 semi tones Select 0 to switch off the transposition 3 Press EXIT JUMP to return to the main page Musette Detune You probably know th...

Page 36: ...e into 12 equal steps intervals User 1 3 These settings refer to the tuning systems programmed by yourself or someone else See 1 4 Scale Edit on p 64 for details Arabic 1 2 These two settings refer to...

Page 37: ...do not need the noise in question 3 Press the DATA ENTER knob to select the TYPE parameter and rotate it to select the accordion type The possibilities are Bandoneon I Folk I Folk 2 Clas sic Cajun Jaz...

Page 38: ...USB memory can only be connected in one direc tion Insert the USB memory without applying exces sive force 4 Close the USB compartment cover Playing back audio files The FR 7x can play back audio file...

Page 39: ...want to play back in succes sion Programming your playlists Note Playlists know where the referenced audio files are stored they remember the file path We therefore urge you never to move mp3 or WAV...

Page 40: ...ENTER knob to select SAVE then press the DATA ENTER knob The display changes to Naming the playlist 3 Press the DATA ENTER knob The display changes to 4 Rotate the DATA ENTER knob to select the name i...

Page 41: ...at should replace the A 6 Press the DATA ENTER knob to confirm your selection Saving the playlist On the PLAYLIST SAVE page you can also specify where the file should be saved on your USB memory 1 Pre...

Page 42: ...r playlist then press the knob The display changes to The following functions are available 8 Press the DATA ENTER knob to start playback If the CHAIN function see p 45 is set to CHAIN PLY the next so...

Page 43: ...ER e Press the MENU WRITE button to call up the fol lowing window f Rotate the DATA ENTER knob to select the UP or DOWN icon Note The DOWN function has no effect on the last step of your playlist g Pr...

Page 44: ...d All subsequent steps now move up one entry Exam ple if you delete step 04 of a list that contains 10 steps step 05 becomes 04 step 06 becomes 05 etc g See Saving your playlist on p 40 Clearing all s...

Page 45: ...der General procedure b Rotate the DATA ENTER knob to select CHAIN The display changes to c Press the DATA ENTER knob repeatedly to select one of the following options d Press the EXIT JUMP knob to re...

Page 46: ...then press the DATA ENTER knob The display changes to c Press the DATA ENTER knob d Rotate the DATA ENTER knob towards the right until the display looks as follows the name must be selected The first...

Page 47: ...try it nevertheless the display will show the Cannot execute Audio playback is ON message 8 At the end of the song press the DATA ENTER knob once again to stop recording The display now shows a Flush...

Page 48: ...decide not to save the audio file There may be times when you are unhappy about your recording and therefore prefer not to save it In that case proceed as follows 1 If you are still recording press th...

Page 49: ...e is selected the menu page looks as fol lows It means that you cannot select any function Press the EXIT JUMP button to return to the list window and select the file you want to delete c Rotate the D...

Page 50: ...If you don t want to save the renamed song file in a different folder skip to step p j Press the EXIT JUMP button The FR 7x automatically selects the Ins icon k Rotate the DATA ENTER knob towards the...

Page 51: ...t you want to change 4 Press the treble or bass register whose assignment you want to change There are two possibilities for the 13 treble registers for a total of 26 sounds You may therefore have to...

Page 52: ...ny register until you switch it off or until it is switched off by the 10 12 Auto Power Off function see p 92 2 To save the patch to a different register or register memory rotate the DATA ENTER knob...

Page 53: ...available footages are 16 and 8 i e only two harmonic bars Each harmonic bar is assigned to a sine wave pure tone of a set pitch By mixing these sine waves you can create a variety of organ sounds 1...

Page 54: ...4 Confirm your setting by pressing the DATA ENTER knob Note See Saving your settings on p 52 for how to save your settings if you are happy with the organ sound Oth erwise continue with the next secti...

Page 55: ...Press the DATA ENTER knob to select the PARAM parameter 3 Rotate the DATA ENTER knob to select one of the following parameters Parameter Description Switch Allows you to switch the effect on or off Se...

Page 56: ...he desired value and press it to confirm 6 Repeat steps 2 5 to set the remaining parame ters Note See Saving your settings on p 52 for how to save your settings if you are happy with the organ sound O...

Page 57: ...e first character 3 If necessary select a different character position indicated by a dark line by rotating the DATA ENTER knob 4 Press the DATA ENTER knob to confirm your selection 5 Rotate the DATA...

Page 58: ...lows like on any accordion The expression pedal can be used to fade the Orchestra part in and out which is probably most effective in DUAL mode see p 30 When the expression pedal is all the way up hee...

Page 59: ...out removing it from the FR 7x There is no need to remove the battery pack from the FR 7x in order to recharge it Recharging the battery pack takes 3 5 hours 1 Connect the FR 7x to the FBC 7 using the...

Page 60: ...m the FR 7x s battery com partment Note While the compartment cover is open the FR 7x cannot be switched on 6 Pull the battery strip so that the battery pack pro trudes a little from the battery case...

Page 61: ...ECHARGER compartment by sliding it to the left until it clicks into place 16 See Installing the battery pack on p 16 Note Be sure to tighten the two screws of the battery compartment cover all the way...

Page 62: ...a parameter within the selected group If the parameter number is higher than 14 press the ORCHESTRA register to select the first decimal then register 1 10 to select the unit register 10 is used to e...

Page 63: ...66 2 3 Reed Volume p 66 2 4 Treble Octave p 66 2 5 Valve Noise p 67 2 6 Musette Detune p 67 2 7 Bellows Detune p 67 2 8 Reverb Send p 67 2 9 Chorus Send p 67 2 10 Delay Send p 67 2 11 Aftertouch Pitch...

Page 64: ...re the FR 7x is switched off by the 10 12 Auto Power Off function Remember to save all settings as soon as you are sure that you want to keep them See page 103 for how to save your changes Note Change...

Page 65: ...parameters which are also saved to the Set See pages 62 and 63 for how to select and adjust the parameters Press UP and DOWN simultaneously to select the value that is indicated as Default setting In...

Page 66: ...2 2 3 2 Press the DATA ENTER knob to select the STA TUS parameter then rotate the DATA ENTER knob to specify whether the selected reed should sound and whether it should be muffled The STATUS options...

Page 67: ...Low If you don t want any detuning effect select Off The most convincing setting usually depends on the selected instrument s see 2 1 Reed Type on p 65 2 8 Reverb Send 2 9 Chorus Send 2 10 Delay Send...

Page 68: ...he Bass Link func tion if you no longer need it On the main page links are indicated as by means of white arrows Note You can specify that this function should be acti vated automatically each time yo...

Page 69: ...2 Bass Link determines what s possible or not changing that parameter may correct your 2 14 Orchestra Chord Link setting For this reason we recommend that you first set 2 12 Bass Link BASS if you need...

Page 70: ...Confirm your selection by pressing the DATA ENTER knob the name is displayed white on black again 5 Rotate the DATA ENTER knob to select another character position then repeat steps 2 4 to complete yo...

Page 71: ...tting Now use TYPE to switch off the reeds you do not need 3 2 Register The parameters on this page are used in combination with the parameters above Here you decide which reeds should be audible and...

Page 72: ...he available instrument types Bandoneon I Folk I Folk2 Classic Cajun Jazz F Folk D Folk Organetto F Folk2 Classic2 Studio Tradition Steierische Trikitixa F Jazz Classic3 Bajan 2 Press the DATA ENTER k...

Page 73: ...se parameters to set the Reverb Chorus or Delay send levels how much effect should be applied to the bass section The higher the value you set the more the bass section which includes the chord but to...

Page 74: ...select here You may have to change those settings afterwards if you wish to use different noise type 4 2 Register The parameters on this page are used in combination with the parameters above Here yo...

Page 75: ...Organetto F Folk2 Classic2 Studio Tradition Steierische Trikitixa F Jazz Classic3 Bajan 2 Press the DATA ENTER knob to select the LEVEL parameter then rotate the DATA ENTER knob to set the volume of...

Page 76: ...ote parameter allows you to specify the lowest pitch the sample can use If you nevertheless play a lower note on the bass keyboard it will be sounded one octave above the corresponding pitch and sound...

Page 77: ...unds all three will be played simultaneously whenever you press a bass button See page 72 for the procedure 5 8 Reverb Send 5 9 Chorus Send 5 10 Delay Send 0 127 for all three Use these parameters to...

Page 78: ...lue is added to or subtracted from the standard value Std 6 4 Panpot Bass 63 0 Treb 0 63 Bass Depending on the selected sound this parameter allows you to change the ORCHES TRA part s placement in the...

Page 79: ...ch allows you to use different MIDI settings for each Set The parameters of the Orch Chord Edit group apply to the chord button rows of the Bass section As stated earlier the FR 7x allows you to play...

Page 80: ...should be at the center of the stereo image Note If a TW organ sound is assigned to the current ORCHES TRA CHORD register the VALUE parameter will read Rotary to signal that the VALUE parameter cannot...

Page 81: ...peakers to create a livelier sound image The Treb values mean that the sound will appear on the same side as the treble accordion sound This setting applies to both the FR 7x s internal speakers and t...

Page 82: ...nob to select the LEVEL parameter then rotate the DATA ENTER knob to set the Reverb processor s output volume 0 127 The overall reverb volume depends on three things the Send level of the various sect...

Page 83: ...here will be no chorus If the Send level of a section is set to 0 only that sec tion will have no chorus Other sections If the LEVEL parameter on this page is set to 0 the Chorus pro cessor is effecti...

Page 84: ...Feedback 0 127 This parameter sets the level at which the Chorus sound is re input fed back into the Chorus By using Feedback a denser chorus sound can be created Higher val ues result in a greater f...

Page 85: ...ving between left and right It is effective when listening in stereo a kind of stereo slap back effect Delay Rev Reverb is added to the delay sound which moves between left and right It is effective w...

Page 86: ...ault setting 12 This parameter allows you to change the contrast if the FR 7x s display is difficult to read The smaller the value the darker the display becomes 10 2 Bellows Curves Fixed Low Fixed Me...

Page 87: ...he active Music Style Note Arranger instruments of other manu facturers may not understand this message If in doubt see their MIDI implementation section for details The MIDI message trans mitted by t...

Page 88: ...y meaningful if the Rotary effect is currently on Brake OnOff The footswitch allows you to switch the TW organ part s brake effect on and off This simulates the effect you get when you switch a tonewh...

Page 89: ...See also the illustration on page 90 There are four 3 Bs Rows options A 7th and B 7th mean that the 6th chord row plays seventh chords 7 that don t contain the fifth In the case of a C7 chord you the...

Page 90: ...AN controls on your mixing console differently you can use this parameter to reduce the stereo image Wide represents the widest stereo image Natural means that the original stereo image is used while...

Page 91: ...F5 D5 B4 Ab4 F4 D4 B3 Ab3 F3 D3 B2 Ab2 F2 D2 ORCH CHORD ORCH FREE BS ORCH CHORD ORCH FREE BS ORCH CHORD ORCH FREE BS ORCH CHORD ORCH FREE BS ORCH CHORD ORCH FREE BS ORCH CHORD ORCH FREE BS Ab2 Eb2 Bb2...

Page 92: ...t on the TW Upper organ sound There are three Fixed curves that always use the same value no matter how hard or lightly you press the keys no dynamic control Low means that a low value is used Med rep...

Page 93: ...you hit with and without muting choking it Of course the difference is far less dramatic here but it may just be what you are looking for You can also make the notes longer by selecting a positive va...

Page 94: ...ay attention to the note names all Cs appear on a grey background and look at how they are arranged then make your selection The numbers next to the letters refer to the octave The numbers below the n...

Page 95: ...10 20 Treble Mode only for button type Advanced V Accordion r 95 C Griff Europe C Griff 2 B Griff Bajan 10 20 Treble Mode 1 2 FR 7x GB book Page 95 Tuesday August 25 2009 10 58 AM...

Page 96: ...10 System parameters Advanced 96 rFR 7x V Accordion B Griff Fin D Griff 1 D Griff 2 10 20 Treble Mode 2 2 FR 7x GB book Page 96 Tuesday August 25 2009 10 58 AM...

Page 97: ...a Set the Common parameters including the effects as well as the parameters of the various sections Treble Orchestra Bass etc Warning All settings of the target memory are over written It might there...

Page 98: ...Press the MENU WRITE button again The briefly shows the following message and then confirms this operation If a file of the same name already exists the follow ing message is displayed To overwrite th...

Page 99: ...FR 7x imports all Sets 11 7 Import Set This function allows you to import the settings of a Set file You can choose the Set memory the settings should be loaded to Note You cannot select single Sets...

Page 100: ...han a parameter It allows you to set five parameters for all Treble registers of the currently selected Set simultaneously This may help you save a lot of time especially for increasing or decreasing...

Page 101: ...to return to the main page and try out all 7 Bass registers 5 If you like your new settings save them see p 103 11 12 FreeBass Reg on current Set This page allows you to set six parameters for all Fre...

Page 102: ...re replaced by the settings the FR 7x con tained when you first got it You may wish to archive your settings to a USB storage device before initializing the FR 7x see 11 4 Export All FR 7x on p 98 1 P...

Page 103: ...All Param to the specific only one register 3 Rotate the DATA ENTER knob to select the mark and press it to confirm your choice 17 Saving settings using the WRITE function Function Explanation All Par...

Page 104: ...WRITE button The display briefly shows the following message When finished the display shows the Function Com plete message Ignoring settings of the Set group When you check the Set box all related s...

Page 105: ...don t want to save 8 Press the MENU WRITE button The display briefly shows the following message When finished the display shows the Function Com plete message Saving all registers or just a single r...

Page 106: ...2 If necessary use the DATA ENTER knob to deselect AllParam This will uncheck all other boxes as well 3 Rotate the DATA ENTER knob to select the check box of the parameter group whose settings you wan...

Page 107: ...s possible thanks to a common language for musi cal applications which is called Musical Instrument Digital Interface or MIDI for short To take advantage of the FR 7x s MIDI functions you must connect...

Page 108: ...ause your V Accordion has far more versatile perfor mance functions than any other MIDI controller avail able today the FR 7x translates all known accordion techniques and physical effects into MIDI m...

Page 109: ...Bank Select messages along with the program change number CC00 and CC32 must both be set to 0 The Control Ch default setting 13 can only be used for sending program change messages see below 6 Press t...

Page 110: ...dium still generates too many data select Low TX means that this parameter only applies to data sent by the FR 7x Its own MIDI buffer is big enough to receive high resolution data 1 While the main pag...

Page 111: ...nge messages Send PC 12 6 Bank for Send PC Though each register can transmit a program change bank select cluster when pressed see CC00 CC32 PC on p 114 you can also transmit sound select messages on...

Page 112: ...s com plementary bank information 7 Press the DATA ENTER knob to confirm your selection 8 Repeat steps 4 7 using a different memory group 9 Press EXIT JUMP several times to return to the main page 10...

Page 113: ...sed below are only executed by an external tone generator if its MIDI receive RX channel is set to the number you assigned to the section in question page 109 Sections The parameters discussed here ar...

Page 114: ...parameters CC00 CC32 or PC the other two parameters also adopt the STD setting See the following STD table Two bank addresses MSB and LSB with 128 pos sibilities each plus 128 Program Change numbers...

Page 115: ...the end of a note i e when you release a key or button This parameter allows you to specify whether the velocity values corresponding to the strength with which you press a key button should be trans...

Page 116: ...RCHESTRA CHORD section Switch it off see p 19 Certain parameters cannot be selected Does the FR 7x display a message to inform you that a parameter or section is not available If so the section is off...

Page 117: ...ms to transmit the wrong bank select and program change numbers This is not a malfunction When you set the 12 2 Ext Seq Playback parameter to On see p 109 the FR 7x s registers no longer transmit the...

Page 118: ...aving data possibly because the battery pack was depleted or because of a power failure When you switch it on again it attempts to recover everything it can It may however also load the data of the co...

Page 119: ...tra 7 Bass registers Navigation switches UP DOWN MENU WRITE EXIT JUMP Other switches SET UP DOWN SORDINA ON OFF POWER 6 user assignable function switches last bass button row Audio player wave recorde...

Page 120: ...ticore cable Accordion cloth Straps Options V Accordion Gig Bag FBC 7 Gig Bag RH 200 300 headphones AMC 4 Audio MIDI cable AAB 1 Music rest Throne SA 300 Stage amplifier Battery pack BP 24 25 part no...

Page 121: ...n Cassotto 2 3 Reed Volume Value ALL 16 8 8 8 4 5 1 3 2 2 3 Level Off 40 STD 40 2 4 Treble Octave Value 1 0 1 2 5 Valve Noise Type Bandoneon I Folk I Folk2 Classic Cajun Jazz F Folk D Folk Organetto F...

Page 122: ...ve 3 0 3 CC 00 STD Off 0 127 CC32 STD Off 0 127 PC STD Off 1 128 Volume Off 0 127 Panpot Off 0 127 Reverb Off 0 127 Chorus Off 0 127 Velocity On 1 127 Express Off Bellows Pedal 3 14 Name Chararacters...

Page 123: ...bellows velocity control on p 128 7 2 Lowest note Lowest Note C C D Eb E F F G Ab A Bb B C 7 3 Octave Value 3 0 3 7 4 Volume Level Off 40 STD 40 7 5 Panpot Level 63 Bass 0 63 Treb 7 6 Chord Drum Link...

Page 124: ...lue On Off 10 6 Function Switch Status On Off 10 7 Function Switches Edit Switch 1 6 Assign Set Up Set Down Regist Up Regist Down Sust A Sust B Orch On Off Start Stop Intro Fill Up Fill Down Ending Pi...

Page 125: ...Growl Vol Value Reed Bandoneon I Folk I Folk2 Classic Cajun Jazz F Folk D Folk Organetto F Folk2 Classic2 Studio Tradition Steierische Trikitixa F Jazz Classic3 Bajan Vol Off 40 STD 40 Noise Bandoneon...

Page 126: ...gio Scappini 12 TEXMEX Mexican Hat Dance Traditional Luigi Bruti 13 BAROQUE Smells from Toccata by J S Bach Sergio Scappini 14 CAPRICCIO Capriccio 13 by N Paganini Sergio Scappini 15 GarageTNGO Salvad...

Page 127: ...n in the Atmosphere by L Beier Ludovic Beier 32 9thBossa 9th Bossa by Yoshiaki Sato Yoshiaki Sato 33 SngFarEast Song from Far East by Yoshiaki Sato Yoshiaki Sato 34 ZakZakFunk Zak Zak Funk by Yoshiaki...

Page 128: ...lows Tuba Mix Velocity Strings Bellows Sl Strings Bellows HarpsiStr Velocity Violin Bellows Pizzicato Velocity Str Choir Bellows ChorusLuh Bellows Velocity ChorusWoh Bellows Velocity ChoirAahs Bellows...

Page 129: ...m 56 Jingle Bell 57 Cowbell 58 Claves 59 Castanets 60 Woodblock1 61 Woodblock2 62 Shaker 63 Shekere 64 Triangle 1 65 Triangle 2 66 Hand Clap 67 Finger Snap 68 ShrWhistle 69 LongWhistle 70 Quide 71 Gui...

Page 130: ...1 16 kk note number 00H 7FH 0 127 vv note on velocity 01H 7FH 1 127 Status 2nd byte 3rd byte BnH 00H mmH BnH 20H llH n MIDI channel number 0H FH Ch 1 16 mm Bank number MSB 00H 7FH ll Bank number LSB 0...

Page 131: ...inet 13 Oboe 14 Piccolo ORCHESTRA REGISTER RX 1 assignable 2 assignable 3 assignable 4 assignable 5 assignable 6 assignable 7 assignable 8 assignable 9 assignable 10 assignable 11 assignable 12 assign...

Page 132: ...PTY 52 EMPTY 53 EMPTY 54 EMPTY 55 EMPTY 56 EMPTY 57 EMPTY 58 EMPTY 59 EMPTY 60 EMPTY 61 EMPTY 62 EMPTY 63 EMPTY 64 EMPTY 65 EMPTY 66 EMPTY 67 EMPTY 68 EMPTY 69 EMPTY 70 EMPTY 71 EMPTY 72 EMPTY 73 EMPT...

Page 133: ...O 1 O 1 O 1 O 1 O 1 O 1 O 1 O 1 O O 1 X X O O X X Bank Select Modulation Volume Panpot Expression Hold 1 Reverb Send Chorus Send Program Change True O 1 0 127 O 0 9 Program Number 1 128 transmitted R...

Page 134: ...ntos Musicales J E Olear y ESQ Manduvira Asuncion PARAGUAY TEL 595 21 492147 PERU Audionet Distribuciones Musicales SAC Juan Fanning 530 Miraflores Lima Peru TEL 511 4461388 TRINIDAD AMR Ltd Ground Fl...

Page 135: ...82 Connecting AC adapter 16 Connections 17 Contrast 86 Convert PC 111 Copy Set 97 Copy Effects 97 Copying settings 97 Crescendo 56 Curve 86 D Data 31 Write Error 117 Del 70 Delay 26 82 84 Fback 83 Mac...

Page 136: ...rd Edit 79 81 Chord Link 69 Chord MIDI TX 80 81 Chord Volume 80 Edit 78 Free Bass 34 Free Bass Volume 81 Link 68 MIDI TX 79 Mode 30 Octave 78 80 81 Touch 92 Volume 31 78 Orchestra Free Bass Volume 34...

Page 137: ...Timbre 51 76 78 79 81 Time 83 TO FBC 7 14 Tone Generator 108 Touch 92 Tradition 66 67 71 72 74 75 Transpose 35 64 Treble 12 Edit 65 MIDI TX 70 Octave 66 Orchestra 29 Panel functions 12 Playing bass pa...

Page 138: ...138 rFR 7x V Accordion For China For China FR 7x GB book Page 138 Tuesday August 25 2009 10 58 AM...

Page 139: ...es For EU Countries For the USA For Canada This product complies with the requirements of European Directives EMC 89 336 EEC and LVD 73 23 EEC For EU countries FR 7x GB book Page 139 Tuesday August 25...

Page 140: ...R 602 00 0346 01 RES 738 09 FR 7x Owner s Manual E FR 7x GB book Page 140 Tuesday August 25 2009 10 58 AM...

Reviews: