6
Panel Descriptions
Top Panel/Front Panel
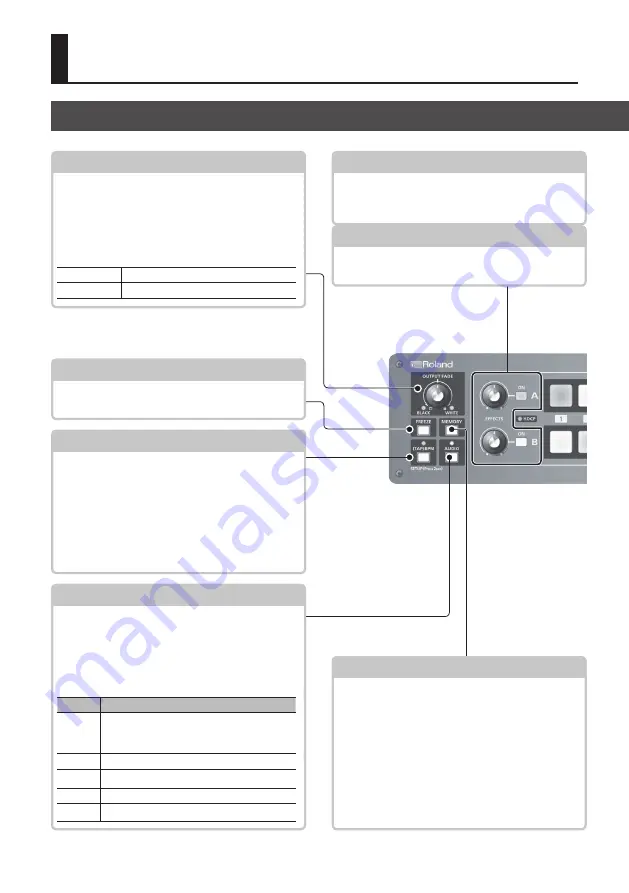
EFFECTS A/EFFECTS B [ON] Buttons
These turn effects on and off for the respective
output video on bus A and bus B. When turned on,
the [ON] button lights up.
[OUTPUT FADE] Knob
This performs a fade-in or fade-out for the output
video.
Turning the control clockwise applies a white fade.
Turning it counterclockwise applies a black fade.
The indicators on the left and right of the [OUTPUT
FADE] knob show the status of the fade.
Flashing
Fade-in/fade-out in progress
Dark
Normal output
[EFFECTS A] and [EFFECTS B] Knobs
When an effect is on, these adjust the degree of
effect applied.
[MEMORY] Button
This turns the memory function on and off. When
this is turned on (lighted), you can save and recall
up to eight types of settings, including video and
audio settings and operation-panel states.
The [A-1] through [A-4] and [B-1] through [B-4]
buttons function as memory selection buttons 1
through 8.
5
Turning on the memory function displays the
MEMORY menu on the monitor connected to the
PREVIEW connector.
[(TAP) BPM] Button
This sets the BPM (tempo) according to the timing
with which you tap the [(TAP) BPM] button. The
indicator above the [(TAP) BPM] button flashes in
sync with the current BPM setting.
5
Pressing and holding the [(TAP) BPM] button
(for 2 seconds or longer) to turn it on (lighted)
displays the SETUP menu on the monitor
connected to the PREVIEW connector.
[AUDIO] Button
Turning this on (lighted) displays the AUDIO
menu on the monitor connected to the PREVIEW
connector.
The [A-1] through [A-4] and [B-1] through [B-4]
buttons function as shortcut selection buttons for
the AUDIO menu.
Button AUDIO Menu
[A-1]
:
[A-4]
HDMI IN 1 LEVEL
:
HDMI IN 4 LEVEL
[B-1]
AUDIO IN LEVEL
[B-2]
MIC LEVEL
[B-3]
MASTER OUT LEVEL
[B-4]
AUDIO FOLLOW
[FREEZE] Button
This stops (freezes) input video. The [FREEZE]
button lights up during a freeze.


