


Correct the sensor for reading crop marks.
Depending on the characteristics of the media, such as reflectivity and colors, the machine may not be able to
read the crop marks. In such cases, correct the sensor for reading crop marks.
1.
Correct the sensor for reading crop marks.
Procedure
1.
Set up the media for which the machine has failed to read the crop marks.
Use the very media that has already been printed for which the machine has failed to read the crop marks.
2.
Press [MENU].
3.
Press [
▲
] to display the screen shown below.
MENU
CUTTING MENU
4.
Press [
▶
] once, and then press [
▼
] twice to display the screen shown below.
CUTTING MENU
CROPSENS CALIB.
5.
Press [
▶
] to display the screen shown below.
CROPSENS CALIB
SENS CALIB.
6.
Press [ENTER] to display the screen shown below.
MOVE CUT TOOL
TO MARK CENTER
7.
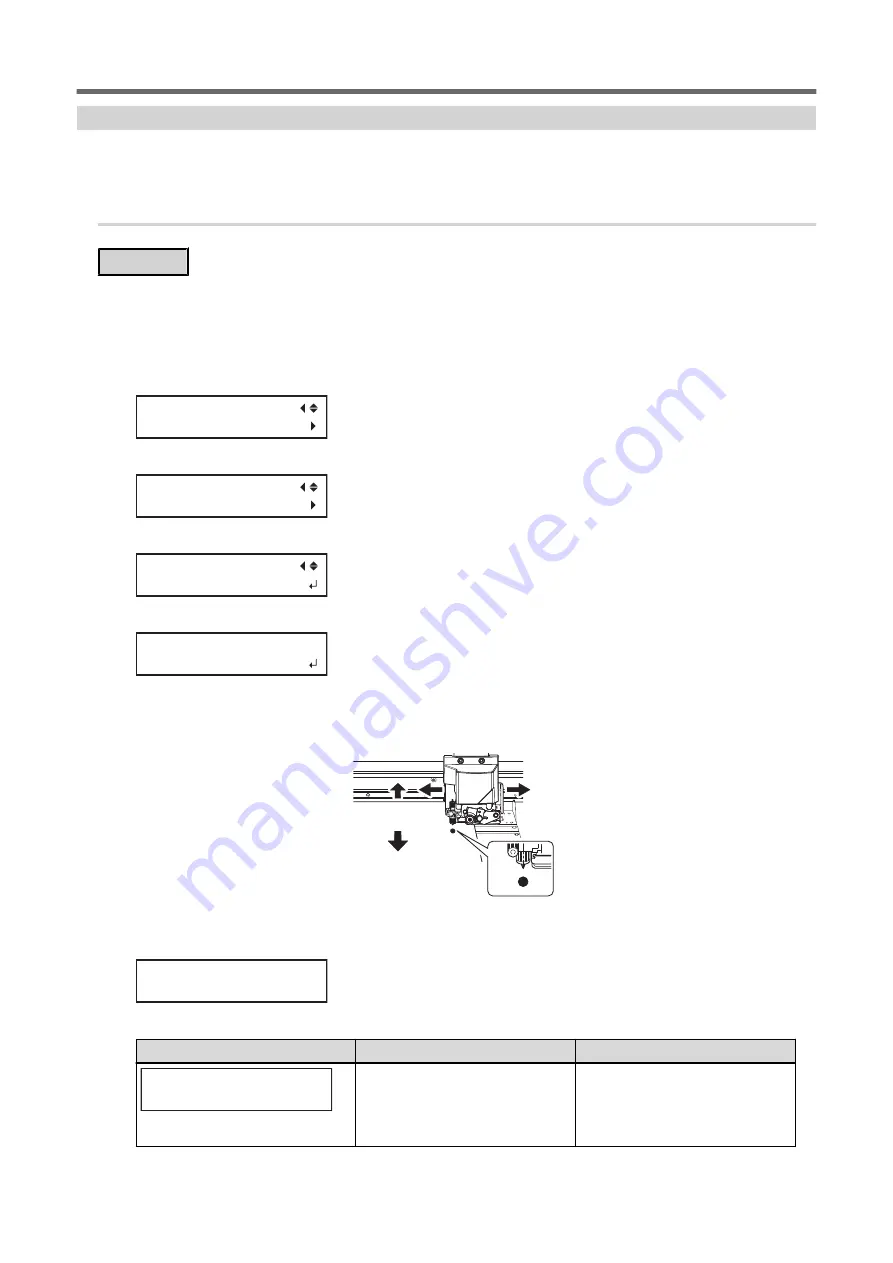
Press [
◀
], [
▶
], [
▲
] or [
▼
] to move the center of the blade over the crop marks.
The center of the blade should only be over the crop marks, and does not need to be aligned with the cen-
ter of the crop marks.
8.
Press [ENTER].
If correction succeeds, the following message appears. Proceed to the next step.
CALIB. SUCCESS
+ 20%
If correction fails, the following message appears. Take countermeasures and redo the correction.
Messages
Cause
Countermeasures
CALIB. FAILED
(TOO BRIGHT)
• The lighting in the room where the
printer is installed or vicinity of the
printer is too bright.
• The reflected light from the media is too
strong.
• Adjust the brightness of the lighting.
• Change the media type.
Accurately Adjusting the Settings for Cutting with Crop Marks
184
1. Optimizing the Output Quality
Summary of Contents for TrueVIS VG2-540
Page 9: ...Chapter 1 Basic Handling Methods 8 ...
Page 36: ...Setup of Media 2 Basic Operations 35 ...
Page 43: ...Setup of Media 42 2 Basic Operations ...
Page 60: ...Ink Pouch TR2 Cleaning Liquid Pouch Replacement 2 Basic Operations 59 ...
Page 61: ...Chapter 2 Output Method 60 ...
Page 70: ...REDO ADJ YES DONE 10 Press ENTER to confirm your entry Printing Output 1 Printing Method 69 ...
Page 138: ...Chapter 3 Optimizing Quality and Efficiency 137 ...
Page 195: ...W1100mm B Adjusting the Output start Location 194 2 Optimizing Work Efficiency ...
Page 217: ...Chapter 4 Maintenance 216 ...
Page 272: ...Chapter 5 Troubleshooting Methods 271 ...
Page 305: ...Chapter 6 Appendix 304 ...
Page 308: ...8 Detach the blade holder Preparing to Move the Machine 1 Operations When Moving the Unit 307 ...


