


7.
Correct the misalignment of the printing and cutting positions when using crop
marks.
When you remove the printed media, and then reload it and perform cutting, use the crop marks. For this case,
correction is to be performed because the positioning of printing and cutting may be misaligned even when you
are using crop marks depending on the composition of the media.
Procedure
1.
Press [
▶
] to select "NEXT".
PRINT-CUT ADJ.
SET [NEXT]
2.
Press [ENTER] to confirm your entry.
3.
Press [
◀
] or [
▶
] to select "NEXT" or "SET".
Select "NEXT" when you will not print crop marks. Select "SET" when you will print crop marks.
CROP-CUT ADJ.
[SET] NEXT
4.
Press [ENTER] to confirm your entry.
If you select "SET", the test pattern (C&C1) is printed and cut. Proceed to the next step.
If you select "NEXT", proceed to step 8.
5.
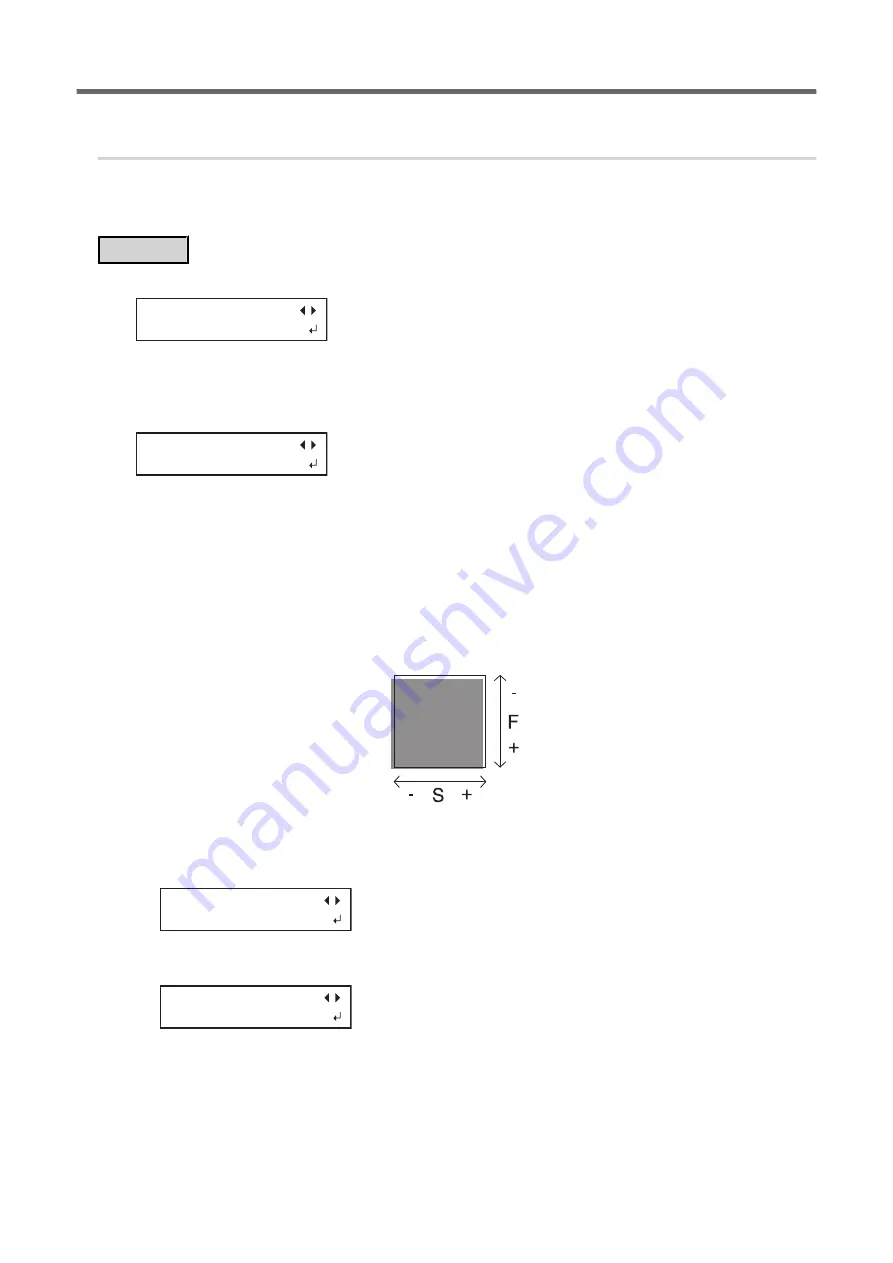
Check the test pattern (C&C1) condition.
Check whether the printing position (shaded part) and the cutting position (outer frame) are aligned. An
example of the printing position and the cutting position being misaligned is shown in the following figure.
"F" indicates the feed direction of the media (the feed direction) and "S" indicates the direction of print
head movement (the scan direction).
6.
Determine whether to correct the misalignment.
• Cutting position and printing position are not aligned
Press [
◀
] to select "YES".
CONTINUE ADJ.?
[YES] DONE
• Cutting position and printing position are aligned
Press [
▶
] to select "DONE".
CONTINUE ADJ.?
YES [DONE]
7.
Press [ENTER] to confirm your entry.
• If you select "YES", the test pattern (C&C2) for setting the correction values is printed and cut. Proceed
to the next step.
• If you select "DONE", proceed to step 8.
Cutting with Crop Marks
4. How to Cut with Crop Marks
125
Summary of Contents for TrueVIS VG2-540
Page 9: ...Chapter 1 Basic Handling Methods 8 ...
Page 36: ...Setup of Media 2 Basic Operations 35 ...
Page 43: ...Setup of Media 42 2 Basic Operations ...
Page 60: ...Ink Pouch TR2 Cleaning Liquid Pouch Replacement 2 Basic Operations 59 ...
Page 61: ...Chapter 2 Output Method 60 ...
Page 70: ...REDO ADJ YES DONE 10 Press ENTER to confirm your entry Printing Output 1 Printing Method 69 ...
Page 138: ...Chapter 3 Optimizing Quality and Efficiency 137 ...
Page 195: ...W1100mm B Adjusting the Output start Location 194 2 Optimizing Work Efficiency ...
Page 217: ...Chapter 4 Maintenance 216 ...
Page 272: ...Chapter 5 Troubleshooting Methods 271 ...
Page 305: ...Chapter 6 Appendix 304 ...
Page 308: ...8 Detach the blade holder Preparing to Move the Machine 1 Operations When Moving the Unit 307 ...


