123
Editing a Sample
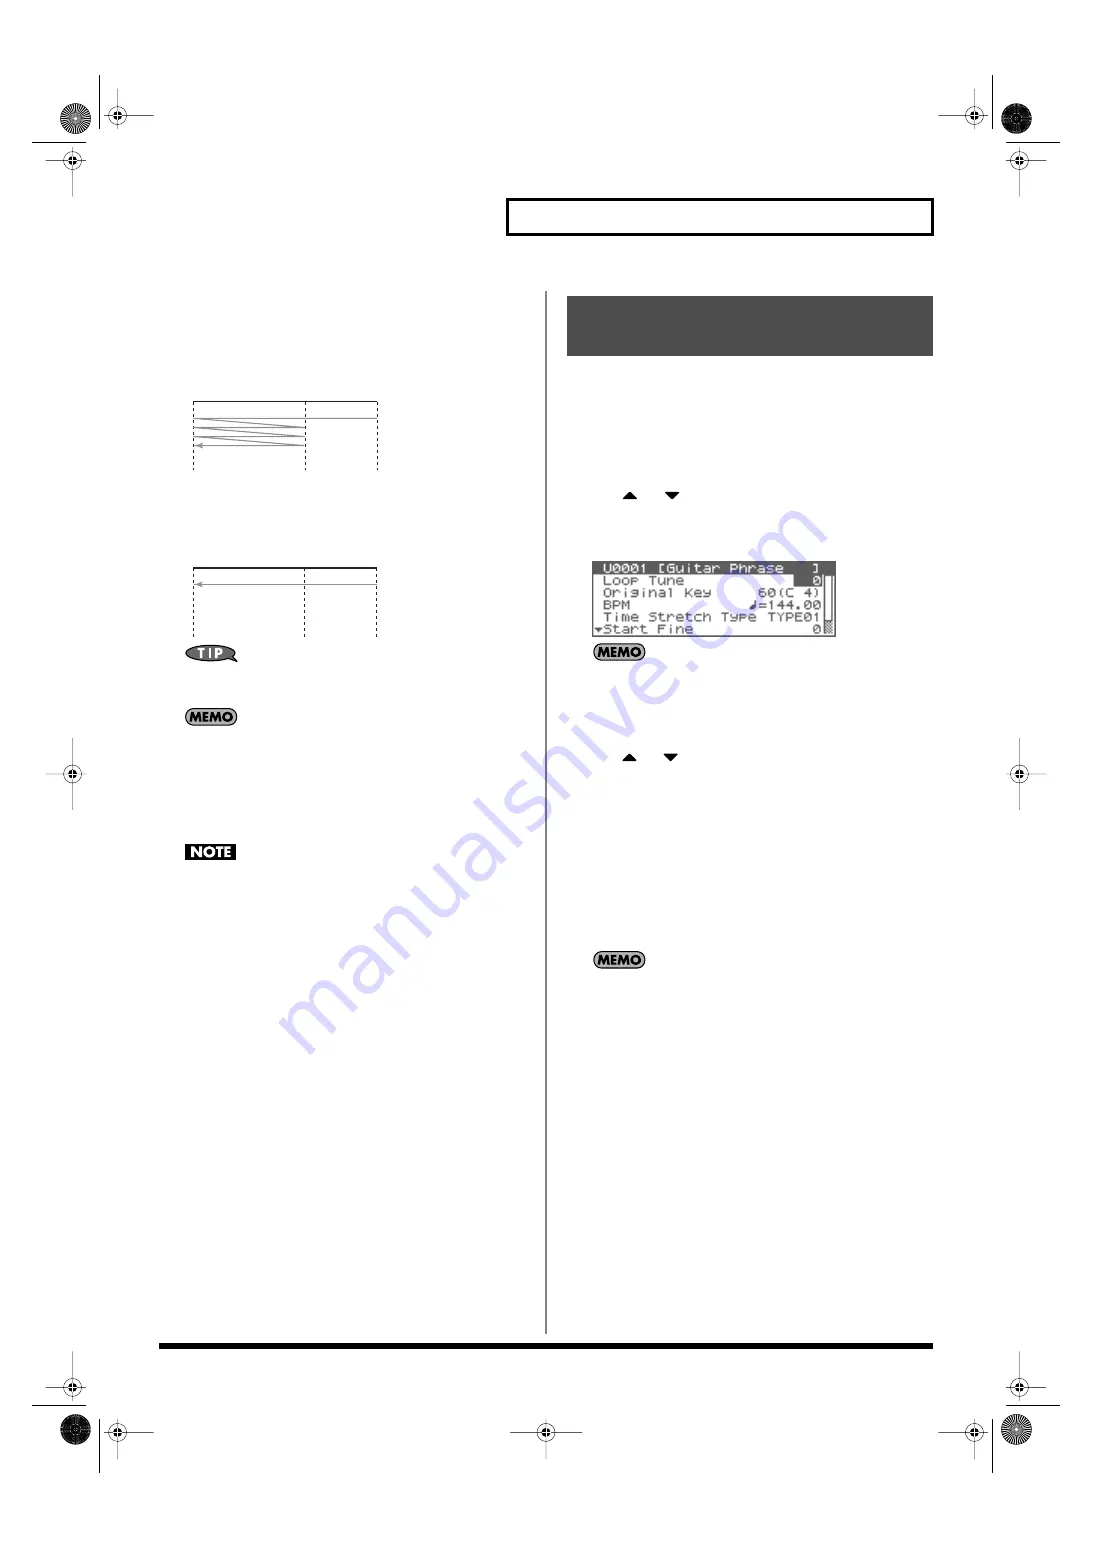
REV (Reverse)
When the sample has been played back from the End point to
the Start point, it will be repeatedly played back in the reverse
direction, from the Loop Start point to the Start point.
fig.15-007
REV-ONE (Reverse One-shot)
The sample will be played back only once from the End point to
the Start point in the reverse direction.
fig.15-008
By pressing OUTPUT knob, you can audition the sample sound.
Press the knob once again to stop playback.
If you hold down OUTPUT knob and edit the start/loop/end
point, the sample will play repeatedly across that point. Since
the sound in the region you’re specifying will play repeatedly,
this is a convenient way to check your setting.
(Zooming-in or zooming-out on the waveform will change the
region that loops.)
Sample modify operations (Chop, Normalize, etc.) apply to the
entire sample. Even if you specify a start point or end point,
they will be ignored. If you want to apply the operation only to
the region between the start point and end point, use Truncate
to delete unwanted portions of the sample, and then perform
the sample modifying operation.
Here you can make various settings for the sample.
1.
In the Sample List screen, select the sample that you want
to edit.
2.
Press [MENU].
The Sample Utility screen will appear.
3.
Use
or
to select “Sample Parameter.”
4.
Press [ENTER].
The Sample Parameter screen will appear.
fig.15-009
Alternatively, you can access the Sample Parameter screen from
the Sample Edit screen by pressing [MENU] to get the Sample
Utility, choosing “Sample Parameter” from the menu, and
pressing [ENTER].
5.
Use
or
to select the parameter and turn the VALUE
dial or use [INC][DEC] to get the value you want.
•
Loop Tune
Specifies the pitch of the loop region.
Value:
-50– +50
*
Make fine adjustments in one-cent (1/100 semitone) increments.
•
Original Key
Note number that will play the sample at the pitch at which it
was sampled.
Value:
0 (C-1)–127 (G9)
You can also specify the key by playing a note on your external
MIDI keyboard.
•
BPM (TEMPO)
Specifies the original tempo of the sample.
To set the BPM (tempo), you can press and turn the VALUE
dial, or press the VALUE dial and use [INC][DEC] to adjust the
value below the decimal point.
Value:
5.00–300.00
*
In order to synchronize the tempo, Wave Temp Sync (p. 55) must be
turned on.
•
Time Stretch Type
Specifies how the tempo will be synchronized. Decreasing this
value will optimize the sound for more rapid phrases, and
increasing this value will optimize the sound for slower
phrases.
Value:
TYPE01–TYPE10
•
Start Fine
Fine adjustment of the Start point.
Value:
0–255
Start P.
Loop
Start P.
End P.
Start P.
Loop
Start P.
End P.
Making Settings for Sample
(Sample Parameters)
Fantom-XR_r_e.book 123 ページ 2006年4月4日 火曜日 午前10時14分
Summary of Contents for Fantom XR
Page 20: ...20 Getting Ready Fantom XR_r_e book 20 ページ 2006年4月4日 火曜日 午前10時14分 ...
Page 21: ...21 Quick Start Fantom XR_r_e book 21 ページ 2006年4月4日 火曜日 午前10時14分 ...
Page 31: ...31 Advanced Use Fantom XR_r_e book 31 ページ 2006年4月4日 火曜日 午前10時14分 ...
Page 175: ...175 Appendix Fantom XR_r_e book 175 ページ 2006年4月4日 火曜日 午前10時14分 ...
Page 281: ...281 MEMO Fantom XR_r_e book 281 ページ 2006年4月4日 火曜日 午前10時14分 ...


