background image

57

Using the SD-50 as an Audio Interface

Adjust the input level

1.

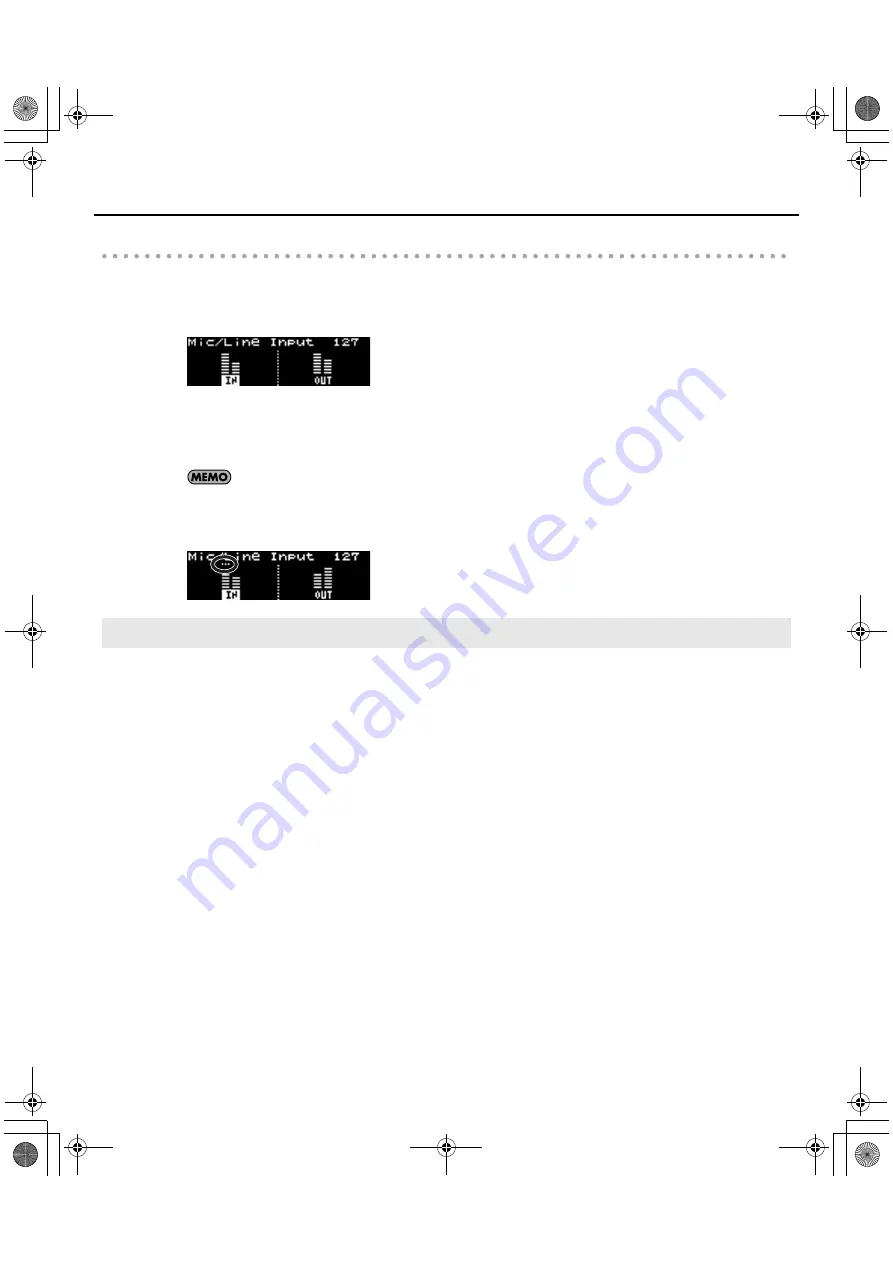
Press the [PART] button a number of times to access the audio part screen.

The level meters will appear.

page_audio_meter-mic.eps

2.

Turn the [SENS] knob to adjust the input volume.

In order to record with the best audio quality, use the [SENS] knob to increase the level as far as possible without 
allowing an overload to occur; i.e., don’t let the level meter reach the maximum point.

You can apply echo to the sound of the connected microphone or guitar (p. 59).

* If the indication below appears, the input level has overloaded even though the level meter did not reach the 

maximum point.

fig.input-level-over.eps

1.

Operate your computer to start recording.

For details on how to start recording, refer to the user’s guide for the software you’re using.

Recording

SD-50_e.book  57 ページ  2010年1月25日 月曜日 午前10時52分

Summary of Contents for 5100011346 -01

Page 1: ... 5 1 0 0 0 1 1 3 4 6 0 1 ...

Page 2: ......

Page 3: ...ountries 201a Before using this unit carefully read the sections entitled USING THE UNIT SAFELY p 4 and IMPORTANT NOTES p 7 These sections provide important information concerning the proper operation of the unit Additionally in order to feel assured that you have gained a good grasp of every feature provided by your new unit Owner s manual should be read in its entirety The manual should be saved...

Page 4: ...upplied power cord must not be used with any other device 009 Do not excessively twist or bend the power cord nor place heavy objects on it Doing so can damage the cord producing severed elements and short circuits Damaged cords are fire and shock hazards Used for instructions intended to alert the user to the risk of injury or material damage should the unit be used improperly Material damage ref...

Page 5: ...to operate normally or exhibits a marked change in performance 013 In households with small children an adult should provide supervision until the child is capable of following all the rules essential for the safe operation of the unit 014 Protect the unit from strong impact Do not drop it 015 Do not force the unit s power supply cord to share an outlet with an unreasonable number of other devices...

Page 6: ...sing new batteries together with used ones In addition avoid mixing different types of batteries 3 Remove the batteries whenever the unit is to remain unused for an extended period of time 5 If a battery has leaked use a soft piece of cloth or paper towel to wipe all remnants of the discharge from the battery compartment Then install new batteries To avoid inflammation of the skin make sure that n...

Page 7: ... in this condition Therefore before using the unit you must allow it to stand for several hours until the condensation has completely evaporated 360 Depending on the material and temperature of the surface on which you place the unit its rubber feet may discolor or mar the surface You can place a piece of felt or cloth under the rubber feet to prevent this from happening If you do so please make s...

Page 8: ...Do not keep cards in direct sunlight in closed vehicles or other such locations Do not allow cards to become wet Do not disassemble or modify the cards Copyright 852a This product can be used to record or duplicate audio or visual material without being limited by certain technological copy protection measures This is due to the fact that this product is intended to be used for the purpose of prod...

Page 9: ... Off 22 Turning the Power On 22 Turning the Power Off 22 Installing the Driver 23 Windows 7 Windows Vista Users 24 Input Output Device Settings 26 Windows XP Users 28 Input Output Device Settings 31 Mac OS X Users 33 Input Output Device Settings 34 Verifying That You Hear Sound 38 Connecting Your Audio Playback System 38 Playing Back the Sample Data 39 Using Playlist Editor 40 Installing Playlist ...

Page 10: ...e SD 50 as an Audio Interface 55 Listening to Playback from Your Computer 56 Recording Your Microphone or Guitar 56 Getting Ready to Record 56 Recording 57 Recording Sound From the Line Input 58 Getting Ready to Record 58 Recording 58 Input Output and Effect Settings 59 Using the SD 50 as a MIDI Interface 60 Using the SD 50 as an SMF Audio Player 61 Listening to the Demo Songs 63 Playing Back 64 S...

Page 11: ...ng USB Memory USB MEM FORMAT 76 Returning to the Factory Settings FACTORY RESET 77 Viewing Information About the SD 50 INFORMATION 78 Appendix 79 Controlling DAW Software 80 About V LINK 81 Driver Settings 83 Reinstalling the Driver 86 Troubleshooting 88 Error Messages 104 Settings Saved as User Data 105 Solo Tone 106 MIDI Implementation Chart 108 Specifications 109 Index 111 SD 50_e book 11 ページ 2...

Page 12: ...ication software for managing songs SD 50 driver Do not touch the data surface unprinted surface of the disc Doing so might make the data unreadable If the disc gets dirty clean it using a commercially available disc cleaner AC adaptor with power cord This is a dedicated AC adaptor for the SD 50 You must use only the supplied adaptor USB cable This cable connects the SD 50 to your computer s USB c...

Page 13: ...13 Getting Ready SD 50_e book 13 ページ 2010年1月25日 月曜日 午前10時52分 ...

Page 14: ...p 21 Normally this will be extinguished It will light when the batteries run low If you continue using the unit the indicator will eventually start blinking stop using the unit and replace the batteries If you continue playing even when the indicator is blinking the display will indicate Battery Low and further operation will not be possible COMPUTER indicator This will light when the SD 50 is abl...

Page 15: ...NST button This button accesses a screen where you can edit the part s sound p 46 PLAYER button This button accesses a screen where you can select songs p 63 STOP button This button stops song playback PLAY PAUSE button This button starts or pauses song playback PREV button This button moves to the beginning of the song or selects the previous song By holding down this button you can rewind the so...

Page 16: ... to connect fig TRSJack eps SETTING switch Set this appropriately for the device connected to the MIC GUITAR IN jack This switch will turn on the phantom power that is supplied to the MIC IN jack Rear Panel 11 2 1 3 4 5 6 7 8 9 10 Setting Explanation BUS When connected to a computer and using bus power this setting turns the power on OFF Turns the power off DC IN BATTERY When using an AC adaptor o...

Page 17: ...A if a phantom powered condenser microphone is connected to the MIC IN jack 922 This instrument is equipped with balanced XLR type jacks Wiring diagrams for these jacks are shown below Make connections after first checking the wiring diagrams of other equipment you intend to connect fig XLRJack eps LINE IN jack You can connect a portable audio player or similar device here p 58 LINE OUT jacks Thes...

Page 18: ...emory sold separately here p 64 931 Carefully insert the USB memory all the way in until it is firmly in place PHONES jack Connect headphones here VOLUME dial This dial adjusts the overall volume of the output from the rear panel LINE OUTPUT jacks and PHONES jack Side Panel 1 2 3 4 1 2 3 4 SD 50_e book 18 ページ 2010年1月25日 月曜日 午前10時52分 ...

Page 19: ...ill be used preferentially If you want to use batteries disconnect the AC adaptor from the SD 50 If you want to switch the power from battery or AC adaptor you must turn off the power first If batteries are installed unplugging the power cord from the AC outlet while the power is turned on will cause the power to turn off The indication shown by the battery indicator is an approximation Do not use...

Page 20: ...en opening the battery compartment cover make sure that no foreign objects flammable items coins pins etc or liquids water juice etc enter the compartment 928 When turning the unit upside down get a bunch of newspapers or magazines and place them under the four corners or at both ends to prevent damage to the buttons and controls Also you should try to orient the unit so no buttons or controls get...

Page 21: ...cator is blinking the display will indicate Battery Low and further operation will be impossible The indication shown by the battery indicator is an approximation If the SD 50 is connected to your computer it can operate using power supplied from your computer via the USB cable You must install the driver if you want to connect the SD 50 to your computer p 23 With some computers the SD 50 might no...

Page 22: ...d The volume of the SD 50 and of the connected equipment is minimized 2 Set the POWER switch to DC IN BATTERY If you re using bus power set the POWER switch to BUS 942 This unit is equipped with a protection circuit A brief interval a few seconds after power up is required before the unit will operate normally 3 Use the VOLUME dial to adjust the volume 4 Adjust the volume of the connected equipmen...

Page 23: ... system Perform the following three steps to install and check the driver If you are using the SD 50 s player function p 61 the SD 50 cannot be used while connected to a computer The procedure for installation and checking Windows 7 Windows Vista Windows XP Mac OS X 1 Install the driver p 24 p 28 p 33 2 Input output device settings p 26 p 31 p 34 3 Verifying that you hear sound p 38 p 38 p 38 SD 5...

Page 24: ... is not supported or The version of this file is not compatible with the version of Windows you re running or if you don t know the version of your operating system check your operating system as described below If System type indicates 64 bit Operating System you have the 64 bit version Windows 7 users Open Control Panel click System and Security and then click System If the Control Panel shows t...

Page 25: ...s directed by the message 7 To begin the installation click Next once again Installation will begin If a Windows security dialog box appears click Install fig win7securitya e eps_36 8 Turn the SD 50 s POWER switch OFF p 22 9 When the screen indicates Ready to install the driver use a USB cable to connect the SD 50 to your computer fig win7drv3 e eps_36 3 If any other message appears proceed as dir...

Page 26: ...input output device For details on how to do this refer to the documentation for your software If you re unable to select the SD 50 as the audio input output device in your software it may be that a problem has occurred Refer to Problems with Settings p 94 in the Troubleshooting section Audio input output device If you re using ASIO compatible software select the SD 50 in the ASIO settings of your...

Page 27: ...setting If you select the SD 50 as the default playback device audio alerts and other sounds from Windows will also be output from the SD 50 and therefore will not be heard from your computer s speakers This completes driver installation and settings Next verify that you hear sound from the SD 50 Verifying That You Hear Sound p 38 Caution when recording or playing back with your software Check the...

Page 28: ... your operating system If the Install Program As Other User dialog box appears click Cancel to terminate the installation log on to Windows using an administrator account and perform the installation once again 5 The screen will indicate SD 50 Driver will be installed on your computer Click Next If any other message appears proceed as directed by the message 6 To begin the installation click Next ...

Page 29: ...e indication Found New Hardware will appear in the lower right corner of your screen It may take several minutes for the Found New Hardware Wizard to appear 10 If you are asked whether you want to connect to Windows Update choose No not this time and click Next fig xpwupd e eps 11 Choose Install the software automatically Recommended and click Next fig xpdrv6 e eps Operation of the SD 50 Operation...

Page 30: ...bed in Driver Signing Option Settings Windows XP p 99 and perform the installation once again 13 The screen will indicate Completing the Found New Hardware Wizard Click Finish When installation is complete the SD 50 Driver Setup dialog box will indicate Installation has been completed 14 Click Close to close the SD 50 Driver Setup dialog box If the System Settings Change dialog box appears click Y...

Page 31: ...n your software it may be that a problem has occurred Refer to Problems with Settings p 94 in the Troubleshooting section Audio input output device If you re using ASIO compatible software select the SD 50 in the ASIO settings of your software MIDI input output device Input Output Device Settings Audio output device OUT SD 50 Audio input device IN SD 50 MIDI output device SD 50 SD 50 MIDI SD 50 CO...

Page 32: ...c Playback area select SD 50 3 Click OK to complete the setting If you select the SD 50 as the default playback device audio alerts and other sounds from Windows will also be output from the SD 50 and therefore will not be heard from your computer s speakers This completes driver installation and settings Next verify that you hear sound from the SD 50 Verifying That You Hear Sound p 38 Caution whe...

Page 33: ...s DVD ROM into your DVD ROM drive 4 Double click one of the following icons on the DVD ROM to start up the installer A message concerned with checking whether installation is possible may appear If so click Continue If a message indicating that installation is not possible appears check the operating system you re using and perform step 4 5 The screen will indicate Welcome to the SD 50 Driver Inst...

Page 34: ...u ll need to select the SD 50 as the audio input output device p 35 and MIDI input output device For details on how to do this refer to the documentation for your software Audio input output device settings If you re unable to select the SD 50 as the audio input output device in your software it may be that a problem has occurred Refer to Problems with Settings p 94 in the Troubleshooting section ...

Page 35: ...ting close System Preferences MIDI input output device settings 1 Double click Audio MIDI Settings Applications Utility to start it up 2 Access the dialog box Mac OS X 10 6 or later From the Window menu choose Show MIDI Window to open MIDI Studio Mac OS X 10 5 or earlier Click the MIDI Devices tab 3 Verify that SD 50 is shown in the MIDI Studio or Audio MIDI Settings dialog box fig osxaudiomidi1 e...

Page 36: ...evice Name field For each New Device enter the following names fig osxnewdevice e eps 6 Use the mouse to drag between the and symbols representing input and output respectively of SD 50 and each New Device so that they are connected as shown in the illustration below fig osxmidiset e eps_32 New Device Device Name First New Device SD 50 Second New Device SD 50 MIDI Third New Device SD 50 CONTROL SD...

Page 37: ... Quit Audio MIDI Setup to finish making settings Click Click Caution when recording or playing back with your software Check the following points before you use the SD 50 to record or play back Connect the SD 50 to your Macintosh before you start up the software you re using Do not disconnect the SD 50 s USB cable from your Macintosh while your software is running Close the software you re using b...

Page 38: ...rn off the power on all devices before making any connections As shown in the illustration connect your headphones or monitor speakers so that you can hear the sound played back from the computer fig connect 2 eps Verifying That You Hear Sound Connecting Your Audio Playback System USB connector COMPUTER connector LINE OUT jacks PHONES jack Computer Amplified Speakers Headphones SD 50_e book 38 ページ...

Page 39: ...sktop If you re using Windows Windows Media Player will start If you re using Macintosh iTunes will start Click the play button and the sample data will start playing Depending on your system other playback software may start up If so play the sample data as described in the documentation for the software you re using 4 Adjust the volume Use the SD 50 s VOLUME dial to adjust the volume You should ...

Page 40: ...er 2 A user account control dialog box will appear click Continue 3 The installer will start up Follow the instructions that appear on the screen to install Playlist Editor 1 Insert the included DVD ROM into your DVD ROM drive and double click the Setup exe file located in the Editor folder 2 The Welcome screen will appear Click Next 3 Follow the instructions that appear on the screen to install P...

Page 41: ... on the SD 50 itself You can play songs individually without creating a playlist To do so place the SMF or audio files in the root directory of your USB memory Creating a Playlist Viewing the online manual Playlist Editor s online manual is located in the Manual folder within the folder in which Playlist Editor was installed The online manual is provided as a PDF file You ll need Adobe Reader avai...

Page 42: ...42 MEMO SD 50_e book 42 ページ 2010年1月25日 月曜日 午前10時52分 ...

Page 43: ...43 Operation SD 50_e book 43 ページ 2010年1月25日 月曜日 午前10時52分 ...

Page 44: ...desired GM type as described in System Settings p 72 Classical This is the basic set of sounds that will blend easily into an ensemble You should also use this sound set if GM2 data compatibility is an important consideration Contemporary This is a set of sounds that emphasizes the realism of each individual instrument This set is selected when the SD 50 is powered up Solo 3 sounds These sounds re...

Page 45: ...efers to processing that can be applied to modify the sound By switching effects you can significantly alter the character of the sound The SD 50 contains the following effects you can modify the depth and type of each effect p 52 Studio set A studio set is a collection of settings for the sixteen parts and the effects fig studio set_e eps The number of notes polyphony that the SD 50 can produce s...

Page 46: ...ange page_part_meter eps 3 Press the INST button to access the tone list screen page_patch_list 1 eps 4 Turn the VALUE dial to select a tone page_patch_list 2 eps Press the button and Sample notes will be played so you can audition the tone 5 Press the ENTER button The tone has now been selected page_part_meter 5h eps If you save the studio set your selections will be saved to internal memory p 54...

Page 47: ...he VALUE dial to select either CATEGORY or GROUP and then press the ENTER button The category list or group list will appear page_patch_grp_list eps 5 Turn the VALUE dial to select the desired category or group and then press the ENTER button The first tone in the selected category or group will be selected For information on the tones in each category or group refer to PDF Tone List page_patch_li...

Page 48: ...program change and bank select numbers of the currently selected tone 1 Press the INST button a number of times to access the tone information screen page_tone_info eps Viewing a Tone s Program Change and Bank Select Numbers SD 50_e book 48 ページ 2010年1月25日 月曜日 午前10時52分 ...

Page 49: ...he PART button a number of times to access the MIDI part screen page_part_meter eps 2 Turn the VALUE dial to select the part that you want to mute or solo and then press the ENTER button page_part_meter 1 eps 3 Turn the VALUE dial to change the setting page_part_meter s eps The mute and solo settings will be saved in internal memory if you save the studio set p 54 Adjusting the Settings of Each Pa...

Page 50: ...rt_meter eps 2 Turn the VALUE dial to select the part whose volume you want to adjust and then press the ENTER button twice page_part_meter 100 eps 3 Turn the VALUE dial to adjust the setting The adjusted volume of each part will be saved in internal memory if you save the studio set p 54 Adjusting Each Part s Volume Value 0 127 SD 50_e book 50 ページ 2010年1月25日 月曜日 午前10時52分 ...

Page 51: ...u want to adjust and then press the ENTER button page_part_edit 3 eps 3 Turn the VALUE dial to adjust the setting The pan and effect settings you specify will be saved in internal memory if you save the studio set p 54 Adjusting the Pan and Effect Depth Setting Value Explanation Pan 0 127 Left right balance of the sound Reverb Send 0 127 Depth of reverb Choose 0 if you don t want to apply reverb C...

Page 52: ...ELAY Selects either Chorus or Reverb When CHORUS has been selected for Cho mode Cho Type CHORUS1 CHORUS2 CHORUS3 CHORUS4 FB CHORUS FLANGER CHORUS1 CHORUS2 CHORUS3 CHORUS4 Typical chorus effect adding depth and spaciousness to the sound FB CHORUS Chorus effect that produces a soft flanger like sound FLANGER Produces a sound that s reminiscent of a jet airplane taking off and landing Cho Rate 0 127 ...

Page 53: ... SD 50 as a MIDI Sound Module 3 Turn the VALUE dial to adjust the setting The effect settings you adjust will be saved in internal memory if you save the studio set p 52 SD 50_e book 53 ページ 2010年1月25日 月曜日 午前10時52分 ...

Page 54: ... number of seconds until the REGIST SONG screen appears page_regist_favorite eps 3 Press the FAVORITE button a number of times to access the REGIST STUDIO SET screen page_studio_write eps 4 Press one of the PART 1 PLAYER 3 buttons Once the following screen appears the studio set has been saved page_studioset_write eps 1 Press the FAVORITE button a number of times to access the screen shown below T...

Page 55: ... the computer 983 Howling could be produced depending on the location of microphones relative to speakers This can be remedied by 1 Changing the orientation of the microphone s 2 Relocating microphone s at a greater distance from speakers 3 Lowering volume levels fig connect 3_e eps USB connector Computer Electric Guitar Microphone SD 50 Portable Audio Device SETTING switch SENS knob SD 50_e book ...

Page 56: ... connecting 3 Connect your microphone or guitar to the MIC IN jack or the MIC GUITAR IN jack Connect a microphone to the MIC IN jack or MIC GUITAR IN jack Connect a guitar to the MIC GUITAR IN jack You can t use both the MIC GUITAR IN and MIC IN jacks simultaneously You can apply echo to the microphone p 59 Listening to Playback from Your Computer Recording Your Microphone or Guitar Getting Ready ...

Page 57: ...l as far as possible without allowing an overload to occur i e don t let the level meter reach the maximum point You can apply echo to the sound of the connected microphone or guitar p 59 If the indication below appears the input level has overloaded even though the level meter did not reach the maximum point fig input level over eps 1 Operate your computer to start recording For details on how to...

Page 58: ...2 Adjust the output level of the connected audio device You can apply echo p 59 or center cancel p 69 to the sound of the audio device connected to LINE IN or modify its pitch p 68 If the indication below appears the input level has overloaded even though the level meter did not reach the maximum point In this case you should keep the input at a low level by turning ON the Audio Input Att in the A...

Page 59: ... MIDI sound generator on an external device Mic Echo Level 0 10 Adjusts the amount of echo applied to the microphone connected to the MIC IN jack or MIC GUITAR IN jack Higher values produce a deeper echo effect Audio Input Att Audio input attenuator ON OFF Reduces the input level from the MIC IN jack MIC GUITAR IN jack and LINE IN jack This will reduce input noise Direct Mon Sw Direct Monitor Swit...

Page 60: ...er to the user s guide for the software you re using If the SD 50 is not connected to a computer you can use your MIDI keyboard to play the SD 50 s sound generator When connected to a computer fig connect MIDI Inter pc_e eps When not connected to a computer fig connect MIDI Inter npc_e eps Computer MIDI keyboard SD 50 MIDI signal flow Sound Generator MIDI keyboard SD 50 MIDI signal flow Sound Gene...

Page 61: ...the playlist Getting ready to use the SD 50 as a player 1 Copy the data to USB memory fig Player howto 1_e eps 2 Connect the USB memory to the SD 50 fig Player howto 2_e eps 931 Carefully insert the USB Memory all the way in until it is firmly in place Please use USB memory sold by Roland Operation cannot be guaranteed if you use other products If you re using new USB memory you must first format ...

Page 62: ...the SD 50 is connected to a computer Some utility functions p 74 cannot be executed while the player is playing back a song SMF MID Format 0 or 1 SMF format 1 limits the tracks that can be played back File size Maximum of approximately 240 KB differs slightly depending on the content of the SMF System exclusive Packet size of 512 bytes or less Audio files WAV AIFF Sampling frequency 44 1 kHz Bit d...

Page 63: ...stop song playback press the If you ve connected USB memory in which you ve saved song files choose Demo Songs in the playlist screen For more about playing from a playlist refer to page 64 982 No data for the music that is played will be output from MIDI OUT 981b Use of the demo song supplied with this product for any purpose other than private personal enjoyment without the permission of the cop...

Page 64: ...will start from the first song in the playlist To stop playback press the button The next time you press the button playback will resume from where you stopped it 4 Press the ENTER button The playlist will be selected and the song list will appear page_song_list 1 eps If the song is not of a file type that can played by the SD 50 a symbol will appear This song will not be played 5 Turn the VALUE d...

Page 65: ...ng moves you to marker A p 67 Playing back from the middle of a song 1 In the play screen press the ENTER button The play screen cursor will be shown as follows page_song_way eps 2 Turn the VALUE dial to specify the desired point within the song that you want to play Playing a Song Operation Explanation Press the button Play Press the button Pause Press the button Stop Press the button Next song P...

Page 66: ... page_song_level_edit eps 3 Turn the VALUE dial to turn the play mode setting on or off If you decide to cancel press the EXIT button 4 Press the ENTER button The play mode setting will be stored Play mode Values Explanation Chain Play ON OFF The songs in the playlist will play consecutively When the last song finishes playing playback will stop Repeat All ON OFF The songs in the playlist will pla...

Page 67: ...llow the song to play to its end without specifying point B playback will repeat between point A and the end of the song Playback operation buttons when using A B Repeat Cancelling the A B Repeat settings With point A and point B specified press the point A and point B settings will be cleared The point settings will also be cleared if you select a different song Button operation Explanation Press...

Page 68: ...o that s being input via the MIC IN jack or LINE IN jack 4 Press the TEMPO button to exit the Tempo screen 1 Play back a song 2 Press the KEY CTRL button The Key Control screen will appear page_key_control eps 3 Turn the VALUE dial The song s key will change If key control is set to a value other than 0 the KEY CTRL button s indicator will light You can also change the key of audio that s being in...

Page 69: ...so be applied to audio being input via the LINE IN jack p 55 Changing the Minus One part 1 Press the MENU button The menu screen will appear 2 Turn the VALUE dial to select Minus One and then press the ENTER button 3 Turn the VALUE dial to change the setting Using Minus One and Center Cancel MINUS ONE CENTER CANCEL File type Function Explanation SMF Minus One The sound of the specified part s will...

Page 70: ...ist_favorite eps 3 Press one of the PART 1 PLAYER 3 buttons Once the following screen appears the studio set has been saved page_studioset_write eps 1 Press the FAVORITE button The registered songs will be displayed and the PART 1 PLAYER 3 button LEDs will blink page_favorite eps 2 Press one of the PART 1 PLAYER 3 buttons The corresponding favorite song will be selected Selecting Favorite Songs FA...

Page 71: ...0 is connected via USB to a computer When not connected to a computer page_audio_meter 2 eps When connected to a computer 3 Turn the VALUE dial to edit the setting Adjusting the Input Output Volume Indication Values Explanation Mic Line Input 0 127 Adjusts the level of the input to the MIC IN jack MIC GUITAR jack and LINE IN jack MP3 Audio Player 0 127 Adjusts the volume of audio data playback SMF...

Page 72: ...e of the selected parameter will be highlighted menu 2 eps 3 Turn the VALUE dial to edit the value and then press the ENTER button 4 When you ve finished making settings press the MENU button The following message will appear fig screen eps If you decide to cancel press EXIT 5 If you decide to execute press the ENTER button When the settings have been written the following screen will appear and t...

Page 73: ...s being used ALKALINE Alkaline batteries Ni MH Nickel metal hydride batteries Mastering OFF SHARP CLEAR POWER This effect is provided for use on the output of the sound generator it makes the sound more consistent and powerful Choose the setting that s appropriate for your particular song Use this if you re creating music that will be made into an audio CD SHARP The low frequency and high frequenc...

Page 74: ...s used BACKUP RESTORE and USB MEM FORMAT are not available while the SD 50 is connected via USB to a computer 1 Press the MENU button The menu screen will appear menu 1 eps 2 Turn the VALUE dial to select Utility until 1 eps 3 Press the ENTER button The utility screen will appear until 1 eps Item Function Page BACKUP Back up user data p 75 RESTORE Restore backed up data into the SD 50 p 75 USB MEM...

Page 75: ...e backup press the ENTER button When the backup is completed the following screen will appear page_utilback up comp eps For details on the user data settings that are saved refer to p 105 Here s how user data backed up to USB memory can be returned to the SD 50 This operation is called restore 1 Connect the USB memory device containing your backup data to the SD 50 2 In the utility screen select U...

Page 76: ...y contains important data be aware that formatting USB memory will cause all data saved on that USB memory to be lost 1 Connect your USB memory device to the SD 50 2 In the utility screen select USB Mem Format page_util foramt eps 3 Press the ENTER button The following screen will appear formar dialog eps To cancel without formatting press the EXIT button 4 To execute the format operation press th...

Page 77: ... it to USB memory before you proceed 1 In the utility screen select Factory Reset page_util fact eps 2 Press the ENTER button The following screen will appear page_power_off eps To cancel without executing press the EXIT button 3 To execute the factory reset operation press the ENTER button When the factory reset has been completed the following screen will appear page_power_off eps 4 Turn the SD ...

Page 78: ...battery power 1 In the utility screen select INFORMATION page_util infor eps 2 Press the ENTER button The following screen will appear page_system_info eps Press the EXIT button to return to the previous screen Viewing Information About the SD 50 INFORMATION SD 50_e book 78 ページ 2010年1月25日 月曜日 午前10時52分 ...

Page 79: ...79 Appendix SD 50_e book 79 ページ 2010年1月25日 月曜日 午前10時52分 ...

Page 80: ...trol As described in the owner s manual of your DAW software set your DAW software so that it can be controlled by the following MIDI messages Button operation Transmitted MIDI message button Press 90 5D 00 Release 90 5D 7F button Press 90 5E 00 Release 90 5E 7F button Press 90 5B 00 Release 90 5B 7F button Press 90 5C 00 Release 90 5C 7F Hold down the EXT button and turn the VALUE dial Clockwise ...

Page 81: ...ntrol images on the EDIROL P 10 In order to enjoy V LINK with the SD 50 and the EDIROL P 10 you ll need to make connections using MIDI cables sold separately Here we explain an example of connecting the SD 50 to the EDIROL P 10 Use a MIDI cable to connect the SD 50 s MIDI OUT connector to the EDIROL P 10 s MIDI IN connector To prevent malfunction and speaker damage you must minimize the volume on ...

Page 82: ...RL button Switch images switch clips C0 01 Press the MINUS ONE button Switch images switch clips C0 02 Press the button Switch images switch clips C0 03 Press the button Switch images switch clips C0 04 Press the button Switch images switch clips C0 05 Press the button Switch images switch clips C0 06 Press the button Switch images switch clips C0 07 Press the PART button and then turn the VALUE d...

Page 83: ...if you re recording or playing back song data that contains numerous tracks and imposes a heavy processing load on your computer you should increase the buffer size in order to decrease clicks and pops Change the buffer size as appropriate for your situation in order to achieve a balance between realtime response and audio data transfer while avoiding problems such as clicks and pops If the Window...

Page 84: ...at in some cases the buffer size shown here might not match the actual buffer size For details on how to set and view the buffer size refer to the owner s manual for your application Use Smaller ASIO Buffer Size By selecting this check box you can decrease the buffer size when using ASIO compatible software If you experience dropouts in the sound with this check box selected clear the check box Cl...

Page 85: ...fer size setting Some software does not allow you to adjust the buffer size Recording Margin If there are dropouts or noise in the recorded audio data even after you have adjusted the audio buffer size in your software and have also adjusted the Audio Buffer Size try increasing this recording margin setting Some software does not allow you to adjust the buffer size Recording Timing Adjust this set...

Page 86: ... are disconnected Log on using a user name whose account type is computer administrator such as Administrator 2 Insert the included Mobile Studio Canvas DVD ROM into your computer s DVD ROM drive 3 On the DVD ROM navigate to the following folder and double click Uninstal 4 If a user account control message appears click Yes or Continue 5 The screen will indicate The installed SD 50 Driver will be ...

Page 87: ... Macintosh Click Uninstall If any other message appears proceed as directed by the message 5 The screen will indicate Are you sure to uninstall the driver Click OK 6 An Authenticate dialog box or the dialog that asks to type your password will appear Enter the password and click OK 7 The screen will indicate Uninstallation is completed Click Restart to restart your computer It may take some time f...

Page 88: ...ect settings appropriate Check the effect on off effect balance and level settings p 50 Could a MIDI message received from an external MIDI device volume message or exclusive message have lowered the volume Is the SD 50 connected to a computer The Player function cannot be used when the SD 50 is connected to a computer Nor is it possible to play the SD 50 s sound generator via the MIDI IN connecto...

Page 89: ...nd reverb send levels This means that even if these are set to their maximum value of 127 there will be no effect if the send level of the patch you re using has been lowered If you want to apply the effect more deeply you ll need to edit the settings of the patch The patch s send levels to chorus and reverb can be specified separately depending on whether you re using multi effects Settings are d...

Page 90: ...are trying to use an external device to play the SD 50 s sound generator you should switch on your software s MIDI Thru setting The bend range is set to the maximum but the pitch does not rise all the way when pitch bend messages are received via MIDI The bend range can be set in the range of 0 24 but depending on the wave that s used there are cases in which the pitch will not rise all the way i ...

Page 91: ...ngs are not displayed This might be due to one of the following reasons Is the song located in the root directory The song might not be displayed if you directly add delete modify the song data in the SD 50 folder without using Playlist Editor It may be that the USB memory has not been formatted correctly If the USB memory was formatted by a device other than the SD 50 use the SD 50 to format it p...

Page 92: ...r an error message may appear when you begin the installation Reinstall the SD 50 driver as described in Reinstalling the Driver p 86 Are there any devices labeled Other Unknown or X in the Device Manager If driver installation was not completed successfully the partially installed driver may remain in an incomplete state Reinstall the SD 50 driver as described in Reinstalling the Driver p 86 Can ...

Page 93: ...the USB specification In this case you may be able to solve the problem by connecting a self powered USB hub a USB hub that has an internal power supply or an AC adaptor Found New Hardware Wizard appears even though you ve installed the driver Windows XP Could you have connected the SD 50 to a different USB connector than the one you used when installing the driver If your computer or USB hub has ...

Page 94: ...n If this does not solve the problem restart your computer Could you have disconnected and reconnected the USB cable while using the SD 50 Close all software that s using the SD 50 Next switch off the SD 50 s power then turn it back on again If this does not solve the problem restart your computer Could the SD 50 have been connected when the computer started up On some computers the SD 50 may be u...

Page 95: ...isconnect the SD 50 s USB cable and then reconnect it If this does not solve the problem restart your computer Could you have connected or disconnected the USB cable during playback or recording or switched off the SD 50 then turned it back on again If you disconnect and reconnect the USB cable during playback or recording or switch off the SD 50 then turn it back on again the SD 50 may become una...

Page 96: ...e the automatic volume adjustment Voice communication Software Settings Windows 7 p 103 Insufficient volume from your guitar or microphone Is the SETTING switch set correctly Check the SETTING switch p 56 Is the input level appropriate Try turning the SD 50 s SENS knob toward the right to increase the input level p 56 Could you be using a cable that contains a resistor Make connections using a cab...

Page 97: ...g problems you should leave this check box cleared the default state Try disabling the LAN In your computer s Device Manager try disabling LAN wired wireless If this eliminates the clicks and pops it may be that updating your LAN driver or BIOS may solve the problem Check whether updated software is available Could you have connected the SD 50 to a USB hub Try connecting the SD 50 directly to a US...

Page 98: ...ould you have left an unused microphone or guitar connected If an unused microphone or guitar is connected to the SD 50 disconnect the microphone or guitar and turn the SENS knob to MIN in order to lower the input level Have you connected the ground terminal You may be able to solve the problem by grounding a metal component of your computer or the ground pin of your computer s AC adaptor Also che...

Page 99: ...m Properties dialog box 5 Install the driver as described in the procedure for Windows XP Users p 28 Once you ve finished installing the driver change the driver signing options back to their original settings In some cases adjusting your graphics acceleration setting may solve problems with noise during audio playback 1 Open the Control Panel and double click Display If you don t see the above ic...

Page 100: ...nce and then click Power Options If you re using the Classic view double click the Power Options icon 2 In Select a power plan choose High performance 3 In the High performance area click Change plan settings 4 Click Change advanced power settings 5 In Power Options Advanced Settings click the symbol for Hard Disk and click the symbol for Turn off hard disk after to open it 6 Click Setting Minutes...

Page 101: ...tem and Maintenance and click System If you re using the Classic view double click the System icon 2 In the list of tasks shown at the left click Advanced System Settings 3 A User Account Control dialog box will appear click Continue If you re asked to enter an administrator password log on to Windows as a user whose account type is administrator and make the setting again 4 Click Performance Sett...

Page 102: ...ume If the Mute button is on click the mute button once again to turn it off You can also access the volume mixer by right clicking the speaker icon located in the bottom right corner of your screen and choosing Open Volume Mixer Windows XP users 1 Open the Control Panel and double click Sounds and Audio Devices If you re using the Classic view double click Sounds and Audio Devices 2 Click the Aud...

Page 103: ...K to close Sound If the monitoring function of Windows is enabled the input sound might be heard in duplicate doubled or might cause an oscillating loop feedback In this case proceed as follows to disable the monitoring function in Windows 1 Open the Control Panel click Hardware and Sound and then click Sound If the Control Panel shows the Icon view click Sound 2 In Recording select the SD 50 IN a...

Page 104: ...ot write protected Incorrect File This is a file that the SD 50 is unable to play Do not use this file This song has not been transferred from Playlist Editor to USB memory Select the song for transfer from Playlist Editor and transfer the data once again to USB memory Playback is not possible since you have exceeded the number of songs that the SD 50 can handle The SD 50 can handle up to 99 songs...

Page 105: ...volume settings p 71 Audio settings p 59 Studio set p 54 Setting LCD Contrast Master Tune Output Gain Battery Mastering PowerSave Power Off Setting Mic Line Input MP3 Audio Player SMF Player Setting Mic Input SW Mic Echo Level Audio Input Att Direct Mon Sw Direct Mon Level TG to COMPUTER SD 50_e book 105 ページ 2010年1月25日 月曜日 午前10時52分 ...

Page 106: ...t that is set to play in Mono mode will allow you to sound a chord by pressing two or more notes simultaneously When all notes turn off the instrument will return to Mono mode This effect will be obtained if the Mono Poly mode is set to Mono Wind instruments Shakuhachi Trombone allow you to control Growl Sens CC18 This lets you vary the distinctive nuance growl that occurs when you blow strongly i...

Page 107: ... open strings Trombone Playing legato with the portamento switch ON will produce the glissando effect that is typical of a trombone Moving the bender up will produce the discontinuous pitch change that is distinctive of brass instruments 1 Moving the bender down will produce a fall effect 1 Shakuhachi The distinctive breath noise of the shakuhachi is simulated Play strongly note on velocity 115 to...

Page 108: ...y 1 O Tone Modify 2 O Tone Modify 3 O Tone Modify 4 O O O O O O O O O O O O O O Tone Modify 5 O Tone Modify 6 O Tone Modify 7 X O O Reverb O Chorus X X O X O 0 127 O X X X O X O O X O 123 127 O X Remarks 1 Bank select Modulation Portamento time Data entry Volume Panpot Expression General purpose controller 1 General purpose controller 2 General purpose controller 3 General purpose controller 4 Hol...

Page 109: ...version 24 bits Sampling Frequency USB Audio 44 1 kHz AD DA Conversion 44 1 kHz Nominal Input Level Input jack MIC GUITAR IN Mic 50 30 dBu Guitar 30 10 dBu Input jack LINE IN Line 30 4 dBu Nominal Output Level Output jacks 0 dBu SMF Audio Player Section File Format Standard MIDI File format 0 1 Audio File WAV AIFF MP3 Others Display 122 x 32 dots LCD display Jacks and Connectors MIDI connectors OU...

Page 110: ...us power 400 mA AC Adaptor Battery Dimensions 249 9 W x 166 9 D x 55 15 H mm 9 7 8 W x 6 5 8 D x 2 3 16 H inches Weight 0 8 kg 1 lbs 13 oz excluding batteries Accessories Owner s Manual USB Cable DVD ROM USB Driver SONAR LE AC Adaptor Power Cord Options USB Memory 0 dBu 0 775 V rms In the interest of product improvement the specifications appearance and or contents of this unit or this package are...

Page 111: ...51 CHORUS1 52 CHORUS2 52 CHORUS3 52 CHORUS4 52 COMPUTER Connector 16 COMPUTER Indicator 14 D DC IN Connector 16 Direct Mon Level 59 Direct Mon Sw 59 Display 14 Dly HF DMP 52 Dly Time 52 Driver 23 Drum Set 45 E Effect 45 89 ENTER Button 15 EXIT Button 15 External Devices 89 External Input 90 F FACTORY RESET 77 FAVORITE Button 15 FB CHORUS 52 Feedback 52 FLANGER 52 G Ground Terminal 17 GS Mode 44 I ...

Page 112: ...on 15 PHONES Jack 18 PLATE 52 Play 91 PLAY PAUSE Button 15 PLAYER Button 15 Playlist 91 Polyphony 45 POWER Switch 16 PREV Button 15 Program Change 48 R Repeat All 66 Rev Send 52 Rev Time 52 Rev Type 52 Reverb 45 Reverb Send 51 S Security Slot 18 SENS Knob 17 SETTING Switch 16 SMALL ROOM 52 SMF 61 Soloed 49 Songs 91 Standard MIDI File 62 STOP Button 15 Studio Set 45 54 T Tempo 68 TEMPO Button 15 TG...

Page 113: ...113 MEMO SD 50_e book 113 ページ 2010年1月25日 月曜日 午前10時52分 ...

Page 114: ...114 MEMO SD 50_e book 114 ページ 2010年1月25日 月曜日 午前10時52分 ...

Page 115: ...115 MEMO SD 50_e book 115 ページ 2010年1月25日 月曜日 午前10時52分 ...

Page 116: ...TY Compliance Information Statement Model Name Type of Equipment Responsible Party Address Telephone SD 50 Sound Module with Audio Interface Cakewalk Inc 268 Summer Street Boston MA 02210 617 423 9004 For EU Countries SD 50_e book 116 ページ 2010年1月25日 月曜日 午前10時52分 ...

Page 117: ...s fig 17_Proposition65 eps For China WARNING This product contains chemicals known to cause cancer birth defects and other reproductive harm including lead For C A US Proposition 65 SD 50_e book 117 ページ 2010年1月25日 月曜日 午前10時52分 ...

Page 118: ... harmful interference in a residential installation This equipment generates uses and can radiate radio frequency energy and if not installed and used in accordance with the instructions may cause harmful interference to radio communications However there is no guarantee that interference will not occur in a particular installation If this equipment does cause harmful interference to radio or tele...

Page 119: ......

Page 120: ... 5 1 0 0 0 1 1 3 4 6 0 1 ...

Reviews: