


49
Remote Control
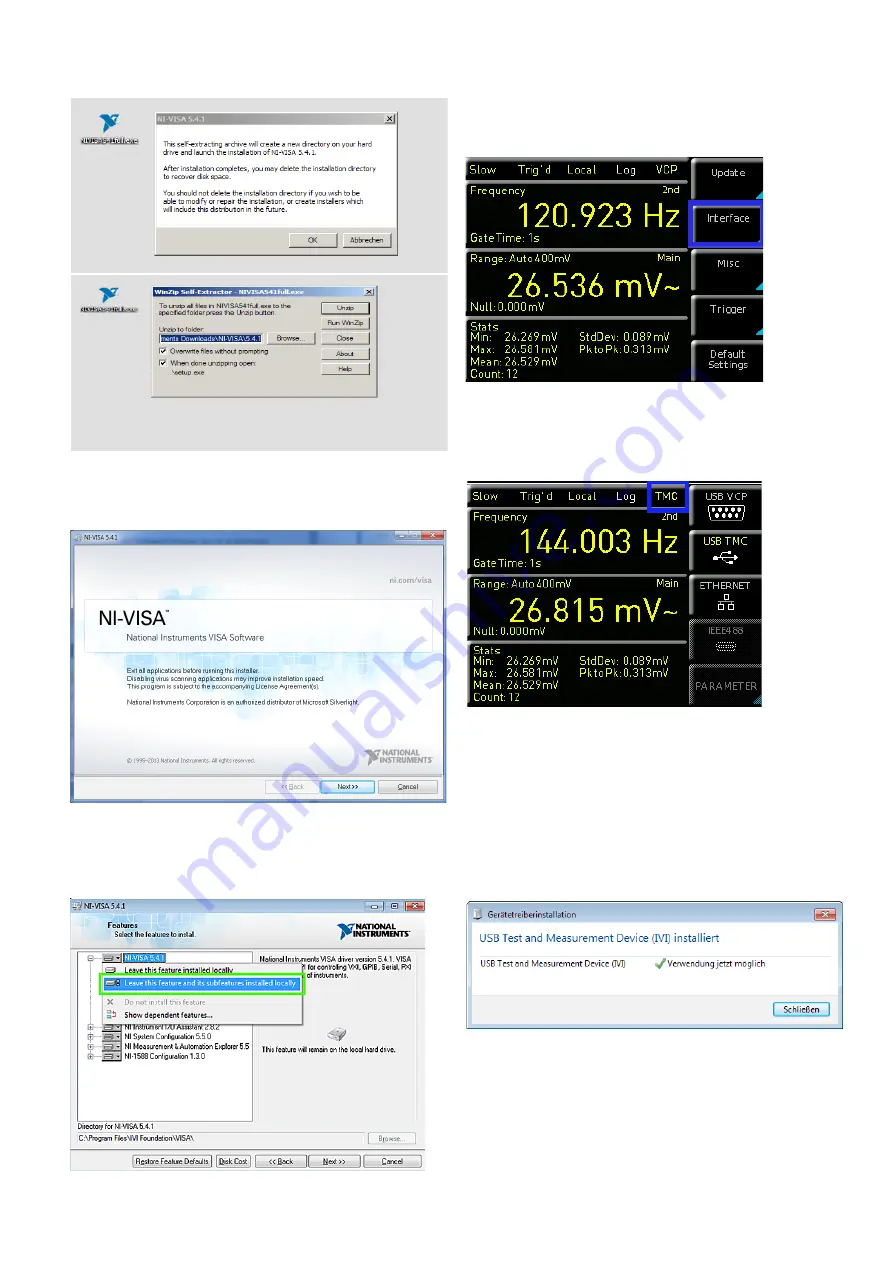
Below please find an example for NI-VISA 5.4.1:
Select “Next“ to start the installation and follow the
installation instructions.
In this step, please select “NI-VISA xxx --> Leave this fea-
ture and its subfeatures installed locally“.
Fig. 9.3: NI-VISA 5.4.1
Fig. 9.4: NI-VISA installation instructions
Fig. 9.5: NI-VISA feature installation locally
Now that you have successfully installed the NI-VISA driv-
ers, you can switch your ¸HMC8012 power supply
to the USB-TMC interface. Select the SETUP menu and
choose INTERFACE.
Use the soft key to select “USB TMC”. The main view will
now display “TMC” as selected interface type.
Finally, use a USB interface cable (type A – B) to connect
the power supply with your Windows PC. On the first use,
the operating system issues the following message:
“Found New Hardware”. Once the installation has been
successfully completed, the following message will be
displayed: “Device Setup” - “USB Test and Measurement
Device (IVI), ready to use“.
Once you open the Windows Device Manager, the follow-
ing entry will be displayed: “USB Test and Measurement
Devices --> USB Test and Measurement Device (IVI)”.
Fig. 9.6: Setup menu
Fig. 9.7: Interface menu
Fig. 9.8: Instrument driver installation


