


69
Advanced Functions
8 Advanced Func-
tions
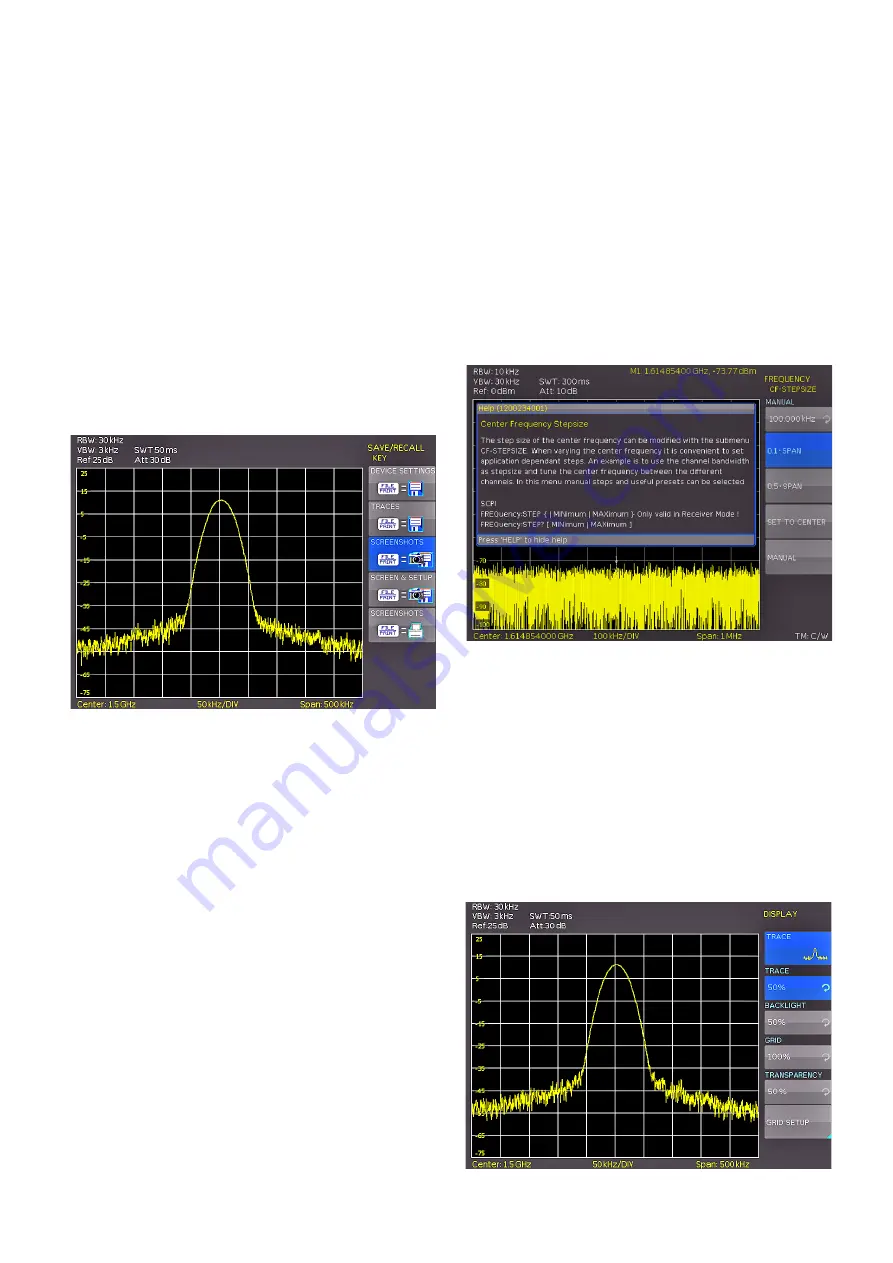
8.1 Using the help function
The integrated help function can be activated by pressing
the key HELP. A window will open. The text of the window
box is dynamically updated depending on the key (inclu-
ding softkey’s) you are pushing. Additionally, the appropri-
ate SCPI interface command is displayed. If you don‘t need
the help function anymore, you can switch off the help
window by pushing the HELP key.
8.2 Display settings
By pushing the key DISPLAY the display settings menu will
be opened. Following display settings are available:
❙
TRACE:
Adjustment of the trace intensity (0%...100%) of
the displayed spectrum.
❙
BACKLIGHT:
Adjustment of the backlight intensity
(10%...100%).
❙
GRID:
Adjustment of the raster intensity (0%...100%). The
soft menu item GRID SETUP allows to select a cross,
raster lines or no raster with the respective soft menu
Fig. 8.1: Internal help function
Fig. 8.2: Display settings menu
Please verify that the USB connector into which you
plugged the USB stick (front or rear) is written in the top
softmenu. You can change the destination by opening
the respective menu if you press the softkey STORAGE.
You can save a screenshot if you press the softkey SAVE
using the predefined name written in the menu below File
Name. You may name the destination memory with up to
7 characters; in order to do this select the menu File Name
and define the name by using the knob. After pressing the
softkey ACCEPT the instrument has stored the name and
return to the settings menu. Now you can store the actual
screen display by pressing the SAVE softkey.
Alternatively, you can select the menu FILE/PRINT. In the
following menu press the softkey Screenshot: this will
assign the function screenshot to the key FILE/PRINT with
the settings chosen. This enables you to store a screen-
shot file on your USB stick by just pressing FILE/PRINT at
any time and in any menu.
Fig. 7.11: Settings of the button FILE/PRINT
Summary of Contents for HMS-X
Page 82: ...82 Appendix ...
Page 83: ...83 Appendix ...


