


Getting Started
R&S
®
FSW
89
User Manual 1173.9411.02 ─ 19
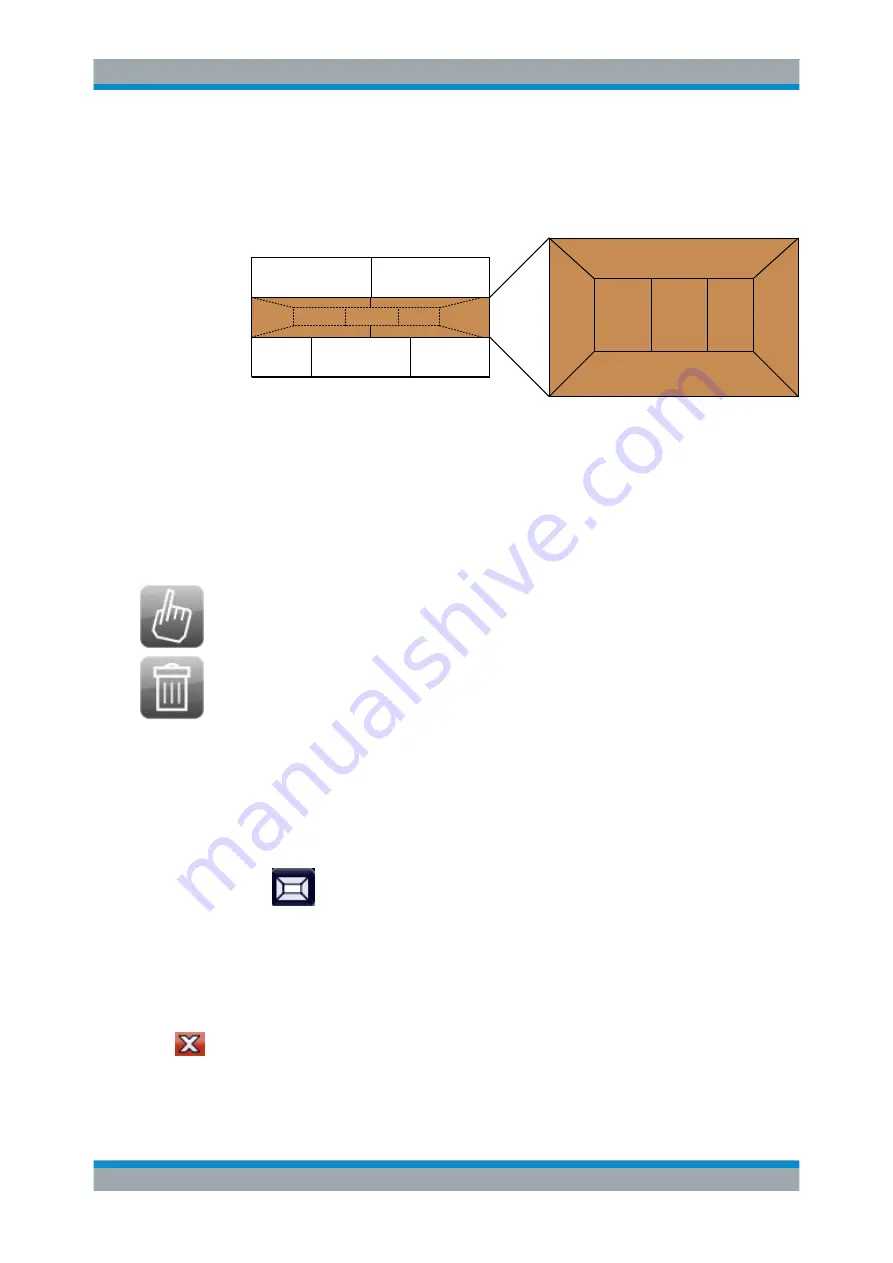
always span the entire width of the screen and may not be interrupted by a column. A
single row is available as the drop area for the window in the SmartGrid. The row can
be split into columns, or a new row can be inserted above or below the existing row (if
the maximum of 4 has not yet been reached).
1
1
2
2
2
3
3
A
B
C
Fig. 3-22: SmartGrid window positions
1 = Insert row above or below the existing row
2 = Create a new column in the existing row
3 = Replace a window in the existing row
SmartGrid functions
Once the evaluation icon has been dropped, icons in each window provide delete and
move functions.
The "Move" icon allows you to move the position of the window, possibly changing the
size and position of the other displayed windows.
The "Delete" icon allows you to close the window, enlarging the display of the remain-
ing windows.
How to Activate SmartGrid Mode
All display configuration actions are only possible in SmartGrid mode. In SmartGrid
mode the evaluation bar replaces the current softkey menu display. When the Smart-
Grid mode is deactivated again, the previous softkey menu display is restored.
► To activate SmartGrid mode, do one of the following:
●
Select the "SmartGrid" icon from the toolbar.
● Select the "Display Config" button in the configuration "Overview".
● Select the "Display Config" softkey from the MEAS CONFIG menu.
The SmartGrid functions and the evaluation bar are displayed.
To close the SmartGrid mode and restore the previous softkey menu select the "Close"
icon in the right-hand corner of the toolbar, or press any key on the front panel.
Operating the Instrument


