store your future
ARCTICROC 4T
User Manual
4-Bay RAID System
eSATA, 2xFireWire 800, FireWire 400 & USB
Raid 0, Raid 1, Raid 5, Raid 5+Hot-Spare and Raid 0+1
All manuals and user guides at all-guides.com
all-guides.com
Page 1: ...future ARCTICROC 4T User Manual 4 Bay RAID System eSATA 2xFireWire 800 FireWire 400 USB Raid 0 Raid 1 Raid 5 Raid 5 Hot Spare and Raid 0 1 All manuals and user guides at all guides com a l l g u i d...
Page 2: ...S 8 SYSTEM VIEWS 9 INSERTING REPLACING THE HARD DRIVES IN THE RAID SYSTEM 11 CONNECTING THE RAID SYSTEM TO A COMPUTER 17 CONNECTING MULTIPLE DEVICES 19 RAID MODES 20 RAID MODE COMPARISON LIST 20 RAID...
Page 3: ...ANSWERS CONCERNING RAID SYSTEMS 36 SPECIFICATIONS 38 PARTITIONING AND FORMATTING THE ARCTICROC 4 BAY DRIVE ON A MAC OS 39 PARTITIONING AND FORMATTING THE ARCTICROC 4 BAY DRIVE ON A WINDOWS OS 48 KNOW...
Page 4: ...ted under different Operating Systems and formatting The storage volume is measured in total bytes before formatting References to round numbers of gigabytes or terabytes are an approximation only For...
Page 5: ...munications PRECAUTIONS FOR THE RAID SYSTEM The main circuit board of the RAID System is susceptible to static electricity Proper grounding is required to prevent electrical damage to the RAID System...
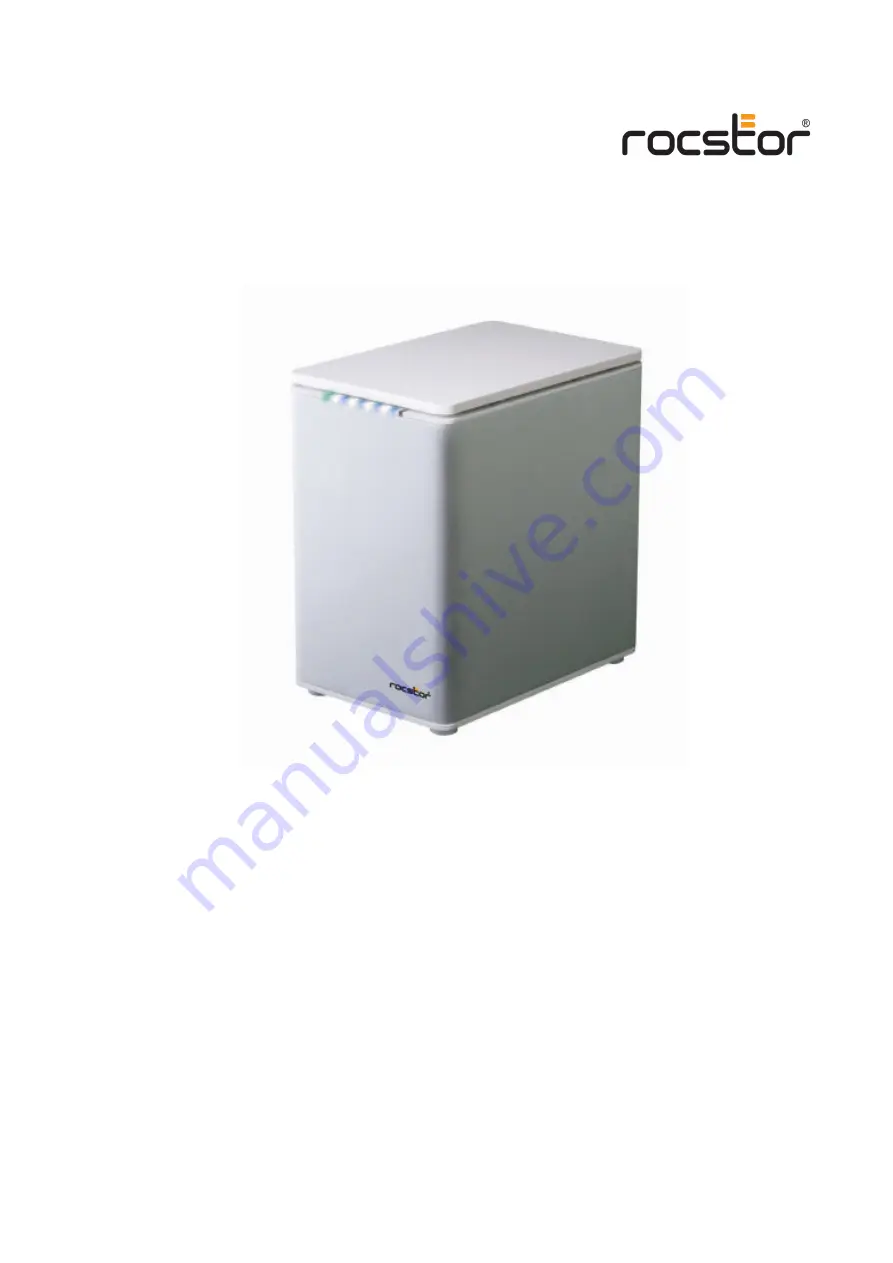
Page 6: ...t dissipating aluminum case Silent fans assure quiet operation while providing maximum airflow for cooling purposes The trayless function with SmartGuider ensures swift and simple hot swapping The RAI...
Page 7: ...ia LED indicators Prevents over tightened HDDs with auto limiting segmented screws Features a trayless function with the SmartGuiderTM and user friendly design enables effortless HDD hot swapping Diss...
Page 8: ...riety of accessories to work with PC Windows or Mac based Computers Please visit us at www ROCSTOR com CONNECTORS FireWire 800 IEEE 1394b port x2 FireWire 400 IEEE 1394a port x1 USB 2 0 Type B port x1...
Page 9: ...Front View The status indication of each LED indicator is listed under the LED INDICATORS section below Rear View eSATA DC IN RAID HD 2 FireWire 800 2 ports 6 RAID Mode Switch 3 FireWire 400 4 USB 2 0...
Page 10: ...RCTICROC 4T 4Bay RAID System User Manual Page 10 Top Cover View Exposed FRONT Indicator 4 Spare HDD Screws 11 12 HDD Slots indicate HDD 1 through HDD 4 1 3 All manuals and user guides at all guides co...
Page 11: ...lid Simultaneously push the lid in the direction away from you front to back using your thumbs A click sound would indicate the release of the top lid security clasp Lift the top lid up to remove and...
Page 12: ...side facing up and ensure that the interface connectors are oriented toward your left side Connectors Position the handle to the end which is facing away from the interface connectors and align it wi...
Page 13: ...onto the HDD by inserting and tightening the screws the left one first then the right one Left Right Now flip the HDD so it is facing you with the PCBA Printed Circuit Board on top and the unfasten h...
Page 14: ...t by sliding the handle to ensure the holes glide smoothly on the screw guides Repeat the same procedures for the rest of HDDs The auto limiting segmented screws are designed to prevent the HDDs and o...
Page 15: ...System won t be able to align and the HDD cannot be inserted Align the handle with the guide rails and slide the HDD into the indicated slot Firmly push downward until a thump sound is heard Repeat t...
Page 16: ...on the front edge and one on the back edge of the top lid Simultaneously push the lid firmly downward and toward you back to front A click sound indicates the top lid is securely attached Now the RAI...
Page 17: ...ion of the system to a computer via two or more interfaces simultaneously is not recommended Connect the AC DC power adapter eSATA DC IN RAID HD Insert both ends of the USB 2 0 eSATA FireWire 400 or F...
Page 18: ...e steady green and the HDD LED lights will become white and blink about 15 seconds If the HDDs are inside the RAID System the HDD LED lights will remain steadily white If there are no HDDs inside the...
Page 19: ...tal video camera another HD or DVD writer However you must use the same interface in order for Daisy Chain to work The computer will not recognize the different interfaces if they are all used at the...
Page 20: ...of the following increased data integrity fault tolerance and throughput or capacity when compared to single drives Deleting the current partition prior to changing RAID modes is highly recommended Us...
Page 21: ...configuration Striping should never be used for mission critical applications The speed of operation is excellent in comparison to other RAID modes In Striping mode it is not possible to see the HDDs...
Page 22: ...he target HDD should then be inserted in one of the other HDD slot The RAID System will then recognize the target HDD and the rebuild process will begin when the HDD LED starts blinking In Mirroring m...
Page 23: ...inside the parity block is not the identical copy of the source data It is generated via parity calculation RAID 5 mode provides decent data protection and fault tolerance The speed of operation is av...
Page 24: ...slow in comparison to other RAID modes Under RAID 5 HotSpare Mode 4 HDDs in an array are required The storage capacity will become 3 minus 1 totaling only 2 HDD storing data and is limited to the sma...
Page 25: ...D modes except RAID 0 Under the RAID 0 1 Mode 4 HDDs in an array are required However the storage capacity is only 2 HDDs and is limited to size of the smallest HDD RAID 1 RAID 0 1 RAID 0 RAID 0 Disk...
Page 26: ...eletes all data stored on the device If you have data in the drives backup all data before changing the RAID Mode Power OFF the RAID System Use a small flat blade screwdriver to select the RAID Mode R...
Page 27: ...tting the new RAID mode and the number of HDDs power the RAID System ON eSATA DC IN RAID HD ON It is highly recommended to always power OFF the RAID System before setting or changing the RAID Mode Swi...
Page 28: ...h 2 4 3 4 HotSpare Disk Number Setting If the HD Switch setting is not supported by the RAID Mode desired or the number of disk inserted is not the same as recommended the RAID System cannot be succes...
Page 29: ...Disk in RAID RAID 0 Striping 2 or 4 RAID 1 Mirroring 2 RAID 5 3 or 4 RAID 5 HotSpare 4 RAID 0 1 4 HDD Slot Number 1 2 3 4 It is highly recommended to place the HDDs into the RAID System in order from...
Page 30: ...is in error When the number of disk set is not supported by a certain RAID Mode or the number of disks inserted is not the same as HDD Switch setting a RAID cannot be created successfully HDD LED x 8...
Page 31: ...AID SYSTEM Safe removal of the RAID System from the host controller is highly recommended especially when switching interfaces In order to safely remove your RAID System from the host controller you w...
Page 32: ...uter does not come with eSATA interface and an optional eSATA card is added it is highly recommended you choose a card that comes with a built in drive and operating system Disk Volume Over 2TB The 2...
Page 33: ...your computer and locate an available PCI Express slot on your motherboard 3 Insert the card in the available PCI Express slot Ensure that the card is firmly seated in the slot 4 Replace the housing...
Page 34: ...essage appears after restarting the computer follow the recommendations provided in the error message Windows OS 1 Right click the My Computer icon on your desktop and choose Manage from the pop up me...
Page 35: ...ARCTICROC 4T 4Bay RAID System User Manual Page 35 Windows 2003 and XP Windows 2000 All manuals and user guides at all guides com...
Page 36: ...and still have a large storage capacity HDD Capacity Q All my HDDs are at least 1 TB or above Will the RAID be able to support the gigantic storage capacity A Yes the Arcticroc 4 Bay RAID will be abl...
Page 37: ...ated under different Operating Systems and formatting The storage volume is measured in total bytes before formatting References to round numbers of gigabytes or terabytes are an approximation only Fo...
Page 38: ...0 1 Data Transfer Speed eSATA up to 3Gbit sec USB 2 0 up to 480Mbit sec 1394a up to 400Mbit sec 1394b up to 800Mbit sec System Material Aluminum case with plastic parts LED Indicators Power Connection...
Page 39: ...ID to your computer using the appropriate cable s 3 Click means left click Right Click will be so labeled 4 Some computes are set so a single click will perform the task such as opening a window Depen...
Page 40: ...ON of Disks Supported s s s 2 or 4 1 2 3 RAID 1 ON of Disks Supported s s s 2 1 2 3 RAID 5 ON of Disks Supported s s s 3 or 4 1 2 3 RAID 5 HotSpare ON of Disks Supported s s s 4 1 2 3 RAID 0 1 ON of...
Page 41: ...ay RAID System User Manual Page 41 Disk Drive Configuration 2 Disks ON s s 1 2 3 Disks ON s s 1 2 4 Disks ON s s 1 2 4 Disks HotSpare ON s s 1 2 All manuals and user guides at all guides com a l l g u...
Page 42: ...C 4T 4Bay RAID System User Manual Page 42 4 Reformat the Arcticroc 4 Bay RAID by following these instructions a Initialize b You will be prompted to Disk Utility All manuals and user guides at all gui...
Page 43: ...available drives One will be the Arcticroc 4 Bay RAID labeled Rocraid Click on the Rocraid icon 6 You are now in the Rocraid menu Click the Partition tab and then click the Current tab up down arrows...
Page 44: ...ns available under Volume Scheme Normally select 1 partition 8 If you are using Panther proceed to 10 below 9 If you are using Tiger click on Options on the lower center of the window Select the Parti...
Page 45: ...11 Format Click on either the Format area or the Blue up down arrows Select Mac OS Extended journaled 12 After selecting the type of format click the Partition or Apply tab in the lower right of the...
Page 46: ...gin to format and upon completion the icon with your designated name will appear on the Desktop The next screen will ask you to backup your data using the Time Machine application Click Cancel or Use...
Page 47: ...ARCTICROC 4T 4Bay RAID System User Manual Page 47 14 You can now Exit or close to return to the desktop All manuals and user guides at all guides com...
Page 48: ...ee instructions below DIFFERENT WAYS TO GET TO THE CONTROL PANEL You may use any one of the following methods 1 If the icon My Computer shows on your desktop click or double click on the icon Under Ot...
Page 49: ...on My Computer does not show on your desktop click on the Start icon on the lower left of your screen If the Control Panel link is not displayed click on the Settings link and then click on the Contro...
Page 50: ...eft of your screen Click on Run Delete anything listed in the Open window Type the following compmgmt msc and then click OK You will be taken to the Computer Management screen Skip to Instruction 3 be...
Page 51: ...CONTROL PANEL 1 After reaching the Control Panel click on Administrative Tools 2 After reaching Administrative Tools click on Computer Management 3 After reaching Computer Management click on Disk Man...
Page 52: ...t Click will be so labeled 4 Some computes are set so a single click will perform the task such as opening a window Depending on your mouse setting you may have to double click to get to the next wind...
Page 53: ...ON of Disks Supported s s s 2 or 4 1 2 3 RAID 1 ON of Disks Supported s s s 2 1 2 3 RAID 5 ON of Disks Supported s s s 3 or 4 1 2 3 RAID 5 HotSpare ON of Disks Supported s s s 4 1 2 3 RAID 0 1 ON of...
Page 54: ...TICROC 4T 4Bay RAID System User Manual Page 54 Disk Drive Configuration 2 Disks ON s s 1 2 3 Disks ON s s 1 2 4 Disks ON s s 1 2 4 Disks HotSpare ON s s 1 2 All manuals and user guides at all guides c...
Page 55: ...ter Management then double click on Disk Management A window on the lower right side of the screen will open indicating the various drives on the computer Right click on the red circular icon Then cli...
Page 56: ...4 Bay RAID then click OK 6 The Arcticroc 4 Bay RAID will show up in the lower menu as an Unallocated disk The color of the bar should be black 7 Right click anywhere in the Unallocated disk area in th...
Page 57: ...stem User Manual Page 57 9 You are taken to Welcome to the New Partition Wizard Click Next 10 Click on Primary partition it should be selected as the default partition Click Next All manuals and user...
Page 58: ...l Page 58 11 Under Specify Partition Size click Next to accept the default setting which is the maximum size allowed 12 Under Assign Drive Letter or Path accept the default letter and click Next All m...
Page 59: ...Page 59 13 In the Format Partition accept the default setting 14 The Volume label can be changed to any name up to 11 characters 15 Suggest Perform a quick format be selected and then click Next All...
Page 60: ...tition Wizard screen It displays the various settings you previously selected If you are satisfied with your selections click Finish to complete the new formatting At this time the Arcticroc 4 Bay RAI...
Page 61: ...ume label the Arcticroc 4 Bay RAID will show up as New Volume To rename the volume at this time right click New Volume and click Properties You can now change the volume name up to 11 characters Click...
Page 62: ...limited to 14 8 ft 4 5 meters although up to 16 cables can be daisy chained using active repeaters external hubs or internal hubs often present in FireWire equipment The S400 standard limits any confi...
Page 63: ...pports data rates up to 3200 Mbits sec over beta mode optical connections up to 320 Ft 100 meters in length Universal Serial Bus USB is a serial bus standard to interface devices USB was designed to a...
Page 64: ...s are faster transfers ability to remove or add devices while operating hot swapping thinner cables that let air cooling work more efficiently and more reliable operation with tighter data integrity c...
Page 65: ...line PATA 133 1064 133 18 inches 0 46 meters No 2 FireWire 3200 3144 393 100 Cables available for 100m 12 25 V 15 W 63 FireWire 800 786 98 25 100 11 m 12 25 V 15 W 63 FireWire 400 393 49 13 15 Ft 4 5...
Page 66: ...ad and write to FAT32 file systems of any size but the format program included in Windows 2000 and higher can only create FAT32 file systems of 32 GB or less This limitation is by design and was impos...
Page 67: ...gth and n forked files similar to NTFS though almost no software takes advantage of forks other than the data fork and resource fork HFS Plus also uses a full 32 bit allocation mapping table rather th...
Page 68: ...ct is your proof of the purchase or lease date You may be required to provide proof of purchase or lease as a condition of receiving warranty service You are entitled to warranty service according to...
Page 69: ...r leased These terms and conditions supersede any prior agreements or representations including representations made in Rocstor sales literature or advice given to you by Rocstor or an agent or employ...
Page 70: ...tor products to work with any third party equipment Nor can Rocstor accept any liability or responsibility for software or third party hardware products Limited Warranty Period The limited warranty pe...
Page 71: ...to round numbers of gigabytes or terabytes are an approximation only For example a disk drive labeled as having 500GB Gigabytes has space for approximately 500 000 000 bytes before formatting After f...
Page 72: ...oduct at the time of your purchase or lease of the product is available for a fee WARNING The individual user should take care to determine prior to use whether this device is suitable adequate or saf...
Page 73: ...Intel Itanium Pentium XXX Celeron and Xeon MMX are registered U S trademarks of Intel Corporation or its subsidiaries in the United States and other countries This product is may also be integrated wi...
Page 74: ...our U S A and Canadian customers find a storage solution that best serves their needs We will help you determine your best purchasing options For more information please contact the appropriate depar...