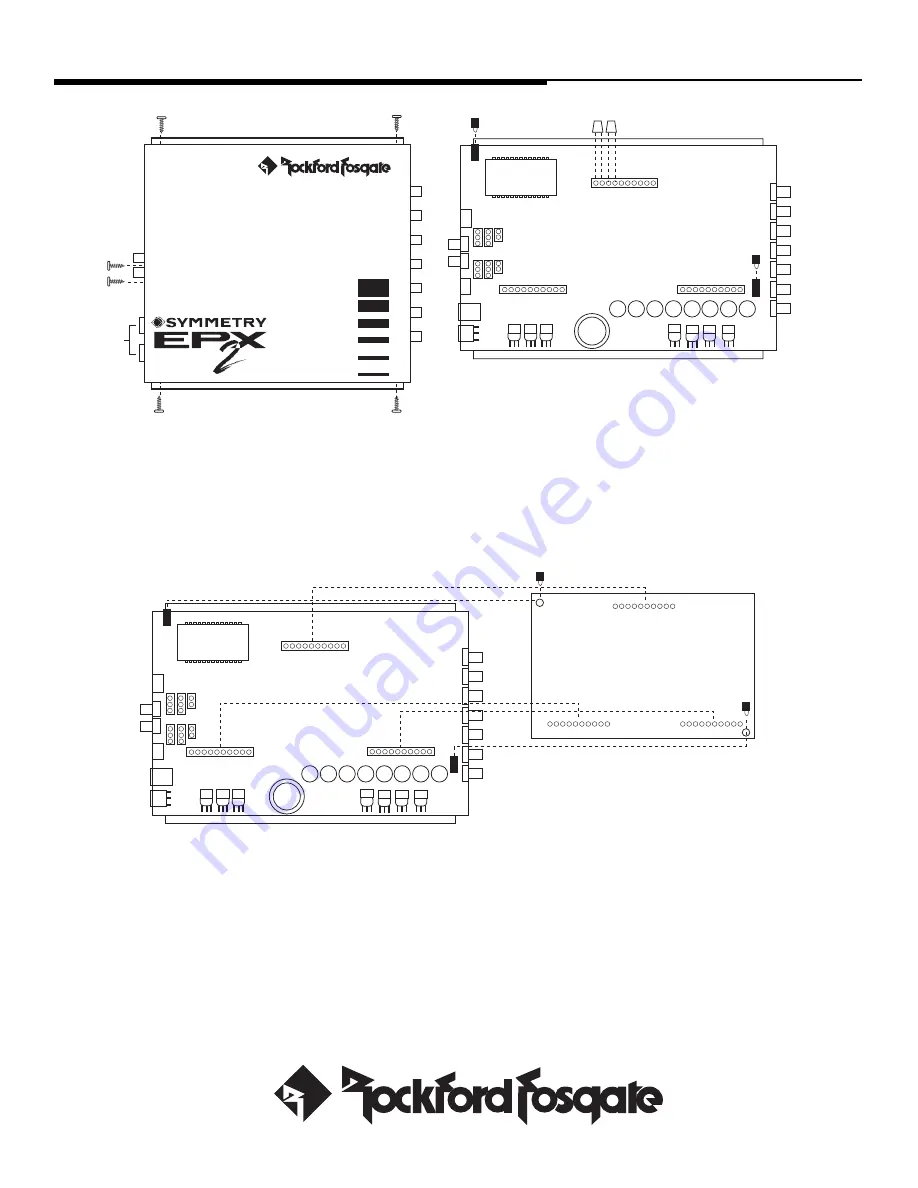
A. Disconnect RDAT & Power from the main unit.
B. Remove Cover from main unit by unscrewing the six hex head screws with the 3/32" Allen wrench supplied with the EPX
2
.
C. Remove 2 Jumpers on connector P5 corresponding to LOL, LRL, LOR & LRR.
D. Remove the Top Half of the 2 Standoffs carefully by hand from the main unit. It is not necessary to remove the top screws
when separating the standoff into its segments.
MAN-0953-C
©5/97
®
®
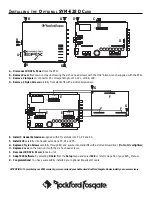
E. Install E14 carefully into header connections P3, P4 and P5.
F. Replace 2 Top Standoffs, with screws intact, carefully by hand. (
Do Not Overtighten.)
G. Replace Cover on the main unit with the six hex head screws.
H. Reconnect RDAT & Power to main unit.
I. Adapt E14 Software by selecting DCard from the Setup menu and select E14 or refer to page 36 of your EPX
2
Manual.
J. Congratulations! You have successfully installed your optional Equalizer Module.
ATTENTION: To maintain your EPX
2
warranty, we recommend your Authorized Rockford Fosgate Dealer install your new accessory.
I
NSTALLING
THE
O
PTIONAL
SYM-E14 DC
ARD
®
®
P4
P5
P3
B
B
B
B
A
B
D
C
D
™
P4
P5
P3
F
E
F
E
E
E
E
E


