MPT1100-SS Pan and Tilt System User’s Guide
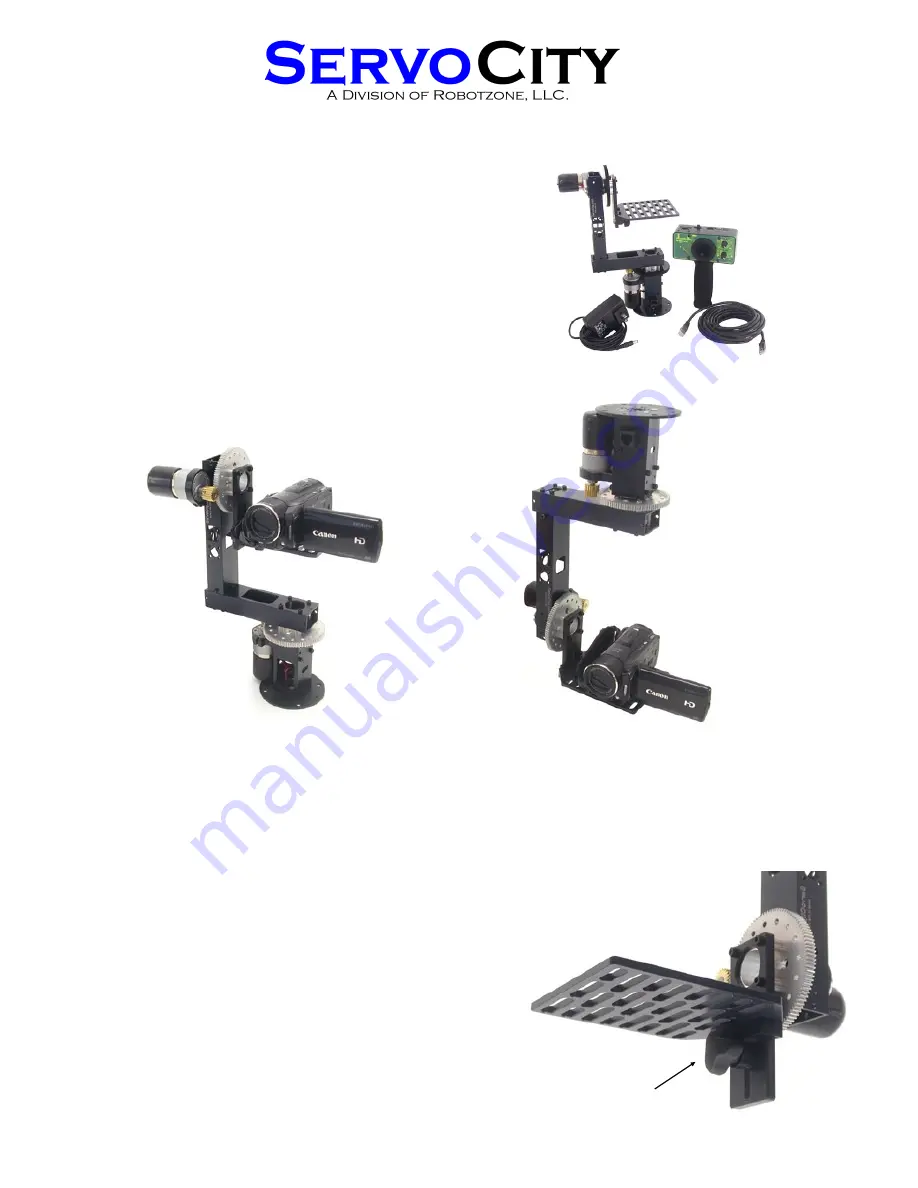
Make sure your system includes the following parts:
Mounting Configurations:
Hanging Configuration
Upright Configuration
Copyright 2016 Robotzone, LLC.— All Rights Reserved
OVER►
(1) MPT1100-SS Pan and Tilt Head
(1) Joystick Controller
(1) 25’ CAT6 Patch Cable
(1) 12V DC Power Supply (120-220AC)
(1) Camera Mounting Screw
(1) 1/4” Washer
The head can be mounted in the hanging position or upright position as desired with no modifications necessary.
Mounting camera:
Most cameras accept a 1/4-20 screw for mounting. Attach camera to the camera plate with the supplied 1/4-20 thumb
screw and 1/4” washer.
Balancing camera:
(Step 1)
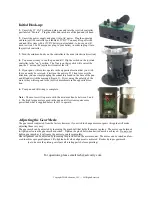
The height of the camera platfor m is able to be adjusted using
the adjustment slide shown on the picture to the right. Loosen the thumb
nut so that the platform can slide up and down the adjustment slide. Slide
the platform up so that the center of the camera lens is the same height as
the center of the tilt shaft. Once the height is properly adjusted, re-tighten
the thumb nut to secure the camera plate.
(Step 2)
The camer a plate has many slots so that the camer a can be
properly positioned. Ideally, the balance point of the camera should be
positioned at the very center of the tilt platform. Mount camera to the slot
that allows for the best weight balance front to back. Some cameras have
lenses that are too long to be perfectly balanced; in this case mount your
camera to the most rearward slot with the 1/4-20 thumb screw.
(by performing this step the head will operate quieter and smoother than if
the camera is left unbalanced).
Thumb Nut for
adjustment slide


