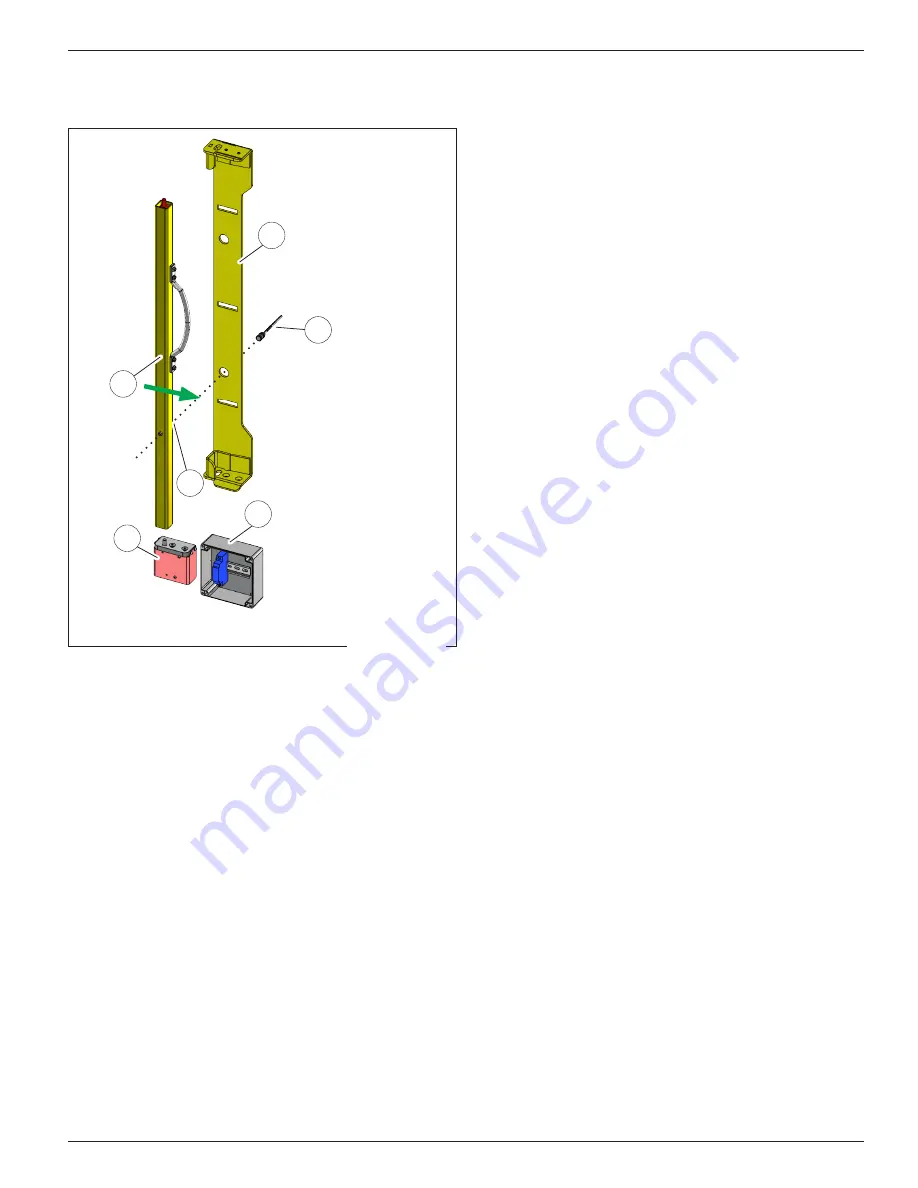
INSTALLATION
Interlock/Interdeterrent
(OPTIONAL)
A Curtain Lead Bar
B Switch
C Latch Bracket
D Interlock Assembly
E Magnet
F Control Box
A
B
C
F
E
D
Shown: Left mount unit with Left to Right pull
Interlock/Interdeterrent Switch
1 Determine the correct location of latch bracket (C) on
post to have the curtain provide the proper stopping
distance from impact
2 Ensure concentricity of magnet and large circular hole
in latch bracket (E)
3 Remove curtain lead bar (A)
4 Using latch bracket (C) as a template, drill a
1/2in [13mm] hole through the post (not shown) to
pass the threaded body of the switch (B) to the back
side of the post
5 Install switch (B) in hole leaving the sensing face
minimally recessed from the front surface of
latch bracket (C)
6 Wire switch (B) to options module on trailer restraint
Interlock (Actuator) Assembly
1 Drill 1/4in [64mm] hole through the post near the
back side of interlock assembly (D) avoiding the
potential obstruction of any interlock assembly
components
2 Mount the interlock assembly (D) to the
latch bracket (C) using 2 screws provided
3 Feed wires through hole drilled in Step 1 and wire
interlock assembly (D) to options module on trailer
restraint
4 Mount the power supplied control box (F) in a
convenient location on the back of post or on the wall
5 Repeat steps as necessary for common post units
Figure 8
Rite‑Hite
®
Installation/Service/Owner's Manual
Dok‑Guardian™ LD Safety Barrier
Publication:
AMEN00150 2019-11-13
11


