3. Installing the Printer Driver
36
7
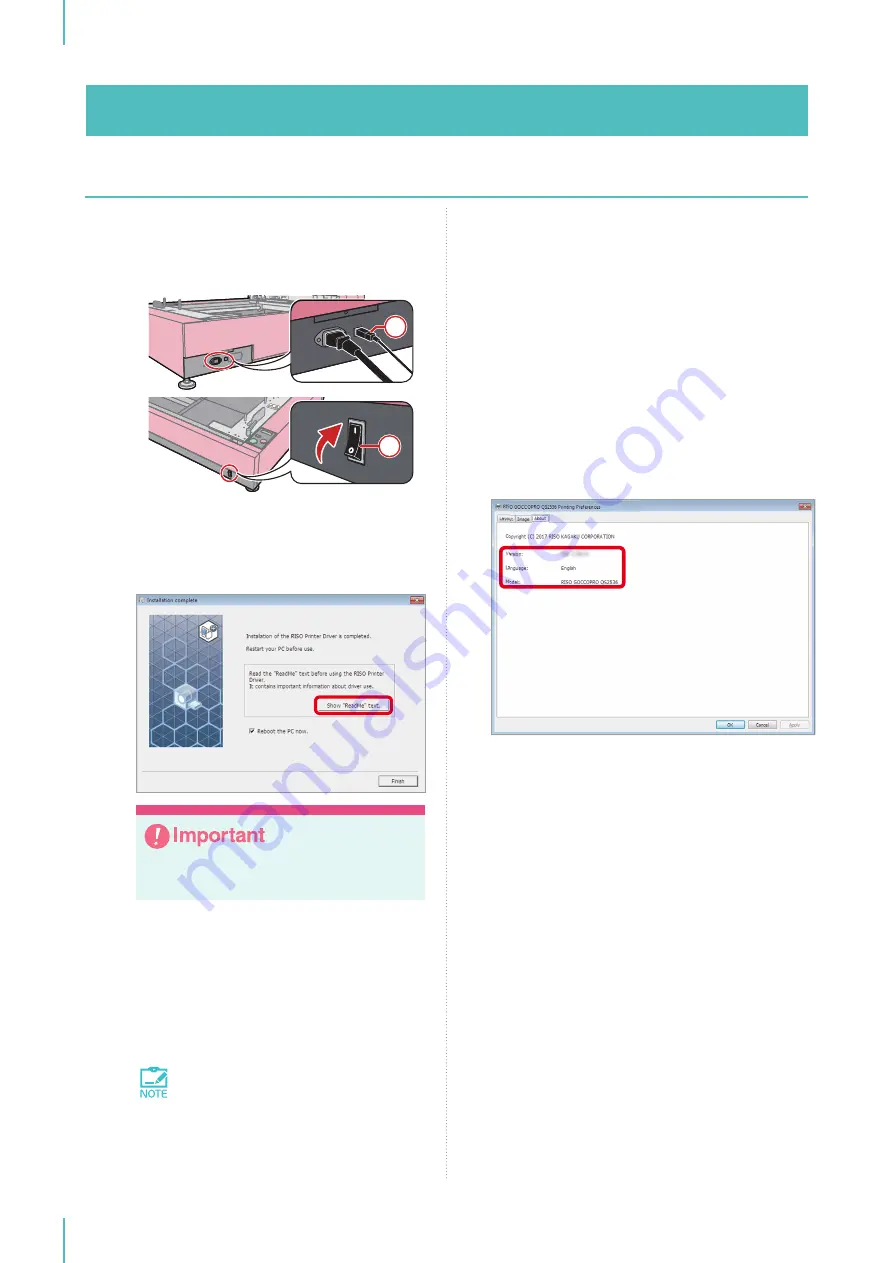
Connect the machine to the computer
via a USB cable, and then turn the power
switch of the machine on.
2
1
①
Connect the USB cable.
②
Turn the Power Switch on.
8
Click [Show “ReadMe” text.].
Make sure to read the cautions for use
before using the machine.
9
Select the [Reboot the PC Now] check
box, and click [Finish].
The computer is rebooted automatically.
If the [Found New Hardware] dialog box is
displayed, click [Cancel].
If you do not want to reboot the
computer immediately, deselect the
[Reboot the PC now.] check box be-
fore clicking [Finish].
10
After the computer has rebooted, open
the [Devices and Printers] dialog box and
check that [RISO GOCCOPRO QS2536]
is installed.
11
Remove the [RISO GOCCOPRO Printer
Driver] CD-ROM from your computer.
Checking the Version
Information
Display the printer properties dialog box, and
click the [About] tab.
①
Version
The version of the printer driver that is in-
stalled
②
Language
The language of the printer driver that is in-
stalled
③
Model
The model name of the machine
“RISO GOCCOPRO QS2536”
Summary of Contents for GOCCOPRO QS2536
Page 1: ......
Page 2: ......
Page 12: ...10...
Page 22: ...MEMO...
Page 58: ...MEMO...
Page 65: ...63 Cleaning the Machine 64 Thermal Print Head 64 Main Unit Exterior 65 6 Maintenance...
Page 68: ...MEMO...
Page 82: ...MEMO...
Page 85: ...83...
Page 99: ...97...
Page 113: ...111...
Page 127: ......
Page 128: ......


