


2-46
ComColor Series User’s Guide 09
■
Original orientation
[Top side up]
Select this when loading originals in an orientation
from which they can be read normally.
[Top side left]
Select this when loading originals so that the top of
the original is aligned with the left edge.
■
Binding side
Select the binding side of the paper.
[Left], [Right], [Upper]
■
Staple
Select the position for stapling. If you set [Staple
speed priority] in the details to [ON], the processing
speed of stapling does not decrease.
[OFF], [1 pos.] (or [Left 1], [Right 1]), [2 pos.],
[Details]
●
[Left 1] and [Right 1] are displayed only when
[Binding side] is set to [Upper].
●
If you set [Staple speed priority] to [ON], both
ends of the staples will come out on the front
pages.
1
Press [Functions] on the copy
mode screen.
2
Press [Staple/Punch].
The [Staple/Punch] screen is displayed.
[Output image] displays an output image that
reflects the [Staple/Punch] settings.
3
Select the original orientation.
4
Select the binding side.
5
Configure the staple setting.
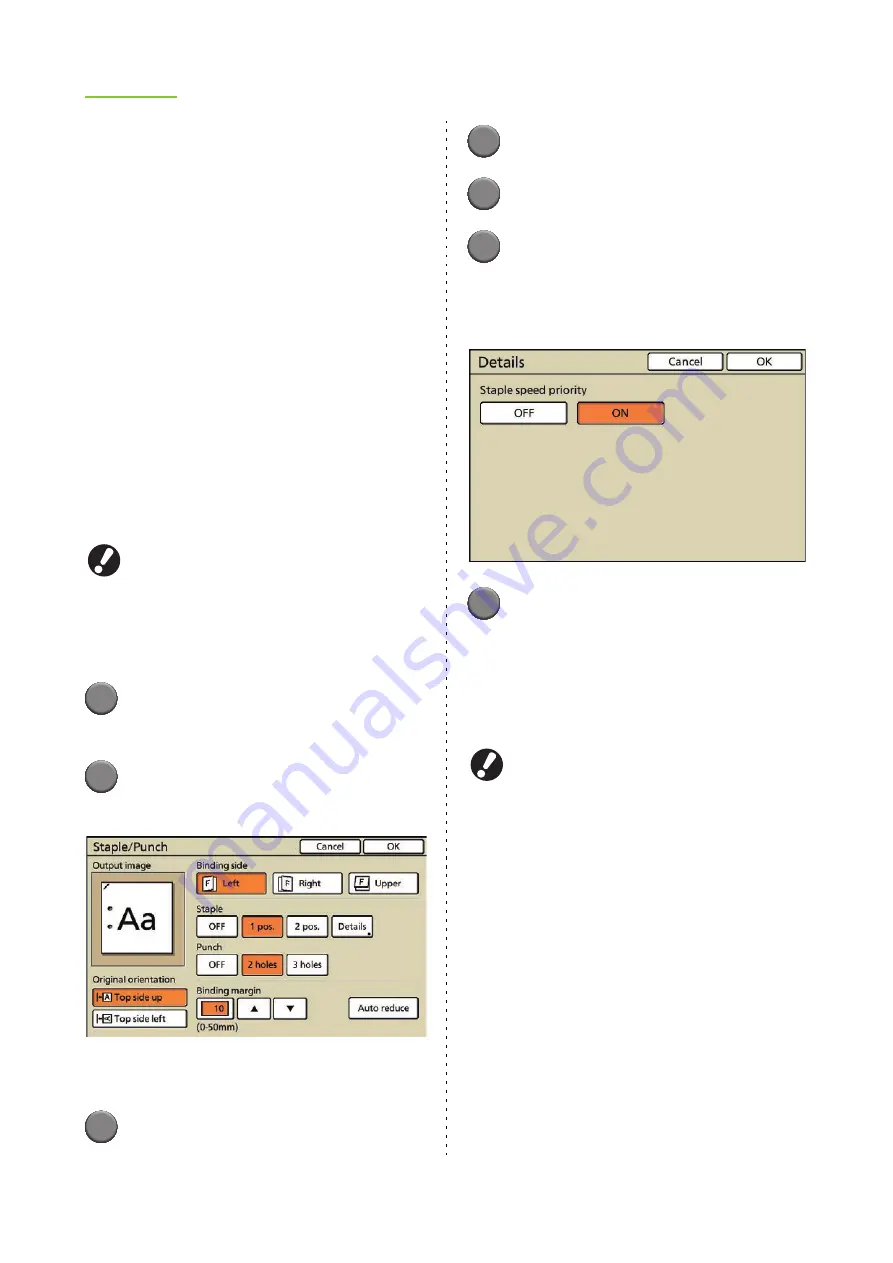
6
Configure [Staple speed priority]
in [Details] as needed.
You can configure this only during simplex printing
when using the multifunction finisher.
7
Press [OK].
The settings are confirmed and the previous
screen is displayed.
●
Configuring the Punch Setting
Punch holes in the paper.
The number of holes that can be punched varies
depending on the connected multifunction finisher.
<Types of paper that can be punched>
•
Paper size
2 holes: A3, B4, A4, A4-LEF, B5-LEF, Ledger,
Legal, Letter, Letter-LEF
3 holes: A3, B4, A4-LEF, B5-LEF, Ledger,
Letter-LEF
4 holes: A3, A4-LEF, Ledger, Letter-LEF
•
Paper weight: 52 g/m
2
(14-lb bond) to 200 g/m
2
(53-lb bond)
■
Original orientation
[Top side up]
Select this option when loading originals in an
orientation from which they can be read normally.
[Top side left]
Select this option when loading originals so that the
top of the original is aligned with the left edge.
Summary of Contents for 7150R
Page 40: ...38 ComColor Series User s Guide 09...
Page 41: ...1 ComColor Series User s Guide 09 Printer Driver...
Page 78: ...1 38 1 Printer Driver ComColor Series User s Guide 09...
Page 79: ...2 ComColor Series User s Guide 09 Copy...
Page 134: ...2 56 2 Copy ComColor Series User s Guide 09...
Page 135: ...3 ComColor Series User s Guide 09 Scanner...
Page 150: ...3 16 3 Scanner ComColor Series User s Guide 09...
Page 151: ...4 ComColor Series User s Guide 09 Printer...
Page 167: ...5 ComColor Series User s Guide 09 RISO Console...
Page 181: ...6 ComColor Series User s Guide 09 Appendix...
Page 201: ...Please contact following for supplies and service Copyright 2014 RISO KAGAKU CORPORATION...


