Part Replacement
• Before you start: This process is protective level II. Operators should wear electrostatic chains.
• If you need to replace the main board, you have to get into service mode and record the LED
usage hour (page 41 "Service Mode ").
Exterior Cover
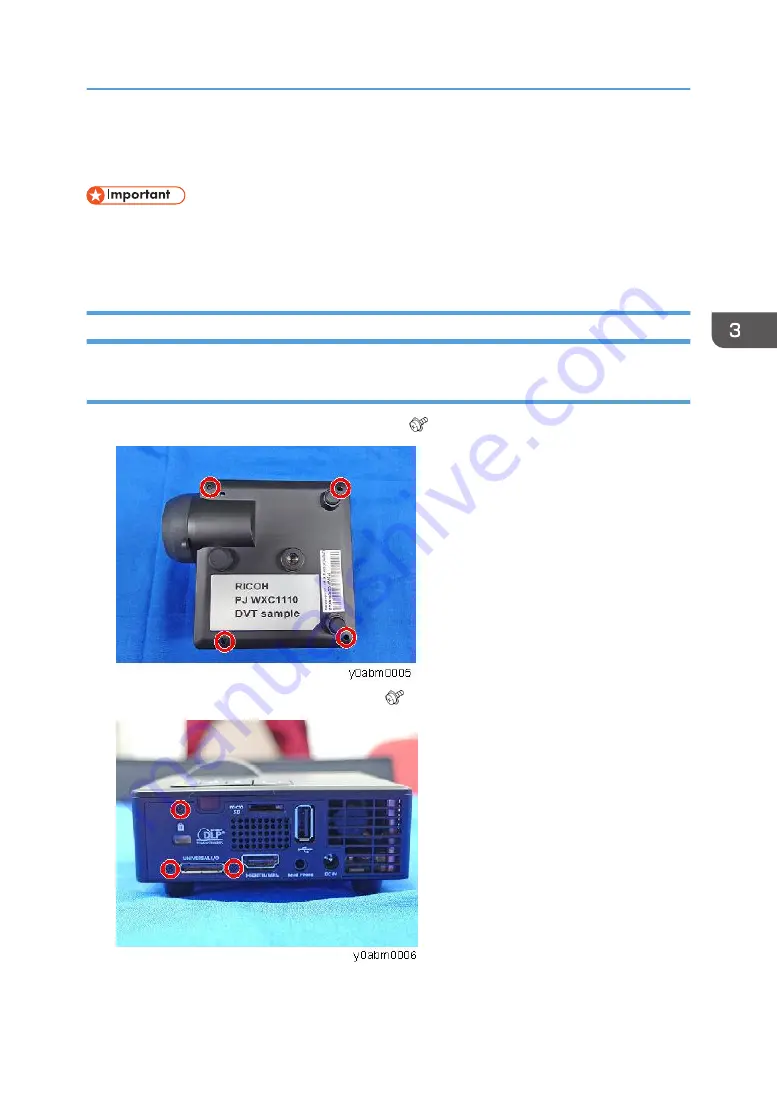
Top Cover
1.
Remove screws on the Bottom Cover (M1.6x5 x4).
2.
Remove screws on the I/O cover (M1.6x5 x3).
Part Replacement
25
Summary of Contents for WXC1110 Y0AB
Page 1: ...Kaus PJ1 RICOH PJ RICOH PJ WXC1110 Machine Codes Y0AB Field Service Manual May 2016...
Page 2: ......
Page 7: ...1 Product Information Overview Main Unit 5...
Page 20: ...1 Product Information 18...
Page 24: ...2 Installation 22...
Page 33: ...2 FPC cable A Multimedia Board 1 Top Cover page 25 2 FPC Cable page 30 Part Replacement 31...
Page 35: ...Engine Module 1 Bottom Cover page 28 2 Remove screws M1 6 4 x3 Part Replacement 33...
Page 39: ...Adjustable Foot 1 Adjustable foot A Part Replacement 37...
Page 40: ...3 Replacement 38...
Page 50: ...4 Adjustment 48...
Page 51: ...5 Troubleshooting Troubleshooting Main Procedure 49...
Page 52: ...No Power Troubleshooting 5 Troubleshooting 50...
Page 53: ...Power Troubleshooting Troubleshooting 51...
Page 54: ...Image Performance Troubleshooting 5 Troubleshooting 52...
Page 55: ...Troubleshooting 53...
Page 56: ...Remote Control Troubleshooting 5 Troubleshooting 54...
Page 60: ...5 Troubleshooting 58...
Page 64: ...4 Click Next 5 Click Next 6 Click Next 6 Firmware Update 62...
Page 76: ...3 Click Download 4 The success information will appear on screen 6 Firmware Update 74...
Page 78: ...MEMO 76 EN...


