background image

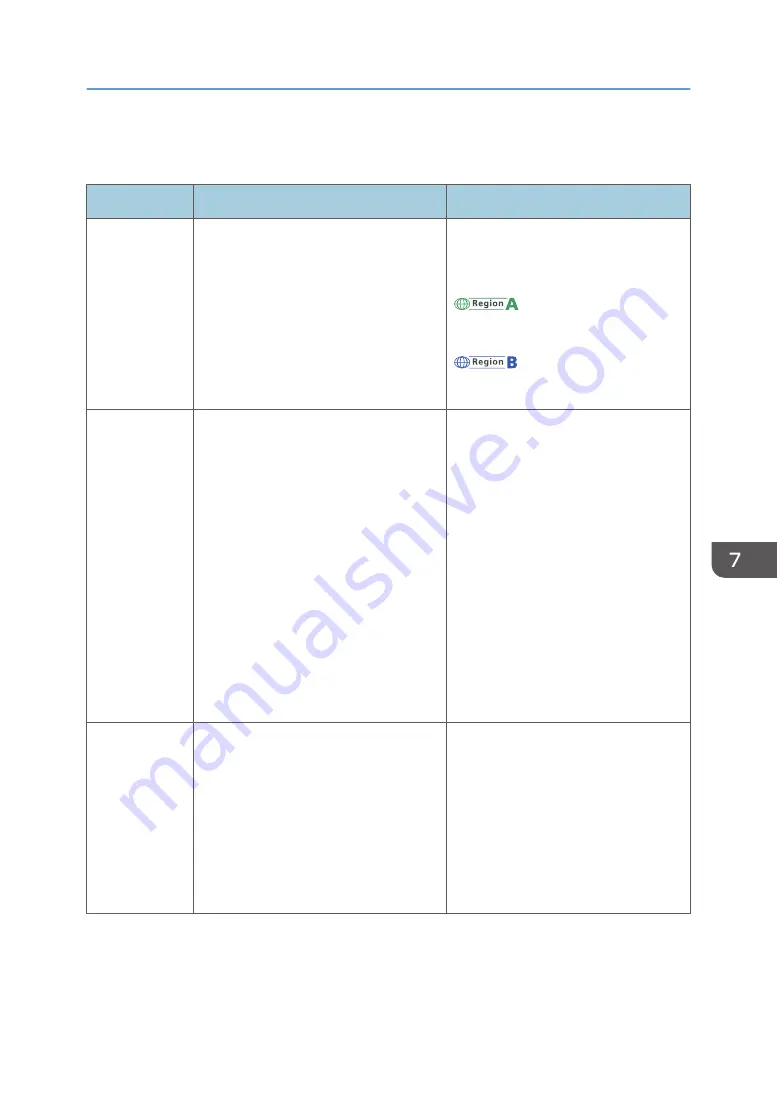
Scan Settings

Item

Description

Value

Scan Size

Specifies the scanning size according to
the size of the original.

1

/

2

 × 14, 8 

1

/

2

 × 11, 8 

1

/

2

 × 5

1

/

2

, 7 

1

/

4

 × 10 

1

/

2

, A4, B5, A5,

16K, Custom Size

Default: [A4]

Default: [8 1/2 × 11]

Scanning
Mode

Specifies the scanning mode using the
control panel.

• B&W

The machine creates 1-bit black-
and-white images. Images contain
only black and white colors.

• Color

The machine creates 8-bit color
images. Images are full color.

• Gray Scale

The machine creates 8-bit black-
and-white images. Images contain
black and white, and intermediate
gray colors.

Default: [B&W]

Max. E-mail
Size

Specifies the maximum size of a file that
can be sent by e-mail.

• 1 MB
• 2 MB
• 3 MB
• 4 MB
• 5 MB
• No Limit

Default: [1 MB]

Scan Settings

181

Summary of Contents for SP 320SFN

Page 1: ...etwork Settings Using OS X Troubleshooting Maintaining the Machine Configuring the Machine Using Utilities Configuring the Machine Using the Control Panel Sending and Receiving a Fax Scanning Originals Copying Originals Printing Documents Paper Specifications and Adding Paper Guide to the Machine User s Guide ...

Page 2: ......

Page 3: ... or SP 377SNwX 20 Control Panel When Using SP 320SFN or SP 377SFNwX 21 Changing Operation Modes 24 Multi access 25 About Operation Tools 28 Assigning a Setting to the Shortcut Key 30 Assigning a Setting Using the Control Panel 30 Assigning a Setting Using Web Image Monitor 30 Accessing the Function Assigned to the Shortcut Key 31 Entering Characters 32 2 Paper Specifications and Adding Paper Workf...

Page 4: ...es 61 Paper Storage 62 Print Area 62 Placing Originals 65 Placing Originals on the Exposure Glass 65 Placing Originals in the Auto Document Feeder only SP 320SFN SP 377SNwX and SP 377SFNwX 65 About Originals 66 3 Printing Documents What You Can Do with the Printer Function 69 Displaying the Printing Preferences Dialog Box 70 Displaying the Printing Preferences Dialog Box from the Start Menu 70 Dis...

Page 5: ...n 93 Scanner Mode Screen 94 Registering Scan Destinations 95 Modifying Scan Destinations 100 Deleting Scan Destinations 101 Testing Transmission 101 Basic Operation of Scan to Folder 103 Printing the Check Sheet 103 Confirming the User Name and Computer Name 104 Creating a Shared Folder on a Computer 106 Specifying Access Privileges for the Created Shared Folder 107 Registering a Shared Folder in ...

Page 6: ...According to the Size of the Original 132 Adjusting Image Density 132 Specifying Resolution 133 6 Sending and Receiving a Fax What You Can Do with the Fax Function 135 Fax Setting Workflows 137 Fax Mode Screen 138 Setting the Date and Time 139 Registering Fax Destinations 140 Registering Fax Destinations Using the Control Panel 140 Registering Fax Destinations Using Web Image Monitor 142 Sending a...

Page 7: ...gs 202 Administrator Settings 206 Printing Lists Reports 213 Printing the Configuration Page 213 Types of Lists Reports 213 Network Settings 215 Wi Fi Setup Wizard 219 8 Configuring the Machine Using Utilities Available Setting Functions Using Web Image Monitor and Smart Organizing Monitor 221 Using Web Image Monitor 222 Displaying Top Page 223 Changing the Interface Language 224 Checking the Syst...

Page 8: ...SMTP Tab 241 POP3 Tab 242 Wireless Tab only SP 377SNwX and SP 377SFNwX 242 Google Cloud Tab 244 Configuring the IPsec Settings 245 IPsec Global Settings Tab 245 IPsec Policy List Tab 245 Printing Lists Reports 249 Configuring the Administrator Settings 250 Administrator Tab 250 Rest Settings Tab 250 Backup Setting Tab 251 Restore Setting Tab 252 Set Date Time Tab 253 Energy Saver Mode Tab 254 Usin...

Page 9: ... Status Messages Appear on Smart Organizing Monitor 279 Clearing Misfeeds 281 Removing Jammed Paper from Tray 1 281 Removing Jammed Paper from the Bypass Tray 283 Removing Jammed Paper from the Standard Tray or Duplex Unit 285 Removing Jammed Paper from the Auto Document Feeder 290 When You Cannot Print Test Page 292 Paper Feed Problems 293 Print Quality Problems 295 Checking the Condition of the ...

Page 10: ...x Transmission Using IPsec 319 Encryption and Authentication by IPsec 319 Security Association 320 Encryption Key Exchange Settings Configuration Flow 321 Specifying Encryption Key Exchange Settings 321 Specifying IPsec Settings on the Computer 322 Enabling and Disabling IPsec Using the Control Panel 324 Notes About the Toner 325 Specifications of the Machine 326 General Function Specifications 32...

Page 11: ...sers in USA 337 Notes to users in the United States of America 337 Notes to Canadian Users of Wireless Devices 340 Notes to Canadian Users 341 Remarques à l attention des utilisateurs canadiens 341 ENERGY STAR Program 342 Saving Energy 342 Copyright Information about Installed Applications 346 Apache License 346 dnsmasq 348 GPL Version 2 349 iperf 357 libHaru 359 Libsasl 359 mDNSResponser 361 Open...

Page 12: ...t it to a computer Initial Guide for FAX only SP 320SFN and SP 377SFNwX This manual explains the preparations for using the fax function Be sure to read this manual before using the fax function Operating Manual Digital Format Operating manuals can be viewed from Ricoh s website or from the provided CD ROM Viewing from a web browser Access the Internet from a web browser Confirm that the computer ...

Page 13: ...ng procedure to open the Help files learn about the printer driver and Smart Organizing Monitor functions For details about using Smart Organizing Monitor see page 255 Using Smart Organizing Monitor Printer driver 1 Click Help on the printing preferences dialog box For the procedure on how to open the printing preferences dialog box see page 70 Displaying the Printing Preferences Dialog Box DSG250...

Page 14: ...Smart Organizing Monitor 1 Click Help on the Printer Configuration screen DSG253 12 ...

Page 15: ...ine and explanations of likely causes of paper misfeeds damage to originals or loss of data Be sure to read these explanations Indicates supplementary explanations of the machine s functions and instructions on resolving user errors Indicates the names of keys on the machine s display or control panels Model Specific Information This section explains how you can identify the region your machine be...

Page 16: ...istered data or the use or non use of this product and operation manuals provided with it Make sure that you always copy or have backups of the data registered in this machine Documents or data might be erased due to your operational errors or malfunctions of the machine In no event will the manufacturer be responsible for any documents created by you using this machine or any results from the dat...

Page 17: ...can access these menus without a password by factory default The setting for creating a password can be found in Admin Tools Configuring the machine using Web Image Monitor You can configure the machine using Web Image Monitor without a password by factory default The setting for creating a password can be found in Administrator Settings For details about creating passwords see page 250 Configurin...

Page 18: ...16 ...

Page 19: ...s This section introduces the names of the various parts on the front and rear side of the machine and outlines their functions Exterior SP 320SN is not equipped with an Auto Document Feeder ADF DSG101 13 14 15 16 17 2 1 3 4 5 12 11 10 7 6 9 8 18 No Name Description 1 Control Panel Contains a screen and keys for machine control 17 ...

Page 20: ...nnecting the machine to the network using a network interface cable 9 G3 analog Line Interface Connector For connecting a telephone line 10 Tray 1 Rear Cover Remove this cover when loading paper longer than A4 in Tray 1 11 Rear Cover Open this cover to remove jammed paper or to lower the levers inside before printing on envelopes 12 Tray 1 This tray can hold up to 250 sheets of plain paper 13 Bypa...

Page 21: ...ke the printed paper out DSG102 Interior 1 DSG104 No Name Description 1 Print Cartridge A replacement consumable that is required to make prints on paper It needs to be replaced when the alert indicator flashes red For details about replacing the cartridge see page 259 Replacing the Print Cartridge Guide to Components 19 ...

Page 22: ...to enter numerical values when specifying settings such as fax numbers and copy quantities or to enter letters when specifying names 9 Clear Stop key Press to cancel or stop print jobs document copying scanning fax transmission reception and other actions in progress 10 User Tools key Press to display the menu for configuring the machine s system settings 11 Power key This indicator lights up blue...

Page 23: ...oner is nearly empty 18 OK Key Press to confirm settings and specified values or to move to the next menu level 19 Start key Press to start fax transmission reception scanning or copying Control Panel When Using SP 320SFN or SP 377SFNwX 1 2 3 4 5 6 7 8 9 10 11 12 13 14 15 16 17 18 19 20 21 22 23 25 DSG106 24 No Name Description 1 On Hook Dial key Press to use on hook dialing to check the destinati...

Page 24: ...ination 15 Pause Redial key Press to insert a pause in a fax number or to display the last used scan or fax destination 16 Shift key Press to use the Quick Dial numbers 5 to 8 when specifying a scan or fax destination using the One Touch buttons 17 Wi Fi Direct key only SP 377SFNwX Pressing this key while Wi Fi is disabled activates Wi Fi and reboots the machine automatically Press this key while ...

Page 25: ...he paper settings do not match the settings specified by the driver or when other errors occur It flashes when the toner is nearly empty 24 OK Key Press to confirm settings and specified values or to move to the next menu level 25 Start key Press to start fax transmission reception scanning or copying Guide to Components 23 ...

Page 26: ...onding key lights up DSG108 Function Priority By default copy mode is selected when the machine is turned on or if the preset System Auto Reset Timer time passes with no operation while the initial screen of the current mode is displayed You can change the selected mode using Function Priority under Admin Tools For details about System Auto Reset Timer or Function Priority see page 206 Administrat...

Page 27: ...ceiving a LAN Fax job from a computer LAN Fax transmission Scanning Fax memory transmission Fax immediate printing Fax memory reception Printing a fax received in the machine s memory Printing Receiving a LAN Fax job from a computer LAN Fax transmission Scanning a fax into the machine s memory before transmission Fax memory transmission Fax immediate printing Fax memory reception Printing a fax re...

Page 28: ... received fax into the machine s memory Copying Scanning Scanning a fax into the machine s memory before transmission Receiving a LAN Fax job from a computer Printing a fax received in the machine s memory Scanning 1 Scanning a fax into the machine s memory before transmission Fax immediate transmission Fax memory transmission Receiving a LAN Fax job from a computer LAN Fax transmission Printing S...

Page 29: ...N Fax job from a computer 1 Fax printing may take longer than normal if you scan using the control panel at the same time especially when scanning multiple pages using the exposure glass If you try to use a function that cannot be performed simultaneously you will hear a beep sound from the machine or see a failure message pop up on your computer screen In this case try again after the current job...

Page 30: ...hine Using the Control Panel Smart Organizing Monitor Install this utility on your computer from the included CD ROM before using it Using Smart Organizing Monitor you can check the machine s status configure its settings and use other functions For details about how to use Smart Organizing Monitor see page 255 Using Smart Organizing Monitor Web Image Monitor You can check the machine s status and...

Page 31: ...For details about how to use Web Image Monitor see page 221 Configuring the Machine Using Utilities About Operation Tools 29 ...

Page 32: ... to select Shortcut to Function and then press the OK key 5 Press the or key to select the setting you want to configure and then press the OK key 6 Press the User Tools key to return to the initial screen A password for accessing the Admin Tools menu can be specified in Admin Tools Lock Assigning a Setting Using Web Image Monitor 1 Start the web browser and enter http the machine s IP address in ...

Page 33: ...Accessing the Function Assigned to the Shortcut Key 1 Press the Shortcut to Func key DSG139 The function assigned to the Shortcut to Func key is displayed Assigning a Setting to the Shortcut Key 31 ...

Page 34: ...an digits Press Press Press Pause Press the Pause Redial key P appears on the screen Space Press the key To enter a name Letters numbers and symbols can be entered using the number keys To enter two characters consecutively that use the same number key press the key to move the cursor before entering the second character DSG155 Characters you can enter depend on the setting you are configuring 1 G...

Page 35: ...u entered is too large or too small for the setting it will not be accepted If you press the OK key the machine will increase or decrease the number to the minimum or maximum value for the setting Entering Characters 33 ...

Page 36: ...1 Guide to the Machine 34 ...

Page 37: ... type and size on the printer driver DSG260 For details about the procedures refer to the next page Procedure Reference See page 36 Loading Paper There are three ways to specify the paper type and size When using the control panel See page 45 Specifying Paper Type and Paper Size Using the Control Panel When using Web Image Monitor See page 50 Specifying Paper Type and Paper Size Using Web Image Mo...

Page 38: ...e following example explains how to load paper in the standard paper tray Tray 1 of SP 377SNwX and SP 377SFNwX All models are loaded in the same way Before printing on paper other than envelopes make sure to pull up the levers on the machine rear inside the rear cover Leaving the levers lowered can cause print quality problems when printing on paper other than envelopes 1 Pull out tray 1 carefully...

Page 39: ...ide faced down Make sure paper is not stacked higher than the upper limit marked inside the side paper guide DSG113 4 Slide the guides inward until they are flush against the sides of the paper DSG112 When loading custom size paper set the paper guide slightly wider than the actual paper size Loading Paper 37 ...

Page 40: ...per is remaining Extending the Tray 1 to load paper When Using SP 377SNwX or SP 377SFNwX This section explains how to load paper longer than A4 297 mm into the machine 1 Pull out tray 1 carefully with both hands Place the tray on a flat surface 2 Remove the tray 1 rear cover by pushing its center DSG116 3 Release the extender lock on the left rear of the tray and then pull out the extender until i...

Page 41: ... the Tray 1 to load paper When using SP 320SN or SP 320SFN This section explains how to load paper longer than A4 297 mm into the machine 1 Pull out tray 1 carefully with both hands Place the tray on a flat surface 2 Remove the tray 1 rear cover by pushing its center DSG116 3 Release the extender locks on both sides of the tray and then pull out the extender until it clicks Make sure the extender ...

Page 42: ...how much paper is remaining Loading Paper into Bypass Tray Before printing on paper other than envelopes make sure to pull up the levers on the machine rear inside the rear cover Leaving the levers lowered can cause print quality problems when printing on paper other than envelopes Do not load paper while the machine is printing 1 Open the bypass tray If you load A4 297 mm or larger size paper pul...

Page 43: ...ops against the machine DSG119 3 Adjust the side guides to the paper width DSG120 Loading Envelopes Before printing on envelopes make sure to lower the levers on the machine rear inside the rear cover to avoid envelopes coming out creased Also pull up the levers back to their original Loading Paper 41 ...

Page 44: ...ds wrinkles or print poorly Print quality on envelopes may be uneven if parts of an envelope have different thicknesses Print one or two envelopes to check print quality In a hot and humid environment the envelope might be output creased or improper printing quality 1 Open the bypass tray DSG118 2 Slide the side guides outward then load envelopes with the print side up and push in until it stops a...

Page 45: ...ing envelopes on both sides to the position indicated with an envelope mark DSG125 Make sure to pull up the levers back to their original positions after printing 6 Close the rear cover Be sure to load envelopes so that their flaps are on the left If you do not the envelopes will become creased Loading Paper 43 ...

Page 46: ... badly creased load the envelopes in the opposite direction and then rotate the print object by 180 degrees using the printer driver before printing For details see the printer driver Help 2 Paper Specifications and Adding Paper 44 ...

Page 47: ...ps temporarily if a paper type size error is detected The printing restarts automatically with the settings made with the control panel after about ten seconds For details about Auto Continue see page 193 System Settings Specifying the Paper Type This section describes how to specify the paper type 1 Press the User Tools key DSG126 2 Press the or key to select Tray Paper Settings and then press th...

Page 48: ...e OK key 5 Press the User Tools key to return to the initial screen You can press the Back key to exit to the previous level of the menu tree Specifying a Custom Paper Size This section describes how to specify a custom paper size When you perform printing make sure that the paper size specified with the printer driver matches the paper size specified with the control panel If a paper size mismatc...

Page 49: ...ss the OK key 5 Press the or key to select mm or inch and then press the OK key 6 Enter the width using number keys and then press the OK key To enter a decimal point press 7 Enter the length using number keys and then press the OK key To enter a decimal point press 8 Press the User Tools key to return to the initial screen You can press the Back key to exit to the previous level of the menu tree ...

Page 50: ...t selected click Connect Printer and then do one of the following Select the machine s model Enter the IP address of the machine manually Click Search Network Printer to search the machine via the network 5 Click OK 6 On the User Tools tab click Printer Configuration If you are requested to enter an access code enter the access code and then click OK The default access code is Admin 7 On the Paper...

Page 51: ... the machine via the network 5 Click OK 6 On the User Tools tab click Printer Configuration If you are requested to enter an access code enter the access code and then click OK The default access code is Admin 7 On the Paper Input tab select Custom Paper Size in the Paper Size list 8 In the Unit list select mm or inch 9 In the Horizontal box and Vertical box specify the width and length 10 Click O...

Page 52: ...t the paper type and paper size for the tray you want to use 5 Enter the administrator password if required 6 Click OK 7 Close the web browser Specifying a Custom Paper Size 1 Start the web browser and access the machine by entering the IP address 2 Click System Settings 3 Click Tray Paper Settings 4 Select Custom Size in the Paper Size list 5 Select mm or inch and specify the width and length 6 E...

Page 53: ...ating system you are using 1 Open the Printing Preferences dialog box from the printer driver For information of how to open the printer driver properties from Devices and Printers see page 70 Displaying the Printing Preferences Dialog Box The Printing Preferences dialog box appears 2 Click the Paper tab 3 In the Input Tray list select the paper tray you want to use for printing 4 In the Paper Typ...

Page 54: ...system you are using 1 Start System Preferences 2 Click Printers Scanners 3 Select the printer you are using 4 In the Paper Size list select the size of the document to be printed 5 Select Printer Features in the pop up menu 6 In the Media Type list select the type of paper that is loaded in the paper tray 2 Paper Specifications and Adding Paper 52 ...

Page 55: ...ize paper specify the width and length using the control panel and the printer driver Tray 1 Type Size Weight Capacity Plain Paper Recycled Paper Thick Paper 1 Thick Paper 2 Thin Paper Letterhead Preprinted Paper Label Paper Prepunched Paper Bond Paper Cardstock Color Paper A4 81 2 11 B5 JIS B6 JIS A5 LEF A5 SEF A6 81 2 14 81 2 13 8 5 13 4 8 5 13 6 16K 8 11 13 3 51 2 81 2 52 to 162 g m2 14 to 43 l...

Page 56: ...es in length 52 to 162 g m2 14 to 43 lb 250 80 g m2 20 lb Bypass tray Type Size Weight Capacity 1 Plain Paper Recycled Paper Thick Paper 1 Thick Paper 2 Thin Paper Letterhead Preprinted Paper Envelope Label Paper Prepunched Paper Bond Paper Cardstock Color Paper A4 81 2 11 B5 JIS B6 JIS A5 LEF A5 SEF A6 81 2 14 81 2 13 8 5 13 4 8 5 13 6 16K 8 11 13 3 51 2 81 2 41 8 91 2 37 8 71 2 DL Env C6 Env C5 ...

Page 57: ...s set the paper vertically regardless of the size Specifications of Paper Types The following tables describe the types of paper that can be used with this machine Depending on the paper type the toner may take a while to dry Before handling printed sheets make sure that they have fully dried Otherwise the toner may smudge Print quality can be guaranteed only if recommended paper is used For more ...

Page 58: ... A4 81 2 11 81 2 14 81 2 13 8 5 13 4 8 5 13 6 8 11 13 3 Thick Paper 2 Item Description Paper thickness 131 to 162 g m2 35 to 43 lb Supported paper tray Tray 1 and bypass tray Duplex supported size None Thin Paper Item Description Paper thickness 52 to 64 g m2 14 to 16 lb Supported paper tray Tray 1 and bypass tray Duplex supported size A4 81 2 11 81 2 14 81 2 13 8 5 13 4 8 5 13 6 8 11 13 3 2 Paper...

Page 59: ...4 lb Supported paper tray Tray 1 and bypass tray Duplex supported size A4 81 2 11 81 2 14 81 2 13 8 5 13 4 8 5 13 6 8 11 13 3 Notes If the paper thickness is outside the specified range select Thin Paper Plain Paper Thick Paper 1 or Thick Paper 2 Preprinted Paper Item Description Paper thickness 75 to 90 g m2 20 to 24 lb Supported paper tray Tray 1 and bypass tray Duplex supported size A4 81 2 11 ...

Page 60: ...r thickness 100 to 130 g m2 27 to 35 lb Supported paper tray Tray 1 and bypass tray Duplex supported size A4 81 2 11 81 2 14 81 2 13 8 5 13 4 8 5 13 6 8 11 13 3 Notes Paper that has a thickness outside the specified range cannot be printed onto Bond Paper Item Description Paper thickness 105 to 160 g m2 28 to 43 lb Supported paper tray Tray 1 and bypass tray Duplex supported size None Notes If the...

Page 61: ...tes Avoid using adhesive label paper on which glue is exposed Glue may stick to the inner parts of the machine which can cause paper feed problems deterioration in print quality or premature wear of the print cartridge s photo conductor unit Envelope Item Description Supported paper tray Bypass tray Duplex supported size None Notes Avoid using self adhesive envelopes They may cause machine malfunc...

Page 62: ...er smear on their unprinted sides Print images might also be blurred When printing large black solid areas striping can occur as a result of the envelopes overlapping To correctly specify the length of an envelope whose flap opens along its short edge be sure to include the open flap when measuring CER112 Fan envelopes and then align their edges before loading DAC573 When fanning envelopes make su...

Page 63: ...er Wrinkled paper Damp paper Dirty or damaged paper Paper that is dry enough to emit static electricity Paper that has already been printed onto except a preprinted letterhead paper Malfunctions are especially likely when using paper printed on by other than a laser printer e g monochrome and color copiers ink jet printers etc Special paper such as thermal paper and carbon paper Paper weighing hea...

Page 64: ...dation or malfunctions Paper Storage Store paper appropriately If the paper is stored incorrectly misfeeds lower printing quality or malfunctions may result When storing paper Do not store paper in a humid place Do not store paper in direct sunlight Do not stand paper on its edge Store any leftover paper in a wrapping or box supplied with the paper Print Area The diagram below shows the area of th...

Page 65: ... 0 2 inches Envelope CMC044 4 4 3 3 2 1 1 Print area 2 Feed direction 3 Approximately 4 2 mm 0 2 inches 4 Approximately 4 2 mm 0 2 inches Copier function CHZ904 2 3 3 1 4 4 1 Print area 2 Feed direction 3 Approx 4 mm 0 2 inches 4 Approx 2 8 mm 0 1 inches Supported Paper 63 ...

Page 66: ... Approx 2 mm 0 08 inches The print area may vary depending on the paper size printer language and printer driver settings For better envelope printing we recommend you set the right left top and bottom print margins to at least 15 mm 0 6 inches each 2 Paper Specifications and Adding Paper 64 ...

Page 67: ...made by marker or highlighter pen on originals are difficult to reproduce they might not appear on copies 1 Lift the ADF or the exposure glass cover Be careful not to hold the input tray when lifting the ADF for the tray might be damaged 2 Place the original face down on the exposure glass The original should be aligned to the rear left corner DSG127 3 Lower the ADF or the exposure glass cover Hol...

Page 68: ...rely 1 Open the cover of the input tray for the ADF and adjust the guides according to the size of the original DSG128 2 Place the aligned originals face up in the ADF The last page should be on the bottom DSG129 When placing originals longer than A4 pull out the ADF tray s extenders About Originals This section describes the types of originals that can be placed and the parts of the original that...

Page 69: ...20SFN SP 377SNwX and SP 377SFNwX If placed in the ADF the following types of original might be damaged or become jammed or result in gray or black lines appearing on prints Originals larger or heavier than recommended Stapled or clipped originals Perforated or torn originals Curled folded or creased originals Pasted originals Originals with any kind of coating such as thermal fax paper art paper a...

Page 70: ...argins when using exposure glass In copier mode In scanner mode In fax mode Top 4 mm 0 mm 0 mm Right 3 mm 0 mm 0 mm Left 3 mm 0 mm 0 mm Bottom 3 mm 0 mm 0 mm Margins when using ADF only SP 320SFN SP 377SNwX and SP 377SFNwX In copier mode In scanner mode In fax mode Top 4 mm 0 mm 0 mm Right 3 mm 0 mm 0 mm Left 3 mm 0 mm 0 mm Bottom 3 mm 2 mm 0 mm 2 Paper Specifications and Adding Paper 68 ...

Page 71: ...uments What You Can Do with the Printer Function Duplex printing You can print on both sides of a sheet of paper For details see the printer driver Help DSG261 Combined printing You can combine multiple pages and print them on a single sheet of paper For details see the printer driver Help 1 2 3 DSG262 69 ...

Page 72: ...ent print settings for each user The settings configured in this dialog box are used as the default 1 On the Start menu click Devices and Printers 2 Right click the icon of the printer you want to use 3 Click Printing Preferences Displaying the Printing Preferences Dialog Box in an Application You can make printer settings for a specific application To make printer settings for a specific applicat...

Page 73: ...g the Printing Preferences Dialog Box in an Application When Using OS X The following procedure is explained using OS X 10 11 as an example 1 Open the document to print 2 Select Print on the File menu 3 Check that the machine name or IP address you are using is selected in the Printer popup menu If the machine name or IP address you are using is not selected in the Printer list click the list and ...

Page 74: ... Set printing options as necessary and then click OK The printer properties dialog box closes 3 Click Print If a paper jam occurs printing stops after the current page has been printed out After the jammed paper is removed printing restarts from the jammed page automatically For details about how to remove the jammed paper see page 281 Clearing Misfeeds After printing on envelopes make sure to pul...

Page 75: ...ings and prints on whatever paper is loaded Printing stops temporarily when the error is detected and restarts automatically after about ten seconds using the settings made on the control panel For details about Auto Continue see page 193 System Settings Continuing printing using mismatched paper If the paper is too small for the print job the printed image will be cropped 1 If the error message i...

Page 76: ...t has already been processed printing may continue for a few pages before being canceled It may take a while to cancel a large print job Canceling a print job while printing 1 Press the Clear Stop key DSG129 3 Printing Documents 74 ...

Page 77: ... Sided Originals with 2 Sided and Combined Printing DSG263 Combined copying only SP 320SFN SP 377SNwX and SP 377SFNwX are available You can copy multiple pages onto a single sheet of paper For details about the settings see page 82 Copying Single Sided Originals with 2 Sided and Combined Printing and page 86 Copying 2 Sided Originals with 2 Sided and Combined Printing 1 2 3 DSG264 ID card copying ...

Page 78: ...by mode DSG132 1 Current status or messages Displays the current status or messages 2 Current settings Displays the current tray reproduction ratio and scan settings 3 Selection key items Displays the functions you can use by pressing the corresponding selection keys 4 Copy quantity Displays the current copy quantity You can change the copy quantity using the number keys The start up mode can be s...

Page 79: ...mber of copies using the number keys 4 Press the Start key DSG133 The maximum number of copies is 99 You can change the paper tray for the current job by pressing the or key You can also select to change the paper tray automatically according to the paper size A4 Letter or 16K You can select the paper tray for printing out copies in Select Paper under Copier Features If you set the machine to swit...

Page 80: ...canning jam occurs in the ADF copying is canceled immediately In this case copy the originals again starting from the jammed page For the direction to remove the jammed paper see page 281 Clearing Misfeeds Canceling a Copy While scanning the original If copying is canceled while the machine is scanning the original copying is cancelled immediately and there is no printout When the original is set ...

Page 81: ...2 Press the Clear Stop key DSG129 Basic Operation of Copying 79 ...

Page 82: ...a preset ratio or manually specifying a customized ratio Preset ratio CES103 mainly Europe and Asia 50 71 82 93 122 141 200 400 mainly North America 50 65 78 93 129 155 200 400 Custom ratio CES106 25 to 400 in 1 increments Specifying Reduce Enlarge 1 Press Scale 4 Copying Originals 80 ...

Page 83: ...ess Reduce Enlarge or Zoom For Reduce or Enlarge press the or key to select the desired ratio For Zoom specify the desired ratio using the number keys 3 Press the OK key Making Enlarged or Reduced Copies 81 ...

Page 84: ...d for printing copies must be set to A4 Letter or Legal Paper between 64 and 105 g m2 can be used for duplex printing The types of paper that can be used for 2 sided copy are plain thin thick 1 recycled color letterhead preprinted and prepunched There are following copy modes Select a copy mode according to your original and how you want the copy outputs to appear Combined copy on one side In this...

Page 85: ...py on both sides In this mode a multiple page original is combined and printed on both sides of paper 1Sd 4Orig Comb 2on1 2Sd Portrait Landscape Original Copy Top to Top Top to Bottom Top to Top Top to Bottom CMF254 1Sd 8Orig Comb 4on1 2Sd Copying Single Sided Originals with 2 Sided and Combined Printing 83 ...

Page 86: ...ttom Top to Bottom CMF255 8 7 6 5 8 6 7 5 6 5 8 7 7 5 8 6 Landscape Original Copy Left to Right Top to Top Left to Right Top to Bottom Top to Bottom Top to Top Top to Bottom Top to Bottom DCT004 1 Sided Orig 2 Sided Copy In this mode one sided pages are printed on the front and back sides of paper without being combined 4 Copying Originals 84 ...

Page 87: ...r key to select the desired copy mode and then press the OK key 3 Press the or key to select paper orientation and page order and then press the OK key You can change the machine s default Duplex Combine setting to always make photocopies in combine mode For details see page 176 Copier Features Settings Copying Single Sided Originals with 2 Sided and Combined Printing 85 ...

Page 88: ... printed on the front and back of all sheets Otherwise the job will be reset The following five types of manual 2 sided copying are available 2Sd 1Orig Comb 2on1 1Sd Copies one 2 sided original to one side of a sheet 2Sd 2Orig Comb 4on1 1Sd Copies two 2 sided originals to one side of a sheet 2 Sided Orig 2 Sided Copy Makes 2 sided copies of 2 sided originals 2Sd 2Orig Comb 2on1 2Sd Copies both sid...

Page 89: ...r tray 7 Press the Start key After you place the originals press the Start key within the time specified in System Auto Reset Timer Otherwise the job is canceled For details see page 206 Administrator Settings If the memory becomes full while originals are being scanned the job is canceled Duplex Copying Manually Using the Exposure Glass for SP 320SN When printing odd pages in Manual 2 Sided Scan ...

Page 90: ...s on the display 5 Place the original on the exposure glass with the back side faced down and with the top to the rear of the machine 6 Press the Start key again When all originals have been scanned press the Clear Stop key After you load the original press the Start key within the time specified in System Auto Reset Timer Otherwise the job is canceled For details see page 206 Administrator Settin...

Page 91: ...iginal is set on the exposure glass not when it is set in the ADF To use this function the paper size used for printing copies must be set to A6 A5 A4 Half Letter or Letter Printed paper size Scanned paper size A4 A5 148 210 mm Letter Half Letter 140 216 mm A5 A6 105 148 mm Half Letter Quarter Letter 108 140 mm A6 A7 74 105 mm CES165 1 Press the Shortcut to Func key DSG139 Copying an ID Card 89 ...

Page 92: ...140 4 Press the Start key A message prompting you to place the original back side down on the exposure glass appears on the display 5 Place the original on the exposure glass with the back side faced down and with the top to the rear of the machine within the time specified in System Auto Reset Timer and then press the Start key again For the ID card copy function you can set the machine to print ...

Page 93: ...o always make copies with a specific density level For details see page 176 Copier Features Settings Selecting the Document Type According to Original There are three document types Mixed Select this when the original contains both text and photographs or pictures Text Select this when the original contains only text and no photographs or pictures Photo Select this when the original contains only ...

Page 94: ...r key to select the desired document type and then press the OK key You can change the machine s default Original Type setting to always make copies with a specific document type For details see page 176 Copier Features Settings 4 Copying Originals 92 ...

Page 95: ...d Scanned Documents by E mail Scanning Documents from a Client Computer Specify a destination and start scanning Specify a e mail address and start scanning Specify scan settings and start scanning Scanned data is displayed on the computer screen Files are sent directly to shared folders Distribute the document as a file attached to an e mail Specify scan settings and start scanning Scanned files ...

Page 96: ...riginal Dest 300 x 300dpi 1 3 2 1 Current status or messages Displays the current status or messages 2 Current settings Displays the current scanning mode and scan settings When Specify Address is displayed Scan to E mail Scan to FTP or Scan to Folder functions can be used 3 Selection key items Displays the functions you can use by pressing the corresponding selection keys The machine s default mo...

Page 97: ...orrectly entered in the destination information In such cases after registering destinations check that the user name and password are correctly entered by sending test documents to those destinations The Address Book can contain up to 100 entries including 8 Quick Dial entries Destinations registered as Quick Dial entries can be selected by pressing the corresponding One Touch button only SP 320S...

Page 98: ...er transmission Can contain up to 64 characters Subject Required Subject of the e mail Can contain up to 64 characters Sender s Name Optional Name of e mail sender The name specified here will be shown under From or a similar field of the recipient s email application Can contain up to 32 characters File Format Color Gray Scale Required File format of the scanned file when scanning in color PDF or...

Page 99: ...ct the scan resolution from 100 100 150 150 200 200 300 300 400 400 or 600 600 dpi Density Optional Specify the image density by clicking the right or left button is the lightest and is the darkest Scan to FTP Settings Item Setting Description Quick Dial Number Optional Select when setting the destination as a Quick Dial entry Name Required Name of the destination The name specified here will be s...

Page 100: ...irectory where scanned files are stored Can contain up to 64 characters Notification E mail Address Optional E mail address to which a notification is sent after transmission Can contain up to 64 characters Original only SP 377SNwX and SP 377SFNwX Optional Select the sides of the original 1 side or 2 sides to scan according to the page and binding orientation Scan Size Optional Select the scanning...

Page 101: ...nd name of the shared folder can contain up to 32 characters Domain Optional Specify the name of the domain to which the computer belongs Can contain up to 15 characters Login User Name Optional User name for logging in to the destination computer Can contain up to 32 characters Login Password Optional Password for logging in to the destination computer Can contain up to 32 characters Directory Op...

Page 102: ...om 100 100 150 150 200 200 300 300 400 400 or 600 600 dpi Density Optional Specify the image density by clicking the right or left button is the lightest and is the darkest To send files via e mail SMTP and DNS settings must be configured properly If you are using the Scan to E mail function select a time zone according to your geographic location to send email with correct transmission date and t...

Page 103: ...es how to delete registered destinations 1 Start the web browser and access the machine by entering its IP address 2 Click Scan Destination 3 Click the E mail Address FTP or Folder tab 4 Select the entry to delete and then click Delete 5 Confirm that the entry you have selected is the entry that you want to delete 6 Enter the administrator password if required 7 Click Apply 8 Close the web browser...

Page 104: ...ange automatically according to the information registered for that destination in the Address Book If necessary you can change the scan settings using the control panel For scan settings see page 132 Specifying Scan Settings for Scanning 5 Press the Start key Scanning starts and scanned documents will be stored in a shared folder If the machine fails to transmit the file confirm the following ite...

Page 105: ...7 1 only Windows You can create the shared folder under Windows Vista or later Windows Server 2003 or later and OS X 10 7 or later Files can be sent via SMB using the SMB 139 TCP 137 UDP or CIFS 445 TCP protocol Files can be sent via SMB 139 TCP 137 UDP in a NetBIOS over TCP IP environment only Files cannot be sent via SMB in a NetBEUI environment Printing the Check Sheet Print out the following c...

Page 106: ...ex ABCD NET USERDNSDOMAIN USERDOMAIN Computer s user name ex TYamada 3 Computer s login password ex Administrator 4 Computer s shared folder name ex scan Depending on the network environment USERDNSDOMAIN or USERDOMAIN may not be displayed Write the domain name or working group name in the check sheet Confirming the User Name and Computer Name Confirming the User Name and Computer Name When Runnin...

Page 107: ... creating a shared folder see page 106 Creating a Shared Folder on a Computer Depending on the operating system or security settings it might be possible to specify a user name that does not have a password assigned However we recommend that for greater security you select a user name that has a password Confirming the User Name and Computer Name When Running OS X Confirm the user name and the nam...

Page 108: ...urity risk so we recommend that you give access rights only to specific users Use the following procedure to remove Everyone and specify user access rights 1 Create a folder just as you would create a normal folder in a location of your choice on the computer Write the folder name in 4 on the check sheet 2 Right click the folder and then click Properties 3 On the Sharing tab select Advanced Sharin...

Page 109: ...folder 1 Create the folder that you want to send scan files to Write the folder name into 4 in the check sheet 2 On the Apple menu click System Preferences 3 Click Sharing 4 Select the File Sharing check box 5 Click Options 6 Select the Share files and folders using SMB check box 7 Select the account that will be used to access the shared folder 8 If the Authenticate screen appears enter the passw...

Page 110: ...ne s Address Book If you are creating a shared folder for the first time on this computer you must enable the file sharing function For details see Windows Help Registering a Shared Folder in the Machine s Address Book Register scan destinations using Web Image Monitor 1 Start the web browser and access the machine by entering its IP address 2 Click Quick Dial Destination or Scan Destination 3 Fro...

Page 111: ...to transfer the file Send Scanned Files to a Shared Folder Send scanned files to the shared folder registered in Step 5 The original in the ADF takes precedence over the original on the exposure glass if you place originals both in the ADF and on the exposure glass Register the scan destination in the Address Book using Web Image Monitor For details see page 95 Registering Scan Destinations When a...

Page 112: ...he machine s scan settings change automatically according to the information registered for that destination in the Address Book If necessary you can change the scan settings using the control panel For scan settings see page 132 Specifying Scan Settings for Scanning 5 Press the Start key DSG133 Depending on the machine s settings you may see the following screen on the display when scanning from ...

Page 113: ...the One Touch buttons Pause Redial key only SP 320SFN and SP 377SFNwX For details see page 119 Specifying the Scan Destination Using the One Touch Buttons or Pause Redial Key only SP 320SFN and SP 377SFNwX Basic Operation of Scan to Folder 111 ...

Page 114: ...bout SMTP server information contact the network administrator of your Internet service provider Configure SMTP and DNS information using Web Image Monitor 1 Start the web browser and access the machine by entering its IP address 2 Click Network Settings 3 Click the DNS tab 4 Register information as necessary For details see page 236 Configuring the Network Settings 5 Click OK 6 Click the SMTP tab...

Page 115: ...out sending files to the registered destinations see page 113 Sending Scanned Files by E mail Sending Scanned Files by E mail This section explains how to send scanned files to the destinations registered in Step 2 The original in the ADF takes precedence over the original on the exposure glass if you place originals both in the ADF and on the exposure glass Register the scan destination in the Ad...

Page 116: ...ch time you enter a character the display changes to show the matching name 4 Search for the desired destination by pressing the or key to scroll the Address Book and then press the OK key When you specify a scan destination the machine s scan settings change automatically according to the information registered for that destination in the Address Book If necessary you can change the scan settings...

Page 117: ...ned press No to start sending the scanned file To cancel scanning press the Scanner key and then press the Clear Stop key The scan files are discarded You can also specify a destination using the One Touch buttons Pause Redial key only SP 320SFN and SP 377SFNwX For details see page 119 Specifying the Scan Destination Using the One Touch Buttons or Pause Redial Key only SP 320SFN and SP 377SFNwX Ba...

Page 118: ...b browser and access the machine by entering its IP address 2 Click Quick Dial Destination or Scan Destination 3 From the Destination Type list select FTP 4 Register information as necessary The information you must register are the following items For details see page 95 Registering Scan Destinations Name Hostname or IP Address 5 Enter the administrator password if required 6 Click Apply 7 Close ...

Page 119: ...cut to Func key if Shortcut to Function under Admin Tools is set to Select Scanner Address For Shortcut to Function see page 206 Administrator Settings 3 Make sure Search Address Book is selected and then press the OK key If you want to search for a specific entry by its name enter the first letters of the name using the number keys and then press the OK key Each time you enter a character the dis...

Page 120: ...peat this step until all originals are scanned 7 When all originals have been scanned press No to start sending the scanned file To cancel scanning press the Scanner key and then press the Clear Stop key The scan files are discarded You can also specify a destination using the One Touch buttons Pause Redial key only SP 320SFN and SP 377SFNwX For details see page 119 Specifying the Scan Destination...

Page 121: ...dial key Press this to specify the last used destination as the destination for the current job Using the One Touch buttons Press the One Touch button to which the desired Quick Dial entry is registered Press the Shift key to use the Quick Dial entries Nos 5 to 8 DSG147 Using the Pause Redial key Press the Pause Redial key to select the last used destination DSG148 Specifying the Scan Destination ...

Page 122: ...an settings using the control panel For details see page 132 Specifying Scan Settings for Scanning The Pause Redial key is not effective for the first scan job after the machine is turned on To select destinations not registered as Quick Dial entries use the Address Book key For specifying destinations using the Address Book key see page 103 Basic Operation of Scan to Folder 5 Scanning Originals 1...

Page 123: ... USB to Active For details see page 206 Administrator Settings 1 Insert the USB flash memory device into the USB port DSG149 The scanner screen appears on the display A message indicating the machine is reading the device appears Wait until Save Scn Data to USB appears on the display The time before the message appears differs depending on the type of USB flash memory device 2 Place the original o...

Page 124: ...iginals to scan place the next original on the exposure glass and then press Yes Repeat this step until all originals are scanned 6 When all originals have been scanned press No to start sending the scanned file 7 Wait until Completed the Process is displayed on the screen Scanned files are saved in the root directory of the USB flash memory device 8 Remove the USB flash memory device from the mac...

Page 125: ...may vary depending on the operating system you are using 1 Place originals 2 On the Start menu click All Programs 3 Click SP 320 Series Software Utilities 4 Click Smart Organizing Monitor Smart Organizing Monitor starts 5 Click the User Tools tab 6 Click Scan The dialog box appears Scanning from Smart Organizing Monitor 123 ...

Page 126: ...Organizing Monitor is used for scanning General tab DSG280 1 2 3 4 5 6 1 Original only SP 320SFN SP 377SNwX and SP 377SFNwX Select Exposure Glass to scan from the exposure glass or Automatic Document Feeder to scan from the ADF 2 Original type According to your original select a setting from the list of options detailed below or select Custom to configure your own scan settings Scn Mode Resolution...

Page 127: ...size and scanning time Select from 100 200 300 or 600 dpi 5 Size Select the scanning size When Exposure Glass is selected in Original you can change the scanning size with your mouse in the preview area Also after selecting User defined you can select the unit of measure from cm inches or pixels 6 Duplex only SP 320SFN SP 377SNwX and SP 377SFNwX Appears only when Automatic Document Feeder is selec...

Page 128: ...e Name Prefix Specify the file name prefix Numbers are consecutively assigned after the prefix For example if File Name Prefix is Scan file names will be Scan001 Scan002 and so on 3 Format Select the file format of the scanned document from JPEG TIFF or PDF 5 Scanning Originals 126 ...

Page 129: ...or using the TWAIN scanner To use the TWAIN scanner you must install the TWAIN driver which is on the supplied CD ROM To use the TWAIN scanner a TWAIN compliant application must be installed To use the machine as a TWAIN scanner first do the following Install the TWAIN driver Install a TWAIN compliant application TWAIN scanning TWAIN scanning is possible if your computer is running a TWAIN compati...

Page 130: ...on the security setting if you press Scan a dialog box for entering the user name and password may appear If there are more originals to be scanned place the next original and then click Continue If there are no more originals to be scanned click Complete Settings you can configure in the TWAIN dialog box DSG150 1 2 3 4 5 6 7 1 Scanner Select the scanner you want to use The scanner you select beco...

Page 131: ...e original is set When using the exposure glass 75 100 150 200 300 400 500 600 1200 2400 4800 9600 19200 dpi User defined When using the ADF only SP 320SFN SP 377SNwX and SP 377SFNwX 75 100 150 200 300 400 500 600 dpi User defined 6 Size Select the scanning size If you select User defined enter the scanning size directly in the edit box Also you can change the scanning size with your mouse in the ...

Page 132: ...art menu on your computer click Devices and Printers 3 Right click the icon of the printer model you want to use and then click Start scan to open the dialog box for the scan settings 4 In the dialog box configure the scan settings as required and then click Scan 5 Click Import 5 Scanning Originals 130 ...

Page 133: ...Using SANE scanning This driver allows you to scan images and edit them using SANE compatible software Using SANE scanning 131 ...

Page 134: ...e of the original and then press the OK key If you selected anything other than Custom Size you do not need to perform the remaining steps of the procedure 3 Press the or key to select mm or inch and then press the OK key 4 Enter the width using the number keys and then press the OK key To enter a decimal point press 5 Enter the length using the number keys and then press the OK key To enter a dec...

Page 135: ...ction describes how to specify the scan resolution for the current job There are six resolution settings The higher the resolution the higher the quality but greater the file size 1 Press the Image Quality key DSG143 2 Press the or key to select the desired resolution and then press the OK key You can change the machine s default Resolution setting to always scan with a specific resolution level F...

Page 136: ...5 Scanning Originals 134 ...

Page 137: ...ng a one touch button For details see page 140 Registering Fax Destinations DSG271 Forward received faxes to receive them wherever you are By forwarding received faxes to an e mail address or a folder you can receive them anytime anywhere you are For details see page 168 Forwarding or Storing Faxes in Memory DSG272 Send faxes by data to save paper By using a LAN Fax Driver you can send documents f...

Page 138: ...DSG273 6 Sending and Receiving a Fax 136 ...

Page 139: ... client computer Connect the machine to a telephone line Set the date and time Specify the telephone line type Select either an external line or extension line Specify the number of the external line 1 Specify the reception mode DSG290 1 Specify when using an extension line or a PBX Procedure Reference See Initial Guide for FAX For details about selecting reception modes see page 164 Selecting Rec...

Page 140: ...r messages 2 Current settings Displays the current resolution and density settings 3 Selection key items Displays the functions you can use by pressing the corresponding selection keys 4 Current date and time Shows the current date and time The machine s default mode at power on can be specified in the Function Priority setting under Admin Tools For Function Priority see page 206 Administrator Set...

Page 141: ...ministrator Settings 7 Enter the current date using the number keys and then press the OK key You can press the or key to move between fields 8 Press the or key to select Set Time and then press the OK key 9 Press the or key to select the desired time format and then press the OK key 10 Enter the current time using the number keys and then press the OK key If you selected 12 hour Format press the ...

Page 142: ...to 108 entries 8 Quick Dial entries and 100 Speed Dial entries Quick Dial entries Destinations registered as Quick Dial entries can be selected by pressing the corresponding One Touch button Speed Dial entries Destinations registered as Speed Dial entries can be selected from the Address Book Press the Address Book key select Search Address Book and then select the desired entry using the or key R...

Page 143: ...umber The machine pauses briefly before it dials the digits following the pause You can specify the length of the pause time in the Pause Time setting under Fax TX Settings For Pause Time see page 184 Fax Features Settings To use tone services on a pulse dialing line insert in the fax number switches the dialing mode from pulse to tone temporarily If the machine is connected to the telephone netwo...

Page 144: ...ress the key until the current number is deleted 7 Press the or key to select Name and then modify the fax name up to 20 characters If you want to delete the fax name press the key until the current name is deleted 8 Confirm the setting and then press the OK key 9 Press the User Tools key to return to the initial screen For details about entering characters see page 32 Entering Characters Register...

Page 145: ...s Number before the fax number For PBX Access Number see page 206 Administrator Settings A fax number can contain 0 to 9 P pause and space If necessary insert a pause in the fax number The machine pauses briefly before it dials the digits following the pause You can specify the length of the pause time in the Pause Time setting under Fax TX Settings For Pause Time see page 184 Fax Features Setting...

Page 146: ...x Quick Dial Destination 4 Select the entry to modify and then click Change If you want to delete the entry click Delete 5 Modify settings as necessary To delete the entry confirm the entry you have selected 6 Enter the administrator password if required 7 Click Apply 8 Close the web browser 6 Sending and Receiving a Fax 144 ...

Page 147: ...ssion Immediate transmission In this mode the machine scans several originals into memory and sends them all at once This is convenient when you are in a hurry and want to remove the document from the machine In this mode you can send a fax to multiple destinations If the Auto Redial under Fax TX Settings is enabled the machine redials the fax destination automatically when the line is busy or a t...

Page 148: ... Off On or Next Fax Only and then press the OK key For Memory Transmission select Off For Immediate Transmission select On or Next Fax Only 4 Press the User Tools key to return to the initial screen Basic Operation for Sending a Fax The original in the ADF takes precedence over the original on the exposure glass if you place originals both in the ADF and on the exposure glass If you are using the ...

Page 149: ...to the telephone network through a PBX make sure to enter the outside line access number specified in PBX Access Number before the fax number For PBX Access Number see page 206 Administrator Settings 4 Press the Start key DSG133 Depending on the machine s settings you may be prompted to enter the fax number again if you manually entered the destination fax number In this case re enter the number w...

Page 150: ...firmed When in Memory Transmission mode you can enable the Auto Redial setting under Fax TX Settings to set the machine to automatically redial the destination if the line is busy or an error occurs during transmission For Auto Redial see page 184 Fax Features Settings When in Memory Transmission mode the machine s memory may become full while scanning the originals In this case the screen prompts...

Page 151: ...he Facsimile key DSG153 2 Press the Clear Stop key DSG129 If you cancel sending a fax while broadcasting only the fax to the current destination is canceled The fax will be sent to the subsequent destinations as normal For details about sending a fax using the broadcast function see page 149 Specifying the Fax Destination Specifying the Fax Destination Other than entering the destination fax numbe...

Page 152: ... Dial entry is registered Press the Shift key if you want to use Quick Dial entries Nos 5 to 8 before pressing a One Touch button For registering the Quick Dial entries see page 140 Registering Fax Destinations DSG147 You can check the registered names and fax numbers by printing a report For printing the Quick Dial list see page 213 Printing Lists Reports 6 Sending and Receiving a Fax 150 ...

Page 153: ...ey again enter the number using the number keys and then press the OK key Searching by the name Enter the first letters of the name using the number keys and then press the OK key Each time you enter a character the display changes to show the matching name 4 Press the or key to select the desired Speed Dial entry and then press the OK key For registering the Speed Dial entries see page 140 Regist...

Page 154: ...t a destination and then press the OK key To add a manually specified destination confirm that No key is pressed and then enter the destination fax number using the number keys 3 Press the OK key Press List to see the list of destinations that have been added so far Go back to Step 2 to add further destinations While specifying multiple destinations you can press the Clear Stop key to clear all de...

Page 155: ...ng the On Hook Dial function Using an external telephone you can talk and send a fax in one call This function is available in Immediate Transmission mode only The procedure differs depending on whether Operation is set to Easy Mode or Advanced Mode in Fax Features Sending a fax using On Hook Dial The On Hook Dial function allows you to check the destination s status while listening to the tone fr...

Page 156: ...s enabled 1 Place the original If Operation is set to Easy Mode you cannot send faxes using the exposure glass 2 Press the Facsimile key DSG153 3 Press the On Hook Dial key DSG159 On Hook appears on the screen 4 Specify the destination using the number keys 6 Sending and Receiving a Fax 154 ...

Page 157: ...about Operation see page 184 Fax Features Settings Sending a fax after a conversation An external telephone allows you to send a fax after finishing your conversation without having to disconnect and redial This function is useful when you want to ensure that the fax has been received 1 Place the original If Operation is set to Easy Mode you cannot send faxes using the exposure glass 2 Press the F...

Page 158: ...or details about Operation see page 184 Fax Features Settings Specifying Scan Settings for Faxing Adjusting image density This section describes how to adjust image density for the current job There are three image density levels The darker the density level the darker the printout 1 Press the Density key DSG142 2 Press the or key to select the desired density level and then press the OK key 6 Sen...

Page 159: ...nal is a printed or typewritten document with normal sized characters Detail Select this when the original is a document with small print Photo Select this when the original contains images such as photographs or shaded drawings 1 Press the Image Quality key DSG143 1 Press the or key to select the desired resolution setting and then press the OK key You can change the machine s default Resolution ...

Page 160: ...mes full while storing this data the fax transmission will be canceled If this happens lower the resolution or reduce the number of pages and try again 1 Open the file you want to send 2 On the File menu click Print 3 Select the LAN Fax driver as the printer and then click Print 4 Specify a destination To specify a destination from the LAN Fax address book Select a destination from User List and t...

Page 161: ...can register the fax number you entered in the Specify Destination tab in the LAN Fax Address Book Click Save to Address Book to open the dialog box for registering a destination Canceling a fax You can cancel sending a fax using either the machine s control panel or your computer depending on the status of the job Canceling while the machine is receiving a fax from the computer If the machine is ...

Page 162: ...y and then click OK For details about the settings see the LAN Fax driver help Configuring the LAN Fax Address Book This section describes the LAN Fax address book Configure the LAN Fax address book on the computer The LAN Fax address book allows you to specify LAN Fax destinations quickly and easily The LAN Fax address book can contain up to 1000 entries including individual destinations and grou...

Page 163: ...stination click Cancel Registering groups 1 Open the LAN Fax address Book and then click Add Group 2 Enter the group name in Group Name 3 Select the destination you want to include in the group from User List and then click Add To delete a destination from a group select the destination you want to delete from List of Group Members and then click Delete from List 4 Click OK Modifying groups 1 Open...

Page 164: ...ecify a name for the file and then click Save Importing LAN Fax Address Book data LAN Fax Address Book data can be imported from files in CSV format You can import address book data from other applications if the data is saved as a CSV file 1 Open the LAN Fax Address Book and then click Import 2 Select the file containing the address book data and then click Open A dialog box for selecting the ite...

Page 165: ...ported Editing a Fax Cover Sheet 1 On the File menu click Print 2 Select the LAN Fax driver as the printer and then click Print 3 Click the Specify Destination tab and then click Edit Cover Sheet 4 Configure settings as necessary and then click OK For details about the settings see the LAN Fax driver help Using the Fax Function from a Computer LAN Fax 163 ...

Page 166: ...n Mode The following explains the reception modes of the fax function and how to select them In FAX TAD mode the machine receives the fax automatically after the external telephone answering device rings the number of times specified in Total No of Rings TAD Set the external telephone answering device to ring before receiving a fax For details about Total No of Rings TAD see page 184 Fax Features ...

Page 167: ... incoming calls in fax reception mode after the external telephone rings the number of times specified It is convenient for those who only use telephones for outgoing calls FAX TAD mode auto reception In this mode the external telephone answering device answers and records messages when the machine receives telephone calls If the incoming call is a fax call the machine receives the fax automatical...

Page 168: ...urn to the initial screen In FAX TAD mode the machine automatically starts to receive faxes after the external telephone answering device rings the number of times specified in Total No of Rings TAD under Fax Features Make sure to set the external telephone answering device to answer calls before the machine starts to receive faxes For Total No of Rings TAD see page 184 Fax Features Settings An ex...

Page 169: ...nswer a call with the external telephone while the machine is ringing a normal telephone call starts If you hear a fax calling tone or no sound receive the fax manually To receive the fax manually see page 166 Receiving a fax in FAX TEL Manual mode Receiving a fax in FAX TEL Auto mode When the reception mode is set to FAX TEL Auto mode the machine receives faxes automatically if a fax calling tone...

Page 170: ...he fax automatically If a voice is detected a normal telephone call starts The external telephone answering device records messages You can manually receive a fax during silence detection To receive the fax manually see page 166 Receiving a fax in FAX TEL Manual mode Silence detection does not terminate for 30 seconds even if the external telephone answering device goes on hook unless you press th...

Page 171: ... specified using Web Image Monitor For details about the forwarding destination forwarding trials and interval settings see page 228 Configuring the System Settings Forwarding settings To specify the forwarding conditions for received faxes configure the machine as follows 1 Press the User Tools key DSG126 2 Press the or key to select Fax Features and then press the OK key 3 Press the or key to se...

Page 172: ...received faxes configure the machine as follows 1 Press the User Tools key 2 Press the or key to select Fax Features and then press the OK key 3 Press the or key to select Reception Settings and then press the OK key 4 Press the or key to select Reception File Setting and then press the OK key 5 Press the or key to select Print or Forward Print and then press the OK key 6 Press the or key to selec...

Page 173: ...ey DSG126 2 Press the or key to select Fax Features and then press the OK key 3 Press the or key to select Reception Settings and then press the OK key 4 Press the or key to select RX Store File and then press the OK key 5 Press the or key to select Print Selected File and then press the OK key 6 Press the or key to select the print job and then press the OK key 7 Press the OK key 8 Press the User...

Page 174: ...n the machine s memory Power Failure Report Prints a report when the machine s power has been interrupted while sending or receiving a fax or images stored in the machine s memory have been lost due to the machine being turned off for a prolonged period of time Fax Speed Dial List Prints a list of Speed Dial entries Quick Dial No List Prints a list of Quick Dial entries For more information on Fax...

Page 175: ... in standby mode of each function to access the Copy Scan or Fax settings To check which category the function you want to configure belongs to see page 175 Menu Chart 1 If you want to configure the machine s system settings press the User Tools key DSG126 Otherwise press the or key while Ready is displayed on the initial screen of the Copy Scan and Fax settings DSG156 2 Press the or key to select...

Page 176: ... the password see Admin Tools Lock on page 206 Administrator Settings 3 To confirm setting items and values displayed press the OK key 4 To go back to the previous item press the Back key To return to the initial screen press the Back key the same amount of times as the number of selected items or press the User Tools key once 7 Configuring the Machine Using the Control Panel 174 ...

Page 177: ... Features Settings Address Book User Tools key setting For details see page 192 Address Book Settings System Settings User Tools key setting For details see page 193 System Settings Tray Paper Settings For details see page 202 Tray Paper Settings Wi Fi Setup Wizard For details see Setup Guide Network Settings User Tools key setting For details see page 215 Network Settings Print List Report User T...

Page 178: ...in Paper Tray Priority under Tray Paper Settings If multiple trays contain valid paper the first tray the machine finds will be used for printing when that tray runs out of paper the machine automatically switches to the next tray to continue printing Tray 1 Bypass Tray A4 8 1 2 11 16K Default Tray 1 Sort Configures the machine to sort the output pages into sets when making multiple copies of a mu...

Page 179: ...hen the original contains only text and no photographs or pictures Photo Select this when the original contains photographs or pictures Use this mode for the following types of original Photographs Pages that are entirely or mainly photographs or pictures such as magazine pages Default Mixed Density Specifies the image density for photocopying Lightest Darkest Default Copier Features Settings 177 ...

Page 180: ...s the percentage by which copies are enlarged or reduced 50 71 A4 A5 82 B5J A5 93 100 122 A5 B5J 141 A5 A4 200 400 50 65 LT HLT 78 LG LT 93 129 HLT LT 155 HLT LG 200 400 Zoom 25 400 Default 100 7 Configuring the Machine Using the Control Panel 178 ...

Page 181: ...th 2 Sided and Combined Printing Note that enabling combined copying automatically disables ID card copying Some items might not appear depending on the model type you are using Off 1Sd 2Orig Comb 2on1 1Sd 1Sd 4Orig Comb 4on1 1Sd 1 Sided Orig 2 Sided Copy 1Sd 4Orig Comb 2on1 2Sd 1Sd 8Orig Comb 4on1 2Sd 2Sd 1Orig Comb 2on1 1Sd 2Sd 2Orig Comb 4on1 1Sd 2 Sided Orig 2 Sided Copy 2Sd 2Orig Comb 2on1 2S...

Page 182: ...ther to draw a center line when making ID card copy Print Do not Print Default Do not Print ID Card Size You can change the ID card copy scanning size Horizontal 50 to 148mm 1 90 to 5 83 inches Vertical 50 to 216mm 1 90 to 8 50 inches Default horizontal vertical 57 88mm 2 24 3 46inches 7 Configuring the Machine Using the Control Panel 180 ...

Page 183: ... the control panel B W The machine creates 1 bit black and white images Images contain only black and white colors Color The machine creates 8 bit color images Images are full color Gray Scale The machine creates 8 bit black and white images Images contain black and white and intermediate gray colors Default B W Max E mail Size Specifies the maximum size of a file that can be sent by e mail 1 MB 2...

Page 184: ...ty but greater the file size Low Medium High Default Medium Limitless Scan Sets the machine to request next originals when scanning with the exposure glass Off On Default Off File Type Specifies whether to create a multi page file containing all pages or separate single page files when scanning multiple pages Note that a scanned file can contain multiple pages only when the file format is PDF or T...

Page 185: ... SP 377SNwX and SP 377SFNwX Specifies the orientation to scan and whether to have scanned in double side Sim Portrait Dup Portrait T To T Dup Portrait T To B Dup Landscape T To T Dup Landscape T To B Default Sim Portrait Scan Settings 183 ...

Page 186: ...nsmission only Default Off Resolution Specifies the resolution to use for scanning originals Standard Select this when the original is a printed or typewritten document with normal sized characters Detail Select this when the original is a document with small print Photo Select this when the original contains images such as photographs or shaded drawings Default Standard Density Specifies the imag...

Page 187: ...ng on the Country setting under Admin Tools in five minute intervals Off On Default On Print Fax Header Sets the machine to add a header to every fax you send The header includes the current date and time user fax name and fax number of the machine job ID and page information Off On Default On Original only SP 377SFNwX Specifies the orientation to fax and whether to have faxes printed in both side...

Page 188: ...f a fax calling tone is detected from an incoming call If you answer the call with the external telephone while the machine is ringing a normal telephone call starts If you hear a fax calling tone receive the fax manually Default Fax Only Auto Reduction Sets the machine to reduce the size of a received fax if it is too large to print on a single sheet of paper Note that the machine only reduces th...

Page 189: ...uments are to be printed on both sides of the paper Off 2 Sided Portrait T to T 2 Sided Portrait T to B Default Off RX Store File You can print or delete received faxes Print Selected File You can select and print received faxes Delete Selected File You can select and delete received faxes Delete All Files Reception File Setting Sets the machine to store received faxes into memory for printing or ...

Page 190: ...ription Value Delete Selected File To delete a fax job select the desired job and then press the OK key Pressing the Back key exits to the previous level of the menu tree without deleting the fax job Delete All Files To delete the fax jobs press the OK key Pressing the Back key exits to the previous level of the menu tree without deleting the fax jobs Communication Settings Item Description Value ...

Page 191: ...on the Country setting under Admin Tools Detect Not Detect Default Detect Transmission Speed Specifies the transmission speed for the fax modem 33 6 Kbps 14 4 Kbps 9 6 Kbps 7 2 Kbps 4 8 Kbps 2 4 Kbps Default 33 6 Kbps Reception Speed Specifies the reception speed for the fax modem 33 6 Kbps 14 4 Kbps 9 6 Kbps 7 2 Kbps 4 8 Kbps 2 4 Kbps Default 33 6 Kbps Fax Features Settings 189 ...

Page 192: ...report will be printed on A4 or Letter size paper Error Only Prints a report when a transmission error occurs Error Only Image Attached Prints a report with an image of the original when transmission error occurs Print Every Time Prints a report for every fax transmission Every Time With Image Prints a report with an image of the original for every fax transmission Do not Print Default Every Time ...

Page 193: ... the ADF you can fax them using the ADF in either mode by pressing the Start key Easy Mode If you select Easy Mode you can receive faxes by pressing the Start key The exposure glass cannot be used in this mode Advanced Mode If you select Advanced Mode you can specify whether to send or receive faxes after pressing the Start key Default Advanced Mode Fax Features Settings 191 ...

Page 194: ...space Name Specifies the name for Quick Dial entries The name can contain up to 20 characters Fax Speed Dial No Specifies the fax number and name for Speed Dial entries You can register up to 100 Speed Dial entries No Specifies the Speed Dial number Fax No Specifies the fax number for Speed Dial entries The fax number can contain up to 40 characters including 0 to 9 pause and space Name Specifies ...

Page 195: ...s the volume of the ringing tone Off Low Middle High Default Middle On Hook Mode Specifies the volume of the sound from the speaker during on hook mode Off Low Middle High Default Middle Job End Tone Specifies the volume of the beep that sounds when a job is complete Off Low Middle High Default Middle Job Error Tone Specifies the volume of the beep that sounds when a fax transmission error occurs ...

Page 196: ...y prints the data it has received If printing is frequently interrupted by data from other ports increase the timeout period 15 sec 60 sec 300 sec Default 60 sec Network Specifies how many seconds the machine waits for print data if the data is interrupted while it is being sent from the computer via network If the machine does not receive any more data within the time specified here the machine o...

Page 197: ...ed with any machine other than the one originally used for installation if the machine is of the same model Default Off Auto Continue Item Description Value Auto Continue Sets the machine to ignore an error with paper size or type and continue printing The printing stops temporarily when an error is detected and restarts automatically after about ten seconds using the settings made on the control ...

Page 198: ...15 that is 1 5 and 1 5 mm in 0 1 mm increments Default 0 for all parameters Item Description Horiz Tray 1 Select this to adjust the tray 1 registration horizontally Vert Tray 1 Select this to adjust the tray 1 registration vertically Horiz Bypass Tray Select this to adjust the bypass tray registration horizontally Vert Bypass Tray Select this to adjust the bypass tray registration vertically Horiz...

Page 199: ...spaces in between Selecting On for this setting may prevent these lines from appearing wait for about one day until this setting becomes effective Note that when this setting is enabled the machine automatically performs self maintenance in every 10 minutes Off On Default Off Image Density Item Description Value Image Density Adjusts the density of images on prints 3 to 3 Default 0 System Settings...

Page 200: ...ontains network settings PCL Font List Prints installed PCL font list Duplex Test Page Prints a test page for checking the duplex printing condition System Item Description Value Copies Sets the machine to print the specified number of sets This setting is disabled if the number of pages to print is specified by the printer driver 1 to 999 Default 1 Sub Paper Size Sets the machine to print onto pa...

Page 201: ... Bind Short Edge Bind Default None Blank Page Print Sets the machine to print blank pages When cover sheet printing is enabled from the printer driver cover sheets are inserted even if you select Off Note that this setting has lower priority than the printer driver s blank page setting On Off Default On Print Error Report Sets the machine to print an error page when the machine detects a printer o...

Page 202: ... for fixed space fonts 0 44 to 99 99 Default 10 00 pitch Symbol Set Specifies the character set for the default font The following sets are available Roman 8 Roman 9 ISO L1 ISO L2 ISO L5 PC 8 PC 8 D N PC 850 PC 852 PC 858 PC8 TK Win L1 Win L2 Win L5 Desktop PS Text VN Intl VN US MS Publ Math 8 PS Math VN Math Pifont Legal ISO 4 ISO 6 ISO 11 ISO 15 ISO 17 ISO 21 ISO 60 ISO 69 Win 3 0 MC Text ISO L6...

Page 203: ...d CR to LF Sets the machine to append a CR code to each LF code to print text data clearly On Off Default Off Resolution Specifies the print resolution in dots per inch 600 600 dpi Default 600 600 dpi Printer Features Settings 201 ...

Page 204: ...per Label Paper Prepunched Paper Bond Paper Cardstock Color Paper Default Plain Paper Paper Type Bypass Tray Specifies the paper type for bypass tray Plain Paper Recycled Paper Thick Paper 1 Thick Paper 2 Thin Paper Letterhead Preprinted Paper Envelope Label Paper Prepunched Paper Bond Paper Cardstock Color Paper Default Plain Paper 7 Configuring the Machine Using the Control Panel 202 ...

Page 205: ... 8 5 13 6 16K 8 11 13 3 5 1 2 8 1 2 Custom Size Default A4 Default 8 1 2 11 Paper Size Bypass Tray A4 8 1 2 11 B5 JIS B6 JIS A5 LEF A5 SEF A6 8 1 2 14 8 1 2 13 8 5 13 4 8 5 13 6 16K 8 11 13 3 5 1 2 8 1 2 4 1 8 9 1 2 3 7 8 7 1 2 DL Env C6 Env C5 Env Custom Size Default A4 Default 8 1 2 11 Tray Paper Settings 203 ...

Page 206: ...owever if the paper is too small for the print job the printed image will be cropped Any Custom Size Type The machine prints custom size print jobs according to the printer driver s settings and prints standard size print jobs according to the machine s settings For custom size print jobs printing proceeds even if the paper size type settings of the machine and printer driver do not match However ...

Page 207: ...the machine automatically switches to the next tray to continue printing Printer Select a tray to check first when automatic tray selection is specified for the print job Tray 1 Bypass Tray Default Tray 1 Copier Select a tray to check first when A4 8 1 2 11 or 16K is selected for Select Paper under Copier Features Tray 1 Bypass Tray Default Tray 1 Size Mismatch Detection Sets the machine to report...

Page 208: ...ear Month Day Year 2000 to 2099 Month 1 to 12 Day 1 to 31 Set Time Sets the time of the machine s internal clock Default time format 24 hour Format Time format 12 hour Format 24 hour Format AM PM stamp AM PM for 12 hour Format Hour 0 to 23 for 24 hour Format or 1 to 12 for 12 hour Format Minute 0 to 59 Program Fax Information Specifies the fax name and fax number of the machine No Specifies the fa...

Page 209: ...to the public switched telephone network PSTN or a private branch exchange PBX PSTN PBX Default PSTN PBX Access Number Specifies the dial number to access the outside line when the machine is connected to a PBX Make sure that this setting matches the setting of your PBX Otherwise you may not be able to send faxes to outside destinations 0 to 999 Default 9 Function Priority Specifies the mode that ...

Page 210: ...ine has been idle for about 30 seconds It takes less time to recover from Energy Saver mode 1 than from power off state or Energy Saver mode 2 but power consumption is higher in Energy Saver mode 1 than in Energy Saver mode 2 Default Off Off On EnergySaverMode 2 The machine enters Energy Saver mode 2 after the period of time specified for this setting is passed The machine consumes less power in E...

Page 211: ...Swedish Norwegian Danish Finnish Portuguese Czech Hungarian Polish Simplified Chinese Russian Brazilian Portuguese Turkish Arabic Kazakhstan Area only SP 320SN and SP 377SNwX for Europe By selecting the area in which the machine is being used you can narrow down the choice of display language and other settings You can also specify this setting during the initial setup after turning the power on f...

Page 212: ...lgaria Canada Chile China Colombia Costa Rica Croatia Cyprus Czech Republic Denmark Dominican Republic Ecuador Egypt El Salvador Estonia Finland France Germany Greece Guam Guatemala Honduras Hong Kong Hungary Iceland India Ireland Israel Italy Japan Jordan Kazakhstan Kuwait Latvia Lebanon Liechtenstein Lithuania Luxembourg Malaysia Malta Mexico Montenegro Morocco Netherlands New Zealand Nicaragua ...

Page 213: ...t to the previous level of the menu tree without clearing the settings Clear Address Book Clears the fax Quick Dial Speed Dial destinations Press the OK key to execute Press the Back key to exit to the previous level of the menu tree without clearing the destinations Shortcut to Function Assigns one of the following functions to the Shortcut to Func key on the control panel ID Card Copy Mode Direc...

Page 214: ... entered twice when specifying a destination manually When this function is enabled you cannot use the On Hook Dial function This function appears only when a password is specified under Admin Tools Lock On Off Default Off Save Scn Data to USB Specify whether to enable or disable Scan to USB This function appears only when a password is specified under Admin Tools Lock Inactive Active Default Acti...

Page 215: ... size paper Load one of these sizes of paper into the tray before printing reports Configuration Page Prints general information and the current configurations of the machine Fax Journal Prints a fax transmission and reception journal for the last 50 jobs Standby File List Prints a list of fax jobs remaining in the machine s memory to be printed sent or forwarded Quick Dial No List Prints a list o...

Page 216: ...with the entries sorted by name Scanner Address List Prints a list of scan destinations Scanner Journal Prints a scanner journal for the last 100 Scan to E mail Scan to FTP and Scan to Folder transmissions Maintenance Page Prints the maintenance page 7 Configuring the Machine Using the Control Panel 214 ...

Page 217: ...Set Ethernet Speed Specifies the speed for Ethernet communication Select a speed that matches your network environment For most networks the default setting is the optimum setting Auto Select 100Mbps Full Duplex 100Mbps Half Duplex 10Mbps Full Duplex 10Mbps Half Duplex Default Auto Select Wi Fi Item Description Value Wi Fi Enable Select whether to enable or disable Wireless LAN If Disable is set W...

Page 218: ...nt IPv4 Configuration Item Description Value DHCP Sets the machine to receive its IPv4 address subnet mask and default gateway address automatically from a DHCP server Inactive Active Default Active IP Address Specifies the machine s IPv4 address when DHCP is not used Use this menu to check the current IP address when DHCP is used Default XXX XXX XXX XXX The numbers represented by X vary according...

Page 219: ...t IP Address Method Displays the IP address acquisition method IP Not Ready DHCP Manual Config Default IP Wi Fi Direct IP Address Displays the IP address of Wi Fi Direct IPv6 Configuration Item Description Value IPv6 Select whether to enable or disable IPv6 Inactive Active Default Inactive DHCP Sets the machine to receive its IPv6 address from a DHCP server Inactive Active Default Active IP Addres...

Page 220: ...128 Gateway Address Specifies the IPv6 address of the default gateway Can contain up to 46 characters For details about entering characters see page 32 Entering Characters Stateless Address Displays the IPv6 stateless addresses obtained from a Router Advertisement Stateless Address 1 Stateless Address 2 Stateless Address 3 Stateless Address 4 Link local Address Displays the IPv6 link local address...

Page 221: ...an enable wireless connections by following the wizard s instructions For details see Setup Guide If Wi Fi Enable in Wi Fi under Network Settings is set to Disable the Wi Fi Setup Wizard does not appear Wi Fi Setup Wizard 219 ...

Page 222: ...7 Configuring the Machine Using the Control Panel 220 ...

Page 223: ...ing paper settings Available Available Adjusting the sound volume Available Unavailable Configuring paper settings for copying Available Unavailable Configuring fax settings Available Unavailable Configuring the priority tray Available Available Configuring toner saving Available Unavailable Configuring interface settings Available Available Configuring the shortcut to function settings Available ...

Page 224: ...panel Supported web browsers Internet Explorer 6 or later Firefox 3 0 or later Safari 4 0 or later To operate the machine via Web Image Monitor you must first configure the machine s TCP IP or wireless LAN settings For details see page 215 Network Settings or page 236 Configuring the Network Settings 8 Configuring the Machine Using Utilities 222 ...

Page 225: ...reas 1 2 3 4 DSG161 1 Menu area Clicking a menu shows its contents in the main area 2 Tab area Contains tabs for switching between information and settings you want to see or configure 3 FAQs Knowledge Base Provides answers to frequently asked questions and other useful information about using this machine An Internet connection is required to view this information 4 Main area Displays the content...

Page 226: ...details about the settings contact your network administrator The previous page may not appear even if the back button of the web browser is clicked If this happens click the refresh button of the web browser The FAQs Frequently Asked Questions Knowledge Base are not available in certain languages Changing the Interface Language Select the desired interface language from the Language list 8 Config...

Page 227: ... display Status Item Description Print Cartridge Shows the amount of toner remaining Fusing Unit Shows the remaining life of the fusing unit as Status OK Replacement Required Soon or Replacement Required For replacing contact your sales or service representative Transfer Roller Shows the remaining life of the transfer roller as Status OK Replacement Required Soon or Replacement Required For replac...

Page 228: ...er Printer Features Number of color pages always shows 0 Number of black and white pages Scanner Shows the following for pages scanned using the scanner function Total number of pages Number of color pages Number of black and white pages Copier Shows the following for pages printed using the copier function Total number of pages Number of color pages always shows 0 Number of black and white pages ...

Page 229: ...Duplex Total Page Shows the total number of sheets printed on both sides Machine Information Tab Machine Information Item Description Firmware Version Shows the version of firmware installed on the machine Engine FW Version Shows the version of firmware for the machine engine Machine ID Shows the identification number of the machine Fax Card only SP 320SFN and SP 377SFNwX Shows that a fax card is ...

Page 230: ... Middle or High On Hook Mode Select the volume of the sound from the speaker during on hook mode from Off Low Middle or High Job End Tone Select the volume of the beep that sounds when a job is complete from Off Low Middle or High Job Error Tone Select the volume of the beep that sounds when a fax transmission error occurs from Off Low Middle or High Alarm Volume Select the volume of the alarm tha...

Page 231: ...4 210 297 mm Letter 8 5 11 B5 182 257 mm B6 128 182 mm A5 210 148 mm A5 148 x 210 mm A6 105 148 mm Legal 8 5 14 8 5 13 8 5 13 4 8 5 13 6 16K 8 11 13 3 5 5 8 5 Com10 104 8 241 3 mm Monarch 98 4 190 5 mm DL Env 110 220 mm C6 Env 114 162 mm C5 Env 162 229 mm Custom Size Paper Type Select the paper type for the bypass tray from the following Plain Paper Recycled Paper Thick Paper 1 100 to 130g m2 Thic...

Page 232: ...nted image will be cropped Any Custom Size Type The machine prints custom size print jobs according to the printer driver s settings and prints standard size print jobs according to the machine s settings For custom size print jobs printing proceeds even if the paper size type settings of the machine and printer driver do not match but if the paper is too small for the print job the printed image ...

Page 233: ...es to the next tray to continue printing Separation Line Item Description Separation Line Specify whether to print a line in the middle of the printed paper when making ID card copy or combined copy Fax Tab only SP 320SFN and SP 377SFNwX Fax Number Confirmation Item Description Fax Number Confirmation Enable this setting to configure the machine to require a fax number to be entered twice when spe...

Page 234: ...ation destination specified for the selected scan destination Note that if a destination e mail address is not specified no notification will be sent even if this setting is enabled Forwarding Destination Specifies the forwarding destination E mail Address Enter a destination e mail address Can contain up to 64 characters Scan Destination Select a scan destination as a forwarding destination Numbe...

Page 235: ...ks first for paper that can be used for the job from Tray 1 or Bypass Tray If A4 210 297 mm Letter 8 5 11 or 16K 195 267 mm is selected for Select Paper in the Copier page and multiple trays contain valid paper the first tray the machine finds will be used for printing when that tray runs out of paper the machine automatically switches to the next tray to continue printing Toner Management Tab Ton...

Page 236: ...or installation if the machine is of the same model If disabled you must install the printer LAN Fax driver separately for individual machines because the machine other than the original will be recognized as a new device upon USB connection Shortcut to Function Tab Shortcut to Function Item Description Shortcut to Function Settings Assigns one of the following functions to the Shortcut to Func ke...

Page 237: ...ial and 100 Speed Dial destinations can be registered See the scan and fax sections for more information on registering destinations For details about registering scan destinations see page 95 Registering Scan Destinations For details about registering fax destinations using Web Image Monitor see page 140 Registering Fax Destinations Registering Destinations 235 ...

Page 238: ...he name used to identify the machine on the network Network Version Shows the version of the machine s network module a part of the machine firmware Ethernet MAC Address Shows the Ethernet MAC address of the machine Active Interface Shows the active communication method Wi Fi Direct IP Address only SP 377SNwX and SP 377SFNwX Shows the IP address of Wi Fi Direct TCP IP Status Item Description DHCP ...

Page 239: ...ned from the DHCP server when DHCP is set to Active Stateless Address Displays up to four stateless auto addresses Gateway Address Displays the machine s default gateway address Link local Address Displays the link local address of the machine The link local address is an address that is valid only inside the local network local segment Manual Configuration Address Enter the machine s IPv6 address...

Page 240: ...CP port number to use for raw printing The valid range is 1024 to 65535 except 5222 5353 6006 28900 29102 53550 and 49999 default is 9100 LPR Select to enable network printing using LPR LPD via TCP port 515 mDNS Setting Item Description mDNS Select to enable Multicast DNS via UDP port 5353 If disabled the item below cannot be configured Printer Name Enter the name of the machine Can contain up to ...

Page 241: ...characters IPv6 Domain Name Enter the IPv6 domain name of the machine Can contain up to 32 characters DNS Resolve Priority Select whether to give priority to IPv4 or IPv6 for DNS name resolution DNS Timeout seconds Enter the number of seconds the machine waits before considering a DNS request to have timed out 1 to 999 seconds Host Name Enter a host name for the machine Can contain up to 15 charac...

Page 242: ...m Description Target Trap Select whether to enable the machine to send traps to the management host NMS When disabled SNMP Management Host 1 and SNMP Management Host 2 below become unavailable SNMP Management Host 1 Enter the IP address or host name of a management host Can contain up to 64 characters SNMP Management Host 2 Enter the IP address or host name of a management host Can contain up to 6...

Page 243: ...ssary SMTP The machine supports NTLM and LOGIN authentication POP before SMTP The POP3 server is used for authentication When sending e mails to an SMTP server you can enhance the SMTP server security level by connecting to the POP server for authentication User Name Enter the user name for logging in to the SMTP server Can contain up to 32 characters Password Enter the password for logging in to ...

Page 244: ...assword for logging in to the POP3 server Can contain up to 32 characters Authentication Select an authentication method from the following None Password will not be encrypted APOP Authentication Password will be encrypted Auto Password will be encrypted or not be encrypted according to the POP3 server s settings Wireless Tab only SP 377SNwX and SP 377SFNwX Wireless LAN Status Item Description Wir...

Page 245: ...uthentication enter the WPA encryption key WEP Key Length If WEP is selected for Encryption select 64 bits or 128 bits for the length of the encryption key WEP Transmit Key ID Select an ID number to identify each WEP key in case multiple WEP connections are configured WEP Key Format Select a format for entering the WEP key WEP Key Enter the WEP key The number and type of characters you can enter v...

Page 246: ...loud Print Specify whether to enable Google Cloud Print When Google Cloud Print is disabled Local Discovery and Timeout seconds below cannot be configured Registration Status Displays the status of Google Cloud Print registration Registration Account Displays the Account e mail address of Google Cloud Print registration Local Discovery Specify whether to enable local discovery Timeout seconds Ente...

Page 247: ...llowing DHCPv4 DHCPv6 SNMP mDNS NetBIOS UDP Port 53550 All ICMP Bypass Select whether to apply IPsec to ICMP packets IPv4 and IPv6 from the following Active All ICMP packets will be bypassed without IPsec protection ping command echo request and echo reply is not encapsulated by IPsec Inactive Some ICMP message types will be bypassed without IPsec protection IPsec Policy List Tab Item Description ...

Page 248: ...le the policy Name Enter the name of the policy Can contain up to 16 characters Address Type Select IPv4 or IPv6 as the type of IP address to be used in IPsec communication Local Address Displays the IP address of this printer Remote Address Enter the IPv4 or IPv6 address of the device with which to communicate Can contain up to 39 characters Prefix Length Enter the prefix length of the Remote Add...

Page 249: ...lgorithm for AH Specify the authentication algorithm to be applied when AH or ESP AH is selected for Security Protocol from the following MD5 SHA1 Encryption Algorithm for ESP Specify the encryption algorithm to be applied when ESP or ESP AH is selected for Security Protocol from the following None DES 3DES AES 128 AES 192 AES 256 Authentication Algorithm for ESP Specify the authentication algorit...

Page 250: ...thm from the following MD5 SHA1 IKE Life Time Specify the life time of the ISAKMP SA as a time period Enter a number of seconds IKE Diffie Hellman Group Select the IKE Diffie Hellman Group to be used in the generation of the IKE encryption key from the following DH1 DH2 Pre Shared Key Specify the PSK Pre Shared Key to be used for authentication of a communicating device Can contain up to 32 charac...

Page 251: ...obs remaining in the machine s memory to be printed sent or forwarded Quick Dial Destination List Prints a list of Quick Dial entries Fax Speed Dial Destination List Prints a list of Speed Dial entries Scanner Destination List Prints a list of scan destinations Scanner Journal Prints a scanner journal for the last 100 Scan to E mail Scan to FTP and Scan to Folder transmissions Maintenance Page Pri...

Page 252: ...r the same password again to confirm Change E mail Address only SP 320SFN and SP 377SFNwX Check this to configure the administrator e mail address Administrator E mail Address only SP 320SFN and SP 377SFNwX Enter the administrator e mail address If the machine s e mail address is not configured in the SMTP page this address will be used as the sender s address of e mails sent from this machine suc...

Page 253: ...sec Settings Select to clear the IPsec settings Reset IPsec Settings appears only when the administrator password is specified Backup Setting Tab When sending the machine for repair it is important that you create backup files in advance The machine s settings are returned to the default after repair Backup Setting Item Description Back up Network Settings Backs up the following settings to a file...

Page 254: ...up the IPsec settings to a file Follow the procedure below to create configuration backup files 1 Select the option button for the type of data you wish to back up 2 Enter the administrator password if required 3 Click OK 4 Click Save in the confirmation dialog box 5 Navigate to the location to save the backup file 6 Specify a name for the file and click Save Back up IPsec Settings appears only wh...

Page 255: ... an error message appears Try again to restore the file completely Set Date Time Tab Set Date Item Description Year Enter the current year 2000 to 2099 Month Enter the current month 1 to 12 Day Enter the current day 1 to 31 Date Format Select the date format from MM DD YYYY DD MM YYYY or YYYY MM DD Set Time Item Description Time Format Select 24 or 12 hour time format Time AM PM Select AM or PM if...

Page 256: ...nergy Saver mode 2 Energy Saver Mode 2 Europe Select 30sec or specify the period of time 1 20min for the machine to enter Energy Saver mode 2 Countries other than European countries Select 30sec or specify the period of time 1 240min for the machine to enter Energy Saver mode 2 The machine consumes less power in Energy Saver mode 2 than in Energy Saver mode 1 but it takes longer to recover from En...

Page 257: ...e Utilities 3 Click Smart Organizing Monitor 4 If the machine you are using is not selected click Connect Printer and then do one of the following Select the machine s model Enter the IP address of the machine manually Click Search Network Printer to search the machine via the network 5 Click OK Checking the Status Information 1 2 3 4 5 DSG164 1 Image area Displays the status of this machine with ...

Page 258: ...ork details such as the printer s IP address and network related information Job Log tab Displays the job log information User Tools tab Click to print lists or configuration pages or to configure settings of the machine 3 Message area Displays the status of this machine with a message For details about error messages see page 279 Error and Status Messages Appear on Smart Organizing Monitor 4 Conn...

Page 259: ...rs Only the Paper Input tab is available Tab Settings This section provides a tab by tab overview of the machine settings that can be modified using Smart Organizing Monitor For more information on each setting item see the Smart Organizing Monitor Help Paper Input tab You can change paper size and other paper settings Maintenance tab You can adjust print starting positions System tab You can set ...

Page 260: ...configurations about the printer Printing the Configuration Page 1 On the Start menu click All Programs 2 Click SP 320 Series Software Utilities 3 Click Smart Organizing Monitor 4 If the machine you are using is not selected click Connect Printer and then do one of the following Select the machine s model Enter the IP address of the machine manually Click Search Network Printer to search the machi...

Page 261: ...commend you always keep a new print cartridge ready For good print quality the manufacturer recommends that you use genuine toner from the manufacturer The manufacturer shall not be responsible for any damage or expense that might result from the use of parts other than genuine parts from the manufacturer with your office products Do not allow paper clips staples or other small objects to fall ins...

Page 262: ...pare a new print cartridge when Replace Required Soon Print Cartridge appears on the screen 1 If paper is loaded in the bypass tray remove the paper and close the bypass tray 2 Push the side button to open the front cover and then carefully lower it DSG168 3 Hold the center of the print cartridge and carefully raise it slightly and then pull it out horizontally DSG169 9 Maintaining the Machine 260...

Page 263: ...space 4 Take the new print cartridge out of the box and then take it out of the plastic bag CMC081 5 Place the print cartridge on a flat surface and then remove the protection sheet CMC019 6 Hold the print cartridge and shake it from side to side five or six times DPH045 Even distribution of toner within the bottle improves print quality Replacing the Print Cartridge 261 ...

Page 264: ...e Then put the old print cartridge into the bag and then put it into the box CMC083 Make sure to cover the old print cartridge with the protective cover for recycling and environmental purposes mainly Europe and Asia If you want to discard your used toner container please contact your local sales office If you discard it by yourself treat it as general plastic waste material mainly North America P...

Page 265: ... dry wipe the area and allow it to dry To avoid deformation discoloration or cracking do not use volatile chemicals such as benzine and thinner or spray insecticide on the machine If there is dust or grime inside the machine wipe with a clean dry cloth You must disconnect the plug from the wall outlet at least once a year Clean away any dust and grime from the plug and outlet before reconnecting A...

Page 266: ... the power cord from the wall outlet Remove all the cables from the machine 3 Pull out tray 1 carefully with both hands DSG110 Place the tray on a flat surface If there is paper in the tray remove it 4 Wipe the friction pads with a damp cloth DSG172 9 Maintaining the Machine 264 ...

Page 267: ... push the tray carefully into the machine until it clicks into place DSG174 7 Insert the plug of the power cord into the wall socket securely Connect all the interface cables that were removed 8 Turn on the power If jams or multi sheet feeds occur after cleaning the friction pad contact your sales or service representative Cleaning the Friction Pad and Paper Feed Roller 265 ...

Page 268: ...SP 377SFNwX be careful not to hold the input tray when lifting the exposure glass cover for the tray might be damaged 2 Clean the parts indicated with arrows with a soft damp cloth and then wipe the same parts with a dry cloth to remove any remaining moisture CVW041 9 Maintaining the Machine 266 ...

Page 269: ...ot to hold the input tray when lifting the ADF for the tray might be damaged 2 Clean the parts indicated with arrows with a soft damp cloth and then wipe the same parts with a dry cloth to remove any remaining moisture CVW042 Cleaning the Auto Document Feeder When Using SP 320SFN 267 ...

Page 270: ...t the ADF Be careful not to hold the input tray when lifting the ADF for the tray might be damaged 2 Clean the parts indicated with arrows with a soft damp cloth and then wipe the same parts with a dry cloth to remove any remaining moisture DSG175 9 Maintaining the Machine 268 ...

Page 271: ...n you use this machine in a confined space without good ventilation for a long time or print large quantities you might detect an odd smell This might cause the output paper to also have an odd smell When you detect an odd smell regularly ventilate in order to keep the workplace comfortable Set up the machine so that it does not directly ventilate towards people Ventilation should be more than 30 ...

Page 272: ...s or service representative Disposal Ask your sales or service representative for information about correct disposal of this machine Where to Inquire Contact your sales or service representative for further information about the topics included in this manual or to inquire about other topics not included in this manual 9 Maintaining the Machine 270 ...

Page 273: ...x because the document was too large The paper tray was empty Load paper in the paper tray See page 36 Loading Paper The paper tray did not contain A4 Letter or Legal size paper Load valid size paper in the tray and configure the paper size settings under Tray Paper Settings accordingly A cover or tray was open Close the cover or tray There was a paper jam Remove the jammed paper See page 281 Clea...

Page 274: ... for a while and send the fax again Cannot Copy This Setting Comb 2 on 1 4 on 1 Combined copying could not be performed because the tray does not contain the valid size paper which are A4 Letter or Legal size Set the machine to print copies using the A4 Letter or Legal size paper in the Select Paper setting See page 176 Copier Features Settings Specify the A4 Letter or Legal size paper for the tra...

Page 275: ...Quick Dial entry is associated with the One Touch button you pressed Press a different One Touch button Assign a registered destination to the One Touch button See page 95 Registering Scan Destinations Dial Failed The fax could not be sent Confirm that the fax number you dialed is correct Confirm that the destination is a fax machine Confirm that the line is not busy You may need to insert a pause...

Page 276: ...tridge is installed Remove and replace it with a print cartridge specified by an authorized dealer Internal Misfeed Paper has been jammed in the machine Remove the jammed paper See page 281 Clearing Misfeeds Memory Almost Full Memory has almost reached capacity during sort copy If several originals are still to be scanned it is recommended to start printing now and copy the remaining originals sep...

Page 277: ...feeds Misfeed Dup Unit Remove Paper Paper has been jammed in the duplex unit Remove the jammed paper See page 281 Clearing Misfeeds Misfeed Stnd Tray Paper has been jammed in the paper exit area Remove the jammed paper See page 281 Clearing Misfeeds Misfeed Tray 1 Paper has been jammed in the tray 1 paper input area Remove the jammed paper See page 281 Clearing Misfeeds Net Communication Error Con...

Page 278: ...on Print Cartridge The print cartridge is almost empty Prepare a new print cartridge Replacement Required Fusing Unit The fusing unit is no longer usable and must be replaced Contact your sales or service representative Replacement Required Paper Feed Roller The paper feed roller is no longer usable and must be replaced Contact your sales or service representative Replacement Required Print Cartri...

Page 279: ...d the machine cannot function Contact your sales or service representative Set Correct Paper The paper tray does not contain A4 Letter or Legal size paper While the message is displayed press the OK key A menu for changing the paper size of the current tray appears Load A4 Letter Legal size paper in the tray and then select the corresponding paper size using or key and press the OK key The machine...

Page 280: ...ccessfully scanned into memory Then copy again the originals left in the ADF TX Comm Error A transmission error occurred and the fax could not be transmitted correctly If the Auto Redial setting is enabled the machine will redial the number and try again If all attempts fail or if the machine is in Immediate Transmission mode the fax will not be transmitted Try the operation again 10 Troubleshooti...

Page 281: ... Tray 1 See page 36 Loading Paper Load paper into the bypass tray See page 36 Loading Paper Tray 1 Jam Bypass Tray Jam Duplex Jam Inner Jam Outer Jam Total Jam A paper jam has occurred in the machine Remove the jammed paper See page 281 Clearing Misfeeds and page 293 Paper Feed Problems Paper Size Mismatch Paper of the selected paper size is not loaded in the indicated paper source tray Check the ...

Page 282: ...g becomes not available Please keep Print Cartridge handy The machine has run out of the toner Replace the print cartridge See page 259 Replacing the Print Cartridge Printing has been interrupted because of the memory overflow The data is too large or complex to print Select 600 x 600 dpi in Resolution to reduce the size of data For details see the printer driver Help Waste Toner full No printing ...

Page 283: ...jams can cause pages to be lost Check your print job for missing pages and reprint any pages that did not print out If the alert indicator lights up continuously or flashes switch to copier mode and check the displayed message Removing Jammed Paper from Tray 1 If Internal Misfeed or Misfeed Tray 1 appears on the display follow the procedure below to remove it 1 Pull tray 1 halfway out and check fo...

Page 284: ...arefully raise it slightly and then pull it out horizontally DSG169 Do not shake the removed print cartridge Doing so can cause remaining toner to leak Place the print cartridge on paper or similar material to avoid dirtying your workspace 7 Lifting the guide plate remove the jammed paper carefully DSG178 10 Troubleshooting 282 ...

Page 285: ... the front cover until it closes When closing the front cover push the upper area of the cover firmly After closing the cover check that the error is cleared Removing Jammed Paper from the Bypass Tray If Misfeed BypassTray appears on the display follow the procedure below to remove it 1 If paper is jammed in the bypass tray input area remove the jammed paper carefully DSG179 2 Close the bypass tra...

Page 286: ...arefully raise it slightly and then pull it out horizontally DSG169 Do not shake the removed print cartridge Doing so can cause remaining toner to leak Place the print cartridge on paper or similar material to avoid dirtying your workspace 5 Lifting the guide plate remove the jammed paper carefully DSG178 10 Troubleshooting 284 ...

Page 287: ...s carefully push up the front cover until it closes When closing the front cover push the upper area of the cover firmly After closing the cover check that the error is cleared Removing Jammed Paper from the Standard Tray or Duplex Unit If Misfeed Stnd Tray or Misfeed Dup Unit Remove Paper appears on the display follow the procedure below to remove it 1 Open the rear cover DSG188 Clearing Misfeeds...

Page 288: ...2 Hold down the B lever DSG181 3 Remove the jammed paper carefully DSG190 4 Close the rear cover DSG182 10 Troubleshooting 286 ...

Page 289: ...mmed paper If there is jammed paper remove it carefully DSG176 6 Pull tray 1 out completely with both hands DSG232 Place the tray on a flat surface 7 Push the lever Pushing the lever lowers the duplex transport unit DSG183 Clearing Misfeeds 287 ...

Page 290: ... transport unit still lowered carefully slide tray 1 back in until it stops DSG174 10 If paper is loaded in the bypass tray remove the paper and close the bypass tray 11 Push the side button to open the front cover and then carefully lower it DSG168 10 Troubleshooting 288 ...

Page 291: ...artridge on paper or similar material to avoid dirtying your workspace 13 Lifting the guide plate remove the jammed paper carefully DSG178 14 Slide the print cartridge in horizontally When the cartridge can go no further raise it slightly and push it fully in Then push down on the cartridge until it clicks into place DSG171 15 Using both hands carefully push up the front cover until it closes Clea...

Page 292: ...inal jammed in the ADF ADF Orig Misfeed Open ADF Cover and remove paper 1 Open the ADF cover DSG185 2 Gently pull the jammed original to remove it Be careful not to pull the original too hard as it may rip DSG186 3 Close the ADF cover 4 Lift the ADF and if there is original remaining in the ADF gently pull the jammed original to remove it Be careful not to hold the input tray when lifting the ADF ...

Page 293: ...DSG187 5 Lower the ADF Clearing Misfeeds 291 ...

Page 294: ...able and network cable are connected correctly Also confirm that they are not damaged The port connection is not established correctly 1 On the Start menu click Devices and Printers 2 Right click the icon of the machine and then click Printer properties 3 Click the Ports tab and then make sure that the port is set as a USB or network printer 10 Troubleshooting 292 ...

Page 295: ...m tray and fan it well Then reverse the top and bottom of the paper and put it back in the tray Paper jams occur frequently If there are gaps between the paper and the paper guides adjust the paper guides to remove the gaps Avoid printing on both sides of paper when printing images that contain large solid areas which consume a lot of toner Use supported types of paper See page 53 Supported Paper ...

Page 296: ...e tray Only add paper when there is none left in the tray Paper gets wrinkles Paper is damp Use paper that has been stored properly See page 53 Supported Paper Paper is too thin See page 53 Supported Paper If there are gaps between the paper and the paper guides adjust the paper guides to remove the gaps The printed paper is curled Load the paper upside down in the paper tray If the paper curl is ...

Page 297: ...d or non genuine print cartridge reduces print quality and can cause malfunctions Use genuine print cartridge only An old print cartridge is being used Print cartridge should be opened before their expiration date and used within six months of being opened The machine is dirty See page 259 Maintaining the Machine and clean the machine as required Humidity level surrounding the machine may be too l...

Page 298: ...then print For details about the reduction function see the printer driver Help Photo images are coarse Use the application s or printer driver s settings to specify a higher resolution For details about the printer driver s settings see the printer driver Help A solid line is printed as a dashed line or appears blurred Change the dithering settings on the printer driver For details about the dith...

Page 299: ...at the latest printer driver is being used A print job is canceled Set I O Timeout to a larger value than the current settings There is a considerable delay between the print start command and actual printing Processing time depends on data volume High volume data such as graphics heavy documents take longer to be processed To speed up printing reduce the printing resolution using the printer driv...

Page 300: ...n the computer s display When you use some functions such as enlargement and reduction the layout of the image might be different from that displayed in the computer display Check that the page layout settings are properly configured in the application Make sure the paper size selected in the printer properties dialog box matches the size of the paper loaded For details see the printer driver Help...

Page 301: ...e printer driver s paper settings See the printer driver Help Check that the paper is not curled or bent Envelopes can be curled easily Flatten out the paper before loading it See page 36 Loading Paper Horizontal lines appear on the printed paper Impact can cause lines to appear on printed paper and other malfunctions Protect the printer from impact at all times especially while it is printing If ...

Page 302: ...Help When Paper is Not Fed or Ejected Properly Problem Solution Prints do not stack properly The paper being used may be damp Use paper that has been stored properly See page 53 Supported Paper The printed paper is curled If you enable Toner Saving under System Settings printing is generally less dense Printed envelopes come out creased Check if the fusing unit levers are properly set Lower the fu...

Page 303: ... high humidity Place the original on the exposure glass and then place two or three sheets of white paper on top of it Leave the ADF open when copying A moire pattern is produced The original probably has heavily lined or dotted areas Switching the setting for image quality between Photo and Mixed may eliminate the moire pattern See page 176 Copier Features Settings The printed copy is dirty Image...

Page 304: ...at against the exposure glass When You Cannot Make Copies as Wanted Problem Solution Photocopied pages are not in correct order On the control panel change the Sort setting under Copier Features to collate pages as you require For details about Sort see page 176 Copier Features Settings Copied pages are too dark or too light Adjust the image density See page 91 Specifying Scan Settings for Copying...

Page 305: ...ure glass make sure that toner or correction fluid is dry The scanned image is distorted or out of position The original was moved during scanning Do not move the original during scanning The scanned image is upside down The original was placed upside down Place the original in the correct orientation See page 65 Placing Originals The scanned image is blank The original was placed with the front a...

Page 306: ... The line could not be connected correctly Confirm that the telephone line is properly connected to the machine Disconnect the telephone line from the machine and connect a standard telephone in its place Confirm that you can make calls using the telephone If you cannot make calls this way contact your telephone company If the problem persists contact your sales or service representative 1XXX22 to...

Page 307: ...ze paper Load valid size paper in the tray and configure the paper size settings under Tray Paper Settings accordingly A cover or tray was open Close the cover or tray There was a paper jam Remove the jammed paper See page 281 Clearing Misfeeds A print cartridge was empty Replace the print cartridge See page 259 Replacing the Print Cartridge The received fax was too large Ask the sender to re send...

Page 308: ...ge 36 Loading Paper If fax reception mode is FAX TEL Manual mode you must receive the fax manually See page 164 Receiving a Fax Cannot print received faxes The paper tray is empty Load paper in the paper tray See page 36 Loading Paper The paper tray does not contain paper of the right size Load paper of the right size in the paper tray Faxes you sent appear spotty or dirty when received The exposu...

Page 309: ... interface cable is not connected correctly Reconnect the cable Check that the interface cable is the correct type Strange noise is heard The supplies are not properly installed Confirm that the supplies are properly installed The volume of the sounds produced by the machine is too loud The volume is set to the high level Adjust the volume of the beep ring speaker and alarm sounds For details see ...

Page 310: ... If any of these problems persist turn off the power pull out the power cord and contact your sales or service representative 10 Troubleshooting 308 ...

Page 311: ...ttp www ricoh com printers sp310 support gateway 3 Double click the CD ROM drive icon 4 Double click the Mac OS X folder 5 Double click the folder of driver you want to install 6 Follow the instructions in the setup wizard 7 Click Close in the Summary dialog box 8 Start System Preferences 9 Click Printers Scanners Check that the machine automatically recognized by plug and play appears in the prin...

Page 312: ...Click Printers Scanners 10 Click the button If Add Printer or Scanner appears click it 11 Click Default 12 Select the printer that has Bonjour indicated in the Kind column If the printer name is not displayed select the icon that corresponds to your network environment TCP IP etc 13 Select the printer you are using from the Use pop up menu 14 Click Add 15 Click Duplexer on the Setting up screen an...

Page 313: ...ess manually If you have selected On proceed to Step 25 22 Enter the machine s IPv4 address in IP Address 23 Enter the subnet mask in Subnet Mask 24 Enter the gateway address in Default Gateway Address 25 Click OK 26 Wait until the machine restarts Setup is completed Connecting the Machine to a Wired Network 311 ...

Page 314: ... download a setup file from our website http www ricoh com printers sp310 support gateway 3 Double click the CD ROM drive icon 4 Double click the Mac OS X folder 5 Double click the folder of driver you want to install 6 Follow the instructions in the setup wizard 7 Click Close in the Summary dialog box Installing Smart Organizing Monitor The following procedure is explained using OS X 10 11 as an ...

Page 315: ...ption key The SSID and Encryption key for the router access point may be printed on a label affixed to the router access point For details about the SSID and Encryption key refer to the router access point manual Configuring settings using the control panel Before doing the following procedure install the printer driver according to the procedure on page 312 Installing the Printer Driver Make sure...

Page 316: ...can be specified in Admin Tools Lock under Admin Tools menu 13 Press the or key to select SSID of the router access point from the searched SSID list and then press the OK key 14 Enter the encryption key using the number keys and then press the OK key As the passphrase you can enter either 8 to 63 ASCII characters 0x20 0x7e or 64 hexadecimal digits 0 9 A F a f 15 Press the OK key 16 Check the resu...

Page 317: ...the or key to select Network Settings and then press the OK key 12 If you are requested to enter a password enter the password using the number keys and then press the OK key A password for accessing the Network Settings menu can be specified in Admin Tools Lock under Admin Tools menu 13 Press the or key to select Wi Fi and then press the OK key 14 Press the or key to select WPS and then press the...

Page 318: ...er Driver Make sure the Ethernet cable is not connected to the machine 1 Check that the router access point is working correctly 2 Open the PIN code configuration window web page for the router access point on your computer 3 Press the User Tools key DSG126 4 Press the or key to select Network Settings and then press the OK key 5 If you are requested to enter a password enter the password using th...

Page 319: ...heck the PIN code Write down the PIN code in case you might forget it 18 Enter the machine s PIN code 8 digits on the router access point s web page The web page accessed in Step 2 19 Execute WPS PIN system from the router access point s web page 20 Press Connect Please wait for 2 minutes and connecting with PIN method starts 21 Check the result Connection has succeeded Press EXIT to return to the...

Page 320: ...11 Configuring Network Settings Using OS X 318 ...

Page 321: ... about specifying the IPsec settings using Web Image Monitor see page 245 Configuring the IPsec Settings For details about enabling and disabling IPsec using the control panel see page 206 Administrator Settings Encryption and Authentication by IPsec IPsec consists of two main functions the encryption function which ensures the confidentiality of data and the authentication function which verifies...

Page 322: ...ems use the term Compliance in place of Authentication Security Association This machine uses encryption key exchange as the key setting method With this method agreements such as the IPsec algorithm and key must be specified for both sender and receiver Such agreements form what is known as an SA Security Association IPsec communication is possible only if the receiver s and sender s SA settings ...

Page 323: ... access Web Image Monitor For details about disabling IPsec using the control panel see page 206 Administrator Settings Specifying Encryption Key Exchange Settings This function is available only when an administrator password is specified 1 Start the web browser and access the machine by entering its IP address 2 Click IPsec Settings 3 Click the IPsec Policy List tab 4 Select the number of the se...

Page 324: ...b click Settings 9 In Authenticate and generate a new key after every enter the same validity period in minutes that is specified on the machine in IKE Life Time and then click Methods 10 Confirm that the Encryption Algorithm Encryption Hash Algorithm Integrity and IKE Diffie Hellman Group Diffie Hellman Group settings in Security method preference order all match those specified on the machine in...

Page 325: ... algorithm to the same value as the Encryption Algorithm for ESP specified on the machine 32 When AH is selected for the machine in Security Protocol under IPsec Settings select Data and address integrity without encryption AH and configure the following settings Set the value of Integrity algorithm to the same value as the Authentication Algorithm for AH specified on the machine Clear the Data in...

Page 326: ...er are enabled To disable the computer s IPsec settings select the security policy right click and then click Un assign Enabling and Disabling IPsec Using the Control Panel This function is available only when an administrator password is specified 1 Press the User Tools key 2 Press the or key to select Admin Tools 3 Enter a password using the number keys and then press the OK key 4 Press the or k...

Page 327: ...machine If this cartridge is not initially used the following problems may occur Replace Required Soon Print Cartridge will be displayed before the toner runs out Replacement Required Print Cartridge will be displayed when the toner runs out but instead the printed image suddenly becomes pale or blurred The lifetime of the photo conductor which is built into the print cartridge is taken into accou...

Page 328: ...e for scanning using the ADF only SP 320SFN SP 377SNwX and SP 377SFNwX 216 mm 356 mm 8 5 14 inches Maximum paper size for printing 216 mm 356 mm 8 5 14 inches Warm up time 23 C 71 6 F SP 320SN SP 377SNwX 28 seconds SP 320SFN SP 377SFNwX 28 seconds 29 seconds Paper sizes For details see page 53 Supported Paper Paper type For details see page 53 Supported Paper Paper output capacity 80 g m2 20 lb 50...

Page 329: ...n If the message does not disappear contact your service representative Power consumption Maximum SP 320SN SP 377SNwX 866 W SP 320SFN SP 377SFNwX 873 W Ready SP 320SN SP 377SNwX 71 4 W SP 320SFN SP 377SFNwX 71 2 W During printing SP 320SN SP 377SNwX 463 W SP 320SFN SP 377SFNwX 481 W Power consumption Maximum SP 320SN SP 377SNwX 757 W SP 320SFN SP 377SFNwX 757 W Ready SP 320SN SP 377SNwX 68 6 W SP ...

Page 330: ... A Noise emission SP 320SFN Sound power level Stand by 27 0 dB A During printing 64 7 dB A Sound pressure level Stand by 18 4 dB A During printing 54 8 dB A Noise emission SP 377SFNwX Sound power level Stand by 27 0 dB A During printing 65 0 dB A Sound pressure level Stand by 18 5 dB A During printing 54 1 dB A Machine dimensions Width Depth Height SP 320SFN 405 392 395 mm 15 9 15 4 15 5 inches SP...

Page 331: ...position of the bystander Printer Function Specifications Item Description Printing speed SP 320SN and SP 320SFN 26 pages per minute A4 SP 377SNwX and SP 377SFNwX 28 pages per minute A4 Resolution 600 600 dpi maximum 1200 1200 dpi First print speed 8 seconds or less Interface Ethernet 10BASE T 100BASE TX USB 2 0 Wi Fi only SP 377SNwX and SP 377SFNwX Printer language PCL XL for Windows and the Linu...

Page 332: ...77SFNwX Scanning 600 300 dpi Printing 600 600 dpi First copy speed A4 at 23 C 71 6 F 13 seconds or less Multiple copy speed Countries other than European countries SP 320SN SP 320SFN 26 pages per minute SP 377SNwX SP 377SFNwX 28 pages per minute Reproduction ratio Fixed ratio 50 71 82 93 122 141 200 400 50 65 78 93 129 155 200 400 Zoom ratio 25 to 400 Copy quantity 99 12 Appendix 330 ...

Page 333: ...computer TWAIN Exposure glass 600 600 dpi ADF only SP 320SFN SP 377SNwX and SP 377SFNwX 600 300 dpi Maximum resolution when scanning from a computer WIA 600 600 dpi ADF throughput only SP 320SFN SP 377SNwX and SP 377SFNwX Black and white 13 images per minute Full Color 4 images per minute Interface Ethernet 10BASE T 100BASE TX USB 2 0 Wi Fi only SP 377SNwX and SP 377SFNwX Fax Function Specificatio...

Page 334: ...e 3 seconds 8 dots per mm 3 85 line per mm 33 6 kbps MMR ITU T 1 chart Transfer rate 33 6 kbps to 2400 bps auto shift down system Data compression methods MH MR MMR Memory capacity 100 sheets 8 dots per mm 3 85 line per mm MMR ITU T 1 chart Address book Speed dial 100 items Quick dial 8 items Number of redials for Fax 1 12 Appendix 332 ...

Page 335: ...ible For easy replacement we recommend you purchase and store extra print cartridges Print cartridges consumables are not covered by warranty However if there is a problem contact the store where they were purchased When you first use this machine use the print cartridges packaged with the machine The supplied print cartridges are good for approximately 6 400 pages This machine routinely performs ...

Page 336: ...l impacts on the environment and human health which could otherwise result from inappropriate handling Recycling of products helps to conserve natural resources and protect the environment For more detailed information on collection and recycling systems for this product please contact the shop where you purchased it your local dealer or sales service representatives All Other Users If you wish to...

Page 337: ...lection systems for not only used electrical and electronic products but also batteries and accumulators Please dispose of them correctly at your local community waste collection recycling centre Environmental Advice for Users mainly Europe Users in the EU Switzerland and Norway Consumables yield Please refer to either the User s Manual for this information or the packaging of the consumable Recyc...

Page 338: ...l prints are required and a specified period of time passes the device switches to an energy saving mode In these modes the machine consumes less power watts If the machine is to print again it needs a little longer to return from an energy saving mode than from Ready mode For maximum energy savings we recommend that the default setting for power management is used Products that comply with the En...

Page 339: ... battery or similar backup of memory This device may be subject to ringing or bell tinkle when certain other devices are connected to the same line If this occurs the problem should not be referred to the Telecom Faults Service This equipment should not be used under any circumstances that may constitute a nuisance to other Telecom customers Telepermitted equipment only may be connected to the aux...

Page 340: ...ntrolled environment and meets the FCC radio frequency RF Exposure Guidelines This equipment has very low levels of RF energy that it deemed to comply without maximum permissive exposure evaluation MPE But it is desirable that it should be installed and operated keeping the radiator at least 20cm or more away from person s body excluding extremities hands wrists feet and ankles Certification This ...

Page 341: ...air or warranty information please contact Ricoh Americas Corporation Customer Support Department at 1 800 FASTFIX If this device is causing problems with your telephone network the telephone company may request that you disconnect the equipment until the problem is resolved 8 In the event of operation problems document jam copy jam communication error indication see the manual provided with this ...

Page 342: ...tion exposure limits set forth for an uncontrolled environment and meets RSS 102 of the IC radio frequency RF Exposure rules This equipment should be installed and operated keeping the radiator at least 20cm or more away from person s body excluding extremities hands wrists feet and ankles Model Number SP 377SNwX SP 377SFNwX Remarques à l attention des utilisateurs canadiens d appareils sans fil L...

Page 343: ...eed five Model Number SP 320SFN SP 377SFNwX Remarques à l attention des utilisateurs canadiens Le présent produit est conforme aux spécifications techniques applicables d Innovation Sciences et Développement économique Canada L indice d équivalence de la sonnerie IES sert à indiquer le nombre maximal de dispositifs qui peuvent être raccordés à une interface téléphonique La terminaison d une interf...

Page 344: ...ode 1 and Energy Saver mode 2 If the machine has been idle for a certain period of time the machine automatically enters Energy Saver mode The machine recovers from Energy Saver mode when it receives a print job prints a received fax or when any key is pressed Energy Saver mode 1 The machine enters Energy Saver mode 1 if the machine has been idle for about 30 seconds It takes less time to recover ...

Page 345: ...e 1 Power Consumption 1 SP 320SN SP 377SNwX 48 0 W 47 2 W SP 320SFN SP 377SFNwX 48 4 W 48 3 W Recovery Time 1 SP 320SN SP 377SNwX 8 2 seconds 9 5 seconds SP 320SFN SP 377SFNwX 9 1 seconds 8 3 seconds Information for This Machine 343 ...

Page 346: ... 377SFNwX 12 seconds 14 seconds Duplex Function 2 Standard 1 Recovery time and power consumption may differ depending on the conditions and environment of the machine 2 Achieves ENERGY STAR energy savings product fully qualifies when packaged with or used with a duplex tray and the duplex function is enabled as an option For details about Energy Saver modes see page 206 Administrator Settings 12 A...

Page 347: ...Energy Saver mode 2 for two hours if Low Humidity Mode is enabled However the machine will enter Energy Saver mode 1 as normal even when Energy Saver mode 1 is not enabled For details about Low Humidity Mode see page 193 System Settings Information for This Machine 345 ...

Page 348: ...nd configuration files Object form shall mean any form resulting from mechanical transformation or translation of a Source form including but not limited to compiled object code generated documentation and conversions to other media types Work shall mean the work of authorship whether in Source or Object form made available under the License as indicated by a copyright notice that is included in o...

Page 349: ...t the Work or a Contribution incorporated within the Work constitutes direct or contributory patent infringement then any patent licenses granted to You under this License for that Work shall terminate as of the date such litigation is filed 4 Redistribution You may reproduce and distribute copies of the Work or Derivative Works thereof in any medium with or without modifications and in Source or ...

Page 350: ...the appropriateness of using or redistributing the Work and assume any risks associated with Your exercise of permissions under this License 8 Limitation of Liability In no event and under no legal theory whether in tort including negligence contract or otherwise unless required by applicable law such as deliberate and grossly negligent acts or agreed to in writing shall any Contributor be liable ...

Page 351: ... sure the software is free for all its users This General Public License applies to most of the Free Software Foundation s software and to any other program whose authors commit to using it Some other Free Software Foundation software is covered by the GNU Lesser General Public License instead You can apply it to your programs too When we speak of free software we are referring to freedom not pric...

Page 352: ...s threatened constantly by software patents We wish to avoid the danger that redistributors of a free program will individually obtain patent licenses in effect making the program proprietary To prevent this we have made it clear that any patent must be licensed for everyone s free use or not licensed at all The precise terms and conditions for copying distribution and modification follow GNU GENE...

Page 353: ...odify your copy or copies of the Program or any portion of it thus forming a work based on the Program and copy and distribute such modifications or work under the terms of Section 1 above provided that you also meet all of these conditions a You must cause the modified files to carry prominent notices stating that you changed the files and the date of any change b You must cause any work that you...

Page 354: ... the Program In addition mere aggregation of another work not based on the Program with the Program or with a work based on the Program on a volume of a storage or distribution medium does not bring the other work under the scope of this License 3 You may copy and distribute the Program or a work based on it under Section 2 in object code or executable form under the terms of Sections 1 and 2 abov...

Page 355: ... the source code from the same place counts as distribution of the source code even though third parties are not compelled to copy the source along with the object code 4 You may not copy modify sublicense or distribute the Program except as expressly provided under this License Any attempt otherwise to copy modify sublicense or distribute the Program is void and will automatically terminate your ...

Page 356: ...xample if a patent license would not permit royalty free redistribution of the Program by all those who receive copies directly or indirectly through you then the only way you could satisfy both it and this License would be to refrain entirely from distribution of the Program If any portion of this section is held invalid or unenforceable under any particular circumstance the balance of the sectio...

Page 357: ...u have the option of following the terms and conditions either of that version or of any later version published by the Free Software Foundation If the Program does not specify a version number of this License you may choose any version ever published by the Free Software Foundation 10 If you wish to incorporate parts of the Program into other free programs whose distribution conditions are differ...

Page 358: ...elop a new program and you want it to be of the greatest possible use to the public the best way to achieve this is to make it free software which everyone can redistribute and change under these terms To do so attach the following notices to the program It is safest to attach them to the start of each source file to most effectively convey the exclusion of warranty and each file should have at le...

Page 359: ... mouse clicks or menu items whatever suits your program You should also get your employer if you work as a programmer or your school if any to sign a copyright disclaimer for the program if necessary Here is a sample alter the names Yoyodyne Inc hereby disclaims all copyright interest in the program Gnomovision which makes passes at compilers written by James Hacker signature of Ty Coon 1 April 19...

Page 360: ...wing disclaimers Redistributions in binary form must reproduce the above copyright notice this list of conditions and the following disclaimers in the documentation and or other materials provided with the distribution Neither the names of the University of Illinois NCSA nor the names of its contributors may be used to endorse or promote products derived from this Software without specific prior w...

Page 361: ... damages arising from the use of this software Permission is granted to anyone to use this software for any purpose including commercial applications and to alter it and redistribute it freely subject to the following restrictions 1 The origin of this software must not be misrepresented you must not claim that you wrote the original software If you use this software in a product an acknowledgment ...

Page 362: ...PA 15213 3890 412 268 4387 fax 412 268 7395 tech transfer andrew cmu edu 4 Redistributions of any form whatsoever must retain the following acknowledgment This product includes software developed by Computing Services at Carnegie Mellon University http www cmu edu computing CARNEGIE MELLON UNIVERSITY DISCLAIMS ALL WARRANTIES WITH REGARD TO THIS SOFTWARE INCLUDING ALL IMPLIED WARRANTIES OF MERCHANT...

Page 363: ...les It should complile on any platform that has a C compiler without making any assumptions about availability of so called standard C functions routines or types which may or may not be present on any given platform Formatting notes This code follows the Whitesmiths style C indentation rules Plenty of discussion on C indentation can be found on the web such as http www kafejo com komp 1tbs htm bu...

Page 364: ...aimer in the documentation and or other materials provided with the distribution Neither the names of the copyright holders nor the names of the contributors may be used to endorse or promote products derived from this software without specific prior written permission This software is provided by the copyright holders and contributors as is and any express or implied warranties including but not ...

Page 365: ...nditions are met 1 Redistributions of source code must retain the above copyright notice this list of conditions and the following disclaimer 2 Redistributions in binary form must reproduce the above copyright notice this list of conditions and the following disclaimer in the documentation and or other materials provided with the distribution 3 All advertising materials mentioning features or use ...

Page 366: ...IED WARRANTIES OF MERCHANTABILITY AND FITNESS FOR A PARTICULAR PURPOSE ARE DISCLAIMED IN NO EVENT SHALL THE OpenSSL PROJECT OR ITS CONTRIBUTORS BE LIABLE FOR ANY DIRECT INDIRECT INCIDENTAL SPECIAL EXEMPLARY OR CONSEQUENTIAL DAMAGES INCLUDING BUT NOT LIMITED TO PROCUREMENT OF SUBSTITUTE GOODS OR SERVICES LOSS OF USE DATA OR PROFITS OR BUSINESS INTERRUPTION HOWEVER CAUSED AND ON ANY THEORY OF LIABIL...

Page 367: ...oduct Eric Young should be given attribution as the author of the parts of the library used This can be in the form of a textual message at program startup or in documentation online or textual provided with the package Redistribution and use in source and binary forms with or without modification are permitted provided that the following conditions are met 1 Redistributions of source code must re...

Page 368: ... NOT LIMITED TO PROCUREMENT OF SUBSTITUTE GOODS OR SERVICES LOSS OF USE DATA OR PROFITS OR BUSINESS INTERRUPTION HOWEVER CAUSED AND ON ANY THEORY OF LIABILITY WHETHER IN CONTRACT STRICT LIABILITY OR TORT INCLUDING NEGLIGENCE OR OTHERWISE ARISING IN ANY WAY OUT OF THE USE OF THIS SOFTWARE EVEN IF ADVISED OF THE POSSIBILITY OF SUCH DAMAGE The licence and distribution terms for any publically availab...

Page 369: ...e or promote products derived from this software without specific prior written permission THIS SOFTWARE IS PROVIDED BY THE COPYRIGHT HOLDERS AND CONTRIBUTORS AS IS AND ANY EXPRESS OR IMPLIED WARRANTIES INCLUDING BUT NOT LIMITED TO THE IMPLIED WARRANTIES OF MERCHANTABILITY AND FITNESS FOR A PARTICULAR PURPOSE ARE DISCLAIMED IN NO EVENT SHALL THE COPYRIGHT OWNER OR CONTRIBUTORS BE LIABLE FOR ANY DI...

Page 370: ...mpany Red Hat is a registered trademark of Red Hat Inc Wi Fi and Wi Fi Direct are registered trademarks of Wi Fi Alliance The proper name of Internet Explorer 6 is Microsoft Internet Explorer 6 The proper names of the Windows operating systems are as follows The product names of Windows Vista are as follows Microsoft Windows Vista Ultimate Microsoft Windows Vista Business Microsoft Windows Vista H...

Page 371: ...n Microsoft Windows Server 2003 R2 Datacenter Edition The product names of Windows Server 2008 are as follows Microsoft Windows Server 2008 Foundation Microsoft Windows Server 2008 Standard Microsoft Windows Server 2008 Enterprise Microsoft Windows Server 2008 Datacenter Microsoft Windows Server 2008 for Itanium based Systems Microsoft Windows Web Server 2008 Microsoft Windows HPC Server 2008 The ...

Page 372: ...Windows Server 2012 R2 Foundation Microsoft Windows Server 2012 R2 Essentials Microsoft Windows Server 2012 R2 Standard Microsoft Windows Server 2012 R2 Datacenter Other product names used herein are for identification purposes only and might be trademarks of their respective companies We disclaim any and all rights to those marks Microsoft product screen shots reprinted with permission from Micro...

Page 373: ... 225 255 Consumables 333 Control panel 20 21 Copier mode screen 76 Copy 2 sided copy 82 86 Basic operation 77 Combine 82 86 Copying onto envelopes 41 Enlarge 80 ID Card copy 89 Reduce 80 Scan settings 91 Specifications 330 Copy key 24 D Date and time settings 139 Density 132 DNS setting 238 E E mail notification 1 239 E mail notification 2 239 Encryption 319 Encryption key exchange 321 Energy save...

Page 374: ...e Touch buttons 119 Operation modes 24 Operation tools 28 Original 66 Original type 91 P Page counter 226 Paper jam 281 283 285 290 Paper mismatch 73 Paper recommendations 67 Paper Storage 62 Paper tray 225 Paper types 55 Bond Paper 55 Cardstock 55 Color Paper 55 Envelope 55 Label Paper 55 Letterhead 55 Plain Paper 55 Preprinted Paper 55 Prepunched Paper 55 Recycled Paper 55 Thick Paper 1 55 Thick...

Page 375: ...234 Smart Organizing Monitor 28 255 SMTP settings 241 SNMP settings 240 Sound volume adjustment 228 Specifications 326 329 330 331 Specifying a custom paper size 48 Specifying the paper type and paper size 48 50 51 Speed Dial 142 143 151 Standby file list 213 Status messages 271 279 Supported paper 53 System 240 System information 225 255 System settings 193 T TCP IP status 236 Time setting 253 To...

Page 376: ...MEMO 374 ...

Page 377: ...MEMO 375 ...

Page 378: ...MEMO 376 EN GB EN US EN AU M289 8616A ...

Page 379: ... 2016 ...

Page 380: ...M289 8616A AU EN US EN GB EN ...

Reviews: