9. Maintaining the Machine
Replacing the Print Cartridge
• If "Out of Toner" / "Print Cartridge" is displayed in the control panel, replace the print cartridge by
following the procedure described below. However, this message will not be displayed if [Toner
End Option] has been set to [Continue Printing]. Replace the print cartridge if the printed image
becomes pale or blurred.
• Toner levels are not displayed for Type 4 models. Replace the print cartridge if the printed image
becomes pale or blurred.
• Store print cartridges in a cool dark place.
• Actual printable numbers vary depending on image volume and density, number of pages printed
at a time, paper type and size, and environmental conditions such as temperature and humidity.
Toner quality degrades over time.
• For good print quality, the manufacturer recommends that you use genuine toner from the
manufacturer.
• The manufacturer shall not be responsible for any damage or expense that might result from the use
of parts other than genuine parts from the manufacturer with your office products.
1.
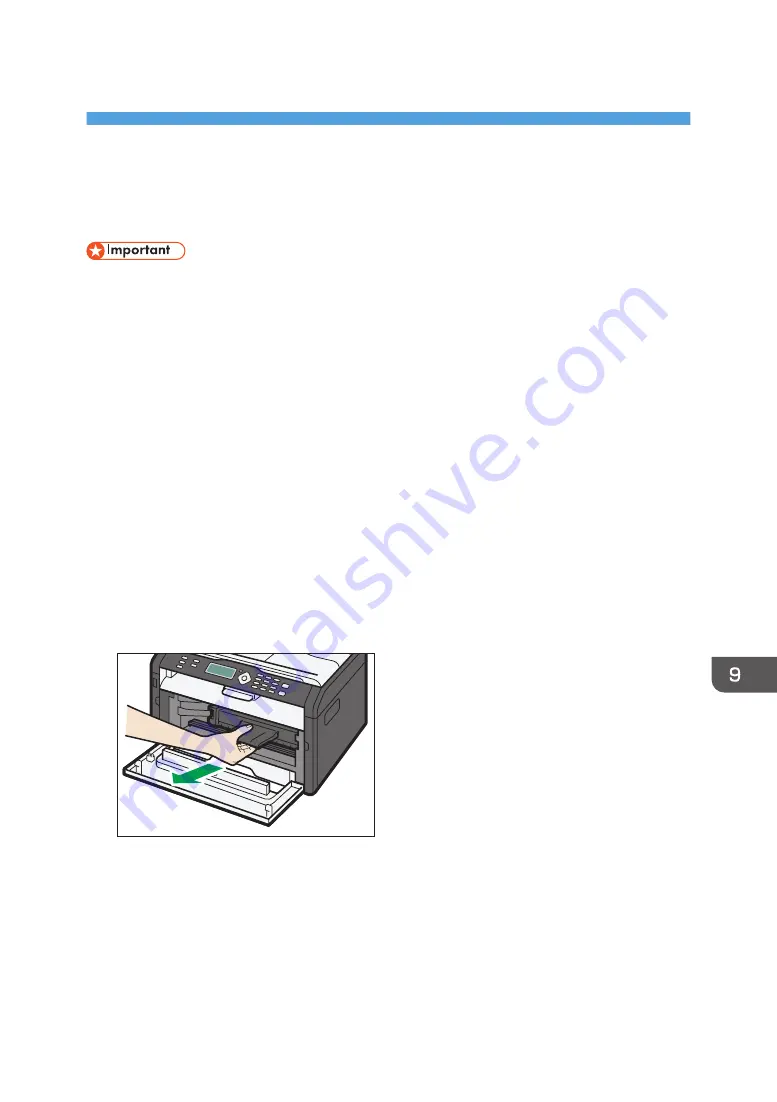
Open the front cover, and then carefully lower it.
2.
Carefully pull out the print cartridge horizontally, holding its center.
CTT045
3.
Take the new print cartridge out of the box, and then take it out of the plastic bag.
4.
Hold the print cartridge and shake it from side to side five or six times.
Shake the print cartridge horizontally in the direction. The first few printed pages may appear
blurred or smeared if the cartridge has not been shaken properly.
141
Summary of Contents for SP 200S
Page 2: ......
Page 6: ...4...
Page 16: ...Bypass Tray 1 sheets 70 g m2 19 lb 2 Loading Paper 14...
Page 28: ...2 Loading Paper 26...
Page 32: ...Canceling a print job while printing 1 Press the key CTT083 3 Printing Documents 30...
Page 42: ...4 Copying Originals 40...
Page 54: ...7 Maintaining the Machine 52...
Page 62: ...7 Close the rear cover CTT044 8 Troubleshooting 60...
Page 81: ...MEMO 79...
Page 82: ...MEMO 80 EN CN M134 8630...
Page 83: ......
Page 84: ...EN CN M134 8630 2012...
Page 86: ......
Page 92: ...6...
Page 106: ...1 Guide to the Machine 20...
Page 108: ...Bypass Tray 1 sheets 70 g m2 19 lb 2 Loading Paper 22...
Page 130: ...3 Printing Documents 44...
Page 158: ...5 Scanning Originals 72...
Page 184: ...6 Sending and Receiving a Fax 98...
Page 194: ...Do not Auto Print 7 Configuring the Machine Using the Control Panel 108...
Page 208: ...7 Configuring the Machine Using the Control Panel 122...
Page 226: ...8 Configuring the Machine Using Utilities 140...
Page 260: ...10 Troubleshooting 174...
Page 273: ...MEMO 187...
Page 274: ...MEMO 188 EN CN M135 8698...
Page 275: ......
Page 276: ...EN CN M135 8698 2013...
Page 278: ......
Page 288: ...Bypass Tray 1 sheets 70 g m2 19 lb 2 Loading Paper 10...
Page 300: ...3 Printing Documents 22...
Page 316: ...7 Close the rear cover CTT044 6 Troubleshooting 38...
Page 326: ...Printer language DDST 7 Appendix 48...
Page 330: ...MEMO 52 EN CN M133 8620...
Page 331: ......
Page 332: ...EN CN M133 8620 2012...
Page 354: ...19...
Page 355: ...2013 EN CN M133 8699 20...


