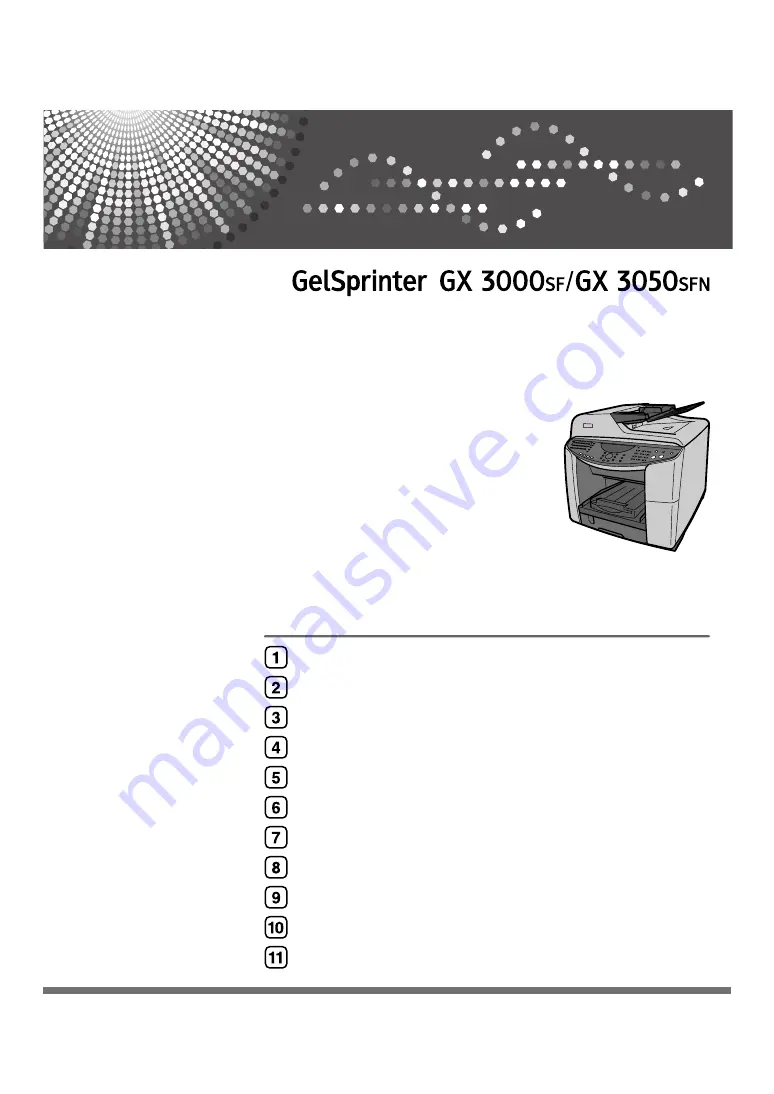
Ricoh GELSPRINTER GX 3000SF User Manual Download Page 1

User Guide

Read this manual carefully before you use this machine and keep it handy for future reference. For safe and correct use, be sure to read "Safety Information" 
before using the machine.

Read This First

Getting Started

Specifying and Adjusting the Machine's Operational Settings

Using the Printer Function

Using the Copy Function

Using the Scanner Function

Using the Facsimile Function

Troubleshooting

Checking the Machine Status

Maintaining

Appendix

Summary of Contents for GELSPRINTER GX 3000SF

Page 1: ...se be sure to read Safety Information before using the machine Read This First Getting Started Specifying and Adjusting the Machine s Operational Settings Using the Printer Function Using the Copy Fun...

Page 2: ......

Page 3: ...he Power Turning Off the Power 30 Turning on the power 30 Turning off the power 31 Saving energy 32 Option 33 Network Interface Board GX4 33 Paper Feed Unit TK1020 34 Multi Bypass Tray Type BY1000 34...

Page 4: ...stall for Network 59 Installing the Printer Driver Network 61 Using the SmartDeviceMonitor for Client Port TCP IP 61 Using the SmartDeviceMonitor for Client Port IPP 63 Changing the Port Settings for...

Page 5: ...Changing a Registered Quick Dial Keys 124 Changing a Fax Destination registered to a Quick Dial key 124 Changing an E mail Address registered to a Quick Dial key 126 Changing an F Code SUB registered...

Page 6: ...rinter Properties Dialog Box 182 Opening the Printing Preferences Dialog Box 182 Opening from an Application 182 Making Option Settings for the Printer 183 Conditions for Bidirectional Communication 1...

Page 7: ...djusting Image Density 228 Selecting Original Type Setting 229 Specifying the Resolution 230 Specifying the Copy Quality Settings 232 Color Balance 232 Sharp Soft 233 Contrast 234 6 Using the Scanner...

Page 8: ...69 Sending a Fax by Immediate Transmission Mode 271 Transmission Functions 273 Automatic Redial 273 Suspended Transmission 273 Dual Access 274 ECM Error Correction Mode 274 JBIG Transmission 275 Cance...

Page 9: ...ing Internet Faxes 320 Reception of Internet Fax 323 Forward to E mail address 324 Sending Fax Documents from Computers 325 Setting LAN Fax Driver Properties 326 8 Troubleshooting Software Cannot Be I...

Page 10: ...l Error Messages General 376 Printer Function Error Messages 376 Copier Function Error Messages 378 Scanner Function Error Messages 381 TWAIN Scanner Function Error Messages Control Panel 381 TWAIN Sc...

Page 11: ...roup Dial Destinations 418 Printing Quick Dial Speed Dial or Group Dial Destinations 420 Changing the Machine s System Settings 420 Displaying the Total Counter 421 Displaying the Options Installed on...

Page 12: ...Specification 461 Scanner Function Specification 463 Fax Function Specification 465 Option Paper Feed Unit 467 Option Multi Bypass Tray 468 Option Network Interface Board GX 3000SF only 469 Software...

Page 13: ...ng this product This manual describes detailed instructions on the operation and notes about the use of this machine To get maximum versatility from this machine all operators are requested to read th...

Page 14: ...istered trademarks or trademarks of Microsoft Cor poration in the U S and or other countries Other product names used herein are for identification purposes only and might be trademarks of their respe...

Page 15: ...hat caused by tapping paper on it z When not using the machine turn off the power z This machine has a nominal operational life of 5 years if used normally for 8 hours a day to pro duce up to 2 500 A4...

Page 16: ...stops if one of the print cartridges becomes empty If a cartridge containing a color ink such as cyan yellow or magenta becomes empty you cannot print even in black white z If you print a large numbe...

Page 17: ...t to do Quick Installation Guide This guide explains how to unpack the machine set it up and install options It also explains basic settings and operations User Guide This guide is stored on the Drive...

Page 18: ...model machine You can identify the model by checking the label on the rear of the machine Read if you purchase this model This explains about the 120 V model machine You can identify the model by chec...

Page 19: ...osoft Internet Explorer Version 4 01 SP2 or later z Netscape 6 2 or later To view the video files of User Guide Adobe Flash Player Macromedia Flash Player 5 or later plug in is required When using scr...

Page 20: ...t to the installed Product name and then click Uninstall User Guide 3 Follow the instructions that appear to remove the User Guide Removing the User Guide using Add or Remove Programs 1 Open My Comput...

Page 21: ...nvelope selector For envelopes set the lever to the rear position for everything else set the lever to the for ward position 3 Print cartridge yellow 4 Print cartridge magenta 5 Print cartridge cyan 6...

Page 22: ...ar view of the machine 1 Duplex unit cover button Press to open the duplex unit cover 2 Connector cover Open this cover to connect a telephone line extension telephone USB cable and to install the net...

Page 23: ...s vented here to prevent the inside of the machine from getting too warm Do not lean any thing against the vent or block it in any way If the inside of the machine gets too warm a breakdown could occu...

Page 24: ...ey Press to specify fax settings 3 Pause Redial key z Pause Inserts a pause in a fax dialing sequence You cannot insert a pause at the beginning of a sequence The pause is indicated by P z Redial Redi...

Page 25: ...or pictures that are printed on paper e g magazines and mechanically produced copies or originals Press the Text Photo key to switch to Photo mode The Photo indicator lights when the machine is in Pho...

Page 26: ...2 Sided Copy key To copy a 2 sided original onto both sides of a sheet press the 2 Sided Original 2 Sided Copy key to switch to 2 Sided Original 2 Sided Copy mode The 2 Sided Original and 2 Sided Cop...

Page 27: ...u can use this to force the machine to print data received in the online status when the paper size or type does not match the actually set size or type To clean the cyan magenta yellow and black prin...

Page 28: ...the Menu key Copy 1 The specified Image Density setting In the Text or Text P mode the pre registered density is applied In the Photo mode you have to specify the density 2 The specified Resolution se...

Page 29: ...etwork settings as follows 1 Install the network interface board 2 Specify the settings in the Network Setting menu 3 Specify SMTP Server Name in the SMTP Settings menu Printer 1 Cartridge replacement...

Page 30: ...ou can enter a fax number The machine is calling the destination The machine is responding to a call The machine is responding to a call The machine is sending a fax The machine is sending or receivin...

Page 31: ...ey z Select Paper Tray key Fax If you press any of the following keys the machine switches to the facsimile screen and the facsim ile indicator lights z Memory trans key z Pause Redial key z On Hook D...

Page 32: ...e z If the power switch is On but the machine is not used for a while the machine automatically enters Energy Save Mode to reduce its power consumption z If the Temp Alert Wait message appears check t...

Page 33: ...switch the power off hold the Power key down until the machine shuts down The On indicator goes off If you select Auto Off Timer for System Settings the machine automatically switches off if it is id...

Page 34: ...e z Energy Save Mode will not operate in the following cases z When the scanner unit is open z When the right front cover is open z When the duplex unit cover is open z When the print cartridge is not...

Page 35: ...his optional network interface board in the machine you can print over the network The GX 3050SFN model is fitted with a network interface board 1 Ethernet Port Use a network interface cable to connec...

Page 36: ...ray cover This is attached to tray 2 Take this cover off when loading paper Multi Bypass Tray Type BY1000 Use this tray to feed in sheets manually 1 Bypass tray Load paper here 2 Bypass tray extension...

Page 37: ...ns how to detach and reattach the multi bypass tray 1 Remove any paper in the bypass tray 2 Push the bypass tray extension in 3 Detach the multi bypass tray 4 Fully insert the multi bypass tray 5 When...

Page 38: ...uthorized Copy Control Sending machine status notification e mail when the machine runs out of paper or when a paper jam occurs etc See p 427 Notifying the Machine Status by E mail Automatically selec...

Page 39: ...how to operate the machine as a printer via USB 1 Use a USB cable to connect the machine to a computer 2 Install the printer driver and any other necessary drivers on the computer 3 Begin using the pr...

Page 40: ...Quick Installation Guide z For details about procedures and settings in step 2 see p 51 Confirming the Connection Method Quick Install for Network Quick Installation Guide p 58 Installing the Drivers...

Page 41: ...z For details about procedures and settings in step 1 see p 116 Setting Copier Features z For details about procedures and settings in step 2 see p 208 Basic Procedure Copying on two sides if necessa...

Page 42: ...procedures and settings in step 1 see p 232 Specifying the Copy Quality Set tings B W Copy Color Copy You can switch the color copy mode by pressing the B W Start or Color Start key depending on the t...

Page 43: ...mputer via TWAIN Driver Use the following procedure to configure the machine for use as a scanner so users can scan origi nals into a client computer via the TWAIN driver 1 Use a USB cable to connect...

Page 44: ...onfigure the machine for use as a scanner so users can send scan files by e mail 1 Connect the machine to the network 2 Specify the network settings such as the machine s IP address and the gateway ad...

Page 45: ...eway address 3 Register the destinations to Address Book if necessary 4 Begin using the scanner z For details about procedures and settings in step 1 see Installing the Printer Driver Network Interfac...

Page 46: ...ission must be included in the header of all pages faxed to from or within the United States z For details about procedures and settings in step 1 see p 78 Connecting a Telephone Line z For details ab...

Page 47: ...the header of all pages faxed to from or within the United States z For details about procedures and settings in step 1 see p 78 Connecting a Telephone Line z For details about procedures and setting...

Page 48: ...uch as the POP3 server and the POP3 port number 5 Begin using the facsimile z For details about procedures and settings in step 1 see Installing the Printer Driver Network Interface Board Quick Instal...

Page 49: ...s IP address 4 Begin using the facsimile z For details about procedures and settings in step 1 see Before installing the Printer Driver USB Installing the Printer Driver Network Interface Board Quick...

Page 50: ...g the Machine z p 109 Specifying the Tray and Paper z p 107 Adjusting the Volume z p 116 Setting Copier Features z p 156 Scanner Features Entering destination using the number keys To enter the destin...

Page 51: ...th GX 3000SF the network interface board must be installed 1 Connect the machine to the network 2 Specify the network settings such as the machine s IP address and the gateway address 3 Specify the LD...

Page 52: ...1 Read This First 50 1...

Page 53: ...stall the necessary software by inserting the sup plied CD ROM into your computer and then clicking Quick Install for Network RPCS Raster Printer Driver GX 3000SF PCL RPCS Raster Printer Drivers GX 30...

Page 54: ...to peer transfer or use the machine as a network printer and send print jobs to the machine from a client computer via a print server z See Quick Installation Guide z p 61 Using the SmartDeviceMonitor...

Page 55: ...on until you have read how to do so z To install under Windows 2000 XP or Windows Server 2003 you must log on as a user with administrator rights 1 Start Windows and insert the provided Drivers Manua...

Page 56: ...he installation location click Change 13 Confirm the program folder in which you want to install Device Setting Utility and then click Next Installation starts 14 When installation is complete click F...

Page 57: ...ine on the network 1 On the Start menu point to Settings and then click Control Panel 2 Double click Network Connections 3 Click Local Area Connection to highlight it and then in the File menu click P...

Page 58: ...ges are available Dansk Danish Deutsch German English English Espanol Spanish Francais French Italiano Italian Nederlands Dutch Norsk Norwegian Portugues Portuguese Svenska Swedish The default interfa...

Page 59: ...rting the CD ROM the Drivers Manual Utilities dialog box appears If it does not double click the CD ROM drive icon under My Computer or Explorer and then double click Setup exe z If the message prompt...

Page 60: ...ows operating system version and connection method used Network connections can be established through Ethernet Windows 98 Me Windows 2000 XP Windows Server 2003 Windows NT 4 0 Connection Method Avail...

Page 61: ...ser Guide z To install under Windows 2000 XP Windows Server 2003 Windows NT 4 0 you must have an account that has Manage Printers permission Log on as an Administrator z Installation of DeskTopBinder...

Page 62: ...alog box and then install the printer driver If you do this SmartDeviceMonitor for Client will not be simultaneously installed so install it after wards and then configure the port 7 Click Finish The...

Page 63: ...2 Quit all applications currently running 3 Select an interface language and then click OK The following languages are available Dansk Danish Deutsch German English English Espanol Spanish Francais Fr...

Page 64: ...heck box 14 Select the Default Printer check box to configure the printer as default 15 Click Continue Installation starts 16 Click Finish in the installation completion dialog box z After inserting t...

Page 65: ...ges are available Dansk Danish Deutsch German English English Espanol Spanish Francais French Italiano Italian Nederlands Dutch Norsk Norwegian Portugues Portuguese Svenska Swedish The default interfa...

Page 66: ...nter as default 18 Click Continue The printer driver installation starts 19 Click Finish in the installation completion dialog box z After inserting the CD ROM the Drivers Manual Utilities dialog box...

Page 67: ...Ports tab click Configure Port The Port Settings dialog box appears Windows XP Windows Server 2003 1 On the Start menu point to Settings and then click Printers and Faxes 2 In the Printers window clic...

Page 68: ...English 4 Click RPCS Raster Printer Driver If your model is the GX 3050SFN click PCL RPCS Raster Printer Drivers 5 The software license agreement appears in the License Agreement dialog box After rea...

Page 69: ...A message appears if there is a newer version of the printer driver already installed If there is you cannot install the printer driver using Auto Run If you still want to install the printer driver...

Page 70: ...P IP appears 10 Enter lp in the Name or address of server providing lpd box and then click OK The port is added 11 Check that the port of the selected printer is displayed in Port 12 Click Shared to d...

Page 71: ...ter using the SmartDeviceMonitor port Recovery Printing and Parallel Printing cannot be used from the client z If you print with a Windows XP or Windows Server 2003 print server notification functions...

Page 72: ...he computer to complete installation z If the message Digital Signature Not Found or the Software Installation or Hardware Installa tion dialog box appears click Yes or Continue Anyway to continue the...

Page 73: ...nska Swedish The default interface language is English 4 Click TWAIN Driver for Network 5 Read the license agreement click I accept the agreement and then click Next 6 Enter the machine s IP address i...

Page 74: ...ch The computer searches the network for available machines If you select the Specify check box enter the machine s IP address and then click OK If you se lected the Specify check box proceed to step...

Page 75: ...guage and then click OK The following languages are available Dansk Danish Deutsch German English English Espanol Spanish Francais French Italiano Italian Nederlands Dutch Norsk Norwegian Portugues Po...

Page 76: ...procedure for Full install 1 Start Windows and then insert the provided Drivers Manual Utilities CD ROM into the CD ROM drive 2 Quit all other applications currently running 3 Select an interface lan...

Page 77: ...lick Next 13 Click Complete If you are required to restart the computer after installing SmartDeviceMonitor for Client restart the computer z After inserting the CD ROM the Drivers Manual Utilities di...

Page 78: ...169 254 xxx xxx mode the machine might have obtained an incorrect IP address or might be using the same address as another network device If this happens consult your network administrator z Supported...

Page 79: ...e Also the fax function might not be available depending on configuration of the environment that the machine is con nected to z If you connect the cables incorrectly the machine might not able to sen...

Page 80: ...nformation Connecting a Telephone Line You can connect a phone line to the machine Lift the connector cover and connect a telephone line to LINE Set the reception mode to Fax Only Set the line type to...

Page 81: ...modes Even if you sit a long way from the machine by having the telephone at hand you can switch between fax and telephone modes without leaving your desk Lift the connector cover and connect a teleph...

Page 82: ...e machine to the telephone line in parallel with any other device Terminat ing the line with more than one device in this can result in degraded fax images errors when sending or receiving fax images...

Page 83: ...stem to treat the connection as an ana log two wire circuit For details consult your sales or service representative who installed your PBX 1 PBX System Raise the connector cover and connect the telep...

Page 84: ...nd then press the Yes key 4 Press the or key to select the reception mode setting you want to apply and then press the Yes key To move the icon press the or key The reception mode setting appears Pres...

Page 85: ...ress the Menu key 2 Press the or key to display Line Settings and then press the Yes key 3 Press the or key to display Dial Push Phone and then press the Yes key 4 Press the or key to select Push then...

Page 86: ...Push Phone and then press the Yes key 4 Press the or key to select Dial then press the Yes key 5 Press the or key to select 10pps or 20pps then press the Yes key Press the No key to switch to the init...

Page 87: ...e Settings and then press the Yes key 3 Press the or key to display PSTN PABX then press the Yes key 4 Press the or key to select PSTN or PABX then press the Yes key If you select PABX proceed to Step...

Page 88: ...as overhead projectors is designed for the pigmented inks used by the machine Film for plain paper copiers cannot be used because it does not absorb ink Film for dye inks is not recommended because th...

Page 89: ...per sizes 140 356 mm length 90 216 mm width Maximum paper capacity 250 sheets Maximum paper output capacity 150 sheets Glossy Paper A4 210 297 mm Maximum paper capacity 250 sheets Maximum paper output...

Page 90: ...per capacity Plain Inkjet Plain Paper A4 210 297 mm A5 148 210 mm A6 105 148 mm B5 182 257 mm Letter 8 1 2 11 Legal 8 1 2 14 5 1 2 8 1 2 Executive 7 1 4 10 1 2 8K 267 390 mm 16K 195 267 mm Custom pape...

Page 91: ...paper weighing more than 163 g m2 z p 201 Setting and Placing Originals Envelope Com10 Env 4 1 8 9 1 2 Monarch Env 3 7 8 7 1 2 DL Env 110 220 mm C6 Env 114 162 mm C5 Env 162 229 mm Maximum paper capac...

Page 92: ...r z Use compatible paper z Load paper with the print side face down in the paper trays z Load paper with the paper grain parallel to the feed direction z Do not load paper of different types at the sa...

Page 93: ...rage precautions This section gives cautions on storing paper If stored under adverse conditions even paper suitable for printing can cause paper jams poor print quality or machine malfunctions When y...

Page 94: ...ve the sheet from the out put tray before printing the next job z Some print images can cause the paper to curl which creates patchy print If this happens set Print Quality to Quality priority z Only...

Page 95: ...aper type the ink may take a while to dry Before handling make sure printed sheets have fully dried Otherwise the ink may smudge z The ink may smear depending on the type of image If this happens set...

Page 96: ...2 Getting Started 94 2 Printable area Printable and unprintable areas 1 Feed Direction 2 Printable Area 3 3 mm 0 118 inches...

Page 97: ...aper 95 2 z When printing on envelopes the following print area limitations apply 1 Feed Direction 2 Printable Area 3 8 mm 0 4 inches 4 38 mm 1 5 inches 5 5 mm 0 2 inches 3 4 5 1 2 3 4 2 1 5 3 4 2 1 5...

Page 98: ...with the paper grain parallel to the feed direction Loading paper into tray 1 Follow the procedure below to load paper into tray 1 A4 Letter size paper is loaded here 1 Lift the output tray 2 Hold th...

Page 99: ...ehand make sure to squeeze the front end paper guide and then expand the guide 4 Load paper with the print side face down but not over the limit mark Load paper according to the capacity of the tray 5...

Page 100: ...paper into tray 2 optional Follow the procedure below to load paper into tray 2 You can load plain paper and inkjet plain paper in tray 2 A4 Letter size paper is loaded here 1 Hold the grip on tray 2...

Page 101: ...wn and then adjust the paper guide to the paper size To load 250 or more sheets of paper first load about 200 sheets and then load the remaining sheets making sure the paper does not exceed the limit...

Page 102: ...ing paper into bypass tray optional Follow the procedure below to load paper into bypass tray A4 Letter size paper is loaded here 1 Pull the bypass tray extension out all the way 2 Load paper in the b...

Page 103: ...pier Features 1 Press the Menu key The menu screen appears 2 Press the or key to display Copier Features 3 Press the Yes key You can also display Original Type by pressing the 2 key When you select a...

Page 104: ...ational Settings 102 3 5 Press the or key to select the item and then press the Yes key To move the icon press the or key The Copier Features screen appears To switch back to the initial screen press...

Page 105: ...the optional network interface board is installed Menu System Settings Tray Paper Setting User Restriction Copier Features Program Dest TX Settings RX Settings Line Settings Auto Print Report General...

Page 106: ...ore it restores the settings to their original values You can specify 0 5 or 1 to 5 in steps of one minute Energ SaverTimer If the machine remains idle for a specified time it automatically switches t...

Page 107: ...he speaker produced during on hook mode The default setting is Middle Daylight saving For the machine to automatically switch between daylight savings and standard times set this to On The date and ti...

Page 108: ...ess the or key to display System Settings and then press the Yes key 3 Press the or key to display Language and then press the Yes key 4 Press the or key to select the language and then press the Yes...

Page 109: ...Adjust Sound Vol and then press the Yes key 4 Press the or key to select Key Alert or Line Vol and then press the Yes key 5 Press the or key to change the volume and then press the Yes key The System...

Page 110: ...1 Press the Menu key The menu screen appears 2 Press the or key to display System Settings and then press the Yes key 3 Press the or key to display Country and then press the Yes key 4 Press the or k...

Page 111: ...aper z Glossy Paper z Transparency z Postcard z Inkjet Postcard z Envelope z Thick Paper Size You can specify the size of the paper loaded in the paper feed tray z LT 8 1 2 11 z LG 8 1 2 14 z HL 8 1 2...

Page 112: ...e Auto Tray Select can be specified only if the optional tray or the optional bypass tray is attached If you select Auto Tray Select the tray is automatically selected according to the paper size set...

Page 113: ...ay1 and then press the Yes key 4 Press the or key to display Paper Type and then press the Yes key 5 5 Press the or key to display Plain Paper and then press the Yes key The paper settings are display...

Page 114: ...tings 112 3 8 Press the or key to display Paper Size and then press the Yes key 9 Press the or key to display A4 and then press the Yes key The paper settings appear Press the No key to switch to the...

Page 115: ...t it a service representative will to have to return the machine to its default state This will result in all data in the machine being lost and the service call may not be free of charge Restriction...

Page 116: ...blank To apply the default password setting blank leave the password box blank and simply press the Yes key 4 Press the or key to display Change Password and then press the Yes key 5 Enter the new pa...

Page 117: ...nd then press the Yes key The default password is blank To apply the default password setting blank leave the password box blank and simply press the Yes key 4 Press Yes key 5 Press the or key to sele...

Page 118: ...o always use Sort Copy The default setting is Off 2 in 1 You can specify whether to always use 2 in 1 Copy The default setting is Off 2 Sided Original You can specify whether to always scan in 2 Sided...

Page 119: ...default setting is Off Output Order You can start printing from the last page of a document z 1st to Last z Last to 1st Use this function when prints come out face up in the output tray This allows a...

Page 120: ...al orientation when making two sided copies z Portrait z Landscape 1 Portrait 2 Landscape The default setting is Portrait z Details about the Color Settings see p 232 Specifying the Copy Quality Setti...

Page 121: ...ct the fax destination if you register Name for the fax destination z You can use the e mail address as the sender s address when sending scan files in scanner mode z Registered Fax numbers and e mail...

Page 122: ...If a destination has both a fax number and an e mail address register the fax number and e mail address to different Quick Dial keys Destinations that are registered to Quick Dial keys can also be reg...

Page 123: ...No key twice The initial screen appears To register further information repeat steps 4 to 7 z You can display Quick Dial by pressing the 1 number key in step 3 z To enter an e mail address press the k...

Page 124: ...ck Dial key to which you want to resister an e mail address 5 Enter a name and then press the Yes key You can enter a name of up to 20 characters 6 To switch the character entry mode to A press the ke...

Page 125: ...Yes key 3 Press the or key to display Quick Dial and then press the Yes key 4 Press the Quick Dial key to which you want to resister an e mail address 5 Enter a name and then press the Yes key You ca...

Page 126: ...is complete appears 9 Press the No key twice The initial screen appears z p 278 Setting SUB Codes for Transmission Changing a Registered Quick Dial Keys You can change the destination registered to a...

Page 127: ...s and then press the Yes key To delete an registered fax number press the Clear Stop key 10 To change the modem speed press the or key to select a modem speed and then press the Yes key A message noti...

Page 128: ...s the Quick Dial key to which the e mail address you want to change is registered 5 Press the No key 6 Press the key to switch the character entry mode to A 7 Enter the new e mail address and then pre...

Page 129: ...hen press the Yes key 3 Press the or key to display Quick Dial and then press the Yes key 4 Press the Quick Dial key to which the F code you want to change is registered 5 Press the key 6 Enter a new...

Page 130: ...nsmission Deleting a Registered Quick Dial Keys You can delete the destination registered to a Quick Dial key 1 Press the Menu key The Menu screen appears 2 Press the or key to display Program Dest an...

Page 131: ...rly if you register an e mail address to a Speed Dial number you can send Internet faxes or scans by e mail simply by keying in the appro priate Speed Dial number using the number keys Usable Speed Di...

Page 132: ...play Speed Dial and then press the Yes key 4 Enter the Speed Dial registration number 00 to 89 to which you want to register a fax number using the number keys For example press the 0 and 1 keys to re...

Page 133: ...To enter a sub address such as an F code press the key in step 6 z p 140 Registering Destinations to Group Dial z p 131 Registering an E mail Address to a Speed Dial Key z p 123 Registering an F Code...

Page 134: ...ress and then press the Yes key You can enter an e mail address of up to 20 characters A message notifying you that registration is complete appears 8 Press the No key twice The initial screen appears...

Page 135: ...transmission and then press the key You can enter an F code of up to 20 characters 8 Enter the password SID and then press the Yes key You can enter a password of up to 20 characters A message notifyi...

Page 136: ...display Program Dest and then press the Yes key 3 Press the or key to display Speed Dial and then press the Yes key 4 Enter the Speed Dial registration number to which the fax number you want to chan...

Page 137: ...Stop key 9 To change the modem speed press the or key to select a modem speed and then press the Yes key A message notifying you that the modification has been completed appears 10 Press the No key tw...

Page 138: ...en press the Yes key 4 Enter the Speed Dial registration number to which the e mail address you want to change is regis tered 5 Press the No key 6 Press the or key to select Edit and then press the Ye...

Page 139: ...ars Changing an F Code SUB registered to a Speed Dial key You can change the F code SUB registered to a Speed Dial key 1 Press the Menu key 2 Press the or key to display Program Dest and then press th...

Page 140: ...password SID and then press the Yes key You can enter a password of up to 20 characters 8 To change the modem speed press the or key to select a modem speed and then press the Yes key A message notif...

Page 141: ...you want to delete the data or not appears 5 Press the No key 6 Press the or key to select Delete and then press the Yes key A message notifying you that the deletion is complete appears If you try to...

Page 142: ...3 Press the or key to display Group and then press the Yes key 4 Press the Quick Dial key to which you want to register a group 5 Enter the group name and then press the Yes key You can enter a group...

Page 143: ...hange or delete the destina tion press the No key Removing a Name from a Group You can delete the destination assigned to a Speed Dial key 1 Press the Menu key The Menu screen appears 2 Press the or k...

Page 144: ...e it To save a destination press the Yes key Each time you press the Yes key the next destination Quick Dial key or Speed Dial number appears in the order it was registered A message notifying you tha...

Page 145: ...hen sending text containing such characters The default setting is Std Memory TX You can specify whether to always use Memory TX The default setting is On Print Fax Header The Fax Header is printed as...

Page 146: ...to 23 59 z Off The default setting is Off Number of Rings You can specify how many times 1 to 16 the machine rings when it receives data The default setting is 2 Auto Reduce RX If the file the machine...

Page 147: ...n may not work properly If you select Auto SW mode you must make the following settings also z Ans Dev Detect Time Set this to between 10 and 30 second s The default setting is 20 second s z Fax Detec...

Page 148: ...for another function For example you may load white A4 paper into tray 1 to use when making copies and yellow A4 paper into tray 2 to use when printing received faxes You can then easily identify for...

Page 149: ...ected There are two types tone and pulse dial z Push z Dial This function is not available in some regions The default setting is Push PSTN PABX You can select the public switched telephone network PS...

Page 150: ...ly Journal You can specify whether to automatically print communication reports z On z Off The default setting is On TX Status Report You can specify whether to automatically print transmission report...

Page 151: ...he time and date for the machine s clock z Set Hour z Set Minute z Set Year z Set Month z Set Day z Time Zone Fax No The sender s fax number is sent to the other party when sending a fax You can regis...

Page 152: ...efault 0 0 0 0 The default setting is Auto If you select Specify you must enter the subnet mask and gateway address as xxx xxx xxx xxx x indicates a number Subnet Mask You can specify the subnet mask...

Page 153: ...me Register LDAP Server host name User Name Enter user name Password Enter password The password is required for authentication to access the LDAP server Server Port No Specify the port number for com...

Page 154: ...3 Specifying and Adjusting the Machine s Operational Settings 152 3 Search Condition Specify the search criteria z Begin z Include z End The default setting is Include...

Page 155: ...SMTP Server Name Specify the SMTP server name Enter SMTP Server Name using up to 64 characters Spaces cannot be entered SMTP Port No Specify the SMTP Port No Enter SMTP Port No between 0 and 65535 us...

Page 156: ...P Auth to On and then specify Name and Pwd z On z Name Enter Name using up to 64 characters z Password Enter Pwd using up to 32 characters z Off z POP before SMTP Specify POP authentication POP before...

Page 157: ...and 65535 using the number keys POP3 Svr Timeout Specify the time to wait for a response from the POP3 server before disconnecting the line POP3 User Name Specify e mail address for receiving Interne...

Page 158: ...can specify the scanning resolution z 150 150 z 300 300 z 600 600 The default setting is 300 300 File Type You can specify the file format of scanned images z TIFF z PDF z JPEG The default setting is...

Page 159: ...ss the or key to display TX RX Result and then press the Yes key 3 Press the or key to display the transmission or reception results 4 Press the B W Start key to print the transmission or reception re...

Page 160: ...the Machine s Operational Settings 158 3 Counter Menu You can display or print the counter value used for all functions z Scan z Full Color z B W z Level Color z Print Counter z For details about the...

Page 161: ...o allow them to dry The interval must be long enough to allow a duplex printed or an inkjet printed transparency sheet to dry z Duplex Unit z On z Off Having selected On press the or key to specify ho...

Page 162: ...faster z Env Selector On Printing is done unidirectionally or bidirectionally according to the envelope selector position If the envelope selector is set to the rear position printing is done unidirec...

Page 163: ...ray or bypass tray optional 1 Press the Menu key 2 2 Press the or key to display Engine Settings and then press the Yes key 3 Press the or key to display List Test Print and then press the Yes key 4 P...

Page 164: ...USB Speed You can specify the settings related to communication when the computer and machine are con nected via USB Usually you do not need to change these settings Usually you do not need to change...

Page 165: ...e You can specify the point size you want to use for the default font between 4 and 999 75 in 1 increments Default 12 00 points This setting is effective only for a variable space font Font Pitch You...

Page 166: ...Off Default Off Resolution You can specify the print resolution in dots per inch z 300 300 dpi z 600 300 dpi z 600 600 dpi Default 600 300 dpi Copies Specify the number of pages to print This setting...

Page 167: ...Report Select this to have an error report printed when a printer or memory error occurs z Off z On Default Off Density Adjust You can adjust the density of the printing color z Light z Normal z Dark...

Page 168: ...nt the test pattern and adjust the print head alignment Adj Paper Feed If printed lines are horizontally misaligned or if images are printed unevenly print the test pattern and adjust the paper feed s...

Page 169: ...s the or key to display Maintenance and then press the Yes key 3 Press the or key to display Nozzle Check and then press the Yes key A test pattern is printed 4 Press the No key twice The initial scre...

Page 170: ...print cartridge is empty replace it instead of performing a print head cleaning After a print cartridge is replaced a print head cleaning will be automatically performed 1 Slide the envelope selector...

Page 171: ...appears Head flushing Follow the procedure below to perform a thorough print head cleaning Since this consumes more ink than a normal head cleaning does perform this when the problem persists after pe...

Page 172: ...ey to select the color of the print head you want to clean and then press the Yes key You can select All Heads Print head 2 or Print head 1 Head flushing starts 6 Press the No key to display Cancel an...

Page 173: ...isplay Head Position and then press the Yes key 4 Press the or key to display Print Test Pattern and then press the Yes key 5 Press the or key to select a test pattern and then press the Yes key To ad...

Page 174: ...ss the or key to display Adjust and then press the Yes key 8 Press the or key to select a resolution from step 5 and then press the Yes key 9 Press the or key to select a line and then press the Yes k...

Page 175: ...etting 1 Press the Menu key 2 Press the or key to display Maintenance and then press the Yes key 3 Press the or key to display Adj Paper Feed and then press the Yes key 4 Press the or key to display P...

Page 176: ...in the opposite direction When the 2 square is the lightest gray square and the 6 horizontal lines are broken in the opposite direction the optimal adjust ment value is between 3 and 5 After adjustme...

Page 177: ...ss the Yes key To print the registration test pattern load A4 or letter size paper in the paper tray for which you want to carry out print registration 5 Press the or key to select a paper tray and th...

Page 178: ...n mark in the direction the optimal adjustment value for the Plain X is 1 10 Fold the test pattern sheet in half widthwise and then check the adjustment value for the Plain Y Adjustment values are in...

Page 179: ...ey 15 Press the or key to enter the adjustment values 40 to 40 in the Plain Y from step10 and then press the Yes key 16 Press the No key to display Cancel and then press the Yes key The Maintenance sc...

Page 180: ...s You can enter the following characters z Alphabetic characters z Symbols z Numerals 0123456789 Keys Number keys Use to enter numbers letters key Press to toggle between entering numbers and letters...

Page 181: ...rs when entering a name 1 Press the key to display A 2 Press the number keys z To enter B press the 2 key twice z To enter the same character again or to enter one of the other characters sharing the...

Page 182: ...eys The numeral is entered and the cursor moves z To enter the same number again press the key to move the cursor and then press the number key again Deleting Characters 1 Press the or key to move the...

Page 183: ...he dialog box displayed in Custom Set ting mode z Custom Setting This type is suitable for users who generally use the same settings to print and seldom need to change their printer properties setting...

Page 184: ...dialog box appears Opening from an Application If you open the printer properties dialog box from an application the factory settings appear Change the settings as required and carry out printing Cha...

Page 185: ...communication z SmartDeviceMonitor for Client included on the CD ROM must be installed and TCP IP must be used z Under Windows 2000 Enable bidirectional support must be selected and Enable printer po...

Page 186: ...and then click Printers The Printers window appears 2 Click the icon of the printer you want to use When you open the printer properties dialog box for the first time after installing the printer driv...

Page 187: ...z Printed inkjet transparencies take some time to dry We recommend that you remove a printed inkjet transparency from the output tray before the next inkjet transparency is deliv ered z The print deli...

Page 188: ...u select Inkjet Plain Paper the machine will print on one side only To print on both sides se lect Plain 4 Make the necessary settings and then click OK The printer properties dialog box closes 5 Make...

Page 189: ...he print job from the status monitor or by pressing the Clear Stop key of the printer Canceling a print job in queue Cancel the print job from the task bar of the computer Canceling Printing from the...

Page 190: ...job being printed but also the print jobs in queue will be canceled 2 Press the Clear Stop key It will take a few moments for printing to stop Canceling Printing from the Task bar Follow the procedur...

Page 191: ...he levels of light in which the photo was taken If there are extreme light and shade light z Printing Low Resolution Images Smoothly You can print outlines of low resolution images which often appear...

Page 192: ...more closely Since more data has to be processed printing will take much longer Use this function if the printed image differs from the display image Black or gray parts will be printed with the four...

Page 193: ...e sheets such as A4 letter or legal z When printing on glossy paper z Printing Web Pages You can specify the settings for printing Web pages properly When a Web page is printed it may not fit on the p...

Page 194: ...cimal points z Printing on Unregistered Custom Size Paper You can print on unregistered custom size paper z Printing on Both Sides of Paper You can print on both sides of paper Only plain paper can be...

Page 195: ...ke this setting in the printer properties z Printing with a Layout Suitable for Making Booklets You can print on both sides of paper using a layout suitable for making booklets There are two kinds of...

Page 196: ...You do not have to install the unit to print files that are protected by data security for copying z You can use this machine to print files that are protected by data security for copying How ever b...

Page 197: ...ng Data security for cop ying Setting Data security for copying in the Printer Driver z Select the Data security for copying check box You can also enter the text in the Text box z You cannot select t...

Page 198: ...function set Print Quality to Quality priority Specifying Data Security for Copying If a document printed with data security for copying is copied by or stored in the Document Box of a copier or mult...

Page 199: ...the Reverse patterns text background check box Printing a Document Using Mask type 1 The print preview of the pattern and the text you set is displayed 2 The document is copied to the copier or the mu...

Page 200: ...eck box and specify mask type Additionally specify the settings in the Unauthorized copy prevention Text area 6 Click OK Important Notice z The supplier does not provide warranty regarding the appeara...

Page 201: ...sing the machine with an operating system that supports multi languages you can change the language of the Printing Preferences dialog box To change the language in the printer properties dialog box c...

Page 202: ...4 Using the Printer Function 200 4...

Page 203: ...image area z As the color of markers or highlighters is difficult to reproduce the copy might not come out depending on the color or a different color might be copied Sizes and Weights of Recommended...

Page 204: ...1 2 14 Half Letter 5 1 2 8 1 2 Executive 7 1 4 10 1 2 F 8 13 Foolscap 8 1 2 13 Folio 8 1 4 13 16K 195 267 mm Custom Size 216 1000 mm Two sided originals A4 210 297 mm A5 148 210 mm B5 182 257 mm Lett...

Page 205: ...ginals with perforated lines z Originals with indexes tags or other projecting parts z Sticky originals such as translucent paper z Thin highly flexible originals z Thick originals such as postcards z...

Page 206: ...ion fluid and ink has completely dried Not taking this precaution could cause marks on the exposure glass that will be copied onto paper z For details about original sizes you can set see p 201 Origin...

Page 207: ...e ADF might open or be damaged 1 Lift the ADF 2 Place the original face down on the exposure glass The original should be aligned to the rear left corner Start with the first page to be copied 1 Posit...

Page 208: ...n the ADF Setting should be made when placing custom size originals 1 Adjust the guide to the original size 2 Set the aligned originals face up into the ADF Do not stack originals beyond the limit mar...

Page 209: ...tally Set 2sd Orig Bind to Top to Top Set 2sd Orig Orient to Portrait 2 To copy a landscape original that opens vertically Set 2sd Orig Bind to Top to Bottom Set 2sd Orig Orient to Portrait 3 To copy...

Page 210: ...aring entered values press the No key 4 Place your originals and then press the B W Start or Color Start key To copy in black and white press the B W Start key To copy in color press the Color Start k...

Page 211: ...d the order of the prints see p 117 EjctPrt FaceDwn p 117 Output Order When Selecting a Paper Tray You can select the paper feed tray according to the paper type and size 1 Select the paper tray using...

Page 212: ...he Menu key The Menu screen appears 2 Press the or key to display Tray Paper Setting and then press the Yes key 3 Press the or key to select the desired tray and then press the Yes key 4 Press the or...

Page 213: ...and then press the Yes key The Tray Paper Setting screen appears Press the No key to switch to the initial screen 8 Press the Select Paper Tray key and then select the bypass tray The indicated paper...

Page 214: ...phs z When printing on large sheets such as A4 letter or legal z When printing on glossy paper z When Resolution is set to Fast the machine can sort a set of up to about 20 sheets when printing on pla...

Page 215: ...Sort 213 5 3 Place your originals and then press the B W Start or Color Start key AQR328S...

Page 216: ...duce Enlarge differs depending on how the original is scanned When the original is set on the exposure glass the upper left corner will be the base point When it is set to ADF the bottom left corner o...

Page 217: ...ess the Zoom key 2 To select a preset ratio press the or key To zoom in or out press the or key 3 Press the Yes key 4 Place your originals and then press the B W Start or Color Start key S T D 1 0 0 1...

Page 218: ...keys Select a ratio using the number keys 1 Press the Zoom key 2 Enter the desired ratio with the number keys and then press the Yes key 3 Place your originals and then press the B W Start or Color S...

Page 219: ...ction 1 Press the Yes key If any other function is displayed press the Copy key If a previous setting remains press the Clear Modes key 2 Press the or key to display a Auto Reduc Enlrg and then press...

Page 220: ...e Copies 2 one sided originals to one side of a sheet 2 Sided 1 Page to Combine 1 Side Copies 1 two sided original onto one side of a sheet 1 Press the 2 in 1 Sort key so the 2 in 1 indicator lights I...

Page 221: ...here are two types of Two Sided Combine z You cannot use the exposure glass with this function 1 Sided 4 Pages to Combine 2 Side Copies 4 one sided originals to one sheet with two pages per side 2 Sid...

Page 222: ...ress the 2 Sided Original 2 Sided Copy key so the 2 Sided Copy indicator lights To copy 1 two sided originals onto one side of a sheet press the 2 Sided Original 2 Sided Copy key so the 2 Sided Origin...

Page 223: ...is 1 Sided Original to 2 Sided Copy Copies 2 one sided pages on 1 two sided page 2 Sided Original to 2 Sided Copy Copies 1 two sided page onto 1 two sided page z When printing on both sides content ot...

Page 224: ...d Copy key so the 2 Sided Copy indicator lights If any other function is displayed press the Copy key 2 Place the originals and then press the B W Start or Color Start key When the Next page message a...

Page 225: ...ed Original indicator lights If any other function is displayed press the Copy key 2 Place the originals and then press the B W Start or Color Start key z For details about the orientation of 2 Sided...

Page 226: ...two sheets z You cannot use the exposure glass with this function 1 Press the 2 Sided Original 2 Sided Copy key so the 2 Sided Original indicator lights If any other function is displayed press the Co...

Page 227: ...he size of the original multiple copies might not be printable 1 Press the Yes key If any other function is displayed press the Copy key 2 Press the or key to display b Image Repeat and then press the...

Page 228: ...cannot use the ADF with this function 1 Press the Yes key If any other function is displayed press the Copy key 2 Press the or key to display c Poster and then press the Yes key 3 Place your original...

Page 229: ...in a mirror 1 Press the Yes key If any other function is displayed press the Copy key 2 Press the or key to display d Mirror Image and then press the Yes key 3 Place your originals and then press the...

Page 230: ...Press the Image Density key If any other function is displayed press the Copy key 2 Press the or key to adjust the image density The density indicator moves 3 Press the Yes key 4 Place your originals...

Page 231: ...Photo key so the Photo indicator lights z When copying developed photographs z When copying photographs or pictures that are printed on paper e g magazines z When copying copies or originals generated...

Page 232: ...you select an unusable resolution the machine prints the copy in the STD mode Usable Unusable 1 Press the Resolution key and then select STD H Qty or Fast If any other function is displayed press the...

Page 233: ...Specifying the Resolution 231 5 2 Place the originals and then press the B W Start or Color Start key AQR328S...

Page 234: ...Menu screen appears 2 Press the or key to display Copier Features and then press the Yes key 3 Press the or key to display Color Settings and then press the Yes key 4 Press the or key to select Color...

Page 235: ...key to display Copier Features and then press the Yes key 3 Press the or key to display Color Settings and then press the Yes key 4 Press the or key to select Sharper Softer and then press the Yes key...

Page 236: ...key to display Color Settings and then press the Yes key 4 Press the or key to select Contrast and then press the Yes key 5 Press the or key to adjust the shades of an image and then press the Yes key...

Page 237: ...a TWAIN Scanner This section explains the necessary preparations and the procedure for using the TWAIN scanner z To use the TWAIN scanner you must install the TWAIN driver which is on the supplied CD...

Page 238: ...nt computer and then sends the scan file to the client computer 2 Client computer Specifies the scanner settings and controls the scanner using an application such as DeskTop Binder Lite that supports...

Page 239: ...river 4 Select the name of the machine you want to use in the list and then click Select 5 Click OK 6 Place originals 7 On the File menu point to Add Document and then click Scan The Scanner Control d...

Page 240: ...d print scan files For more information about DeskTop Binder see DeskTopBinder manuals z The model name of the connected scanner appears in the title bar of the Scanner Control dialog box If there is...

Page 241: ...rol dialog box 2 In the Original Scan Method area select where the original is placed or loaded 3 In the Rotation box select Off Right 90 degrees or Left 90 degrees The following table shows the relat...

Page 242: ...6 Using the Scanner Function 240 6 Placing an Original in the ADF Orientation TWAIN Scanner Properties Dialog Box Key Original Orientation Vertical Portrait Horizontal Landscape AQR009S AQR010S...

Page 243: ...o have an access to an e mail server that supports SMTP Simple Mail Transfer Pro tocol to send scan files by e mail However it is not essential to have an e mail server inside the LAN where this machi...

Page 244: ...splayed press the Scanner key 2 Place originals 3 Select the destination and then press the key You can specify multiple destinations as CC 4 If necessary specify the sender and then press the key 5 I...

Page 245: ...e scanning starts After all origi nals are scanned the transmission starts immediately 9 If you still have originals to send place them on the machine and then press the Yes key Repeat this step until...

Page 246: ...onth z DD Day z hh Hour z mm Minute z ss Second z xx File Number Depending on the characters Space used for the sender name the sender name may be omitted from the file name In this case the file name...

Page 247: ...canner To set and how to place originals see the Using the Copier Function z See the p 201 Setting and Placing Originals Specifying Destination This section explains how to specify e mail destinations...

Page 248: ...g Destination This section explains how to select a destination registered to the Speed Dial 1 Press the Speed Dial key 2 Use the number keys to enter the number 3 Press the or Yes key z For details a...

Page 249: ...achine s Address Book and use the list to select destination e mail addresses z Selecting the E Mail Destination in Search Mode You can search through the machine s Address Book or the LDAP server for...

Page 250: ...ct Search and then press the Yes key 3 Press the or key to select where to search and then press the Yes key 4 Enter the beginning of the destination name 5 Press the Yes key 6 Press the or key to sel...

Page 251: ...ext mode hold down the key until A or 1 appears 2 Enter the e mail address 3 Press the Yes or key z To modify or change an entered e mail address press the Clear Stop key T o k y o o f f i c e O K Y e...

Page 252: ...rver z You can register a sender in advance In this case you cannot specify the sender other than the registered sender in advance z p 153 Settings Required to Send Internet Fax and E mail Using the Q...

Page 253: ...e mail senders Using the Address Book you can select the e mail sender by either of the following methods z Selecting the e mail Sender in Display Mode You can display a list of the senders that are s...

Page 254: ...Display and then press the Yes key 3 Press the or key to display the e mail sender and then press the or Yes key Selecting the E Mail Sender in Search Mode You can search through the machine s Address...

Page 255: ...eginning of the destination name 5 Press the Yes key 6 Press the or key to select the destination 7 Press or Yes key 8 Press the or Yes key D i s p l a y S e a r c h Y e s M a c h i n e L D A P Y e s...

Page 256: ...Scan Files by Scan to FTP This section outlines the function for sending scan files by Scan to FTP 1 This machine You can send scan files to FTP server folders To send scan files to FTP server folders...

Page 257: ...ake sure that no previous settings remain If a previous setting remains press the Clear Modes key If any other function is displayed press the Scanner key 2 Place originals 3 Select a destination 4 If...

Page 258: ...If you still have originals to send place them on the machine and then press the Yes key Repeat this step until all originals are scanned When loading additional originals if you leave the machine id...

Page 259: ...The file name takes the following form File name xxxx_YYMMDDhhmmss_xx extension z xxxx Sender Name z YY Year z MM Month z DD Day z hh Hour z mm Minute z ss Second z xx File Number Depending on the cha...

Page 260: ...specifying destination in step 3 see p 259 Specifying a FTP Destination z For details about specifying destination in step 3 see p 260 Specifying Scan Type z For details about specifying the scan type...

Page 261: ...ect a Scan to FTP folder destination 1 Press the Speed Dial key 2 Use the number keys to enter the number FTP folder destinations are registered under 90 to 99 3 Press or Yes key z FTP server must be...

Page 262: ...ct a resolution and then press the Yes key To specify the file type press the key Specifying File Type This section explains how to set the file type of the document you want to send You can specify t...

Page 263: ...ing the ADF A4 A5 B5 LT HL LG EXE E Gl Scans original sizes using the exposure glass A4 A5 B5 A6 LT HL EXE 1 Press the or key to select placing an original and then press the key 2 Press the or key to...

Page 264: ...just the image density 1 Press the Image Density key 2 Press the or key to adjust the density and then press the Yes key z You can select the original type using the Text Photo key z For details about...

Page 265: ...e is not programmed Fur ther the fax header code and the date and time of transmission must be included in the header of all pages faxed to from or within the United States In the System Settings you...

Page 266: ...ocedure explains how to send a fax using the ADF z To send a fax from the exposure glass select memory transmission as the transmission mode If the transmission mode is set to immediate transmission t...

Page 267: ...p waits and then redials if the line is busy z We recommend you call the receiver and confirm with them when sending important docu ments Memory Transmission Transmission starts automatically after th...

Page 268: ...ype of transmission the original is not stored in memory You can only specify one destination Normally memory transmission mode is selected You can change transmission mode using the Memory Trans key...

Page 269: ...ssion mode press the Memory Trans key The indicator will now be unlit 2 Place the original To change the scan settings press the Resolution key and then specify the settings 3 Specify the destination...

Page 270: ...t key The transmission starts After transmission the initial screen appears To cancel a fax during sending press the Clear Stop key and then remove the original z p 201 Setting and Placing Originals z...

Page 271: ...ls 1 Press the Fax key and make sure the Memory Trans indicator lights Normally memory transmission mode is selected If it is not immediate transmission mode is selected Press the Memory Trans key 2 P...

Page 272: ...the Clear Stop key and then remove the original z In TX Settings you can select memory transmission as the default fax mode z p 143 Settings to Send Fax z p 201 Setting and Placing Originals z p 271 S...

Page 273: ...transmission 1 Press the Memory Trans key Make sure the Memory Trans indicator is unlit 2 Place the original in the ADF To change the scan settings press the Resolution key and then specify the settin...

Page 274: ...s the original After transmission the initial screen appears z p 143 Settings to Send Fax z p 201 Setting and Placing Originals z p 269 Sending a Fax by Memory Transmission Mode z p 275 Canceling a Tr...

Page 275: ...gs you can specify that the machine redial up to 10 times in intervals of 2 to 99 min utes z p 143 Settings to Send Fax z p 440 TX Status Report Suspended Transmission If you specify to send a fax whi...

Page 276: ...suspended and sent after the current printing is completed All keys are acceptable during reception except the On Hook Dial key Only the Clear Stop key is acceptable during scanning But the Clear Sto...

Page 277: ...r Internet Fax z This function requires that the other party s fax machine has both the JBIG function and ECM func tion z If ECM is turned off JBIG transmission is unavailable z p 307 JBIG Reception C...

Page 278: ...ears 2 Press the Yes key The transmission is cancelled Canceling transmission after it has started 1 Press the Clear Stop key A confirmation screen appears 2 Press the Yes key The transmission is canc...

Page 279: ...ling transmission while the machine is waiting to redial 1 Press the Clear Stop key A confirmation screen appears 2 Press the Yes key The transmission is cancelled C a n c e l t r a n s m i s s i o n...

Page 280: ...sisting of numbers and spaces Document transmitted with a SUB Code is stored in the other party s memory and not printed automatically The other party inputs the SUB Code to print the received documen...

Page 281: ...up to 20 digits 5 Press the key and then enter the SID Code using the number keys You can enter the SID Code using up to 20 digits 6 Press the B W Start key The transmission starts z You can specify...

Page 282: ...n use this function together with Send Later This function is not available for Internet Fax 1 Press the Fax key and make sure the Memory Trans indicator lights Normally memory transmission mode is se...

Page 283: ...using up to 20 digits 7 Press the key and then enter the SID Code using the number keys You can enter the SID Code using up to 20 digits 8 Press the B W Start key The transmission starts z You can sp...

Page 284: ...last person to dial a number on the machine sent the document under Send Later this function cannot be used 1 Press the Fax key and make sure the Memory Trans indicator lights Normally memory transmi...

Page 285: ...mail addresses as destinations see Internet Fax You can broadcast faxes to a maximum of 130 destinations 30 by the Quick dial keys 90 by the Speed Dial and 10 by the number keys Faxes are sent to des...

Page 286: ...en press the Yes key 6 Press 0987654 using the number key and then press the Yes key 7 Press the B W Start key A confirmation screen asking whether you want to check the specified destination appears...

Page 287: ...on you can store scan files in memory for sending The message will be sent when the other party calls you up You can store up to 30 files in memory This function is available in memory transmission mo...

Page 288: ...ns key 4 Press the or key to display 3 Polling TX and then press the Yes key 5 Press the or key to display Single or Multi and then press the Yes key 6 Press the B W Start Key The machine scans the or...

Page 289: ...smission When sending a fax to multiple destinations the fax remains in memory even after it is sent by polling transmission 1 Press the Fax key and make sure the Memory Trans indicator lights Normall...

Page 290: ...9999 Using the number keys enter the four digit password The machine scans the original and stores the scan file in memory z You can carry out polling transmission by specifying the sub address only...

Page 291: ...this function together with Broadcast Polling RX and Transfer Request This function is available for Internet Fax 1 Press the Fax key and make sure the Memory Trans indicator lights Normally memory t...

Page 292: ...by Send Later If you do this the fax specified earlier is sent first z If you press the Fax Options key after step 5 you can specify Send Later to use it together with Broadcast Transfer Request or Po...

Page 293: ...Sided Original 2 Sided Copy key Make sure the 2 Sided Original indicator lights 2 Place the original in the ADF To change the scan settings press the Resolution key and then specify the settings 3 Spe...

Page 294: ...mode only This function is not available for Internet Fax 1 Press the Memory Trans key Make sure the Memory Trans indicator is unlit 2 Place the original To change the scan settings press the Resoluti...

Page 295: ...hear a high pitched tone press the B W Start key The transmission starts After transmission the initial screen appears To cancel a transmission press the Clear Stop key and then remove the originals...

Page 296: ...ilable in immediate transmission mode only This function is not available for Internet Fax 1 Press the Memory Trans key Make sure the Memory Trans indicator is unlit 2 Place the original To change the...

Page 297: ...ter transmission the initial screen appears To cancel a transmission press the Clear Stop key and then remove the originals z If you pick up the handset of the external telephone while the machine is...

Page 298: ...est 1 Press the Fax Options key 2 Press the or key to display 6 Cancel Reserv and then press the Yes key The reserved transmission job is displayed To display its details press the key If multiple res...

Page 299: ...keys z Using the Quick Dial key z Using the Speed Dial key z Using the Address Book key If you select the Address Book key you can search for destinations that are registered in the LDAP server Enter...

Page 300: ...key z If you press the Pause Redial key at the first digit of a Fax number the redial screen appears z A pause is shown as a P on the display z You can also program numbers including pauses in the des...

Page 301: ...stered Flip the Quick Dial flip plate down to access Quick Dial keys 01 through 15 flip up to access keys 16 through 30 The registered name is shown on the display If the name is not registered the Fa...

Page 302: ...1 Press the Speed Dial key 2 Using the number keys to enter the registered number 00 89 The registered name is shown on the display If you make a mistake press the Clear Stop key and try again z Regis...

Page 303: ...ng methods z Searching by name z Searching from the list z Searching from LDAP server z p 119 Address Book Selecting the Fax Destination in Display Mode You can select the fax destination in Display m...

Page 304: ...Search and then press the Yes key 3 Press the or key to select where to search and then press the Yes key 4 Enter the beginning of the destination name 5 Press the Yes key 6 Press the or key to select...

Page 305: ...nal You can specify the resolution of the original Specifying the Resolution Settings To change the scan settings press the Resolution key You can specify the Resolution Std Detail Fine Photo Normally...

Page 306: ...them to send the fax again z The data sent to the machine has been corrupted or a format error has occurred z While receiving the fax the machine was switched off or its power or telephone cord unplu...

Page 307: ...s printed as soon as it is received This method is used for standard fax documents If the substitute reception is used a fax document is not printed it is stored in memory Memory RX The machine waits...

Page 308: ...of the conditions in the following list occurs the machine receives fax documents using substi tute reception z During copy z Paper empty z Ink empty z Paper size error z Scanner unit open z Paper mi...

Page 309: ...ge Experts Group compression you can send photographic origi nals faster than with other methods of compression It allows you to receive documents sent in the JBIG format through JBIG transmission z I...

Page 310: ...SW z An external telephone is required to use this machine as a telephone z In RX Settings you can specify the reception mode z p 144 Settings to Receive Fax Fax Only Mode The machine receives all in...

Page 311: ...the handset of the external telephone You will hear a low tone from the internal speaker 2 Press the B W Start key The reception starts After reception the initial screen appears To cancel a fax duri...

Page 312: ...You can switch the machine to Auto SW mode if the external telephone connected to the machine is equipped with an answering machine z An external telephone is required to use this machine as a teleph...

Page 313: ...u can also poll documents from many terminals with only one operation This function is not available for Internet Fax You can use this function together with Send Later The following example shows how...

Page 314: ...tion This section explains how to use polling reception to receive faxes that are protected by SEP Code sub address and password You can use this function together with Send Later 1 Press the Fax Opti...

Page 315: ...ress the Yes key You can enter the password using up to 20 digits 6 Press the B W Start key 7 Press the B W Start key The polling reception starts z The receiver incurs call charges for polling recept...

Page 316: ...one destination To specify the forwarding destination enter fax numbers or an e mail address Additionally you can specify the forwarding destination using the number keys the Quick Dial keys or the S...

Page 317: ...ncelled the fax sent to the machine is deleted after it is printed z The machine deletes the fax after they are forwarded If FW Print is selected the fax is deleted after it is forwarded and printed z...

Page 318: ...k spaces or a P in the last four digits as these will cause a communication error z If Closed Netwrk RX is specified the machine cannot perform polling reception z p 119 Address Book Canceling a Reser...

Page 319: ...3 Press the Yes key To display the detailed data press the key The reservation is canceled z p 311 Polling Reception z p 314 Forwarding Received Documents z p 324 Forward to E mail address 0 2 2 0 0 0...

Page 320: ...erface board must be installed This machine converts scanned document images to e mail format and transmits the data over the Internet The e mail sent by this machine can be received by another Intern...

Page 321: ...e some time before transmission starts This is due to the time the machine requires to convert the data in memory Functions Not Available for E mail Transmission This section lists the functions not a...

Page 322: ...cans as e mail attachments to specified e mail addresses You can also send Internet Faxes using the following types of transmission z A fax from the exposure glass z Send Later z Broadcast To specify...

Page 323: ...key or the Address Book key See the Specifying the Destination 5 Press the B W Start key The Internet Fax is sent to the destination z Using Broadcast you can simultaneously send a file to multiple de...

Page 324: ...Fax and E mail z p 178 Entering Text z p 201 Setting and Placing Originals z p 269 Sending a Fax by Memory Transmission Mode z p 275 Canceling a Transmission z p 283 Broadcast z p 289 Send Later z p 2...

Page 325: ...prints it The following operation allows you to receive Internet faxes manually 1 Press the Fax Options key 2 Press the or key to display Internet Fax RX and then press the Yes key 3 Press the Yes key...

Page 326: ...cuments You can only specify one destination z You can forward a received fax to another destination You can specify this setting in RX Settings z If the Internet Fax fits onto A4 paper and its resolu...

Page 327: ...ng the Device Setting Utility or Web Image Monitor z The facsimile function of this machine cannot be used with IPv6 Connect your computer to the machine by Ethernet or USB 2 0 Then print a document f...

Page 328: ...point to Settings and then click Printers and Faxes 2 Click the icon of the printer and then click Printing Preferences on the File menu The LAN FAX properties dialog box appears 3 In the Settings tab...

Page 329: ...If Test Print Fails TWAIN Driver If you install the TWAIN driver you can scan originals using applications running on client com puters To check whether the TWAIN driver is installed correctly see p 2...

Page 330: ...8 Troubleshooting 328 8 z p 333 If Test Print Fails z p 53 Quick Install for USB z p 59 Quick Install for Network...

Page 331: ...ly Open Windows Device Manager and then under Universal Serial Bus controllers remove any con flicting devices Conflicting devices have a yellow or icon by them Take care not to accidentally remove re...

Page 332: ...e properly connected and not damaged The operating system is incompatible There is insufficient hard disk space Check that the computer s operating system is fully compatible with this machine See Che...

Page 333: ...copied from a CD ROM save the printer driver directly on the hard disk and then install it On the Start menu point to Settings and then click Printers and Faxes In the Printers and Faxes window instal...

Page 334: ...er 2 Delete the device 3 Run Quick Install for USB again If these steps do not solve the problem contact your sales or service representative z For details about deleting the printer driver see p 334...

Page 335: ...is not properly connected Check that the power cord and USB cable Ethernet cable are properly connected The port connection is not properly set 1 On the Start menu point to Settings and then click Pr...

Page 336: ...lling the software see Quick Installation Guide Uninstalling the Driver To update the driver uninstall the old driver before installing the new one z The following explanation uses Windows 98 as an ex...

Page 337: ...ck box 9 Click OK 10 On the Start menu point to Find and then click Files or Folders 11 Click the Name Location tab and then enter INF in the Named field 12 In the Containing text field enter the mode...

Page 338: ...established normally you do not need to perform this procedure z The following explanation uses Windows 98 as an example Procedures under other operat ing systems may differ 1 Press the Power key 2 On...

Page 339: ...l 1 Press the Printer key following display appears In the above display the control panel is indicating that the cyan print cartridge is almost empty In the above display the control panel is indicat...

Page 340: ...eft corner of dialog box is yellow the indicated cartridge is empty Replace the cartridge In this illustration the cyan ink has completely run out If the background of the image in the top left corner...

Page 341: ...paper jam or when no paper is loaded before replacing a print cartridge z Take care to install the cartridges in the correct position z If ink comes into contact with your eyes rinse immediately in r...

Page 342: ...ridges You can shorten the time for need ed replacement 2 Open the right front cover 3 Take out the empty cartridges 4 Check the cartridges orientation and then install them gently Install in the foll...

Page 343: ...wing message appears on the control panel z Dispose of the removed component as general plastic waste or hand it in for collection z After replacing the friction pad be sure to reset the counter on th...

Page 344: ...lift it up 3 Push down the new friction pad until it locks into place Make sure the friction pad shaft is correctly aligned Press down on the friction pad several times to make sure it is properly eng...

Page 345: ...e Yes key The following message appears 8 Press the Yes key The counter is reset and the Maintenance menu reappears Press the No key to switch to the initial screen z For details about buying a replac...

Page 346: ...alled unless necessary z Do not remove a print cartridge while printing is being performed Printing will stop z After replacing the print cartridge be sure to close the right front cover z Even when p...

Page 347: ...t or start up when switched on Wait a while Invalid Password appears The entered password is invalid Be sure to make a note of the password and keep it some where safe in case you need to remind yours...

Page 348: ...the optional bypass tray The printer driver has not detected the optional bypass tray Open the printer properties dia log box click the Accessories tab and check whether Bypass Tray Unit is indicated...

Page 349: ...closed Remove the duplex unit and press both sides of the guide board until it clicks closed z Printing densely colored images on both sides When printing images containing areas of solid color that c...

Page 350: ...per does not feed When a paper jam occurs clear the paper jam and then press the Yes key See p 349 Removing Jammed Originals and Paper z If an error is displayed on the status monitor follow the instr...

Page 351: ...r from the top of the machine z p 35 Detaching and Reattaching the Multi Bypass Tray Optional Removing Paper Jammed in the Paper Tray Tray 1 Follow the procedure below to remove paper jammed in tray 1...

Page 352: ...ray 6 Open and close the scanner unit Printing starts Blank paper may be delivered after printing resumes z Make sure to unfold the output tray before printing z p 357 Removing Paper Jammed around the...

Page 353: ...Tray 2 Optional Follow the procedure below to remove paper jammed in tray 2 1 Hold the grip on tray 2 lift the tray slightly and then pull it out Pull tray 2 completely out Take care not to drop it 2...

Page 354: ...delivered after printing resumes If you cannot locate paper jammed in tray 2 follow the procedure below to remove the paper jammed 1 Unlock the duplex unit at the back of the machine by raising the l...

Page 355: ...y be delivered after printing resumes z p 347 Paper Is Not Fed or Delivered Normally Removing Paper Jammed in the Multi Bypass Tray optional Follow the procedure below to remove paper jammed in the mu...

Page 356: ...with the side to be printed on facing up 4 Open and close the scanner unit If it is difficult to remove jammed paper follow the procedure below to remove it 1 Remove any paper in the bypass tray 2 Pu...

Page 357: ...the multi bypass tray 4 Remove the jammed paper from the rear of the machine 5 Reattach the multi bypass tray 6 Pull the bypass tray extension out 7 Load paper in the bypass tray with the side to be p...

Page 358: ...cedure clear the jam from the multi bypass tray z Turn the knob on the multi bypass tray clockwise to eject the jammed paper z If this does not eject the paper turn the knob one turn counterclockwise...

Page 359: ...is attached to the machine detach it z When removing the duplex unit be careful not to touch its metal contacts or knock them against anything 1 Unlock the duplex unit at the back of the machine by ra...

Page 360: ...Release paper from the roller to make it removable 4 Insert your finger between the paper and the roller and then remove the paper slowly Do not touch the feed belt 5 Close the guide board Push the PU...

Page 361: ...er was jammed printing may resume from the next page not the one jammed z p 347 Paper Is Not Fed or Delivered Normally z p 35 Detaching and Reattaching the Multi Bypass Tray Optional Removing Paper Ja...

Page 362: ...ex unit cover If you have detached the multi bypass tray reattach it Printing starts z Depending on how the paper was jammed printing may resume from the next page not the one jammed z p 35 Detaching...

Page 363: ...Scan ner Unit Follow the procedure below to remove paper jammed in the output tray or under the Scanner Unit 1 Remove jammed paper 2 Open and close the scanner unit Printing starts z Depending on how...

Page 364: ...shooting 362 8 Removing Paper Jammed in the ADF Follow the procedure below to remove the paper jammed in the ADF 1 Open the ADF cover 2 Remove the misfed original 3 Close the ADF cover AQR072S AQR073S...

Page 365: ...n the control panel Reload the indicated number of originals and then press the Yes key to resume scanning z If it is difficult to remove the jammed original open the ADF cover and then turn the knob...

Page 366: ...it z Check whether other applications are operating Close all other applications because these could be interfering with the installation Be sure to close all resident programs also z Check the printe...

Page 367: ...you attempt to print print does not start and an Error Message appears Printer Server Settings On the print server from the Printers icon open Printer Properties On the General tab delete Comment Try...

Page 368: ...he test pattern again and check the result 7 If the pattern is still patchy switch the printer off and leave it unpowered for about eight hours Then switch it back on print the test pattern and check...

Page 369: ...hin paper is used the print heads will rub the paper and ink will leak See p 87 Loadable Paper Sizes and Quantities Have you touched the printed side of paper Avoid touching the printed side of paper...

Page 370: ...Darker or Lighter and then print In the Change User Settings dialog box on the Image Adjustments tab specify Gray reproduction Text Line Art Some characters are garbled or missing In the Change User...

Page 371: ...setting To make the machine automatically switch to unidirectional printing when the envelope selector is set to the envelope position on the Printer Configuration tab select the When the envelope se...

Page 372: ...hould be addressed Have the settings for page layout been made Check whether page layout settings have been made with the application Does the paper size setting match Make sure that the paper size se...

Page 373: ...during Installation This section explains how to carry out troubleshooting if a message appears while installing the printer driver z Message number 14 or 34 indicates the printer driver cannot be ins...

Page 374: ...ing settings under Copier Features set EjctPrt FaceDwn to On or Out put order to Last to 1st When printing multiple pages on one sheet the copies are not printed in the specified order If the copies a...

Page 375: ...xt Photo or from Text Photo to Photo it may be possible to eliminate the moire pattern The same copy area is dirty whenever making copies The exposure glass scanning glass or ADF is dirty Clean them S...

Page 376: ...the exposure glass The scanned image is upside down The original was placed upside down Place the original in the correct orientation See p 201 Setting and Placing Originals No image results from sca...

Page 377: ...he trays contain the right size of paper for printing faxes Load paper of the required size in one of the trays Sent images are spotty The exposure glass scanning glass or ADF is dirty z Clean them Se...

Page 378: ...en on If the message reap pears contact your sales or service representative Paper Misfeed Tray1 Remove Paper Paper has jammed in Tray 1 Remove the jammed paper and then press Yes key See p 349 Removi...

Page 379: ...sure you have a new ink collector on hand Ink Collector Full Replce InkCollct The ink collector unit is full Replace the ink collector unit Ink Collctr Not Set Reset Collector The ink collector unit i...

Page 380: ...aning or flushing its print head Wait a moment Warning Out of Paper Warning Load Paper The selected tray has run out of paper Reload the tray See p 390 No Paper Tray Not Detected Tray 1 p 391 No Paper...

Page 381: ...Reset Duplex Unit The duplex unit is not installed correctly Reinstall the duplex unit correctly See p 403 Duplex Unit Not Detected Scanner Unit Open Close Scanner Unit The scanner unit is open Close...

Page 382: ...nk in the indicated print cartridge has run out Change the indicated print cartridge See p 337 Replacing a Print Cartridge Ink KCMY Depleted The ink in the indicated print cartridge has almost run out...

Page 383: ...TWAIN Scanner Function Error Messages Control Panel This section explains the most common TWAIN scanner function error messages that appear on the machine s control panel and what you must do to resol...

Page 384: ...nner with another function such as copying Retry scanning when the other function has finished using the scanner Failed to read data The client computer failed to read the data from the machine Switch...

Page 385: ...at can be stored in memory was reached before all the orig inals could be scanned Reduce the number of originals to be scanned Original Misfeed Open ADF Cover An original has jammed inside the ADF z R...

Page 386: ...eed Dial key p 120 Registering Destinations to Quick Dial Key p 129 Destinations Registered to Speed Dial Keys Facsimile Function Error Messages This section explains the most common facsimile functio...

Page 387: ...he ADF but the ADF cover is still open Close the ADF cover Out of Paper Load Paper There is no more paper in the selected paper tray Reload the tray p 96 Loading Paper Ink KCMY Depleted Replace Ink KC...

Page 388: ...nough memory Change the Resolution setting and then try fax sending receiving again p 303 Specify ing the Resolution of the Original Programmed Group You are trying to enter the destination in Transfe...

Page 389: ...contains the fax communication logs SUB or SID Error This message appears if you try to use a SUB code to send a file by immediate transmission but the selected code is not specified in the machine on...

Page 390: ...e maximum number of files that can be stored in memory was reached while the machine was sending or receiving a fax Reduce the number of originals Ntwrk Sttng Incomp The network settings are invalid z...

Page 391: ...g up a client computer No Response from Device Follow the procedure below to check the port settings and the connection between the machine and computer 1 Check that the power of the machine is on 2 M...

Page 392: ...z Load the tray z Cancel the print job z If you set Paper source tray to Auto Tray Select on the Setup tab in the printer properties dia log box the machine selects the tray automatically z To load t...

Page 393: ...2 is empty or the paper in it is not loaded properly Do one of the following z Load the tray z Cancel the print job z To load the tray see p 96 Loading Paper Canceling the print job Cancel the print...

Page 394: ...paper in the multi bypass tray or the paper is not loaded properly Do one of the following z Load the tray z Cancel the print job z To load the tray see p 96 Loading Paper Canceling the print job Can...

Page 395: ...opriate paper and then press the Form Feed Head Cleaning key If a paper size mismatch error has occurred If a paper type mismatch error has occurred When a paper type error occurs while using the fax...

Page 396: ...8 Troubleshooting 394 8 Canceling the print job Cancel the print job 1 Press the Clear Stop key 2 Press the Yes key AQR310S AQR308S...

Page 397: ...riate paper and then press the Form Feed Head Cleaning key If a paper size mismatch error has occurred If a paper type mismatch error has occurred When a paper type error occurs while using the fax fu...

Page 398: ...8 Troubleshooting 396 8 Canceling the print job Cancel the print job 1 Press the Clear Stop key 2 Press the Yes key AQR310S AQR308S...

Page 399: ...appropriate paper and then press the Form Feed Head Cleaning key If a paper size mismatch error has occurred If a paper type mismatch error has occurred When a paper type error occurs while using the...

Page 400: ...8 Troubleshooting 398 8 Canceling the print job Cancel the print job 1 Press the Clear Stop key 2 Press the Yes key AQR310S AQR308S...

Page 401: ...nel Load the appropriate paper and then press the Form Feed Head Cleaning key If a paper size mismatch error has occurred If a paper type mismatch error has occurred When a paper type error occurs whi...

Page 402: ...8 Troubleshooting 400 8 Canceling the print job Cancel the print job 1 Press the Clear Stop key 2 Press the Yes key AQR310S AQR308S...

Page 403: ...re below to lower the scanner unit or duplex unit cover z To open the duplex unit cover detach the multi bypass tray After closing the cover reattach the tray z If the bypass tray is attached to the m...

Page 404: ...ively the print cartridges are not installed or are installed incorrectly Install the print cartridges correctly If the cover is open 1 Close the right front cover If the print cartridges are not inst...

Page 405: ...is not attached correctly Follow the procedure below to attach the duplex unit correctly z If the bypass tray is attached to the machine detach it 1 Lock the lever for attaching the duplex unit 2 If y...

Page 406: ...mpty z From left to right the cartridge replacement indicators display the status of the black K cyan C magenta M and yellow Y Print cartridges z With glossy paper if you print an image that needs a l...

Page 407: ...tank are empty z Checking the cartridge replacement indicators of the machine control panel In the above illustration the control panel is indicating that the cyan Print cartridge has com pletely run...

Page 408: ...attach the ink collector unit correctly 1 Open the ink collector unit cover slowly 2 Attach the ink collector unit by pushing it in until it clicks Take care not to spill the ink 3 Close the ink coll...

Page 409: ...om temperature If this happens wait until the Power key stops blinking and stays lit z For details about what conditions the machine can be used under ambient temperature and humidity range see Checki...

Page 410: ...the temperature varies greatly condensation may form inside the machine causing errors If this happens an error might not clear if the power is turned off and then on Wait until the machine acclimates...

Page 411: ...aining ink z p 389 Status Monitor Errors z p 187 Canceling Printing from the Status Monitor Receiving Notification of Print Job Status via the Status Monitor You can specify how to receive notificatio...

Page 412: ...TCP IP protocol supplied with Windows XP z Operating System Windows NT 4 0 Protocol Stack TCP IP protocol supplied with Windows NT 4 0 NetBEUI protocol supplied with Windows NT 4 0 What can you do wit...

Page 413: ...for Client icon select the Displayed on Task Bar check box For details about status icons see SmartDeviceMonitor for Client Help 5 Click OK The dialog box closes and the configured machine is monitor...

Page 414: ...etting a dialog box appears Read the message in the dialog box and then click OK By clicking Cancel the changed setting is cancelled 3 A dialog box about specifying the client computer setting appears...

Page 415: ...box you can reflect the machine status in the SmartDeviceMonitor for Client icon in the task bar system tray 5 Click OK The SmartDeviceMonitor for Client Settings dialog box closes and the selected m...

Page 416: ...eue win dow SmartDeviceMonitor for Client will resume access to the network printer You can delete the print job from the print queue window but canceling a print job printed by the network printer mi...

Page 417: ...Utility from the provided Driv ers Manual Utilities CD ROM What you can do using Device Setting Utility z Register change or print Quick Dial destinations z Register change or print Speed Dial destina...

Page 418: ...ettings to Send Fax z p 144 Settings to Receive Fax z p 147 Specifying the Line Type z p 148 Printing Lists and Reports z p 151 Settings Required to Use LDAP Server z p 155 Settings Required to Receiv...

Page 419: ...achine 3 Download all data 4 Upload all data 5 Open Device Setting Utility file data 6 Save Device Setting Utility file data 7 Menu Settings 1 Launch the Device Setting Utility 2 Click Connect to Devi...

Page 420: ...he computer Registering or Changing Quick Dial Speed Dial and Group Dial Destinations This section explains how to register or change Quick Dial Speed Dial and Group Dial destina tions 1 Click Connect...

Page 421: ...k Dial You can enter up to 20 characters Fax No Specify the fax number SUB Specify the sub address SID Specify the SID password Transmission Speed Specify the communication speed Settings Description...

Page 422: ...ile menu 4 Click on the item you want to print and then click OK z See p 148 Printing Lists and Reports Changing the Machine s System Settings This section explains how to change the machine s system...

Page 423: ...ility data is downloaded from the machine 3 Click Total Counter on the Tools menu z See p 453 Counter Displaying the Options Installed on the Machine This section explains how to display the options a...

Page 424: ...operations from Web Image Monitor TCP IP is required After the machine is con figured to use TCP IP operations from Web Image Monitor become available Recommended Web browser Internet Explorer 4 0 or...

Page 425: ...reas 1 Category area Categories are displayed here Clicking a category opens a menu in the Menu area 2 Menu Area Click items in this area to display their details or a related sub menu 3 Password Area...

Page 426: ...nu is Available Device Info Check information such as which options are attached machine con figuration and machine status Administrator and User Details Check which firmware version is run ning the s...

Page 427: ...Download the data registered to Quick Dials Speed Dials and groups and save it as csv files or upload it to the machine Administrator Menu Allows You To Mode in Which This Menu is Available Fax Setti...

Page 428: ...notification message appears z While a user is logging on to the machine via Web Image Monitor logging on from the machine s control panel is disabled z If you try to log onto the machine while it is...

Page 429: ...g specified in the Web browser click Clear Notifying the Machine Status by E mail You can be notified of the machine status by e mail on an occasion such as if the machine runs out or paper or paper i...

Page 430: ...ng the SMTP authentication setting you can send e mails to destinations where the e mail server carries out SMTP authentication Specify the machine setting Specify the network interface board setting...

Page 431: ...ue Default POP3 Server Name 64 characters max 1 byte alphanumerics None User Name 64 characters max 1 byte alphanumerics None Password 32 characters max 1 byte alphanumerics None Auto E mail Reception...

Page 432: ...o specified recipients when the machine is about to run out of ink Ink Collector Unit Full Send notification e mail to specified recipients when the machine s ink collector unit becomes full Setting I...

Page 433: ...mes jammed inside the machine No Paper Send notification e mail to specified recipients when the machine runs out of paper Setting Items Selectable value Default Group 1 4 On Off Off Notify when error...

Page 434: ...eeded if it is too hot or cold to print Place the machine in a 10 to 32 C 50 to 89 6 F envi ronment Paper Size Mismatch If the tray is not loaded with paper of the correct size the machine notifies it...

Page 435: ...his you must log on in Administrator mode 1 On the Category tab click Address 2 In the Menu area click Speed Dial List The speed dial list appears in the Work area 3 Click 90 99 Speed Dial List Scan m...

Page 436: ...Number Specify the port number of the FTP server when a proxy server is not being used Setting Description Enable E mail Notification Specify whether or not FTP transfers are reported by e mail E mai...

Page 437: ...lnet from launch to exit 1 Using the machine s IP address or host name as the command line argument launch telnet telnet machine s IP address or host name 2 Enter the password The default password is...

Page 438: ...word Restart Reset the network interface board to its default settings Exit to Root Return to the root menu Setting Allows You To Configuration Page Print the configuration page Exit to Root Return to...

Page 439: ...the SNMP manager you can obtain machine data z To use this function under GX 3000SF the optional network interface board must be installed The default community name is public Using this community na...

Page 440: ...tus Report z RX Status Report z Journal z Memory Data List z Print Memory Image z This report does not show the time at which e mails were sent or received Quick Dial List The following explains the Q...

Page 441: ...sub address up to 20 digits assigned to the Speed Dial in the lower z Set Date The date on which the Quick Dial was specified is shown Group List The following explains the Group List You can check t...

Page 442: ...ance z Engine Settings z Host I F Settings TX Status Report The following explains the TX Status Report You can check the following items z Session The session number is shown z Function TX Broadcast...

Page 443: ...ich reception took place is shown z Time The time at which reception took place is shown z Page The number of scanned pages in the receipt file is shown z RX TX Time The time taken to receive the file...

Page 444: ...G Cancel Mem Full Misfeed or No Answer is shown for the communica tion status Memory Data List The following explains the Memory Data List You can check the following items z Function TX Broadcast Pol...

Page 445: ...s shown z Date The date on which communication took place is shown z TX or RX The communication mode is indicated as TX transmission or RX reception z Destination The destination name is shown z Page...

Page 446: ...Displays the destination 2 Communication No Starting with the oldest communication records are assigned numbers 1 to 60 in ascending order Numbers assigned by this setting are used for Journal also 3...

Page 447: ...h a dry cloth z Do not use volatile chemicals like benzene or thinner or insecticides on the machine Using these chemicals could deform crack or change the color of the machine z When wiping the machi...

Page 448: ...This section explains how to clean the exposure glass Clean 1 Wipe it with a soft dry or damp cloth Cleaning the ADF This section explains how to clean the scanning glass and ADF Clean 1 2 and 3 Wipe...

Page 449: ...t release lever and then lift the scanner unit z The Machine weighs approximately 23 kg 50 6 lb z When moving the machine hold the machine by the bottom below the two indentations Lift the machine slo...

Page 450: ...pping lock and then close the scanner unit 4 Always lift and carry the machine with another person Grip the indented area near the machine s base shown in the illustration Lift and carry the machine s...

Page 451: ...moving the machine be sure to release the shipping lock before switching on 1 Turn the power off disconnect the USB cable or Ethernet cable and then unplug the power cord from the wall outlet Do not...

Page 452: ...10 Maintaining 450 10 Disposing Consult with an authorized dealer to dispose of the machine...

Page 453: ...test pattern Clean the print heads as necessary and then begin print ing z If you try to use the machine after it has been out of use for a long time it may not print properly even if head cleaning is...

Page 454: ...10 Maintaining 452 10 Where to Inquire For inquiries contact your sales or service representative...

Page 455: ...eck box is selected in Color Black and White in the printer properties dialog box z Full Color This counter shows the total number of sheets printed in color z B W This counter shows the total number...

Page 456: ...2 Press the or key to display Counter and then press the Yes key 3 Press the or key to display Print Counter and then press the Yes key Printing starts z The counter can count up to 999 999 sheets C...

Page 457: ...ecommended Consumables Consumables recommended for this machine are listed Purchase necessary consumables before your supply runs out For information about consumables contact your sales or service re...

Page 458: ...Multi Bypass Tray Type BY1000 You can also feed paper from the bypass tray Network Interface Board GX4 By installing this optional network interface board in the machine you can print over the networ...

Page 459: ...ndard Standard paper size A4 B5 A5 A6 Legal Letter Executive 184 2 mm 266 7 mm 7 3 10 5 inches F 203 2 mm 330 2 mm 8 0 13 0 inches Foolscap F4 215 9 mm 330 2 mm 8 5 13 0 inches Folio 209 5 mm 330 2 mm...

Page 460: ...options Energy Saver mode z GX 3000SF less than 7 1 W z GX 3050SFN less than 10 5 W To avoid any power consumption disconnect the power plug from the wall outlet Disconnect the power plug after turnin...

Page 461: ...Letter 81 2 11 80 g m2 50 sheets Paper Capacity Legal 11 14 80 g m2 30 sheets Paper Capacity Others 80 g m2 30 sheets Paper weight 50 110 g m2 13 28 lb Print cartridges Print cartridge black Print car...

Page 462: ...11 Printer Function Specification The following explains the specifications of the printer Interface USB 2 0 high speed Ethernet 10 BASE T 100BASE TX Printer language GX 3000SF RPCS Raster GX 3050SFN...

Page 463: ...might not be copied or margins will appear on copies Zoom z The reproduction ratios you can specify are 25 400 z You can select a ratio regardless of the size of an original or copy paper With some r...

Page 464: ...s of the image might not be copied z You cannot use custom size paper Poster You can enlarge an image and print it over multiple sheets You cannot use the ADF with this function Mirror Image Copies by...

Page 465: ...i 10 ipm 300 dpi 10 ipm 600 dpi 2 5 ipm Scan type Sheet book objects Interface USB 2 0 high speed Ethernet 10 BASE T 100BASE TX Maximum scan size A4 210 297 mm Legal 81 2 14 Scan sizes automatically d...

Page 466: ...e following numbers of pages can be stored under Scan to E mail and Scan to FTP Depending on the amount of data needed for individual page images the number of pages that can be stored might vary Scan...

Page 467: ...ion speed G3 33 6 k 2400 bps auto shift down system Internet Fax Transmission and Reception z Network LAN Local Area Network Ethernet 10 BASE T 100 BASE T z Transmit function e mail z Scan line densit...

Page 468: ...ctions Automatic conversion of sent documents to e mail format and e mail transmission Memory transmission only z e mail receive functions Automatic detection and printing of appended TIFF F MH files...

Page 469: ...7 3 10 5 inches F 203 2 mm 330 2 mm 8 0 13 0 inches Foolscap F4 215 9 mm 330 2 mm 8 5 13 0 inches Folio 209 5 mm 330 2 mm 8 3 13 0 inches 16K Custom paper sizes 210 356 mm length 148 216 mm width Pap...

Page 470: ...es A4 A5 A6 B5 Legal Letter 5 1 2 8 1 2 Executive F GL Foolscap 16K COM10 Monarch C6 C5 DL Env 127 1295 4 mm 55 216 mm Paper type Plain paper Recycled paper Color paper Inkjet plain paper Glossy paper...

Page 471: ...e board Network Interface Board GX4 z Interface Connector Ethernet 10 BASE T 100 BASE TX z Data Transmission Speed 10 Mbps 100 Mbps z Protocol for Network Printer TCP IP z Protocol for Network Scanner...

Page 472: ...ndows 2000 XP and Windows Server 2003 DRIVERS PRINTER RPCS_R WIN2K_XP DISK1 z RPCS raster printer driver for Windows NT 4 0 DRIVERS PRINTER RPCS_R NT4 DISK1 System Requirements for the Printer Drivers...

Page 473: ...following folders on the supplied CD ROM z PCL 5c printer driver for Windows 98 Me DRIVERS PRINTER PCL5C WIN9X_ME z PCL 5c printer driver for Windows 2000 XP and Windows Server 2003 DRIVERS PRINTER PC...

Page 474: ...iver This driver is required to scan an original using a scanner To use the machine as a network TWAIN scanner this driver must be installed File Location The TWAIN driver is in the following folders...

Page 475: ...ms Windows 98 Me Windows 2000 XP Windows Server 2003 z Display VGA 640 480 pixels or more Device Setting Utility Using the Device Setting Utility you can register telephone numbers and e mail addresse...

Page 476: ...nd Windows NT 4 0 you can also print over a peer to peer NetBEUI network z You can monitor the machine status over a TCP IP network File Location SmartDeviceMonitor for Client is in the following fold...

Page 477: ...procedure below to check the version of the printer driver currently installed 1 Open the printer properties dialog box 2 Click the Setup tab 3 Click About The About dialog box appears 4 Check the ver...

Page 478: ...will influence the other negatively In the case of a television or radio noise may be generated If this happens do the following z Move the television or radio as far as possible from the machine z Ch...

Page 479: ...r feed Menu Maintenance Adj Paper Feed Print Test Pattern Tray 1 220V A4 120V Letter Plain Test pattern registration Menu Maintenance Registration Selected tray 220V A4 120V Letter Selected paper type...

Page 480: ...kjet plain paper Quick Dial List Fax Options Prnt List Report Quick Dial List Tray selected in Fax Tray Prty in RX Settings in Menu A4 Letter Legal Plain including inkjet plain paper Speed Dial List F...

Page 481: ...Entering Text 479 11 Entering Text This section lists the characters you can enter Fax Number 1 The optional network interface board has been is installed Name Display A 1 AQR004S AQR002S...

Page 482: ...11 Appendix 480 11 Name Display 1 E mail address AQR001S AQR006S...

Page 483: ...Entering Text 481 11 User Fax Number Display A User Fax Number Display 1 AQR005S AQQ142S...

Page 484: ...shed to do so sub ject to the following conditions The above copyright notice and this permission notice shall be included in all copies or substantial portions of the Software THE SOFTWARE IS PROVIDE...

Page 485: ...ATA OR PROFITS OR BUSINESS INTERRUPTION HOWEVER CAUSED AND ON ANY THEORY OF LIABILITY WHETHER IN CONTRACT STRICT LIABILITY OR TORT INCLUDING NEGLIGENCE OR OTHERWISE ARISING IN ANY WAY OUT OF THE USE O...

Page 486: ...ftware Version 0 82 hereinafter Sablotron 0 82 with modifications made by the product manufacturer The original code of the Sablotron 0 82 is provided by Ginger Alliance Ltd the initial developer and...

Page 487: ...sion or under the terms of any subsequent revision of the license THIS SOFTWARE IS PROVIDED BY THE OPENLDAP FOUNDATION AND ITS CONTRIBUTORS AS IS AND ANY EXPRESSED OR IMPLIED WARRANTIES INCLUDING BUT...

Page 488: ...AP is a registered trademark of the OpenLDAP Foundation Copyright 1999 2003 The OpenLDAP Foundation Redwood City California USA All Rights Reserved Permission to copy and distribute verbatim copies of...

Page 489: ...Transmission 275 Canceling Printing 187 188 Canceling Printing from the Status Monitor 187 Canceling printing from the Task bar 188 Canceling the print job 390 391 392 394 396 398 400 Cartridge End 40...

Page 490: ...ata security for copying 195 Deleting a Registered Quick Dial Keys 128 Deleting a Registered Speed Dial Keys 139 Deleting characters 180 Deleting Devices 336 Description for the Specified Model 16 Des...

Page 491: ...f Bidirectional Communication is Disabled 183 If Test Print Fails 333 If You Have Problems Using the Copier Function 372 If You Have Problems Using the Facsimile Function 375 If You Have Problems Usin...

Page 492: ...Bypass Tray Type BY1000 34 Multi tab 181 N Network Cautions 76 Network Interface Board Error 407 Network Interface Board GX4 33 Network Settings 150 Non compatible originals for the ADF 203 Non compat...

Page 493: ...per 185 Printing on Various Paper Types 185 Printing Quick Dial Speed Dial or Group Dial Destinations 420 Printing the Configuration Page 161 Printing the List 443 Printing the Total Counter 454 Print...

Page 494: ...ail Destination in Display Mode 247 Selecting the E Mail Destination in Search Mode 248 Selecting the E Mail Sender in Display Mode 252 Selecting the E Mail Sender in Search Mode 252 Selecting the Fax...

Page 495: ...l Key 300 Specifying the Line Type 147 Specifying the Paper Type and Size 111 Specifying the print server 412 Specifying the Resolution 230 Specifying the Resolution of the Original 303 Specifying the...

Page 496: ...n 245 Using the SmartDeviceMonitor for Client Port IPP 63 Using the SmartDeviceMonitor for Client Port TCP IP 61 Using the Speed Dial key 246 Using the Speed Dial key Specifying Sender 251 Using the S...

Page 497: ...Copyright 2006 2007...

Page 498: ...User Guide GB GB EN USA J013 8604A...

Reviews: